Loading ...
Loading ...
Loading ...
9
■ When the freezer is first started, the compressor will run
constantly until the freezer is cooled. It may take up to
6 or 8 hours (or longer), depending on room temperature and
number of times the freezer door is opened. After the freezer
is cooled, the compressor will turn on and off as needed to
keep the freezer at the proper temperature.
■ The outside of your freezer may feel warm. This is normal.
The freezer’s design and main function is to remove heat
from packages and airspace inside the freezer. The heat is
transferred to the room air, making the outside of the freezer
feel warm.
Adjusting Control
If you need to adjust the temperature in the freezer
compartment, press TEMP SETTING to display the desired
temperature setting from the snowflake on the left (least cold) to
the snowflake on the right (coldest).
NOTE: Except when starting the freezer, do not adjust the
control more than one setting at a time. Wait 24 hours between
adjustments for the temperature to stabilize.
Cooling On/Off
Your freezer will not cool when cooling is turned off.
To turn cooling off, press and hold TEMP SETTING for
3 seconds. In the Off condition, none of the lights on the control
panel will be illuminated. The main freezer light bulb will still
operate.
To turn cooling on, press and hold TEMP SETTING for 3
seconds. When cooling is On, the control panel lights will be
illuminated.
Fast Freeze
Use this feature before adding large amounts of unfrozen food.
For the best food quality, do not exceed 3 lbs (1,361 g) per cu. ft
(28.32 L) of freezer space.
To activate Fast Freeze, press TEMP SETTING until all the
snowflake positions are illuminated simultaneously.
The freezer will remain in the Fast Freeze setting for 24 hours
after the extra-low temperature is reached. Once the time has
expired, the freezer will return to the previous temperature set-
ting. Fast Freeze may be manually turned off by pressing
TEMP SETTING to select the desired temperature setting from
the snowflake on the left (least cold) to the snowflake on the
right (coldest).
Over Temperature Alert (on some models)
The Over Temperature Alert lets you know if the freezer
temperature has risen to 19°F (-7°C) or higher. This alert feature
will sound a continuous alert tone and repeatedly flash a red
light on the control panel. The tone can be turned off by pressing
TEMP SETTING on the control panel once. As you press
TEMP SETTING, the red light will then also change from flashing
to continuously illuminated. The red light will remain illuminated
until the freezer temperature falls below 19°F (-7°C).
NOTE: If the red light on the control panel is repeatedly flashing,
but the alert tone is not sounding, this means that an
overtemperature condition has occurred, but the freezer tem-
perature has since returned to below 19°F (-7°C). To turn off the
red light indicator for this condition, press TEMP SETTING on
the control panel once.
Door Ajar Alarm (on some models)
The Door Ajar alarm lets you know when the freezer door has
been open for 5 minutes or longer and the cooling is turned on.
This alarm feature will sound an alert tone that will repeat every
2 minutes. Close the door to turn off the tone. The feature is
reset and will reactivate when the door is again left open for 5
minutes.
NOTE: To mute the alert tone while keeping the door open, such
as while cleaning the inside of the freezer, press TEMP SETTING
on the control panel. The alert tone will be temporarily turned off.
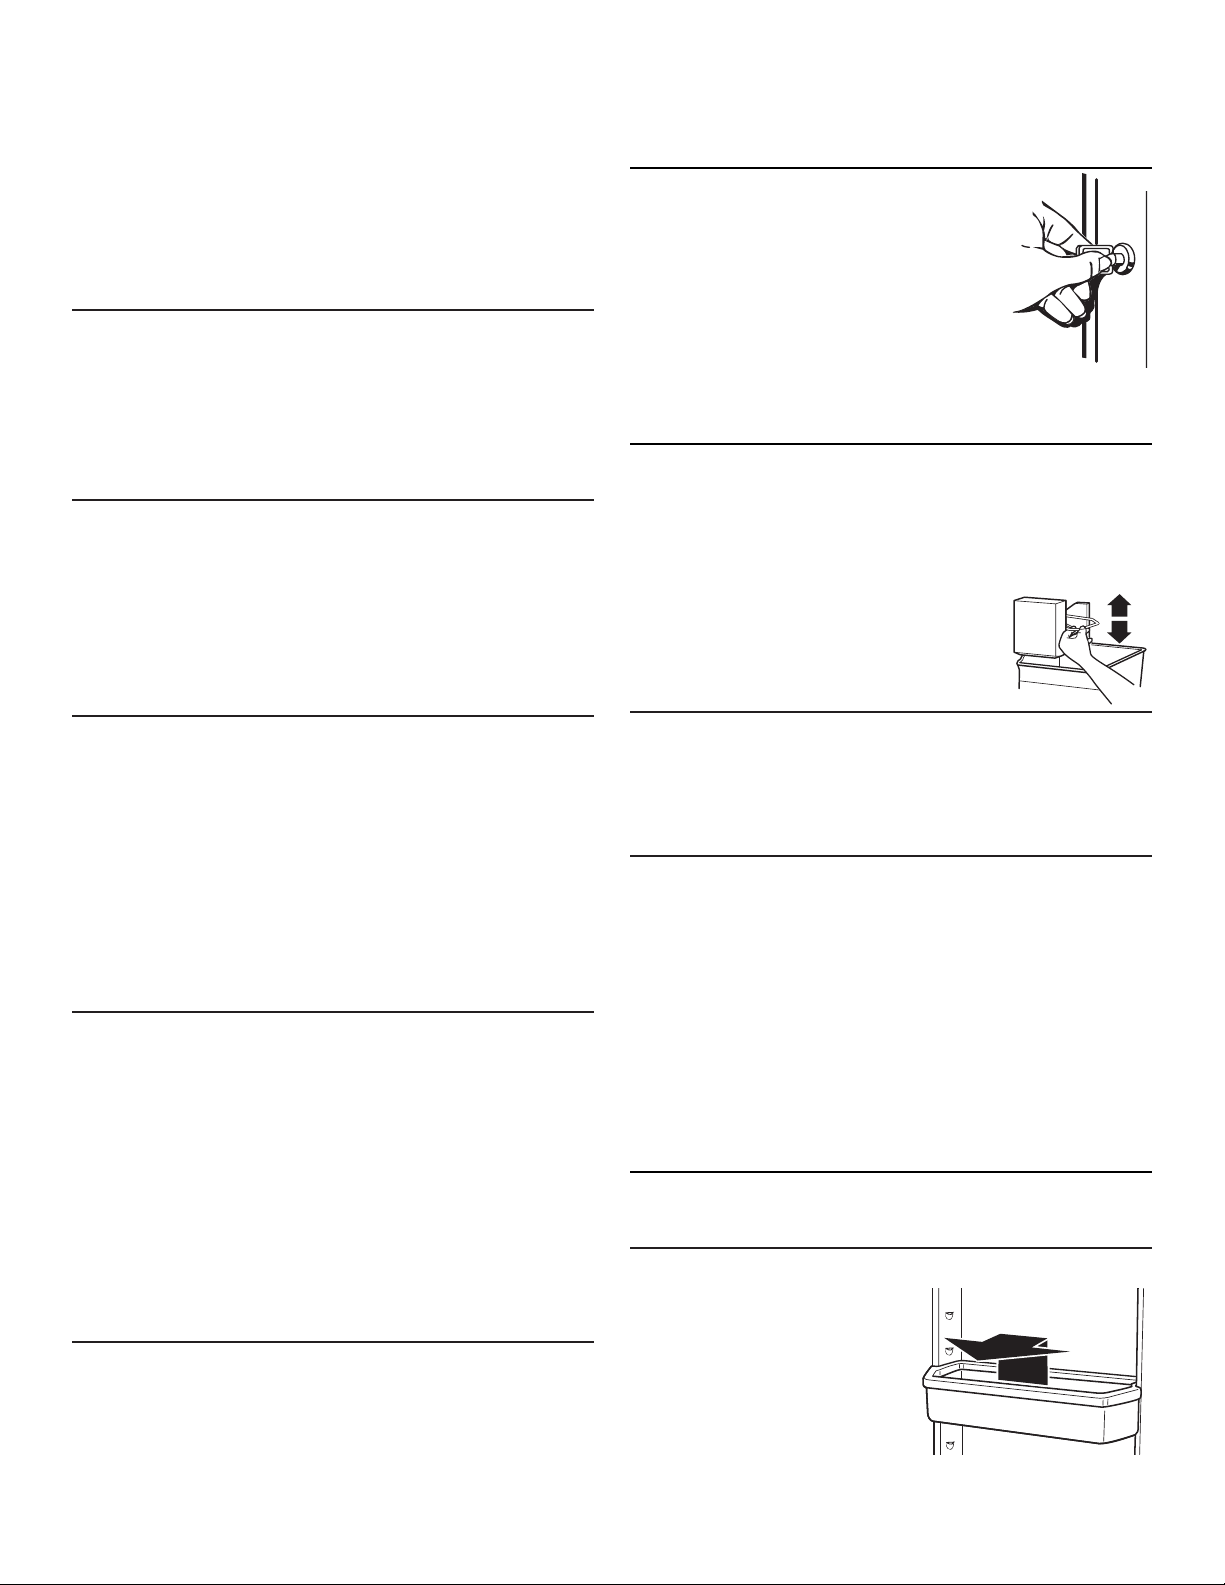
Key Eject Lock (on some models)
To lock or unlock the freezer, you must hold
the key in the lock while turning. The lock is
spring loaded, so the key cannot be left in the
lock.
If the key is lost, contact your dealer for a
replacement. Always give the model and
serial number of your freezer when
requesting a replacement key.
NOTE: Keep the key out of the reach of
children. Do not keep the key close to the
freezer/refrigerator.
Ice Maker (on some models)
To Turn the Ice Maker On/Off
NOTE: Do not force the wire shut-off arm up or down.
■ To turn the ice maker on, simply lower the wire shut-off arm.
NOTE: Your ice maker has an automatic shutoff. As ice is
made, the ice cubes fill the ice storage bin and the ice cubes
will raise the wire shut-off arm to the Off (arm up) position.
■ To manually turn the ice maker off, lift
the wire shut-off arm to the Off (arm up)
position and listen for the click to make
sure the ice maker will not continue to
operate.
Ice Production Rate
The ice maker should produce approximately 7 to 9 batches of
ice in a 24-hour period. If ice is not being made fast enough,
press TEMP SETTING to display the next colder setting. Wait
24 hours and, if necessary, set the temperature control to the
highest setting, waiting 24 hours between each increase.
Remember
■ Allow 24 hours to produce the first batch of ice. Discard the
first three batches of ice produced.
■ The quality of your ice will be only as good as the quality
of the water supplied to your ice maker. Avoid connecting
the ice maker to a softened water supply. Water softener
chemicals (such as salt) can damage parts of the ice
maker and lead to poor quality ice. If a softened water
supply cannot be avoided, make sure the water softener is
operating properly and is well maintained.
■ Do not store anything on top of the ice maker or in the ice
storage bin.
Freezer Features
This manual covers several different models. The freezer you
have purchased may have some or all of the items listed. The
locations of the features may not match those of your model.
Door Bin
To Remove and Replace the
Bin:
1. Remove the bin by tipping
the front of the bin forward
and sliding out.
2. Replace the bin by sliding it
in above the desired support,
tilting it back into place.
Loading ...
Loading ...
Loading ...