Loading ...
Loading ...
Loading ...
86
3
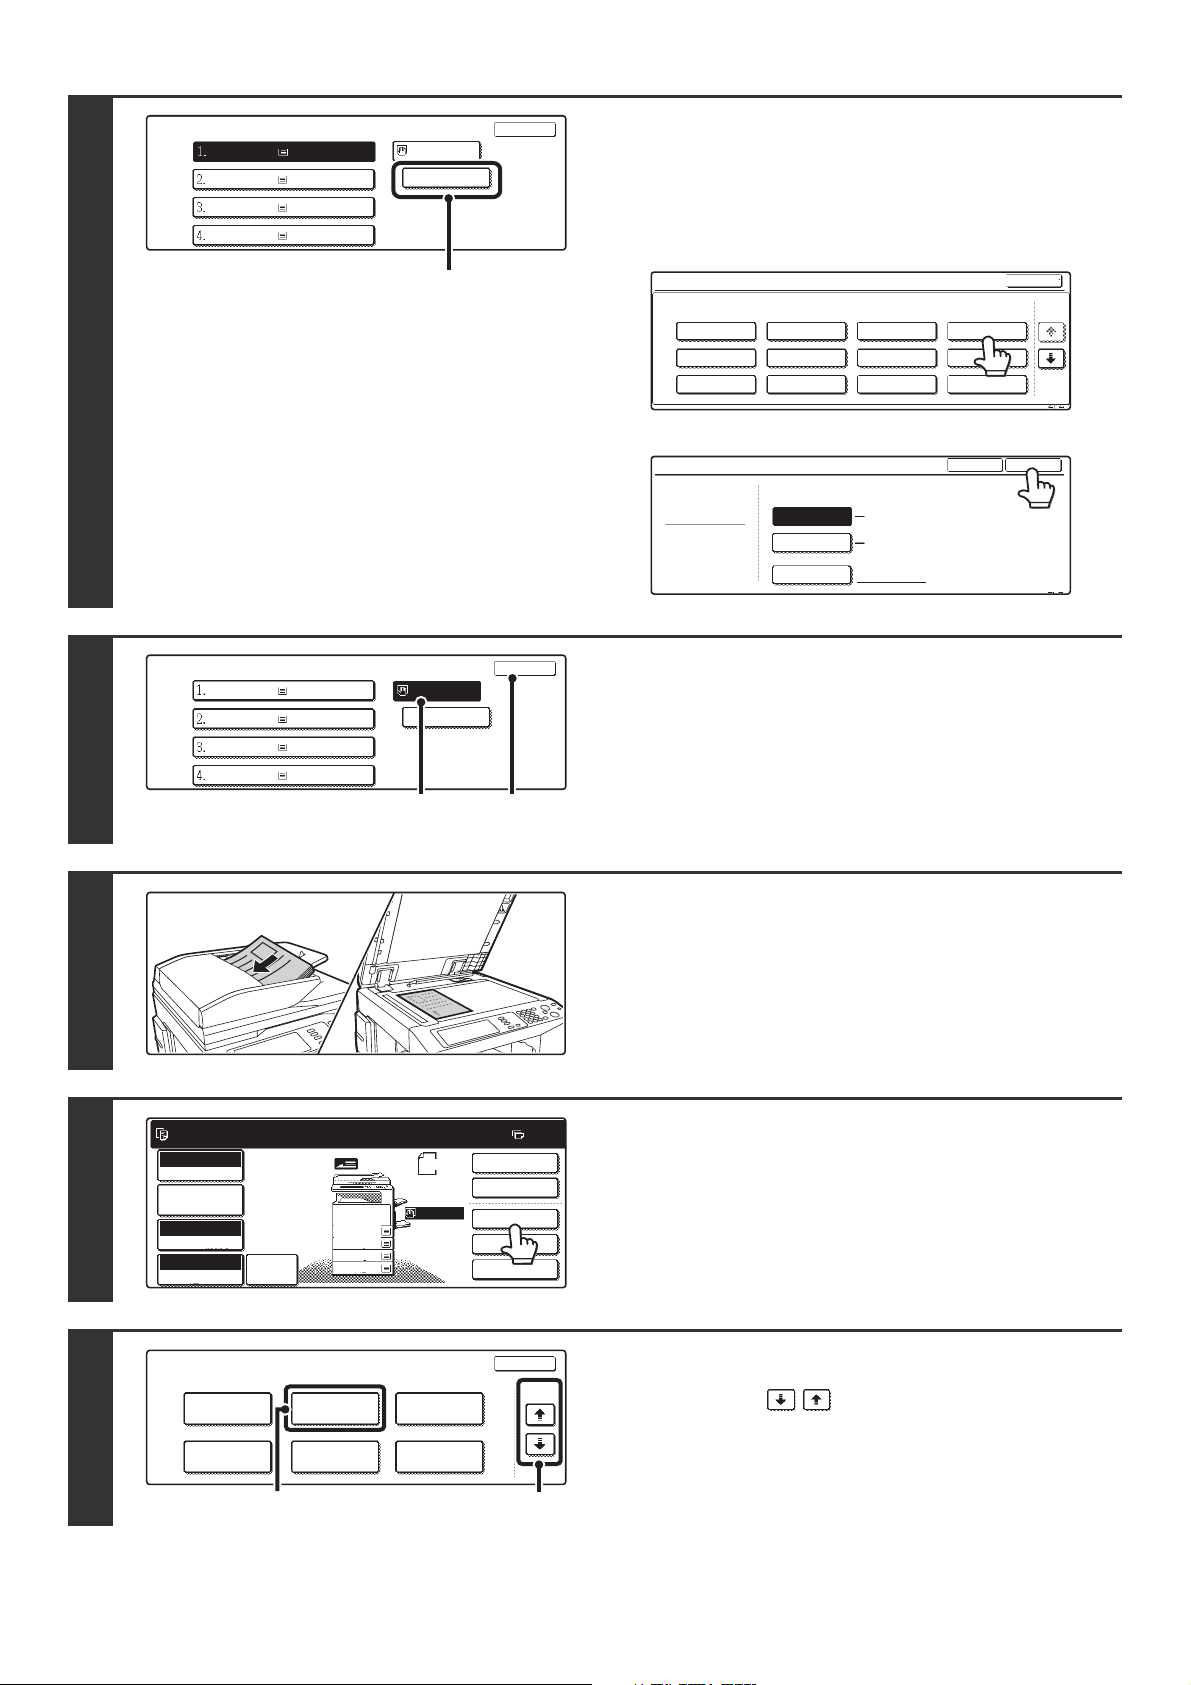
Select the settings for using
transparency film.
(1) Touch the appropriate paper type key.
(2) Touch the [Transparency] key.
(3) Specify the size of the transparency film.
4
Select the bypass tray.
(1) Touch the paper size key of the bypass tray.
(2) Touch the [OK] key.
When the [OK] key is touched, you will return to the job
detail setting screen. Touch the [Job Detail Settings] key
to return to the base screen of copy mode.
5
Place the original.
Place the original face up in the document feeder tray, or face
down on the document glass.
6
Touch the [Special Modes] key.
7
Select Transparency Inserts.
(1) Touch the keys to switch through
the screens.
(2) Touch the [Transparency Inserts] key.
Paper Select
OK
8 x11
8 x11
plain
plain
plain
plain
8 x11R
8 x14
11x17
Plain
1
/
2
1
/
2
1
/
2
1
/
2
(1)
Bypass Tray Type/Size Setting
Select the paper type.
1/2
1/2
Cancel
Transparency
Tab Paper
Envelope
Thin Paper
Heavy Paper
Labels
Letter Head
Pre-Punched
Color
Plain
Pre-Printed
Recycled
Bypass Tray Type/Size Setting
Type
Transparency
Size
Type
OK
2/2
Auto-Inch
Custom Size
Auto-AB
A4,A4R
X17 Y11
8 x11,8 x11R
1
/
2
1
/
2
Paper Select
OK
8 x11
plain
plain
plain
8 x11R
8 x14
11x17
1
/
2
1
/
2
plain
8 x11
1
/
2
1
/
2
Transparency
(1) (2)
11
Ready to scan for copy.
2-Sided Copy
Original
8 x11
1
/
2
0
Output
Special Modes
File
Quick File
Full Color
Color Mode
2.
3.
4.
1.
8 x11R
8 x14
11x17
8 x11
Auto
Exposure
100%
Copy Ratio
Job Detail
Settings
1
/
2
1
/
2
1
/
2
8 x11
1
/
2
OHP
Auto
Image
Special Modes
OK
2/4
Covers/Inserts
Book Copy
Transparency
Inserts
Multi Shot
Tab Copy Card Shot
(2)
(1)
Loading ...
Loading ...
Loading ...