
Loading ...
Loading ...
Loading ...
9
• Run 3 wires; black, white and green ,according to the
National Electrical Code and local codes and ordinances,
in
1
⁄2” conduit from service panel to junction box.
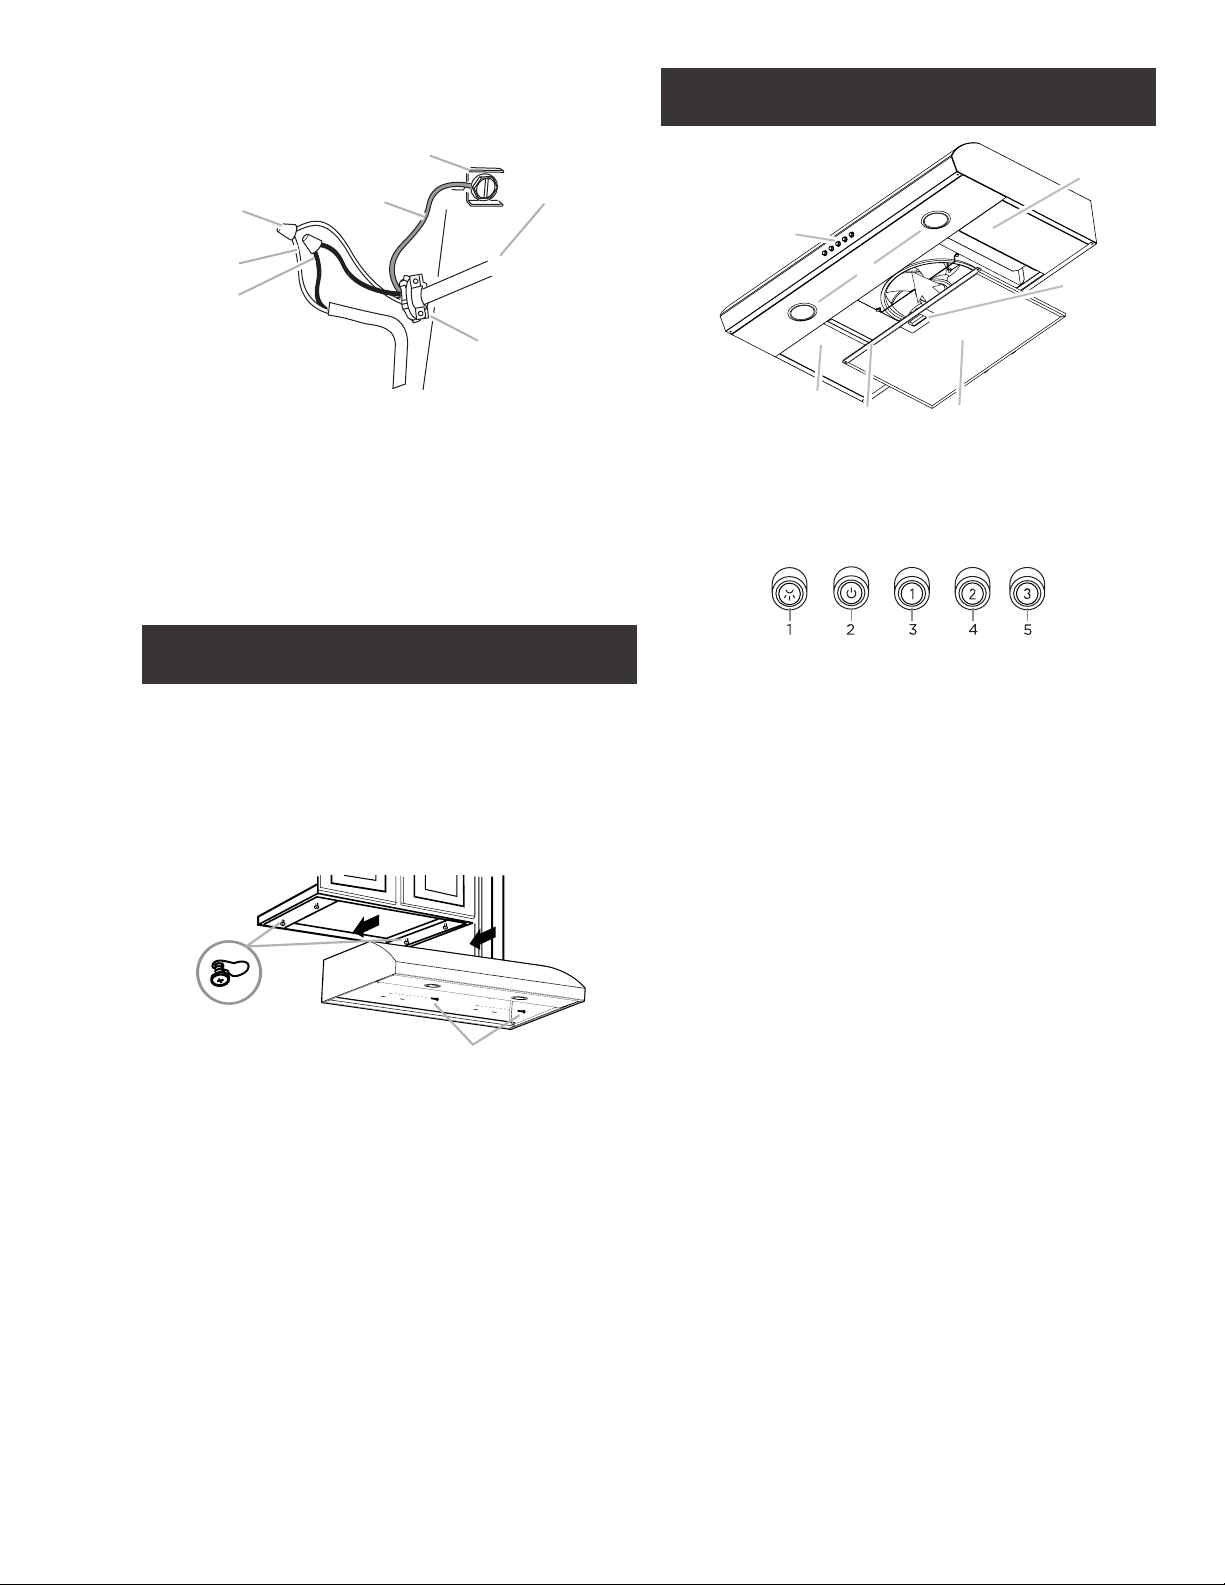
G
E
A
B
C
F
D
A. White wires
B. Black wires
C. UL listed wire connector
D. Green (or bare) ground wire
E. Home power supply cable
or power cord accessory kit
F. UL listed or CSA approved
½” strain relief
G. Green ground screw
• Connect black wire from service panel to black or red in
junction box, white to white and green to green-yellow.
• Close and secure junction box cover.
Complete Installation
• Lift the hood into final position. Feed enough electrical
wire through the ½” UL listed or CSA approved strain relief
to make connections in the terminal box. Tighten the strain
relief screws.
• Position the range hood so that the large end of the keyhole
slots are over the mounting screws. Then push the hood
toward the wall so that the screws are in the neck of the
slots.
A
B
A. Mounting screws (4)
B. Security screws
• Tighten the mounting screws, making sure the screws are
in the narrow neck of slots.
• Connect ventwork to hood. Seal joints with clamps to
make secure and airtight.
• Check that back draft dampers work properly.
• Replace filters. See the “Range Hood Care”.
Check operation of the hood.
If range hood does not operate:
• Check that the circuit breaker is not tripped or the house
fuse blown.
• Disconnect power supply. Check that wiring is correct.
To get the most efficient use from your new range hood, read
the “Use and Care Information” section.
Keep your Installation Instructions and Use and Care Guide
close to range hood for easy reference.
Description of the Hood
3
6
1
2
3
4
5
1. Control
2. LED lights
3. Lateral panels
4. Bracket
5. Grease filter
6. Grease filter handle
Controls
1. Light On/O button
2. Blower On/O button
3. Blower speed minimum button
4. Blower speed medium button
5. Blower speed maximum button
NOTE: Control buttons will light up when range hood is On.
Operating the light
The Light On/O button (1) controls both lights. Press once
for On and again for O.
Operating the blower
The Blower On/O button (2) turns the blower On or O.
The Blower Speed buttons (3, 4 and 5) set the desired speed
and control the sound level for quiet operation. The speed
can be changed anytime during fan operation by pressing the
desired blower speed button.
1 To turn the blower On, press the Blower On/O button (2)
and the desired speed button (3, 4 or 5).
2 To turn the blower O, press the Blower On/O button (2).
Any of the 3 blower speed buttons can be in the On position
at the same time. The blower will operate at the highest speed
button that is pushed in. For lower blower speeds, the higher
speed buttons must not be pushed in.
Loading ...
Loading ...
Loading ...