32
47
33 34 35
36
37
39
40
38
414244 43
51
50
49
48
46
45
32 View nder eyepiece
33 Diopter adjustment control
34
K button
35
P button
36 Multi selector
37
J (OK) button
38 N-Mark (NFC antenna)
39
O button
40 Memory card access lamp
41 Battery-chamber cover latch
42 Battery-chamber cover
43
W/Q button
44
X button
45 Tripod socket
46 Touch-sensitive vari-angle
monitor
47 Rubber eyecup
48 HDMI connector cover
49 Memory card slot cover
50 Power connector cover for
optional power connector
51 Battery latch
A The Multi Selector
In this manual, operations using the multi selector are represented by
1, 3, 4, and 2 icons.
1: Press the multi selector up
4: Press the multi
selector left
2: Press the multi selector
right
3: Press the multi selector
down
J button (select)
B
Quick Start Guide
Attach the Camera Strap
Charge the Battery
If a plug adapter is supplied, raise the wall plug and connect the
plug adapter as shown below at left, making sure the plug is fully
inserted. Insert the battery and plug the charger in.
Battery charging
Charging complete
Insert the Battery and a Memory Card
Open the Monitor
Open the monitor as shown. Do not use force.
Attach a Lens
Mounting mark (camera)
Mounting mark (lens)
Rotate the lens as shown until it clicks into place.
A Lenses with Retractable Lens Barrel Buttons
Before using the camera, unlock and extend the lens. Keeping the
retractable lens barrel button pressed (q), rotate the zoom ring as
shown (w).
Retractable lens barrel button
Pictures can not be taken when the lens is
retracted; if an error message is displayed as
a result of the camera having been turned on
with the lens retracted, rotate the zoom ring
until the message is no longer displayed.
A Removing Lenses
To remove the lens, turn the camera o and press and hold the
lens-release button on the front of the camera while rotating
the lens in the direction opposite that shown above.
Camera Setup
❚❚ Setup from a Smartphone or Tablet
1
Download and install the SnapBridge app.
The app is available free from the Nikon website
(http://snapbridge.nikon.com), the Apple App Store®, and
GooglePlay™.
2
Turn the camera on.
A language-selection dialog will be
displayed; press 1 and 3 to highlight
a language and press J to select.
3
Press J when the dialog at right is
displayed.
4
Pair the camera and the smart device.
• Android devices with NFC support: After checking that NFC is
enabled on the smart device, touch the camera H (N-Mark)
to the NFC antenna on the smart device to launch the
SnapBridge app.
• iOS devices and Android devices without NFC support: Press the
camera J button. The camera will wait for a connection;
launch the SnapBridge app on the smart device and follow
the on-screen instructions to tap the name of the camera you
want to pair with.
5
Check the authentication code.
Press J on the camera and tap PAIR on the smart device (the
button may vary with the smart device).
6
Press J when the dialog at right is
displayed.
If the camera displays Unable to
connect., the display will change after
a short pause. Return to Step 4.
7
Follow the on-screen instructions.
Follow the instructions displayed by the camera and smart
device to complete the setup process.
❚❚ Setup from the Camera Menus
1
Turn the camera on.
A language-selection dialog will be displayed; press 1 and 3
to highlight a language and press J to select.
2
Press G and set the camera clock.
After setting time zone, date format,
and daylight saving time options, use
the multi selector and J button to set
the camera clock.
Focus the View nder
After removing the lens cap, rotate the
diopter adjustment control until the AF
area brackets are in sharp focus. When
operating the control with your eye to
the view nder, be careful not to put your
ngers or ngernails in your eye.
View nder not in focus View nder in focus
C
“Point-and-Shoot” Modes (i and j)
1
Rotate the mode dial to i or j.
2
Frame the photograph.
3
Press the shutter-release button halfway to
focus.
4
Smoothly press the shutter-release button
the rest of the way down to take the
photograph.
D
Viewing Photographs
Pressing K displays a picture in the
monitor.
K button
E
Deleting Unwanted Photographs
Note that photographs can not be recovered
once deleted.
• Press the O button. A con rmation dialog
will be displayed; press the O button
again to delete the image and return to
playback.
O button
• To exit without deleting the picture, press K.
F
Recording Movies
1
Rotate the live view switch.
The view through the lens will be
displayed in the monitor.
Live view switch
2
Press the shutter-release button halfway to focus.
3
Press the movie-record button to
start recording.
Movie-record button
A recording indicator and the time
available are displayed in the monitor.
Time remaining
Recording indicator
4
Press the movie-record button again to end recording.
5
Rotate the live view switch to exit live view.
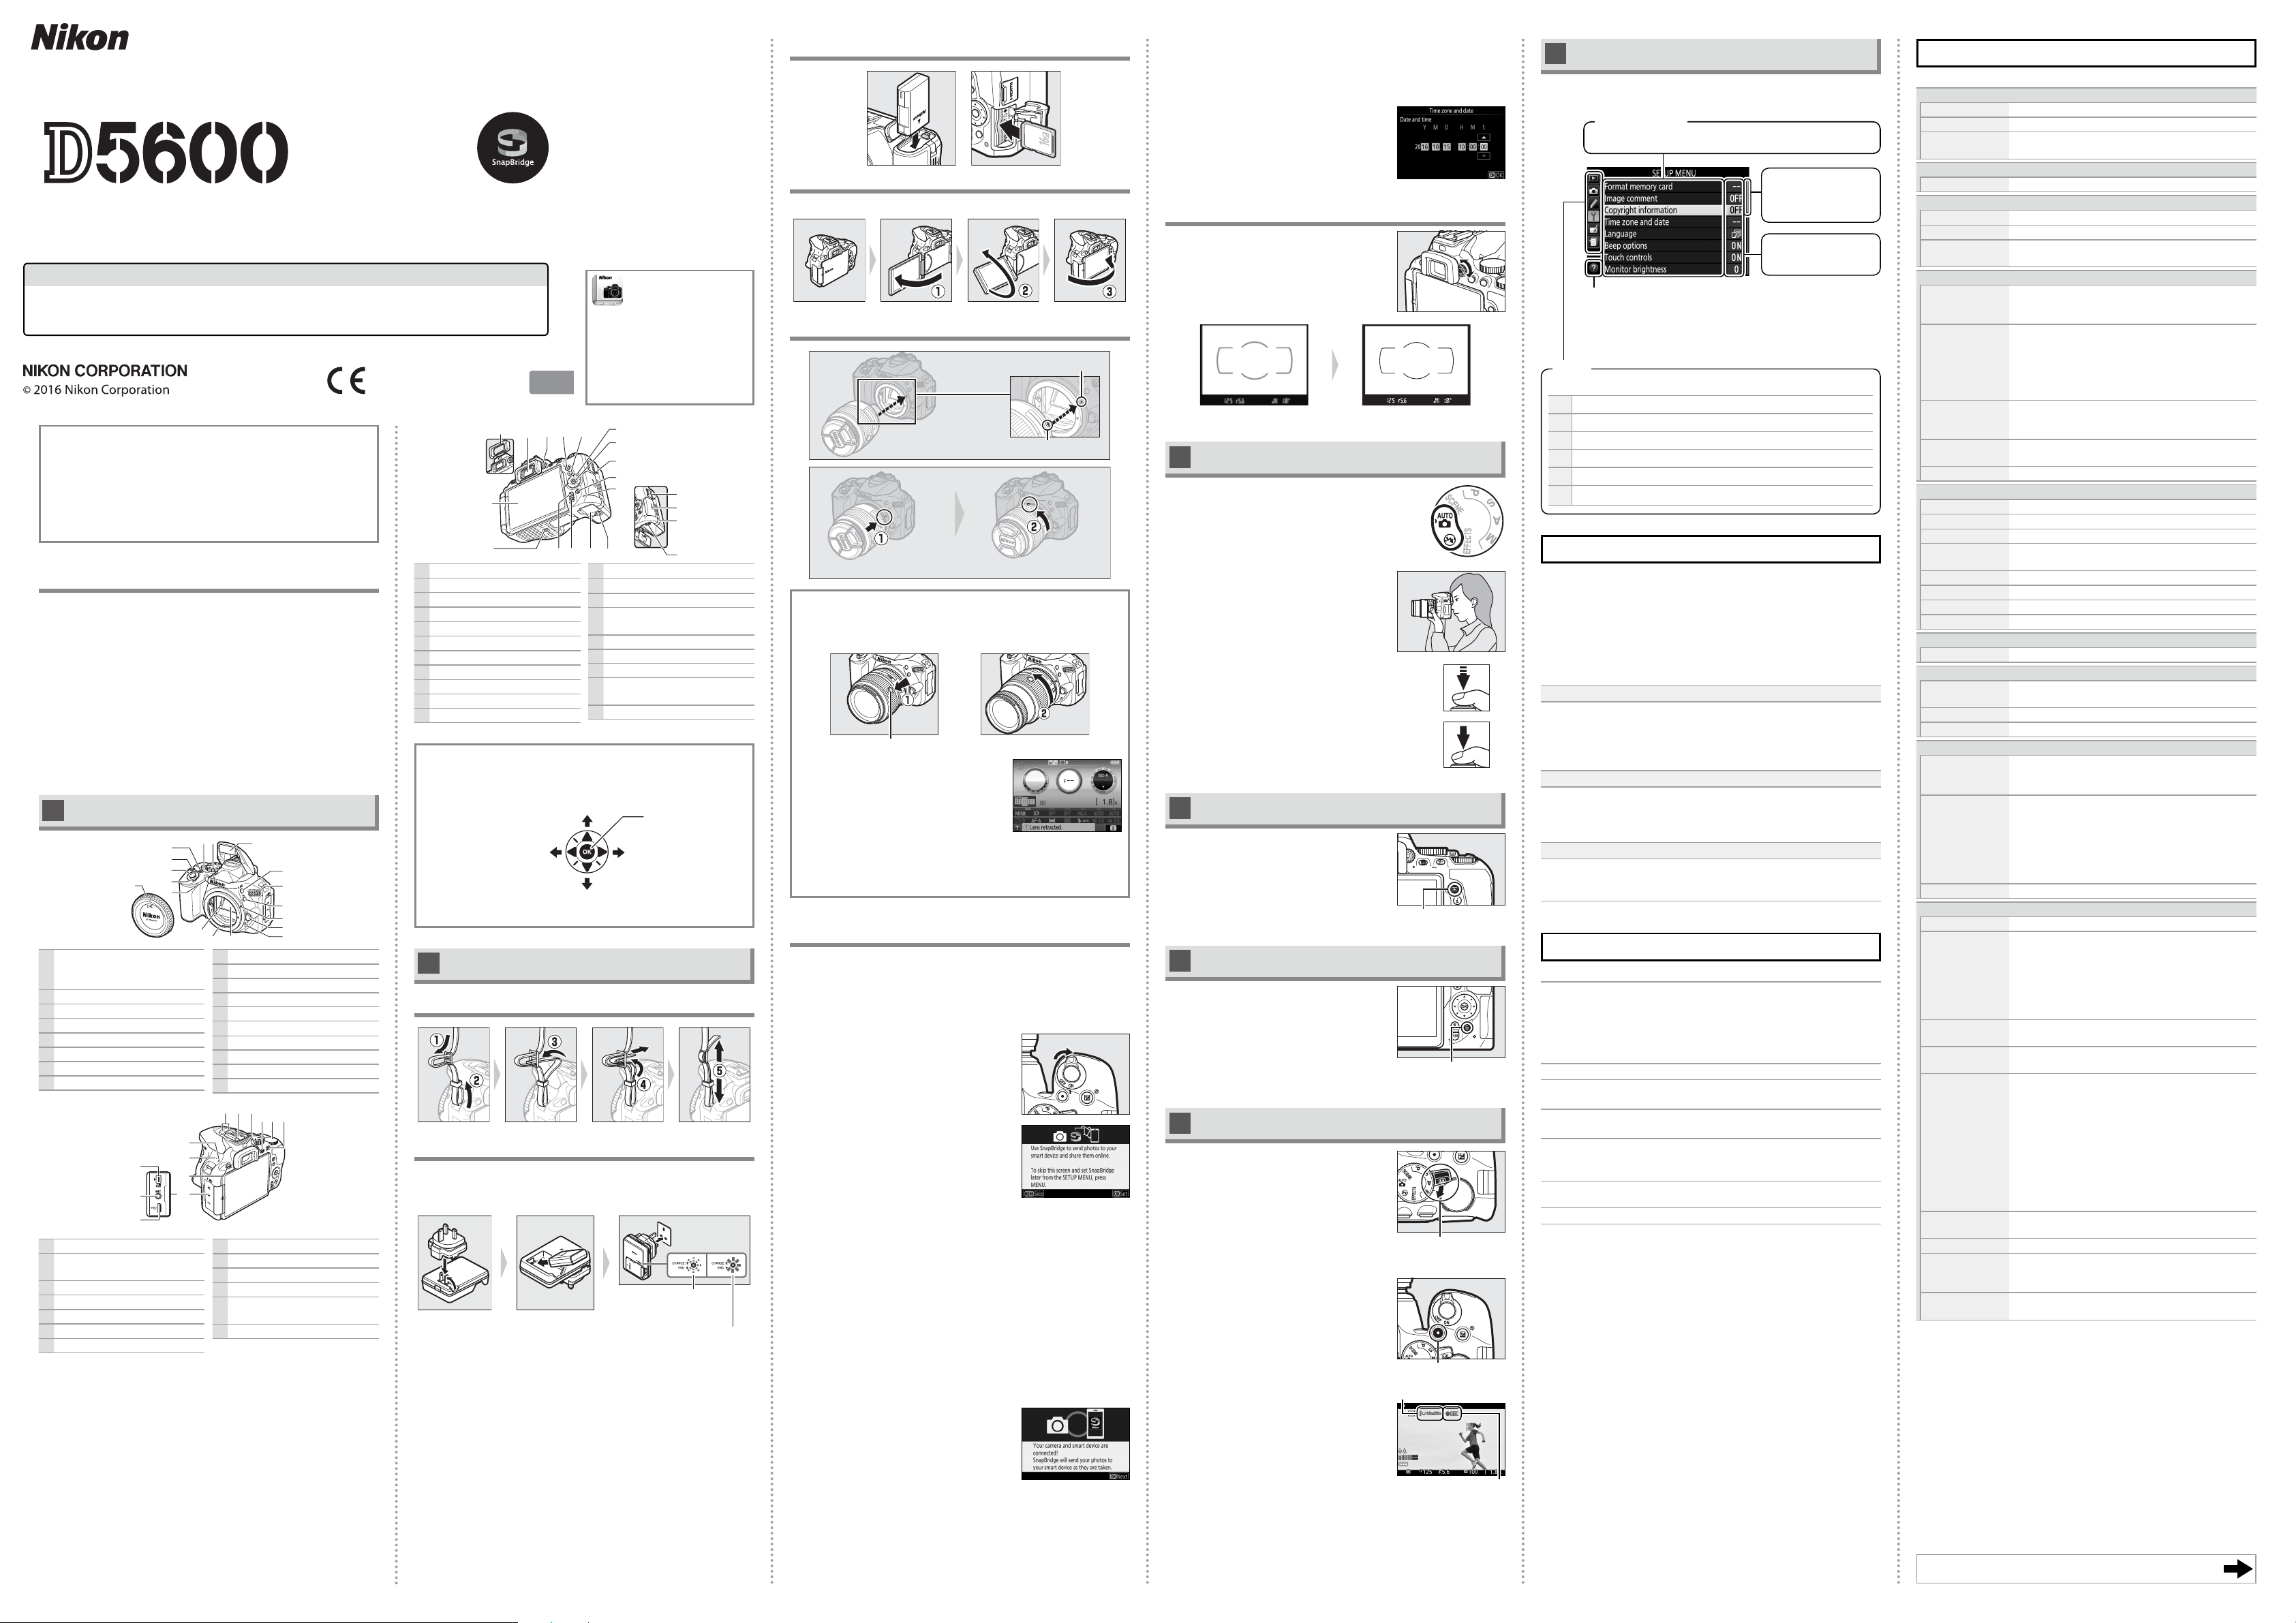
G
Camera Menus
Most shooting, playback, and setup options can be accessed from
the camera menus. To view the menus, press the G button.
Help icon
If the help icon is displayed, you can press the W(Q)
button to view help for the currently selected item.
Choose from the following menus:
D
Playback
C
Shooting
A
Custom Settings
B
Setup
N
Retouch
m Recent Settings / OMy Menu
Tabs
Options in current menu.
Menu options
Slider shows
position in current
menu.
Current settings are
shown by icons.
Caring for the Camera
❚❚ Storage
When the camera will not be used for an extended period, turn the camera
o and remove the battery. Do not store in locations that:
• are poorly ventilated or subject to humidities of over 60%
• are next to equipment that produces strong electromagnetic elds, such
as televisions or radios
• are exposed to temperatures above 50°C (122°F) or below –10°C (14°F)
❚❚ Cleaning
Camera Body
Use a blower to remove dust and lint, then wipe gently with a soft, dry
cloth. After using the camera at the beach or seaside, wipe o sand or salt
with a cloth lightly dampened in distilled water and dry thoroughly.
Important: Dust or other foreign matter inside the camera may cause
damage not covered under warranty.
Lens, Mirror, and View nder
These glass elements are easily damaged. Remove dust and lint with a
blower. If using an aerosol blower, keep the can vertical to prevent the
discharge of liquid. To remove ngerprints and other stains, apply a small
amount of lens cleaner to a soft cloth and clean with care.
Monitor
Remove dust and lint with a blower. When removing ngerprints and
other stains, wipe the surface lightly with a soft cloth or chamois leather.
Do not apply pressure, as this could result in damage or malfunction.
* Do not use alcohol, thinner, or other volatile chemicals.
Troubleshooting
❚❚ Battery/Display
The camera is on but does not respond: Wait for recording to end. If the problem
persists, turn the camera o . If the camera does not turn o , remove and
reinsert the battery or, if you are using an AC adapter, disconnect and
reconnect the AC adapter. Note that although any data currently being
recorded will be lost, data that have already been recorded will not be
a ected by removing or disconnecting the power source.
View nder is dark: Insert a fully-charged battery.
Displays turn o without warning: Choose longer delays for Custom Setting c2
(Auto o timers).
View nder display is unresponsive and dim: The response times and brightness
of this display vary with temperature.
Fine lines are visible around active focus point or display turns red when focus point is
highlighted: These phenomena are normal for this type of view nder and
do not indicate a malfunction.
❚❚ Shooting (All Modes)
Camera takes time to turn on: Delete les or folders.
Speci cations
❚❚ Nikon D5600 Digital Camera
Type
Type Single-lens re ex digital camera
Lens mount Nikon F mount (with AF contacts)
E ective angle of view Nikon DX format; focal length equivalent to approx. 1.5×
that of lenses with FX format angle of view
E ective pixels
E ective pixels 24.2 million
Image sensor
Image sensor 23.5 × 15.6 mm CMOS sensor
Total pixels 24.78 million
Dust-reduction System Image sensor cleaning, Image Dust O reference data
(CaptureNX-D software required)
Storage
Image size (pixels) • 6000 × 4000 (Large)
• 4496 × 3000 (Medium)
• 2992 × 2000 (Small)
File format • NEF (RAW): 12- or 14 bit, compressed
• JPEG: JPEG-Baseline compliant with ne (approx.
1:4), normal (approx. 1:8), or basic (approx. 1:16)
compression
• NEF (RAW)+JPEG: Single photograph recorded in both NEF
(RAW) and JPEG formats
Picture Control System Standard, Neutral, Vivid, Monochrome, Portrait,
Landscape, Flat; selected Picture Control can be
modi ed; storage for custom Picture Controls
Media SD (Secure Digital) and UHS-I compliant SDHC and SDXC
memory cards
File system DCF 2.0, Exif 2.3, PictBridge
View nder
View nder Eye-level pentamirror single-lens re ex view nder
Frame coverage Approx. 95% horizontal and 95% vertical
Magni cation Approx. 0.82× (50mm f/1.4 lens at in nity, –1.0m
–1
)
Eyepoint 17mm (–1.0m
–1
; from center surface of view nder
eyepiece lens)
Diopter adjustment –1.7 – +0.5m
–1
Focusing screen Type B BriteView Clear Matte Mark VII screen
Re ex mirror Quick return
Lens aperture Instant return, electronically controlled
Lens
Autofocus support Autofocus is available with AF-S, AF-P, and AF-I lenses.
Shutter
Type Electronically-controlled vertical-travel focal-plane
shutter
Speed / – 30 s in steps of / or /EV; Bulb; Time
Flash sync speed X = /s; synchronizes with shutter at /s or slower
Release
Release mode
8 (single frame), ! (continuous L), 9 (continuous H),
J (quiet shutter release), E (self-timer); interval timer
photography supported
Frame advance rate
• !: Up to 3fps
• 9: Up to 5fps (JPEG and 12-bit NEF/RAW) or 4fps
(14-bit NEF/RAW)
Note: Frame rates assume continuous-servo AF, manual or
shutter-priority auto exposure, a shutter speed of /s
or faster, Release selected for Custom Setting a1 (AF-C
priority selection), and other settings at default values.
Self-timer 2s, 5s, 10s, 20s; 1 – 9 exposures
Exposure
Metering mode TTL exposure metering using 2016-pixel RGB sensor
Metering method • Matrix metering: 3D color matrix metering II (type G,
E, and D lenses); color matrix metering II (other CPU
lenses)
• Center-weighted metering: Weight of 75% given to 8-mm
circle in center of frame
• Spot metering: Meters 3.5-mm circle (about 2.5% of
frame) centered on selected focus point
Range (ISO100, f/1.4
lens, 20°C/68°F)
• Matrix or center-weighted metering: 0 – 20EV
• Spot metering: 2 – 20EV
Exposure meter
coupling
CPU
Mode
Auto modes (iauto; jauto, ash o ); programmed
auto with exible program (P); shutter-priority auto (S);
aperture-priority auto (A); manual (M); scene modes
(kportrait; llandscape; pchild; msports; nclose
up; onight portrait; rnight landscape; sparty/
indoor; tbeach/snow; usunset; vdusk/dawn; wpet
portrait; xcandlelight; yblossom; zautumn colors;
0food); special e ects modes (%night vision; Ssuper
vivid; Tpop; Uphoto illustration; ' toy camera e ect;
(miniature e ect; 3selective color; 1silhouette;
2high key
; 3low key)
Exposure compensation Can be adjusted by –5 – +5EV in increments of / or /EV
in P, S, A, M, h, and % modes
Exposure lock
Luminosity locked at detected value with A(L) button
ISO sensitivity
(Recommended
Exposure Index)
ISO 100 – 25600 in steps of /EV. Auto ISO sensitivity
control available
Active D-Lighting
YAuto, ZExtra high, PHigh, QNormal, RLow,
!O
• Read this manual thoroughly before using the camera.
• To ensure proper use of the camera, be sure to read “For Your Safety”
(overleaf).
• After reading this manual, keep it in a readily accessible place for
future reference.
No reproduction in any form of this manual, in whole or in part (except
for brief quotation in critical articles or reviews), may be made without
written authorization from NIKON CORPORATION.
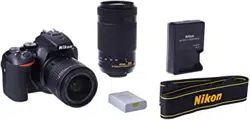
Package Contents
❏ D5600 camera
❏ DK-25 rubber eyecup
❏ BF-1B body cap
❏ EN-EL14a rechargeable Li-ion
battery (with terminal cover)
❏ AN-DC3 strap
❏ User’s Manual (this sheet)
❏ Warranty
❏ MH-24 battery charger (plug adapter supplied in countries or
regions where required; shape depends on country of sale)
Purchasers of the lens kit option should con rm that the package
also includes a lens. Memory cards are sold separately. Cameras
purchased in Japan display menus and messages in English and
Japanese only; other languages are not supported. We apologize
for any inconvenience this may cause.
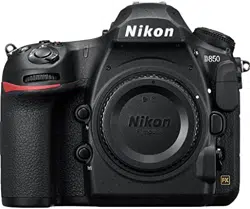
A
The Camera Body
14
12
13
1516
8
9
11
10
18
67
3
4
5
2
1
17
1 AF-assist illuminator
Self-timer lamp
Red-eye reduction lamp
2 Power switch
3 Shutter-release button
4
E/N button
5 Movie-record button
6 Live view switch
7 Mode dial
8 Built-in ash
9
M/Y button
10 Eyelets for camera strap
11 Fn button
12 Mounting mark
13 Lens release button
14
s/E button
15 Mirror
16 Lens mount
17 CPU contacts
18 Body cap
29
30
31
28
27
26
20 2119
22 23 24
25
19 Stereo microphone
20 Accessory shoe (for optional
ash units)
21 Eye sensor
22
R (information) button
23 Command dial
24
A/L button
25 Connector cover
26
G button
27 Speaker
28
Focal plane mark (E)
29 USB connector
30 Connector for external
microphone
31 Accessory terminal
Continued overleaf
D5600 Model Name: N1538
Nikon User Support for India and Australia
Contact a Nikon representative for
technical assistance with the operation
of your Nikon product or products.
For information on the Nikon
representatives in your area, visit
http://www.nikon-asia.com/support.
Nikon Manual Viewer 2
Install the Nikon Manual Viewer 2
app on your smartphone or tablet
to view Nikon digital camera
manuals, anytime, anywhere.
Nikon Manual Viewer 2 can be
downloaded free of charge from
the App Store and Google Play.
DIGITAL CAMERA
En
Printed in Thailand
6MB36911-01
User’s Manual
About the Reference Manual
For more information on using your Nikon camera, download a pdf copy of the caera Reference
Manual from the website listed below.
http://downloadcenter.nikonimglib.com/
Focus
Autofocus Nikon Multi-CAM 4800DX autofocus sensor module with
TTL phase detection, 39 focus points (including 9 cross-
type sensors), and AF-assist illuminator (range approx.
0.5 – 3m/1ft 8in. – 9ft10 in.)
Detection range –1 – +19EV (ISO 100, 20°C/68°F)
Lens servo • Autofocus (AF): Single-servo AF (AF-S); continuous-servo AF
(AF-C); auto AF-S/AF-C selection (AF-A); predictive focus
tracking activated automatically according to subject
status
• Manual focus (MF): Electronic range nder can be used
Focus point Can be selected from 39 or 11 focus points
AF-area mode Single-point AF, 9-, 21-, or 39- point dynamic-area AF,
3D-tracking, auto-area AF
Focus lock Focus can be locked by pressing shutter-release button
halfway (single-servo AF) or by pressing A(L) button
Flash
Built-in ash
i, k, p, n, o, s, w, S, T, U, ': Auto ash with auto
pop-up
P, S, A, M, 0: Manual pop-up with button release
Guide Number Approx. 12/39, 12/39 with manual ash (m/ft, ISO 100,
20°C/68°F)
Flash control TTL: i-TTL ash control using 2016-pixel RGB sensor is
available with built-in ash; i-TTL balanced ll- ash for
digital SLR is used with matrix and center-weighted
metering, standard i-TTL ash for digital SLR with spot
metering
Flash mode Auto, auto with red-eye reduction, auto slow sync, auto
slow sync with red-eye reduction, ll- ash, red-eye
reduction, slow sync, slow sync with red-eye reduction,
rear-curtain with slow sync, rear-curtain sync, o
Flash compensation Can be adjusted by –3 – +1EV in increments of / or /EV
in P, S, A, M, and h modes
Flash-ready indicator Lights when built-in ash or optional ash unit is fully
charged; blinks after ash is red at full output
Accessory shoe ISO 518 hot-shoe with sync and data contacts and safety
lock
Nikon Creative Lighting
System (CLS)
Nikon CLS supported
Sync terminal AS-15 sync terminal adapter (available separately)
White balance
White balance Auto, incandescent, uorescent (7 types), direct sunlight,
ash, cloudy, shade, preset manual, all except preset
manual with ne-tuning.
Bracketing
Bracketing types Exposure, white balance, and ADL
Live view
Lens servo • Autofocus (AF): Single-servo AF (AF-S); full-time-servo AF
(AF-F)
• Manual focus (MF)
AF-area mode Face-priority AF, wide-area AF, normal-area AF, subject-
tracking AF
Autofocus Contrast-detect AF anywhere in frame (camera selects
focus point automatically when face-priority AF or
subject-tracking AF is selected)
Automatic scene
selection
Available in i and j modes
Movie
Metering TTL exposure metering using main image sensor
Metering method Matrix
Frame size (pixels) and
frame rate
• 1920 × 1080; 60p (progressive), 50p, 30p, 25p, 24p
• 1280 × 720; 60p, 50p
Actual frame rates for 60p, 50p, 30p, 25p, and 24p are
59.94, 50, 29.97, 25, and 23.976fps respectively; options
support both ★high and normal image quality
File format MOV
Video compression H.264/MPEG-4 Advanced Video Coding
Audio recording format Linear PCM
Audio recording device Built-in or external stereo microphone; sensitivity
adjustable
ISO sensitivity ISO 100 – 25600
Other options Time-lapse movies
Monitor
Monitor 8.1cm/3.2-in. (3:2), approx. 1037k-dot (720 × 480 ×
3 = 1,036,800dots), TFT vari-angle LCD touch screen
with 170° viewing angle, approx. 100% frame coverage,
brightness adjustment, and eye-sensor controlled on/o
Playback
Playback Full-frame and thumbnail (4, 12, or 80 images or
calendar) playback with playback zoom, playback zoom
cropping, playback face zoom, movie playback, photo
and/or movie slide shows, histogram display, highlights,
photo information, location data display, auto image
rotation, picture rating, and image comment (up to 36
characters)
Interface
USB Hi-Speed USB with Micro-USB connector; connection to
built-in USB port is recommended
HDMI output Type C HDMI connector
Accessory terminal • Wireless remote controllers: WR-1, WR-R10 (available
separately)
• Remote cords: MC-DC2 (available separately)
• GPS units: GP-1/GP-1A (available separately)
Audio input Stereo mini-pin jack (3.5mm diameter); supports
optional ME-1 stereo microphones
Wireless/Bluetooth
Wireless • Standards: IEEE 802.11b, IEEE 802.11g
• Operating frequency: 2412 – 2462 MHz (channels 1 – 11)
• Authentication: Open system, WPA2-PSK
Bluetooth Communication protocols: Bluetooth Speci cation Version 4.1
Range (line of sight) Approximately 10m (32ft) without interference; range
may vary with signal strength and presence or absence
of obstacles
NFC
Operation NFC Forum Type 3 Tag
Supported languages
Supported languages Arabic, Bengali, Bulgarian, Chinese (Simpli ed and
Traditional), Czech, Danish, Dutch, English, Finnish,
French, German, Greek, Hindi, Hungarian, Indonesian,
Italian, Japanese, Korean, Marathi, Norwegian, Persian,
Polish, Portuguese (Portugal and Brazil), Romanian,
Russian, Serbian, Spanish, Swedish, Tamil, Telugu, Thai,
Turkish, Ukrainian, Vietnamese
Power source
Battery One EN-EL14a rechargeable Li-ion battery
AC adapter EH-5b/EH-5c AC adapter; requires EP-5A power
connector (available separately)
Tripod socket
Tripod socket / in. (ISO 1222)
Dimensions/weight
Dimensions (W×H×D) Approx. 124 × 97 × 70mm (4.9 × 3.9 × 2.8in.)
Weight Approx. 465g (1lb 0.4oz) with battery and memory card
but without body cap; approx. 415g/14.7oz (camera
body only)
Operating environment
Temperature 0°C – 40°C (+32°F – 104°F)
Humidity 85% or less (no condensation)
❚❚ MH-24 Battery Charger
Rated input AC 100 – 240 V, 50/60 Hz, 0.2 A maximum
Rated output DC 8.4 V/0.9 A
Supported batteries Nikon EN-EL14a rechargeable Li-ion batteries
Charging time Approx. 1 hour and 50minutes at an ambient
temperature of 25°C (77°F) when no charge remains
Operating temperature 0°C – 40°C (+32°F – 104°F)
Dimensions (W×H×D) Approx. 70 × 26 × 97mm (2.8 × 1.0 × 3.8 in.), excluding
plug adapter
Weight Approx. 96 g (3.4 oz), excluding plug adapter
The symbols on this product represent the following:
mAC, pDC, qClass II equipment (The construction of the product is double-
insulated.)
❚❚ EN-EL14a Rechargeable Li-ion Battery
Type Rechargeable lithium-ion battery
Rated capacity 7.2V/1230mAh
Operating temperature 0°C – 40°C (+32°F – 104°F)
Dimensions (W×H×D) Approx. 38 × 53 × 14mm (1.5 × 2.1 × 0.6in.)
Weight Approx. 49g (1.7oz), excluding terminal cover
A Battery Life
The movie footage or number of shots that can be recorded with fully-
charged batteries varies with the condition of the battery, temperature,
the interval between shots, and the length of time menus are displayed.
Sample gures for EN-EL14a (1230 mAh) batteries are given below.
• Photographs, single-frame release mode (CIPA standard): Approximately
970shots
• Movies: Approximately 70 minutes at 1080/60p
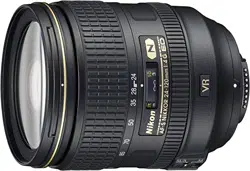
❚❚ AF-P DX NIKKOR 18–55mm f/3.5–5.6G VR
Type Type G AF-P DX lens with built-in CPU and F mount
Focal length 18 – 55mm
Maximum aperture f/3.5 – 5.6
Lens construction 12 elements in 9 groups (2 aspherical lens elements)
Angle of view 76° – 28° 50´
Focal length scale Graduated in millimeters (18, 24, 35, 45, 55)
Distance information Output to camera
Zoom Manual zoom using independent zoom ring
Focusing Autofocus controlled by stepping motor; separate focus
ring for manual focus
Vibration reduction Lens shift using voice coil motors (VCMs)
Minimum focus distance 0.25m (0.9ft) from focal plane at all zoom positions
Diaphragm blades 7 (rounded diaphragm opening)
Diaphragm Fully automatic
Aperture range • 18mm focal length: f/3.5–22
• 55mm focal length: f/5.6–38
The minimum aperture displayed may vary depending
on the size of the exposure increment selected with the
camera.
Metering Full aperture
Filter-attachment size 55mm (P = 0.75 mm)
Dimensions Approx. 64.5 mm maximum diameter ×62.5 mm
(distance from camera lens mount ange when lens is
retracted)
Weight Approx. 205 g (7.3oz)
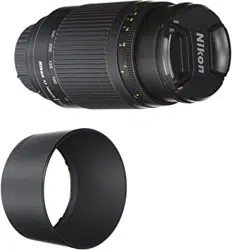
❚❚ AF-P DX NIKKOR 70–300mm f/4.5–6.3G ED VR and AF-P DX NIKKOR 70–300mm
f/4.5–6.3G ED
Type Type G AF-P DX lens with built-in CPU and F mount
Focal length 70 – 300mm
Maximum aperture f/4.5 – 6.3
Lens construction 14 elements in 10 groups (including 1 ED lens element)
Angle of view 22° 50´ – 5° 20´
Focal length scale Graduated in millimeters (70, 100, 135, 200, 300)
Distance information Output to camera
Zoom Manual zoom using independent zoom ring
Focusing Autofocus controlled by stepping motor; separate focus
ring for manual focus
Vibration reduction (AF-
P DX NIKKOR 70–300mm
f/4.5–6.3G ED VR only)
Lens shift using voice coil motors (VCMs)
Minimum focus distance 1.1 m (3.7 ft) from focal plane at all zoom positions
Diaphragm blades 7 (rounded diaphragm opening)
Diaphragm Fully automatic
Aperture range • 70mm focal length: f/4.5–22
• 300mm focal length: f/6.3–32
The minimum aperture displayed may vary depending
on the size of the exposure increment selected with the
camera.
Metering Full aperture
Filter-attachment size 58 mm (P = 0.75 mm)
Dimensions Approx. 72mm maximum diameter × 125mm (distance
from camera lens mount ange)
Weight • AF-P DX NIKKOR 70–300mm f/4.5–6.3G ED VR: Approx. 415 g
(14.7oz)
• AF-P DX NIKKOR 70–300mm f/4.5–6.3G ED: Approx. 400 g
(14.2oz)
❚❚ AF-S DX NIKKOR 18–140mm f/3.5–5.6G ED VR
Type Type G AF-S DX lens with built-in CPU and F mount
Focal length 18 – 140mm
Maximum aperture f/3.5 – 5.6
Lens construction 17 elements in 12 groups (including 1 ED lens element,
1aspherical lens element)
Angle of view 76° – 11° 30´
Focal length scale Graduated in millimeters (18, 24, 35, 50, 70, 140)
Distance information Output to camera
Zoom Manual zoom using independent zoom ring
Focusing Nikon Internal Focusing (IF) System with autofocus
controlled by Silent Wave Motor and separate focus ring
for manual focus
Vibration reduction Lens shift using voice coil motors (VCMs)
Minimum focus distance 0.45m (1.48ft) from focal plane at all zoom positions
Diaphragm blades 7 (rounded diaphragm opening)
Diaphragm Fully automatic
Aperture range • 18mm focal length: f/3.5–22
• 140mm focal length: f/5.6–38
The minimum aperture displayed may vary depending
on the size of the exposure increment selected with the
camera.
Metering Full aperture
Filter-attachment size 67mm (P = 0.75mm)
Dimensions Approx. 78mm maximum diameter × 97 mm (distance
from camera lens mount ange)
Weight Approx. 490g (17.3oz)
• Unless otherwise stated, all measurements are performed in conformity
with Camera and Imaging Products Association (CIPA) standards or
guidelines.
• All gures are for a camera with a fully-charged battery.
• Nikon reserves the right to change the appearance and speci cations of the
hardware and software described in this manual at any time and without
prior notice. Nikon will not be held liable for damages that may result from
any mistakes that this manual may contain.
❚❚ Trademark Information
IOS is a trademark or registered trademark of Cisco Systems, Inc., in the United
States and/or other countries and is used under license. Windows is either a
registered trademark or a trademark of Microsoft Corporation in the United
States and/or other countries. Mac, OS X, Apple®, App Store®, the Apple logos,
iPhone®, iPad®, and iPod touch® are trademarks of Apple Inc. registered in the
U.S. and/or other countries. Android is a trademark of Google Inc. The Android
robot is reproduced or modi ed from work created and shared by Google and
used according to terms described in the Creative Commons 3.0 Attribution
License. PictBridge logo is a trademark. The SD, SDHC, and SDXC logos are
trademarks of the SD-3C, LLC. HDMI, the HDMI logo and High-De nition
Multimedia Interface are trademarks or registered trademarks of HDMI Licensing
LLC.
Wi-Fi and the Wi-Fi logo are trademarks or registered trademarks of the
Wi-Fi Alliance. N-Mark is a trademark or registered trademark of NFC
Forum, Inc., in the United States and/or other countries.
The Bluetooth® word mark and logos are registered trademarks owned
by Bluetooth SIG, Inc. and any use of such marks by Nikon Corporation is
under license.
All other trade names mentioned in this manual or the other
documentation provided with your Nikon product are trademarks or
registered trademarks of their respective holders.
“Made for iPod,” “Made for iPhone,” and “Made for iPad” mean that an
electronic accessory has been designed to connect speci cally to iPod,
iPhone, or iPad, respectively, and has been certi ed by the developer
to meet Apple performance standards. Apple is not responsible for the
operation of this device or its compliance with safety and regulatory
standards. Please note that the use of this accessory with iPod, iPhone,
or iPad may a ect wireless performance.
❚❚ Conformity Marking
The standards with which the camera complies can be viewed using the
Conformity marking option in the setup menu.
❚❚ FreeType License (FreeType2)
Portions of this software are copyright © 2012 The FreeType Project
(http://www.freetype.org). All rights reserved.
❚❚ MIT License (HarfBuzz)
Portions of this software are copyright © 2016 The HarfBuzz Project
(http://www.freedesktop.org/wiki/Software/HarfBuzz). All rights reserved.
For Your Safety
To prevent damage to property or injury to yourself or to others, read “For Your Safety”
in its entirety before using this product.
Keep these safety instructions where all those who use this product will read them.
DANGER: Failure to observe the precautions marked with this icon carries a high
risk of death or severe injury.
WARNING: Failure to observe the precautions marked with this icon could result in
death or severe injury.
CAUTION: Failure to observe the precautions marked with this icon could result in
injury or property damage.
WARNING
• Do not use while walking or operating a motor vehicle.
Failure to observe this precaution could result in accidents or other injury.
• Do not disassemble or modify this product. Do not touch internal parts that
become exposed as the result of a fall or other accident.
Failure to observe these precautions could result in electric shock or other injury.
• Should you notice any abnormalities such as the product producing smoke,
heat, or unusual odors, immediately disconnect the battery or power source.
Continued operation could result in re, burns or other injury.
• Keep dry. Do not handle with wet hands. Do not handle the plug with wet hands.
Failure to observe these precautions could result in re or electric shock.
• Do not let your skin remain in prolonged contact with this product while it is on
or plugged in.
Failure to observe this precaution could result in low-temperature burns.
• Do not use this product in the presence of ammable dust or gas such as
propane, gasoline or aerosols.
Failure to observe this precaution could result in explosion or re.
• Do not directly view the sun or other bright light source through the lens or camera.
Failure to observe this precaution could result in visual impairment.
• Do not aim the ash or AF-assist illuminator at the operator of a motor vehicle.
Failure to observe this precaution could result in accidents.
• Keep this product out of reach of children.
Failure to observe this precaution could result in injury or product malfunction. In
addition, note that small parts constitute a choking hazard. Should a child swallow
any part of this product, seek immediate medical attention.
• Do not entangle, wrap or twist the straps around your neck.
Failure to observe this precaution could result in accidents.
• Do not use batteries, chargers, or AC adapters not speci cally designated
for use with this product. When using batteries, chargers, and AC adapters
designated for use with this product, do not:
- Damage, modify, forcibly tug or bend the cords or cables, place them under
heavy objects, or expose them to heat or ame.
- Use travel converters or adapters designed to convert from one voltage to
another or with DC-to-AC inverters.
Failure to observe these precautions could result in re or electric shock.
• Do not handle the plug when charging the product or using the AC adapter
during thunderstorms.
Failure to observe this precaution could result in electric shock.
• Do not handle with bare hands in locations exposed to extremely high or low
temperatures.
Failure to observe this precaution could result in burns, or frostbite.
CAUTION
• Do not leave the lens pointed at the sun or other strong light sources.
Light focused by the lens could cause re or damage to product’s internal parts.
When shooting backlit subjects, keep the sun well out of the frame. Sunlight
focused into the camera when the sun is close to the frame could cause re.
• Turn this product o when its use is prohibited. Disable wireless features when
the use of wireless equipment is prohibited.
The radio-frequency emissions produced by this product could interfere with
equipment onboard aircraft or in hospitals or other medical facilities.
• Remove the battery and disconnect the AC adapter if this product will not be
used for an extended period.
Failure to observe this precaution could result in re or product malfunction.
• Do not touch moving parts of the lens or other moving parts.
Failure to observe this precaution could result in injury.
• Do not re the ash in contact with or in close proximity to the skin or objects.
Failure to observe this precaution could result in burns or re.
• Do not leave the product where it will be exposed to extremely high
temperatures, for an extended period such as in an enclosed automobile or in
direct sunlight.
Failure to observe this precaution could result in re or product malfunction.
DANGER (Batteries)
• Do not mishandle batteries.
Failure to observe the following precautions could result in the batteries leaking,
overheating, rupturing, or catching re:
- Use only rechargeable batteries approved for use in this product.
- Do not expose batteries to ame or excessive heat.
- Do not disassemble.
- Do not short-circuit the terminals by touching them to necklaces, hairpins, or
other metal objects.
- Do not expose batteries or the products in which they are inserted to powerful
physical shocks.
• Do not attempt to recharge EN-EL14a rechargeable batteries using chargers not
speci cally designated for this purpose.
Failure to observe this precaution could result in the batteries leaking, overheating,
rupturing, or catching re.
• If battery liquid comes into contact with the eyes, rinse with plenty of clean
water and seek immediate medical attention.
Delaying action could result in eye injuries.
WARNING (Batteries)
• Keep batteries out of reach of children.
Should a child swallow a battery, seek immediate medical attention.
• Do not immerse batteries in water or expose to rain.
Failure to observe this precaution could result in re or product malfunction.
Immediately dry the product with a towel or similar object should it become wet.
• Discontinue use immediately should you notice any changes in the batteries,
such as discoloration or deformation. Cease charging EN-EL14a rechargeable
batteries if they do not charge in the speci ed period of time.
Failure to observe these precautions could result in the batteries leaking,
overheating, rupturing, or catching re.
• Prior to disposal, insulate battery terminals with tape.
Overheating, rupture, or re may result should metal objects come into contact
with the terminals. Recycle or dispose of batteries in accord with local regulations.
• If battery liquid comes into contact with a person’s skin or clothing, immediately
rinse the a ected area with plenty of clean water.
Failure to observe this precaution could result in skin irritation.
Notices
• No part of the manuals included with this product may be reproduced, transmitted,
transcribed, stored in a retrieval system, or translated into any language in any form,
by any means, without Nikon’s prior written permission.
• Nikon reserves the right to change the appearance and speci cations of the hardware
and software described in these manuals at any time and without prior notice.
• Nikon will not be held liable for any damages resulting from the use of this product.
• While every e ort has been made to ensure that the information in these manuals
is accurate and complete, we would appreciate it were you to bring any errors
or omissions to the attention of the Nikon representative in your area (address
provided separately).
Notice for Customers in Canada
CAN ICES-3 B / NMB-3 B
Notices for Customers in Europe
CAUTION: RISK OF EXPLOSION IF BATTERY IS REPLACED BY AN INCORRECT TYPE.
DISPOSE OF USED BATTERIES ACCORDING TO THE INSTRUCTIONS.
This symbol indicates that electrical and electronic equipment is to be
collected separately.
The following apply only to users in European countries:
• This product is designated for separate collection at an appropriate
collection point. Do not dispose of as household waste.
• Separate collection and recycling helps conserve natural resources and
prevent negative consequences for human health and the environment
that might result from incorrect disposal.
• For more information, contact the retailer or the local authorities in
charge of waste management.
This symbol on the battery indicates that the battery is to be collected
separately.
The following apply only to users in European countries:
• All batteries, whether marked with this symbol or not, are designated for
separate collection at an appropriate collection point. Do not dispose of
as household waste.
• For more information, contact the retailer or the local authorities in
charge of waste management.
Notices for Customers in the U.S.A.
The Battery Charger
IMPORTANT SAFETY INSTRUCTIONS—SAVE THESE INSTRUCTIONS
DANGER—TO REDUCE THE RISK OF FIRE OR ELECTRIC SHOCK, CAREFULLY
FOLLOW THESE INSTRUCTIONS
For connection to a supply not in the U.S.A., use an attachment plug adapter
of the proper con guration for the power outlet if needed. This power unit is
intended to be correctly oriented in a vertical or oor mount position.
Federal Communications Commission (FCC) Radio Frequency Interference Statement
D5600
This equipment has been tested and found to comply with the limits for a Class
B digital device, pursuant to Part 15 of the FCC rules. These limits are designed
to provide reasonable protection against harmful interference in a residential
installation. This equipment generates, uses, and can radiate radio frequency
energy and, if not installed and used in accordance with the instructions, may cause
harmful interference to radio communications. However, there is no guarantee that
interference will not occur in a particular installation. If this equipment does cause
harmful interference to radio or television reception, which can be determined
by turning the equipment o and on, the user is encouraged to try to correct the
interference by one or more of the following measures:
• Reorient or relocate the receiving antenna.
• Increase the separation between the equipment and receiver.
• Connect the equipment into an outlet on a circuit di erent from that to which the
receiver is connected.
• Consult the dealer or an experienced radio/television technician for help.
CAUTIONS
Modi cations
The FCC requires the user be noti ed that any changes or modi cations made to this
device that are not expressly approved by Nikon Corporation may void the user’s
authority to operate the equipment.
Interface Cables
Use the interface cables sold or provided by Nikon for your equipment. Using other
interface cables may exceed the limits of Class B Part 15 of the FCC rules.
Notice for Customers in the State of California
WARNING: Handling the cord on this product may expose you to lead, a chemical
known to the State of California to cause birth defects or other reproductive harm.
Wash hands after handling.
Nikon Inc., 1300 Walt Whitman Road, Melville, New York 11747-3064, U.S.A.
Tel.: 631-547-4200
Notice Concerning Prohibition of Copying or Reproduction
Note that simply being in possession of material that has been digitally copied or
reproduced by means of a scanner, digital camera, or other device may be punishable
by law.
• Items prohibited by law from being copied or reproduced
Do not copy or reproduce paper money, coins, securities, government bonds, or
local government bonds, even if such copies or reproductions are stamped “Sample.”
The copying or reproduction of paper money, coins, or securities which are
circulated in a foreign country is prohibited.
Unless the prior permission of the government has been obtained, the copying or
reproduction of unused postage stamps or post cards issued by the government is
prohibited.
The copying or reproduction of stamps issued by the government and of certi ed
documents stipulated by law is prohibited.
• Cautions on certain copies and reproductions
The government has issued cautions on copies or reproductions of securities issued
by private companies (shares, bills, checks, gift certi cates, etc.), commuter passes,
or coupon tickets, except when a minimum of necessary copies are to be provided
for business use by a company. Also, do not copy or reproduce passports issued by
the government, licenses issued by public agencies and private groups, ID cards,
and tickets, such as passes and meal coupons.
• Comply with copyright notices
Under copyright law, photographs or recordings of copyrighted works made
with the camera can not be used without the permission of the copyright holder.
Exceptions apply to personal use, but note that even personal use may be restricted
in the case of photographs or recordings of exhibits or live performances.
Disposing of Data Storage Devices
Please note that deleting images or formatting memory cards or other data storage
devices does not completely erase the original image data. Deleted les can
sometimes be recovered from discarded storage devices using commercially available
software, potentially resulting in the malicious use of personal image data. Ensuring
the privacy of such data is the user’s responsibility.
Before discarding a data storage device or transferring ownership to another person,
erase all data using commercial deletion software, or format the device and then
completely re ll it with images containing no private information (for example,
pictures of empty sky). Be sure to also replace any pictures selected for preset manual.
Before discarding the camera or transferring ownership to another person, you
should also use the Wi-Fi > Reset connection settings option in the camera setup
menu to delete any personal network information. Care should be taken to avoid
injury when physically destroying data storage devices.
AVC Patent Portfolio License
THIS PRODUCT IS LICENSED UNDER THE AVC PATENT PORTFOLIO LICENSE FOR THE PERSONAL AND NON-
COMMERCIAL USE OF A CONSUMER TO (i) ENCODE VIDEO IN COMPLIANCE WITH THE AVC STANDARD (“AVC
VIDEO”) AND/OR (ii) DECODE AVC VIDEO THAT WAS ENCODED BY A CONSUMER ENGAGED IN A PERSONAL AND
NON-COMMERCIAL ACTIVITY AND/OR WAS OBTAINED FROM A VIDEO PROVIDER LICENSED TO PROVIDE AVC VIDEO.
NO LICENSE IS GRANTED OR SHALL BE IMPLIED FOR ANY OTHER USE. ADDITIONAL INFORMATION MAY BE OBTAINED
FROM MPEG LA, L.L.C. SEE http://www.mpegla.com
Use Only Nikon Brand Electronic Accessories
Nikon cameras are designed to the highest standards and include complex electronic
circuitry. Only Nikon brand electronic accessories (including chargers, batteries, AC
adapters, and ash accessories) certi ed by Nikon speci cally for use with this Nikon
digital camera are engineered and proven to operate within the operational and
safety requirements of this electronic circuitry.
The use of non-Nikon electronic accessories could damage the
camera and may void your Nikon warranty. The use of third-party
rechargeable Li-ion batteries not bearing the Nikon holographic
seal shown at right could interfere with normal operation of the
camera or result in the batteries overheating, igniting, rupturing, or leaking.
For more information about Nikon brand accessories, contact a local authorized
Nikon dealer.
D Use Only Nikon Brand Accessories
Only Nikon brand accessories certi ed by Nikon speci cally for use with
your Nikon digital camera are engineered and proven to operate within
its operational and safety requirements. T
HE USE OF NON-NIKON ACCESSORIES
COULD DAMAGE YOUR CAMERA AND MAY VOID YOUR NIKON WARRANTY.
A Before Taking Important Pictures
Before taking pictures on important occasions (such as at weddings
or before taking the camera on a trip), take a test shot to ensure that
the camera is functioning normally. Nikon will not be held liable for
damages or lost pro ts that may result from product malfunction.
A Life-Long Learning
As part of Nikon’s “Life-Long Learning” commitment to ongoing product
support and education, continually-updated information is available
on-line at the following sites:
• For users in the U.S.A.: http://www.nikonusa.com/
• For users in Europe and Africa: http://www.europe-nikon.com/support/
• For users in Asia, Oceania, and the Middle East: http://www.nikon-asia.com/
Visit these sites to keep up-to-date with the latest product information,
tips, answers to frequently-asked questions (FAQs), and general advice
on digital imaging and photography. Additional information may be
available from the Nikon representative in your area. See the following
URL for contact information: http://imaging.nikon.com/
Bluetooth and Wi-Fi (Wireless LAN)
This product is controlled by the United States Export Administration Regulations
(EAR). The permission of the United States government is not required for export to
countries other than the following, which as of this writing are subject to embargo or
special controls: Cuba, Iran, North Korea, Sudan, and Syria (list subject to change).
The use of wireless devices may be prohibited in some countries or regions. Contact
a Nikon-authorized service representative before using the wireless features of this
product outside the country of purchase.
Notice for Customers in the U.S.A. and Canada
This device complies with Part 15 of FCC Rules and Industry Canada licence-exempt
RSS standard(s). Operation is subject to the following two conditions: (1) this device
may not cause interference, and (2) this device must accept any interference,
including interference that may cause undesired operation of the device.
FCC WARNING
The FCC requires the user to be noti ed that any changes or modi cations made to
this device that are not expressly approved by Nikon Corporation may void the user’s
authority to operate the equipment.
FCC Radio Frequency Interference Statement
Note: This equipment has been tested and found to comply with the limits for a
Class B digital device, pursuant to part 15 of the FCC Rules. These limits are designed
to provide reasonable protection against harmful interference in a residential
installation. This equipment generates, uses and can radiate radio frequency
energy and, if not installed and used in accordance with the instructions, may cause
harmful interference to radio communications. However, there is no guarantee that
interference will not occur in a particular installation. If this equipment does cause
harmful interference to radio or television reception, which can be determined
by turning the equipment o and on, the user is encouraged to try to correct the
interference by one or more of the following measures:
• Reorient or relocate the receiving antenna.
• Increase the separation between the equipment and receiver.
• Connect the equipment into an outlet on a circuit di erent from that to which the
receiver is connected.
• Consult the dealer or an experienced radio/TV technician for help.
Co-location
This transmitter must not be co-located or operated in conjunction with any other
antenna or transmitter.
Nikon Inc., 1300 Walt Whitman Road, Melville, New York 11747-3064, U.S.A.
Tel.: 631-547-4200
FCC/IC RF Exposure Statement
The available scienti c evidence does not show that any health problems are
associated with using low power wireless devices. There is no proof, however, that
these low power wireless devices are absolutely safe. Low power wireless devices emit
low levels of radio frequency energy (RF) in the microwave range while being used.
Whereas high levels of RF can produce health e ects (by heating tissue), exposure
of low-level RF that does not produce heating e ects causes no known adverse
health e ects. Many studies of low-level RF exposures have not found any biological
e ects. Some studies have suggested that some biological e ects might occur, but
such ndings have not been con rmed by additional research. The D5600, which is
equipped with a LBEE5UW1FS (FCC ID:VPYLB1FS / IC ID:772C-LB1FS) Wireless LAN
Module, has been tested and found to comply with FCC/IC radiation exposure limits
set forth for an uncontrolled environment and meets the FCC radio frequency (RF)
Exposure Guidelines in Supplement C to OET65 and RSS-102 of the IC radio frequency
(RF) Exposure rules. Please refer to the SAR test report that was uploaded to FCC
website.
Notices for Customers in Europe
Hereby, Nikon Corporation, declares that the D5600 is in compliance with
the essential requirements and other relevant provisions of Directive
1999/5/EC. The declaration of conformity may be consulted at
http://imaging.nikon.com/support/pdf/DoC_D5600.pdf
Notice for Customers in Singapore
Trade Name:
Model: D5600
This device complies with radio-frequency regulations. The content of certi cation
labels not a xed to the device is given below.
Complies with
IDA Standards
DA103423
Notice for Customers in Jordan
Notice for Customers in the United Arab Emirates
Security
Although one of the bene ts of this product is that it allows others to freely connect
for the wireless exchange of data anywhere within its range, the following may occur
if security is not enabled:
• Data theft: Malicious third-parties may intercept wireless transmissions to steal user
IDs, passwords, and other personal information.
• Unauthorized access: Unauthorized users may gain access to the network and alter
data or perform other malicious actions. Note that due to the design of wireless
networks, specialized attacks may allow unauthorized access even when security is
enabled.
• Unsecured networks: Connecting to open networks may result in unauthorized
access. Use secure networks only.