Loading ...
Loading ...
Loading ...
17
Before cleaning
Remove accessories and cookware from the cooking
compartment.
Cleaning the cooking compartment floor, ceiling and side
walls
Use a dish cloth and hot soapy water or a vinegar solution.
If there are heavy deposits of dirt, use a stainless steel scouring
pad or oven cleaner. Only use when the cooking compartment
is cold. Never treat the self-cleaning surfaces with a scouring
pad or oven cleaner.
Cleaning the self-cleaning surfaces in the cooking
compartment
The back wall in the cooking compartment is coated with a
highly porous ceramic layer. This coating absorbs and
disintegrates splashes from baking and roasting while the oven
is in operation. The higher the temperature and the longer the
oven is in operation, the better the result will be.
If splashes are still visible even after repeated use, proceed as
follows:
1. Clean the floor, ceiling and side panels of the cooking
compartment thoroughly.
2. Set : 3D hot air.
3. With the door closed, heat up the empty oven for
approximately 2 hours at maximum temperature.
The ceramic coating is regenerated. When the cooking
compartment has cooled down, remove the brown or white
residue with water and a soft sponge.
Light discolouration of the coating does not affect automatic
self-cleaning.
Caution!
■ Never use abrasive cleaning agents. You will scratch or
destroy the highly porous coating.
■ Never treat the ceramic coating with oven cleaner. If oven
cleaner accidentally gets onto it, remove it immediately with a
sponge and plenty of water.
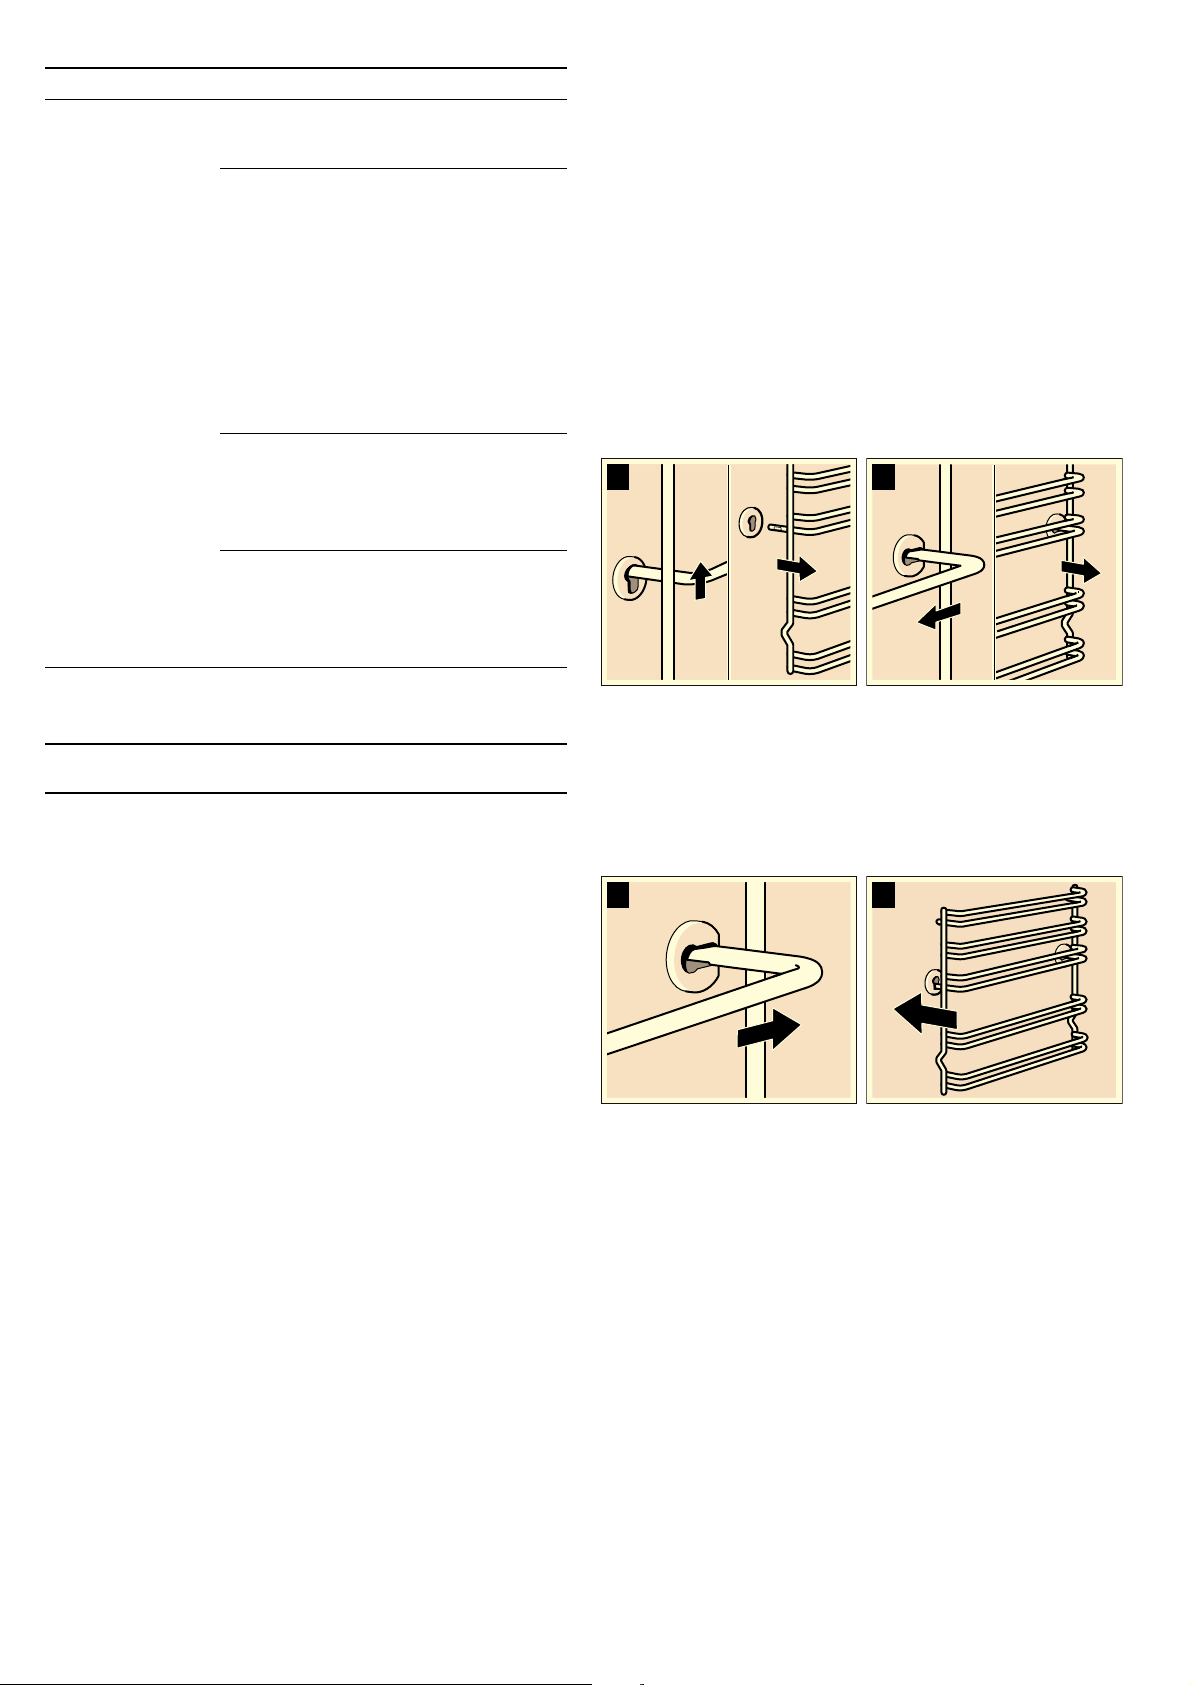
Detaching and refitting the rails
The rails can be removed for cleaning. The oven must have
cooled down.
Detaching the rails
1. Lift up the front of the rail
2. and unhook it (figure A).
3. Then pull the whole rail forward
4. and remove it (Fig. B).
Clean the rails with cleaning agent and a sponge. For stubborn
deposits of dirt, use a brush.
Refitting the rails
1. First insert the rail into the rear socket, press it to the back
slightly (figure A),
2. and then hook it into the front socket (figure B).
The rails fit both the left and right sides. Ensure that, as shown
in figure B, levels 1 and 2 are below and levels 3, 4 and 5 are
above.
Accessories Hot soapy water:
Soak and then clean with a dish cloth or
a brush.
Aluminium baking tray*:
(depending on appliance model)
Dry with a soft cloth.
Do not clean in the dishwasher.
Never use oven cleaner.
To prevent scratches, never touch the
metal surfaces with a knife or a similar
sharp object.
Harsh cleaning products, scratchy
sponges and rough cleaning cloths are
not suitable. Otherwise, you may scratch
the surface.
Rotary spit*
(depending on appliance model)
Hot soapy water:
Clean with a dish cloth or a brush. Do not
clean in the dishwasher.
Meat thermometer*
(depending on appliance model)
Hot soapy water:
Clean with a dish cloth or a brush. Do not
clean in the dishwasher.
Plinth drawer*
(depending on
appliance model)
Hot soapy water:
Clean with a dish cloth.
Zone Cleaning agent
* Optional (available for some appliances, depending on the
appliance model)
%
$
%
$
Loading ...
Loading ...
Loading ...