Loading ...
Loading ...
3
water for a minimum of 10 minutes. Seek
medical attention.
• Do not look into the air vents when the
unit is switched on, as sometimes
there is a possibility of small debris being
discharged from the air vents, especially
after cleaning / replacement of the filters
as debris inside the unit can be disturbed.
ADDITIONAL SAFETY
WARNINGS
a) Prevent unintentional starting. Ensure
the switch is in the off-position before
connecting to battery pack, picking up
or carrying the appliance. Carrying the
appliance with your finger on the switch
or energizing appliance that have the
switch on invites accidents.
b) Recharge only with the charger
specified by the manufacturer. A
charger that is suitable for one type of
battery pack may create a risk of fire
when used with another battery pack.
c) Do not use a battery pack or appliance
that is damaged or modified. Damaged
or modified batteries may exhibit
unpredictable behavior resulting in fire,
explosion or risk of injury.
d) Do not expose a battery pack or
appliance to fire or excessive
temperature. Exposure to fire or
temperature above 266°F (130°C) may
cause explosion.
e) Have servicing performed by a qualified
repair person using only identical
replacement parts. This will ensure that
the safety of the product is maintained.
WARNING: Do not attempt to
modify or repair the appliance
SAVE THESE INSTRUCTIONS
Symbols
• The label on your tool may include the
following symbols. The symbols and their
definitions are as follows:
V ..................volts
A ..................amperes
Hz ................hertz
W .................watts
min ..............minutes
or AC ...... alternating current
or DC ..direct current
n
o ................no load speed
................Class I Construction
(grounded)
................earthing terminal
...............safety alert symbol
................Class II Construction
(double insulated)
.../min or rpm...revolutions or reciprocation
per minute
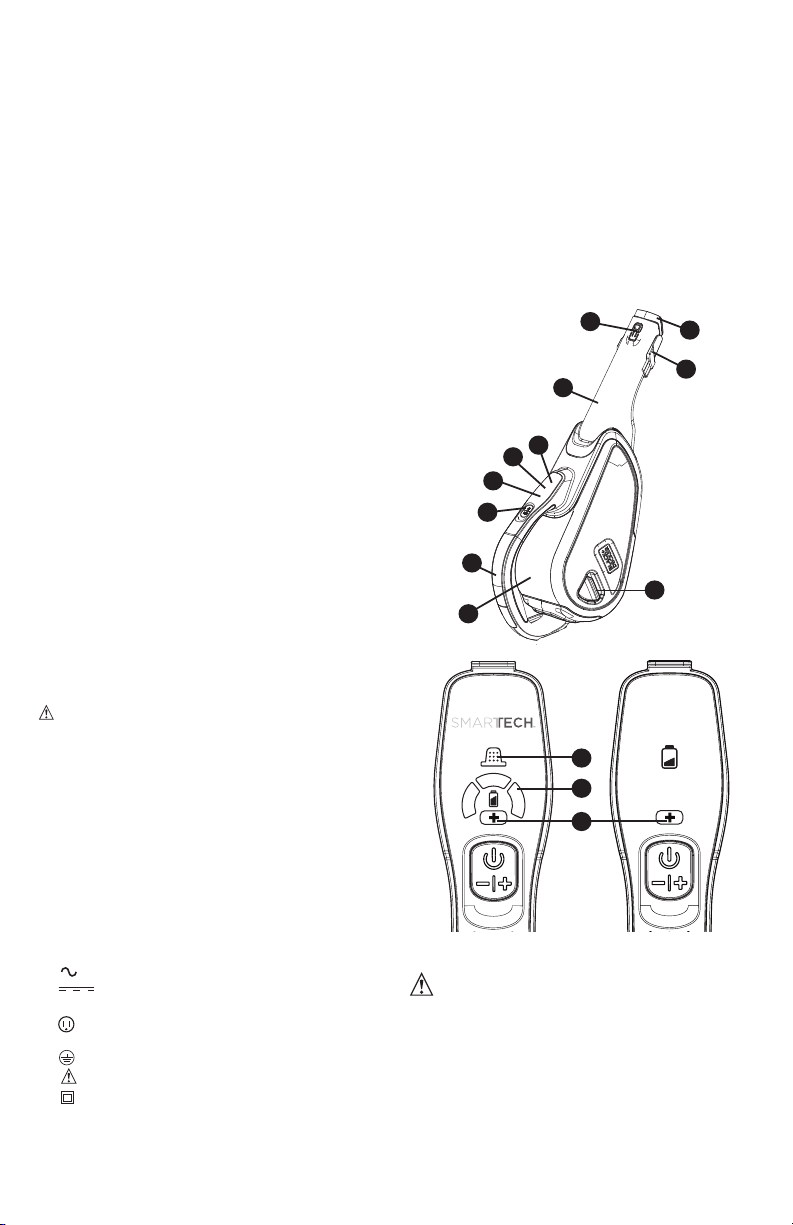
FUCTIONAL DESCRIPTION
1. On/off power button
2. Handle
3. Nozzle
4. Extendable crevice tool
5. Crevice tool release button
6. LED BATTERYSENSE
(SMARTECH vacuums only)
7. LED POWERBOOST indicator
8. Dust bowl
9. Dust bowl release button
10. Flip-up brush
11. FILTERSENSE LED
(SMARTECH vacuums only)
1
2
3
4
5
6
11
7
8
9
10
11
7
6
Charging the battery
WARNING: For use
only with the supplied charger.
From new, the rechargeable cells of the
product need a minimum charge time of 5
hours to ensure full power.
• Plug the jack plug of the charger into
the charging socket of the tool as shown
in Figure A. Plug the charger into any
standard 120 Volt 60 Hz electrical outlet.
The charging indicator will be lit.
Loading ...
Loading ...
Loading ...