Loading ...
Loading ...
Loading ...
4
ASSEMBLY INSTRUCTIONS
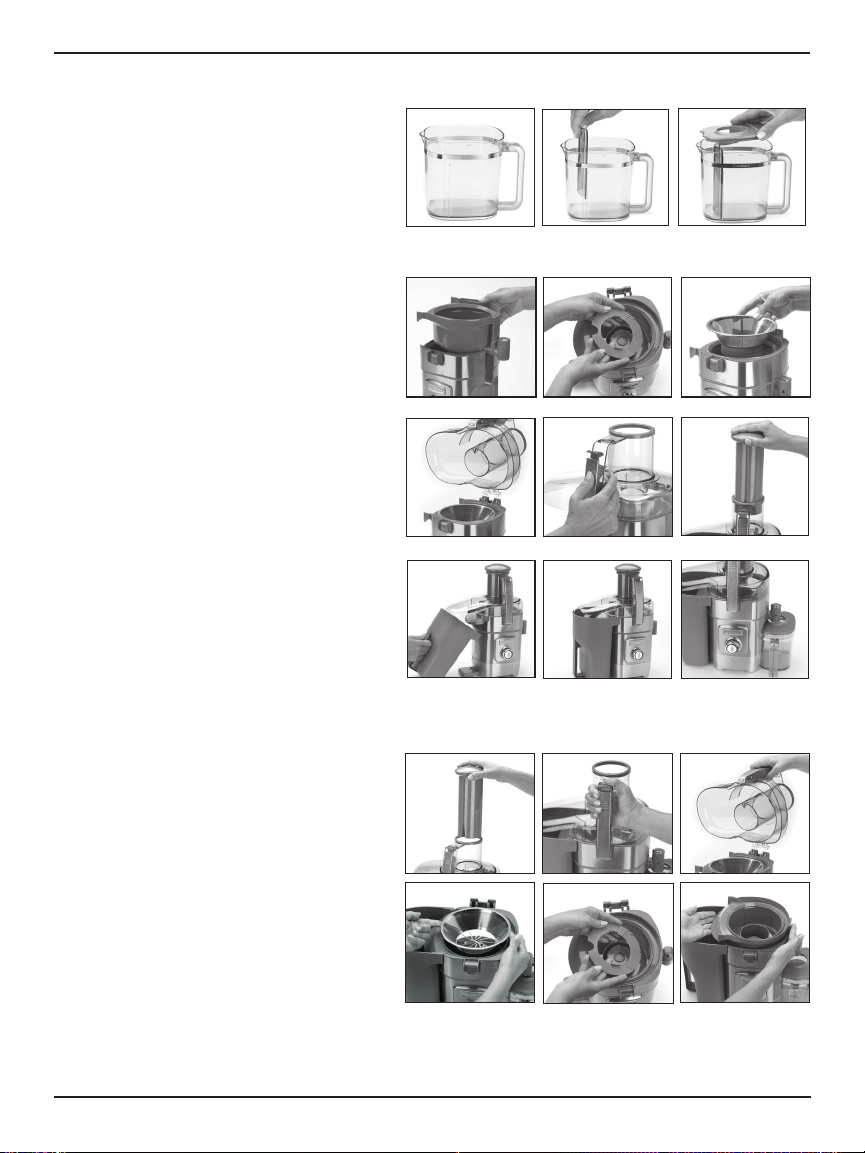
Assembling the Juice Pitcher
1. Place the juice pitcher on a flat surface.
2. Insert the foam separator.
3. Put cover in place. Set pitcher aside.
Assembling the Juice Extractor
1. Place base on a clean, flat surface.
2. Insert filter bowl, positioning spout on right side,
on top of motor housing.
3. Place foam management filter disk in filter
bowl.
4. Place mesh filter basket firmly in place in
the filter bowl.
5. Hold the juice extractor cover by the handle
with the feed tube facing back and the hinge
straight down over the hinge slot on the
motor housing. Insert the hinge into the slot
and lower into position.
6. Make sure the handle lock is in the "open"
position. Press handle in with an upward
motion to close.
7. Slide the food pusher down the feed tube by
aligning the groove in the food pusher with
the small indent on the inside of the top of
the feed tube.
8. Place the pulp container in position by tilting
opening slightly under the cover.
9. Place the assembled juice pitcher under the
spout, with the handle facing forward.
10. Make sure the spout is in the open position. Never juice with the spout in the closed position.
Disassembling the Juice Extractor
1. Unplug the juice extractor.
2. Remove the food pusher.
3. Press the handle tab release to unlock
the cover.
4. Lift and remove cover.
5. Carefully remove the filter basket by pulling
up on either side of the rim. Be careful not
to touch the blades in the bottom of the
basket.
6. Remove foam management filter disk.
7. Remove the filter bowl by pulling up on
either side.
Foam Management System
If you prefer less foam in your juice, use the foam management filter disk and adjust the spout to a smaller
opening. If you prefer more foam, do not use the disk and adjust the spout to a larger opening.
2.
3.
4.
5.
6.
7.
1.
2.
3.
2.
3.
4.
5.
6.
7.
8.
8.
9.
Loading ...
Loading ...
Loading ...