Loading ...
Loading ...
Loading ...

9
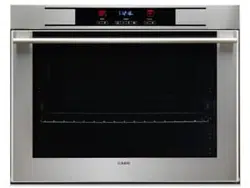
1 - DISPLAY
Clock display
With 4 digits, generally represents duration, hours, and info messages. It comprise 3
symbols representing operative conditions of times.
Pot symbol
If switched on, indicates a working cooking function, even if in manual mode. If flashing, it
indicates the end of a temporized cooking. During delayed start period, it stays switched
off, and then it switches on during effective cooking.
Auto symbol
Normally it is switched off. If on, it indicates a temporized option cooking is selected (the
oven is not in manual mode), and the pot symbol is on. If flashing together with the pot
symbol, it indicates the end of a temporized cooking. During the duration setting step, it
flashes to distinguish from minute minder.
Bell symbol
Normally switched off. If on, it indicates the minute minder is active. If flashing, it indicates
that the cooking operation is completed.
Cooking program display
It visually shows the selected heating elements in the cooking program.
The oven light is always on during cooking operations. During delayed cooking, it stays
switched off to indicate that visually represented cooking is not working.
With the “fan symbol”, when the cooking program selected uses the fan, an animation is
shown, composed of fan blades rotating in quick succession.
During delayed cooking, the animation is suspended and 4 fan blades switched on are
shown (fan not operating at this time).
Temperature display
It shows the selected temperature and is equipped with both a graphic symbol and
progress bar to display a visual thermometer.
2.1 The clock
The clock will require setting when you first turn on the power (or following a power failure).
The time on the clock will advance when the power comes back on, but the oven will not work
until the clock has been set.
2.2 Setting the time (Please set the clock before using the oven functions)
The clock setting is only allowed with the oven on stand-by.
Touch and hold button 6 (programmer function selection) for at least 4 seconds to set the
correct time.
The display shows “bell”, hold until the display shows “hour”. Using buttons 4 and 5 (+ and -)
you can set the hours and minutes. You can press button 6 to alternate between the settings
for hours and minutes, however it will switch automatically between these after 4 sec.
Loading ...
Loading ...
Loading ...