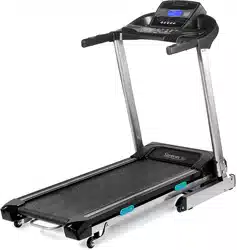
Owner Guide Home Gym Foldable Treadmill
Assembly Instructions
We recommend 2 people assist in assembling this unit. Place all parts of the Treadmill in a cleared area and remove the packing materials. Do not dispose of the packing materials until assembly is completed. Before you start installation inspect and prepare all parts and screws featured in this manual. When you open the carton, you will find the following parts.


Step 1

Step 2
Moving & Storage Instructions
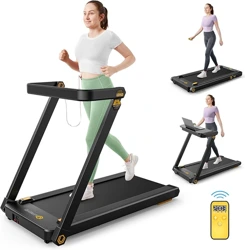
Folding away your Treadmill

A. Turn OFF the treadmill, switch off at the main power switch and pull out the plug.
B. Lift the treadmill deck up towards the main console. You should feel the treadmill gas spring system engage.
C. To lower the treadmill deck, press the gas spring system in with your foot to disengage the lock. The treadmill deck can now be lowered to the ground.
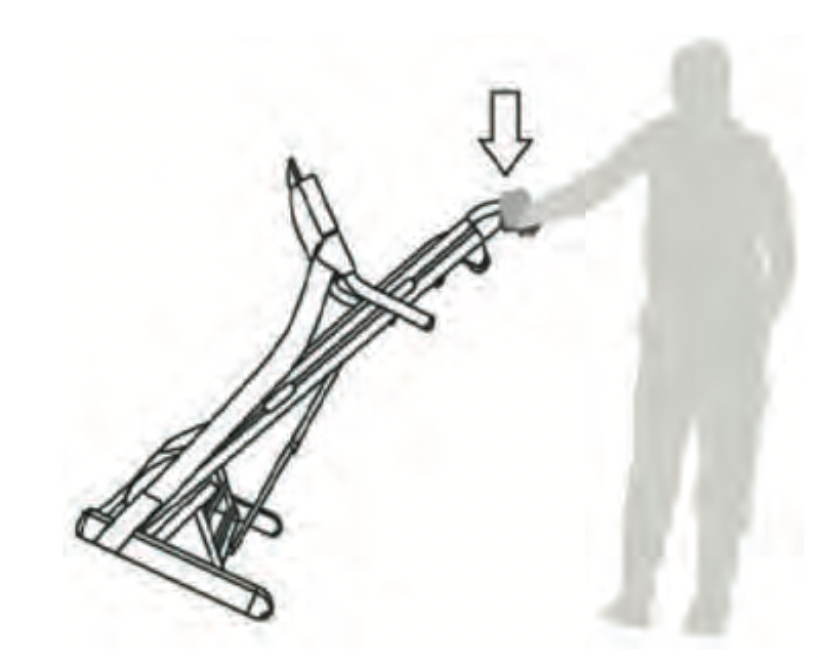
Moving your Treadmill
The treadmill can then be moved by tilting the treadmill deck towards you onto it’s transportation wheels. (Please ensure the power cord cable hasbeen disconnected from the treadmill before attempting to move it).
Operation Instructions
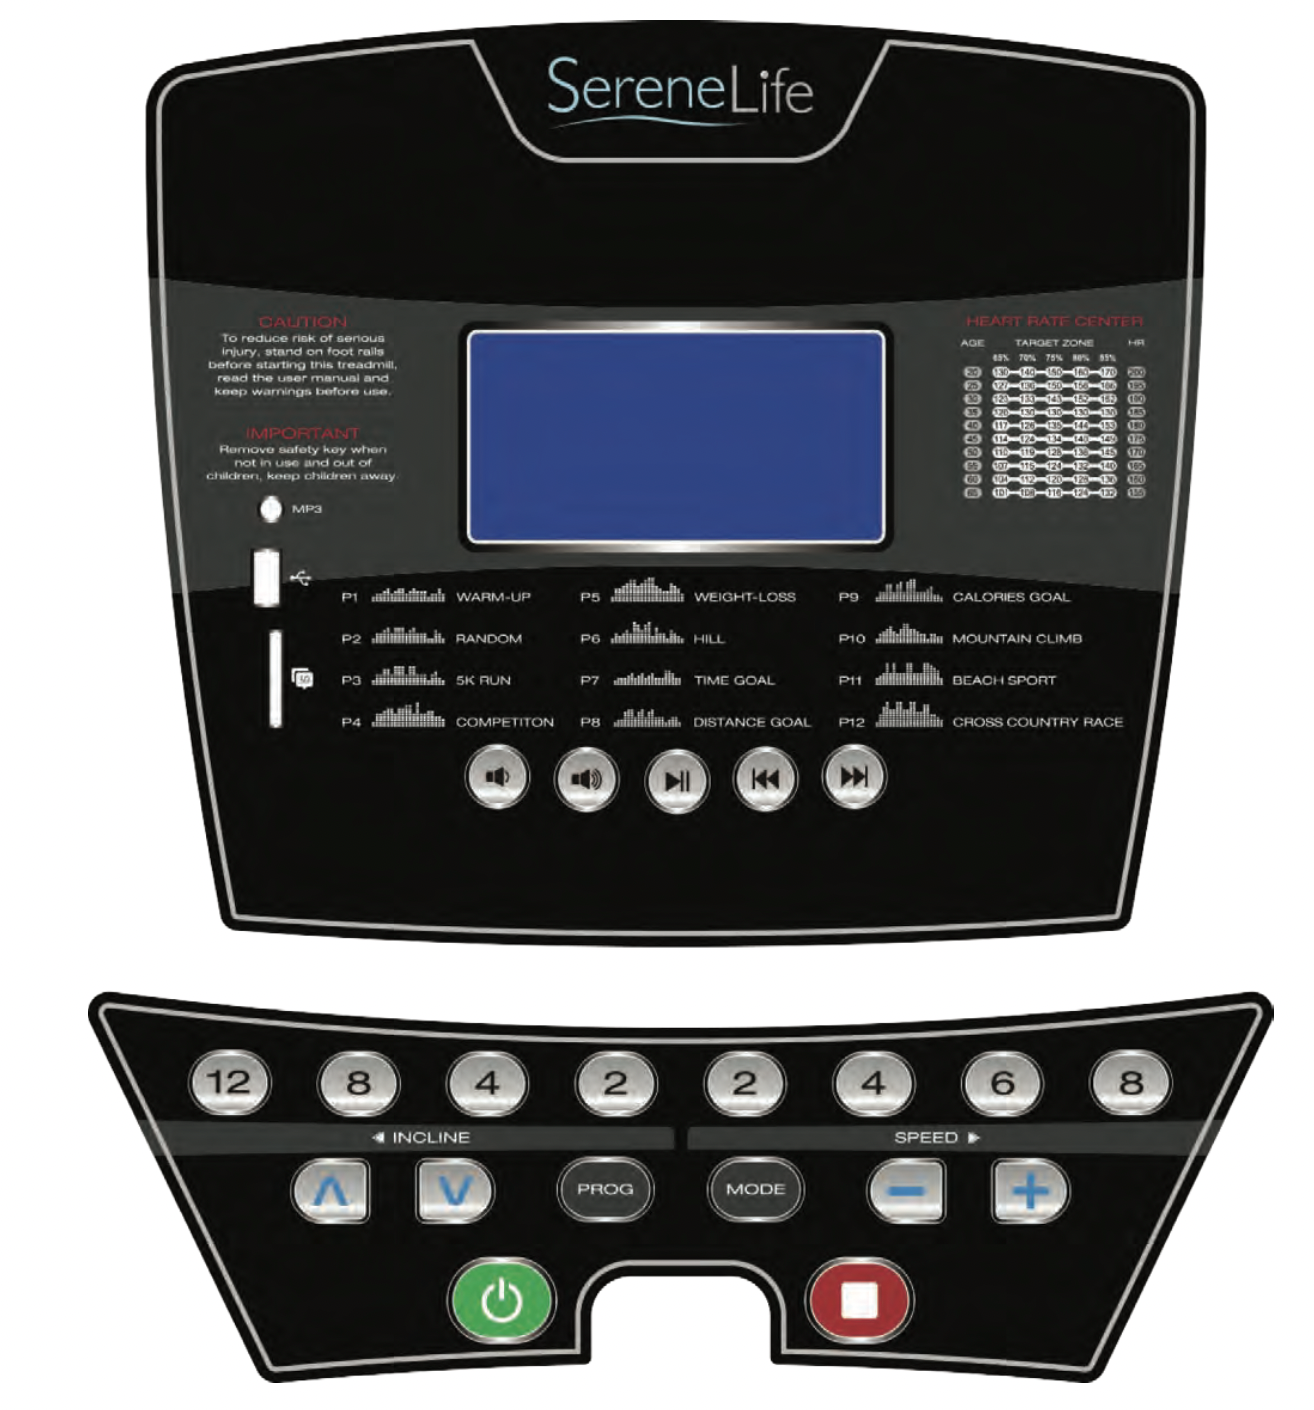
Display Functions

Function Buttons
- MODE: To confirm all settings and to enter exercise modes.
- Speed + : To select training mode and adjust the function value up.
- Speed - : To select training mode and adjust the function value down.
- START/STOP: To start or stop your workout.
POWER ON:
Plug the main power cord in a grounded wall outlet, please make sure the power matched. Ensure the ‘Safety Key’ is in the correct position and inserted properly in the console.
QUICK WORKOUT:
User can start a workout by pressing the ‘Quick Select’ button for either Speed or incline.
There are 4 ‘Quick Select’ buttons for both Speed and Incline 2 MPH to 8 MPH for speed options and 2% to 12% for Incline options.
You can use Quick Workout (the speed and incline) during your workout,press ‘START’ to begin your workout.
If you need to stop the treadmill during your workout, press ‘STOP’ or pull out the Safety Key.
PROGRAM MODE
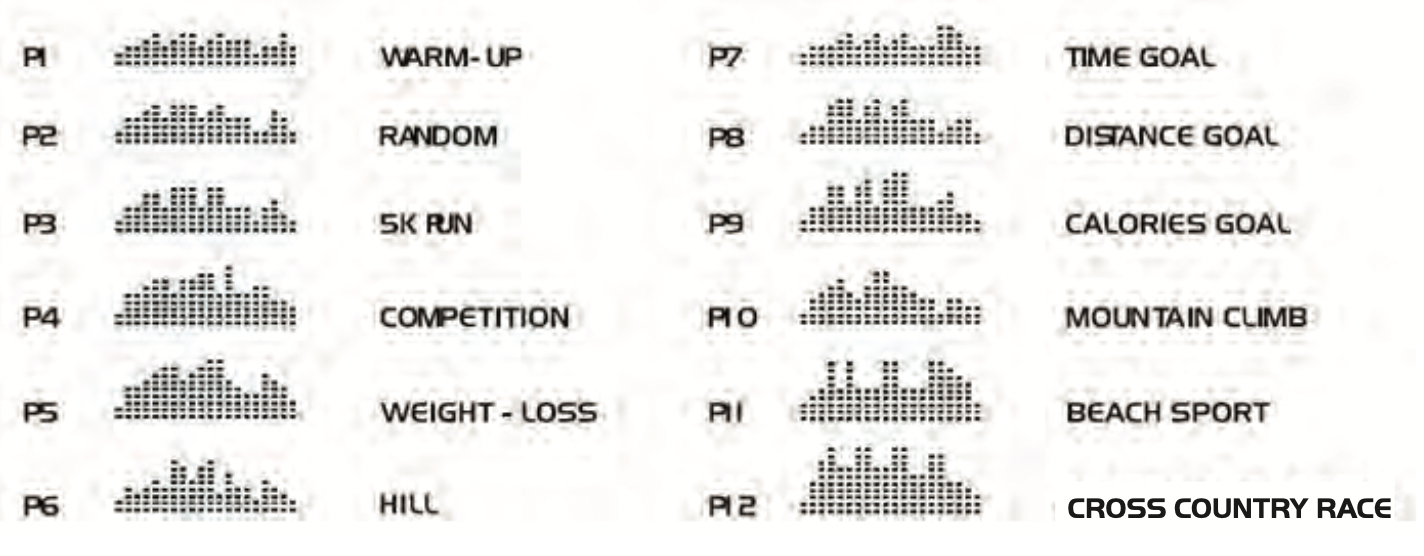
This treadmill console has 12 Preset Workout Programs to choose from (see below for breakdown of each Program). When in PROGRAM mode, use PROGRAM button to select your chosen workout – P1 TO P12. Press START button to confirm and start your workout.
Getting Started
PREPARE: If you are over 45 years old, have health or medical problems, or this is your first time exercising, please consult your local Doctor or Medical Professional before use.
Before using your treadmill, become familiar with the console operation buttons by reading the operation manual carefully. To start, place both feet either side of the running belt surface on the plastic side rails and press the ‘Start’ button, making sure you have attached the treadmill safety key to your clothing. Never attempt to start the treadmill whilst standing stationery on the running belt surface. Once the running belt is in motion, use the +/- speed adjustment buttons to increase the speed before stepping onto the running belt. After adapting to the walking speed, you can now adjust the speed to the desired pace you wish to exercise it.
EXERCISE FREQUENCY: Depending on your fitness level, start your workout programme with a gradual warm- up for at least 5-10 minutes before increasing the speed or elevation on your treadmill. Maintaining frequency and durations of your workouts each week is an important first step in your workout program. Aim to complete 3 x 20-30 minute workouts per week, increasing the intensity of the workouts as your fitness level allows.
As your fitness level improves, you can either: increase the frequency and/or duration of your workouts, or adjust the speed levels to increase your workout intensity each session. Consult a professional trainer for further information on training programs and/or goal specific workouts on your treadmill. Should you feel any discomfort, dizziness, nausea, tightening of the chest stop your workout immediately and seek medical attention.
AMOUNT OF EXERCISE: SHORTCUT----The best way to save time is to exercise for 15-20 minutes. Warm up for 2 minutes at 4.8 km/h, gradually add 0.3 km/h to your speed per 2mins, until you feel your breath quickening but without having difficulty breathing. Keep this speed, if it feels uncomfortable, please reduce by 0.3 km/h. Use the last 4 minutes to reduce speed as a warm down. If you feel it is hard to increase speed, then you can add more intensity to your workout.
CLOTHING: Please wear comfortable clothing and footwear suitable for exercise.
Warm-Up Exercise
Warm up exercise is important in preparing the muscles for activity whilst minimising the risk of injury. You may choose to warm up with a light/brisk walking pace for 5-10 minutes before stopping and performing some simple stretches. (As shown in the pictures below)
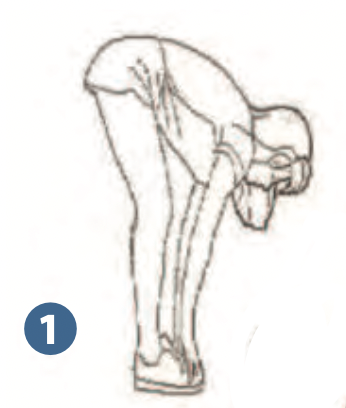
- Hamstring Stretch (Standing): Keep your knees slightly bent and slowly lean forward, back and shoulders relaxed, reaching towards your toes. You should feel the tension and slight discomfort in your hamstring muscles. Hold for15 - 20 seconds. Repeat 2-3 times.
- Hamstrings Stretches (Seated): Sitting on the floor preferably on a mat, put one leg straight, the other inward and close to the inside of the straight leg. Lean forward from the hips, reaching towards your toes. Hold for 10-15 seconds, and relax. Repeat 3 times for each leg (See picture 2).

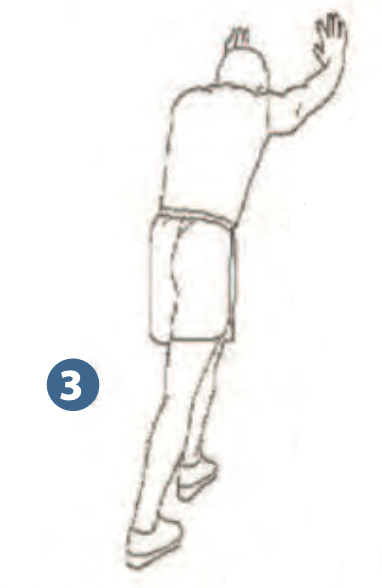
- Calf Stretches: Standing with two hands on the wall or tree, one leg behind. Keeping your legs straight and the heel on the ground, lean forward towards the wall or tree. Hold for 10 -15 seconds, and relax. Repeat 3 times for each leg (See picture 3).
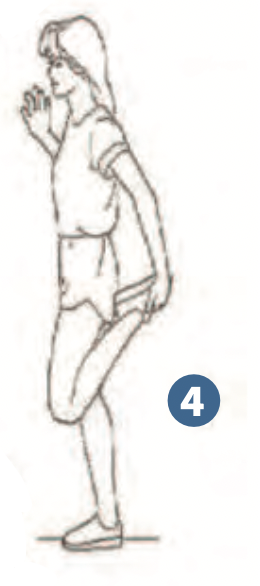
- Quadriceps Stretches: Keeping your balance with your left hand holding onto a wall or stationery fixture, grasp your right foot with your right hand and stretch your right heel toward your buttocks slowly, untilyou feel the stretch in the front of your thigh. Hold for 10 - 15 seconds, and relax. Repeat 3 times for each leg (See picture 4).
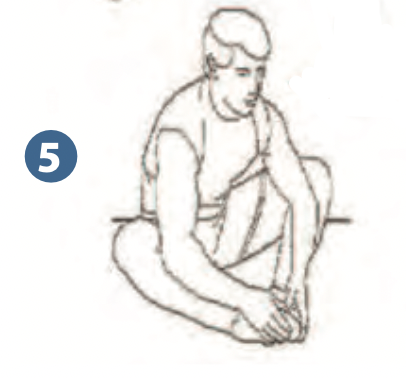
- Sartorius (Inner Muscles of the Thigh) Muscle Stretches: Sitting down with the soles of your feet or shoes together and your knees positioned outward. Pull your feet towards your groin until you can feel the stretch. Hold for 10 -15 seconds, and relax. Repeat 3 times (See picture 5).
Maintenance Instructions
WARNING:
Before cleaning or carrying out any maintenance on your treadmill, ensure the power is turned off and the power cord removed from the plug socket.
At least once a year, the motor cover on your treadmill should be removed and any dust or debris vacuumed up to maintain the smooth operation of the motor anddrive system.
CLEANING
General cleaning the unit will greatly prolong the treadmills working life. Keep the treadmill clean by dusting regularly. Be sure to clean the exposed parts of the deck surface on both side of the walking belt and also the side rails. Make sure the soles of your shoes are clean, this reduces the build up of foreign material underneath the running belt. The top of the belt can be cleaned with a slightly damp cloth. Be careful to keep liquid away from the electrical components and underneath the running belt.
The belt/ deck friction may play a major role in the function and life of your treadmill, thus requiring periodic lubrication. We recommend a periodic inspection of the deck.
We recommend lubrication of the deck according to the following timetable
- Light user (less than 3 hours/ week) annually
- Medium user (3-5 hours/ week) every six months
- Heavy user (more than 5 hours/ week) every three months
Treadmill lubricating oil can be purchased from your nearest Fitness store or ourService Department.
- In order to maintain and prolong the working life of your treadmill, we suggest you power off the treadmill for 10 minutes after every 2 hours of running use.
- A loose running belt may slip when you are running and may require a small adjustment; if the running belt is over tightened it can affect the performance of the motor and add extra wear to the rollers. For ideal tension, the running belt can be lifted 50-75mm from the central part of the running deck.
BELT ADJUSTMENT
- Place treadmill on a level surface.
- Run the treadmill at 6-8km/h.
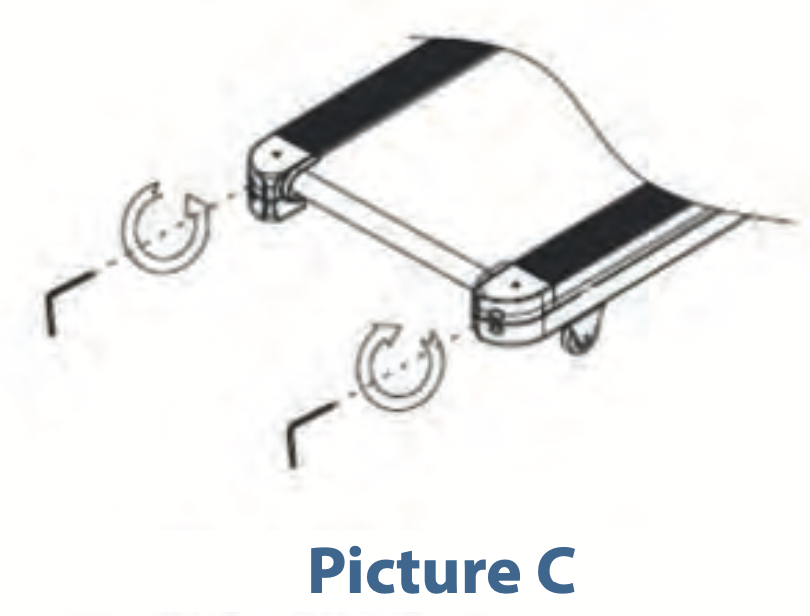
- If the belt has drifted to the right, turn the right bolt clockwise a 1/2 turn and turn the left bolt anticlockwise a 1/2 turn (Picture C).
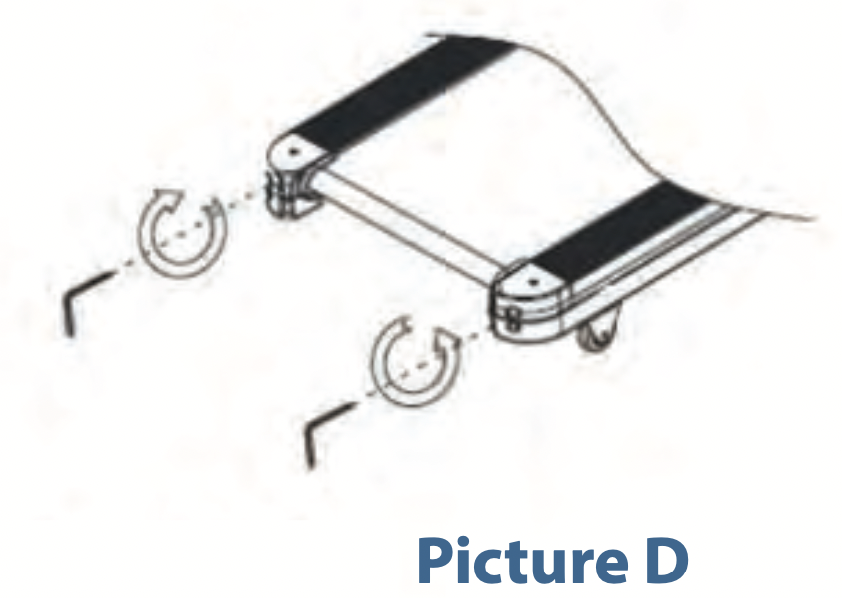
- If the belt has drifted to the left, turn the right bolt anticlockwise a 1/2 turn and turn the left bolt clockwise a 1/2 turn (Picture D).
- Test for at least 15 seconds at 4km/h (check and adjust a further quarter or half turn until the belt is centred).
NOTE: The running belt should not be tightened too hard as this can cause noise and damage the machine.
STORAGE: Remember to store the treadmill in a dry place and not to pile things on top of it.