NOTE: This manual may be subject to updates or changes. Up to date manuals are available through our website at www.lifespanfitness.com.au
Product may vary slightly from the item pictured due to model upgrades
Read all instructions carefully before using this product. Retain this owner’s manual for future
reference.
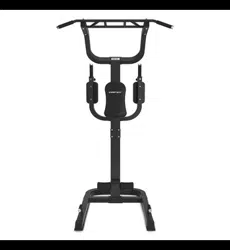
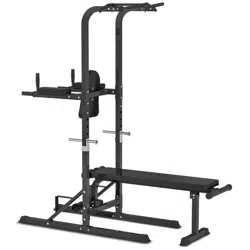
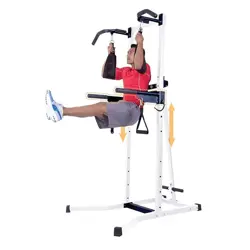
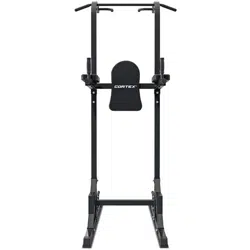
PT-1 POWER TOWER

2
PT-1
TABLE OF CONTENTS
1. IMPORTANT SAFETY INSTRUCTIONS 3
2. PARTS LIST 5
3. ASSEMBLY INSTRUCTIONS 7
4. WARRANTY 11

3
PT-1
1. IMPORTANT SAFETY INSTRUCTIONS
WARNING - Read all instructions before using this machine.
Please keep this manual with you at all times
a. It is important to read this entire manual before assembling and using the equipment. Safe and
effective use can only be achieved if the equipment is assembled, maintained and used properly.
Please note: It is your responsibility to ensure that all users of the equipment are informed of all
warnings and precautions.
b. Before starting any exercise program you should consult your doctor to determine if you have any
medical or physical conditions that could put your health and safety at risk, or prevent you from using
the equipment properly. Your doctor’s advice is essential if you are taking medication that affects your
heart rate, blood pressure or cholesterol level.
c. Be aware of your body’s signals. Incorrect or excessive exercise can damage your health. Stop
exercising if you experience any of the following symptoms: pain, tightness in your chest, irregular
heartbeat, and extreme shortness of breath, lightheadedness, dizziness or feelings of nausea. If you do
experience any of these symptoms, you should consult your doctor before continuing with your
exercise program.
d. Keep children and pets away from the equipment. This equipment is designed for adult use only.
e. Use the equipment on a solid, flat level surface with a protective cover for your floor or carpet. To
ensure safety, the equipment should have at least 2 meters of free space around it.
f. Before using the equipment, check that the nuts and bolts are securely tightened. If you hear any
unusual noises coming from the equipment during use and assembly, stop immediately. Do not use the
equipment until the problem has been rectified.
g. Wear suitable clothing while using the equipment. Avoid wearing loose clothing that may get caught in
the equipment or that may restrict or prevent movement.
h. This equipment is designed for indoor and family use only

4
PT-1
i. Care must be taken when lifting or moving the equipment so as not to injure your back.
j. Always keep this instruction manual and assembly tools at hand for reference.
k. The equipment is not suitable for therapeutic use.
5
PT-1
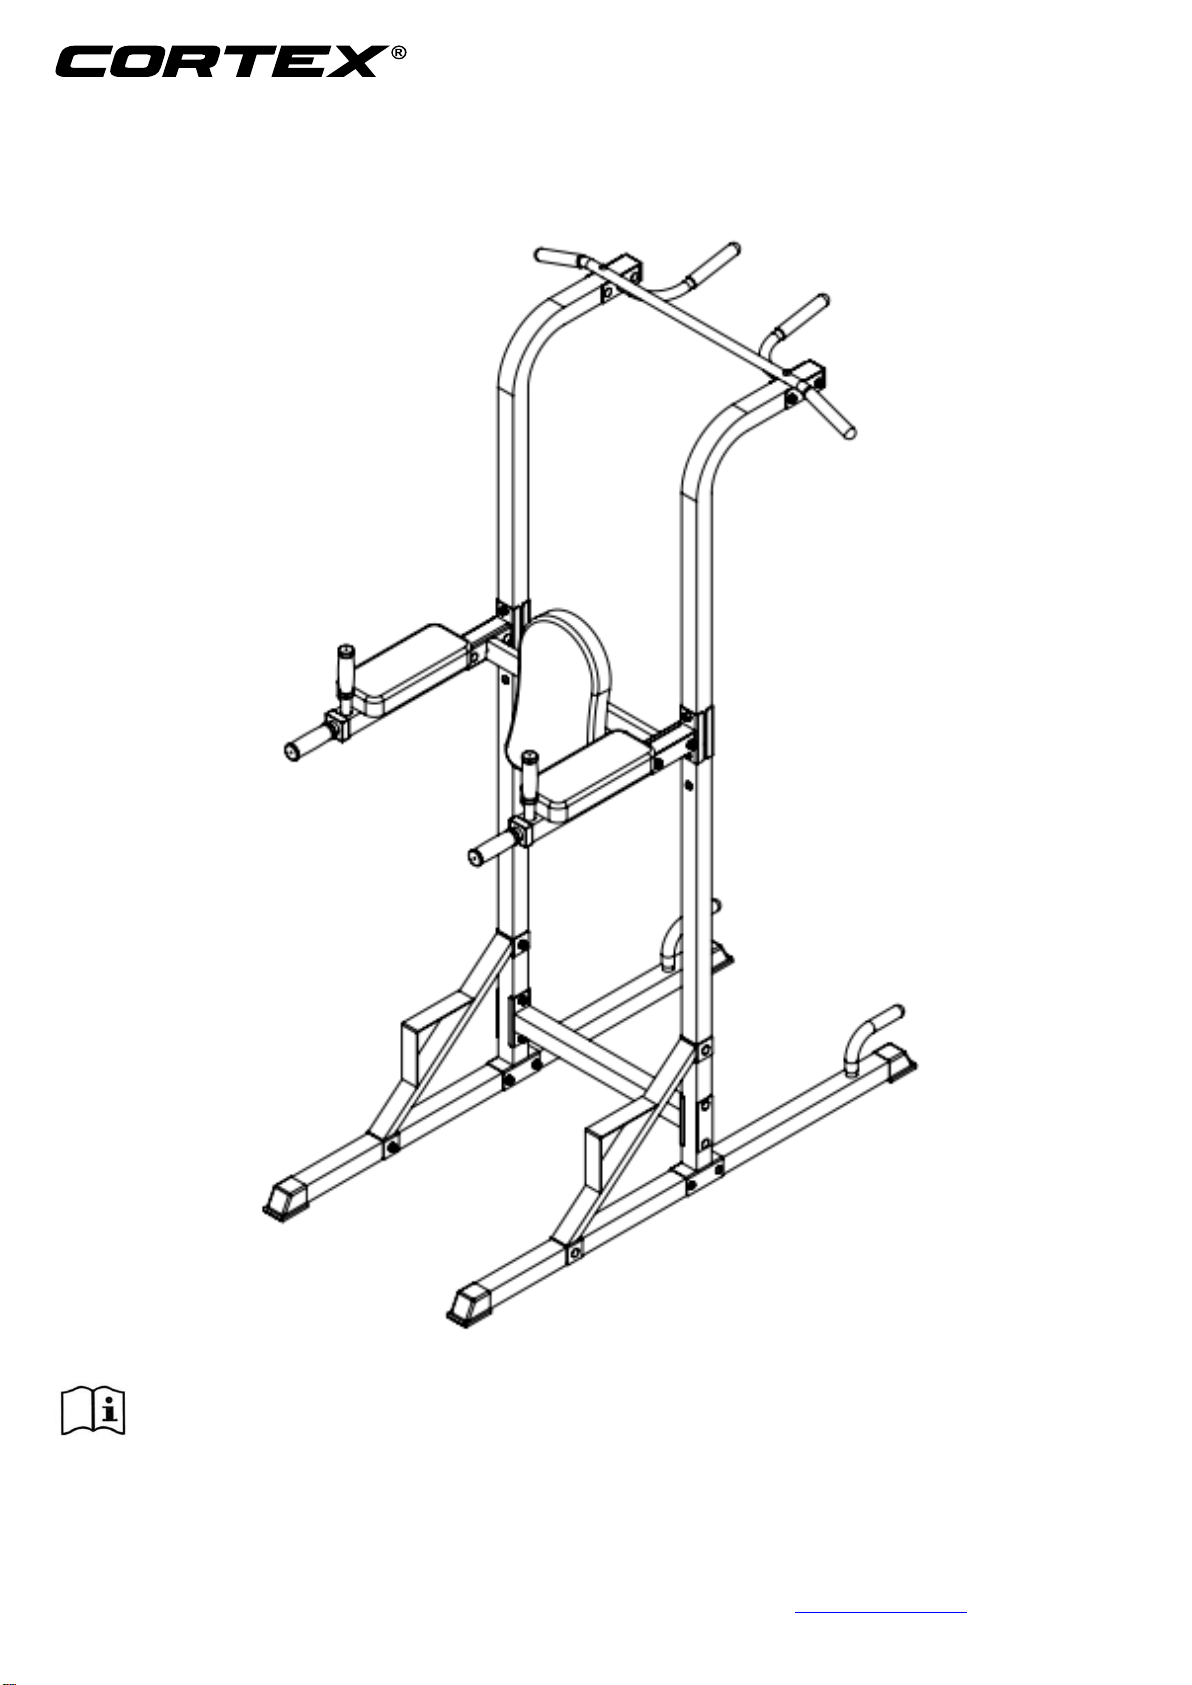
2. PARTS LIST

6
PT-1
NO.
Name
Model
Quantity
1
High pulling bar
1
2
Upright tube A
1
3
Upright tube B
1
4
Tube
2
5
Tube
2
6
Connection tube
1
7
Handles
2
8
Pad
2
9
Upright welding tube
2
10
Plugs
2
11
Welding tube
1
12
Back pad
1
13
Welding tube
2
14
Connection sheet
110mm
4
15
U parts
2
16
Small bar A
1
17
Small bar B
1
18
Connection sheet
90mm
2
19
Foot plates
2
20
Grip A
2
21
Grip
Φ25
2
22
Grip B
4
23
Grip C
2
24
Pipe plug
Φ50
4
25
Carriage bolt
M10x70
18
26
Washers
Φ10
40
27
Nuts
M10
24
28
Washers
Φ8
6
29
Hex bolt
M10x90
2
30
Hex bolt
M10x20
12
31
Hex bolt
M8x15
2
32
Hex bolt
M8x65
4
33
Hex bolt
M10x70
4
7
PT-1
3. ASSEMBLY INSTRUCTIONS
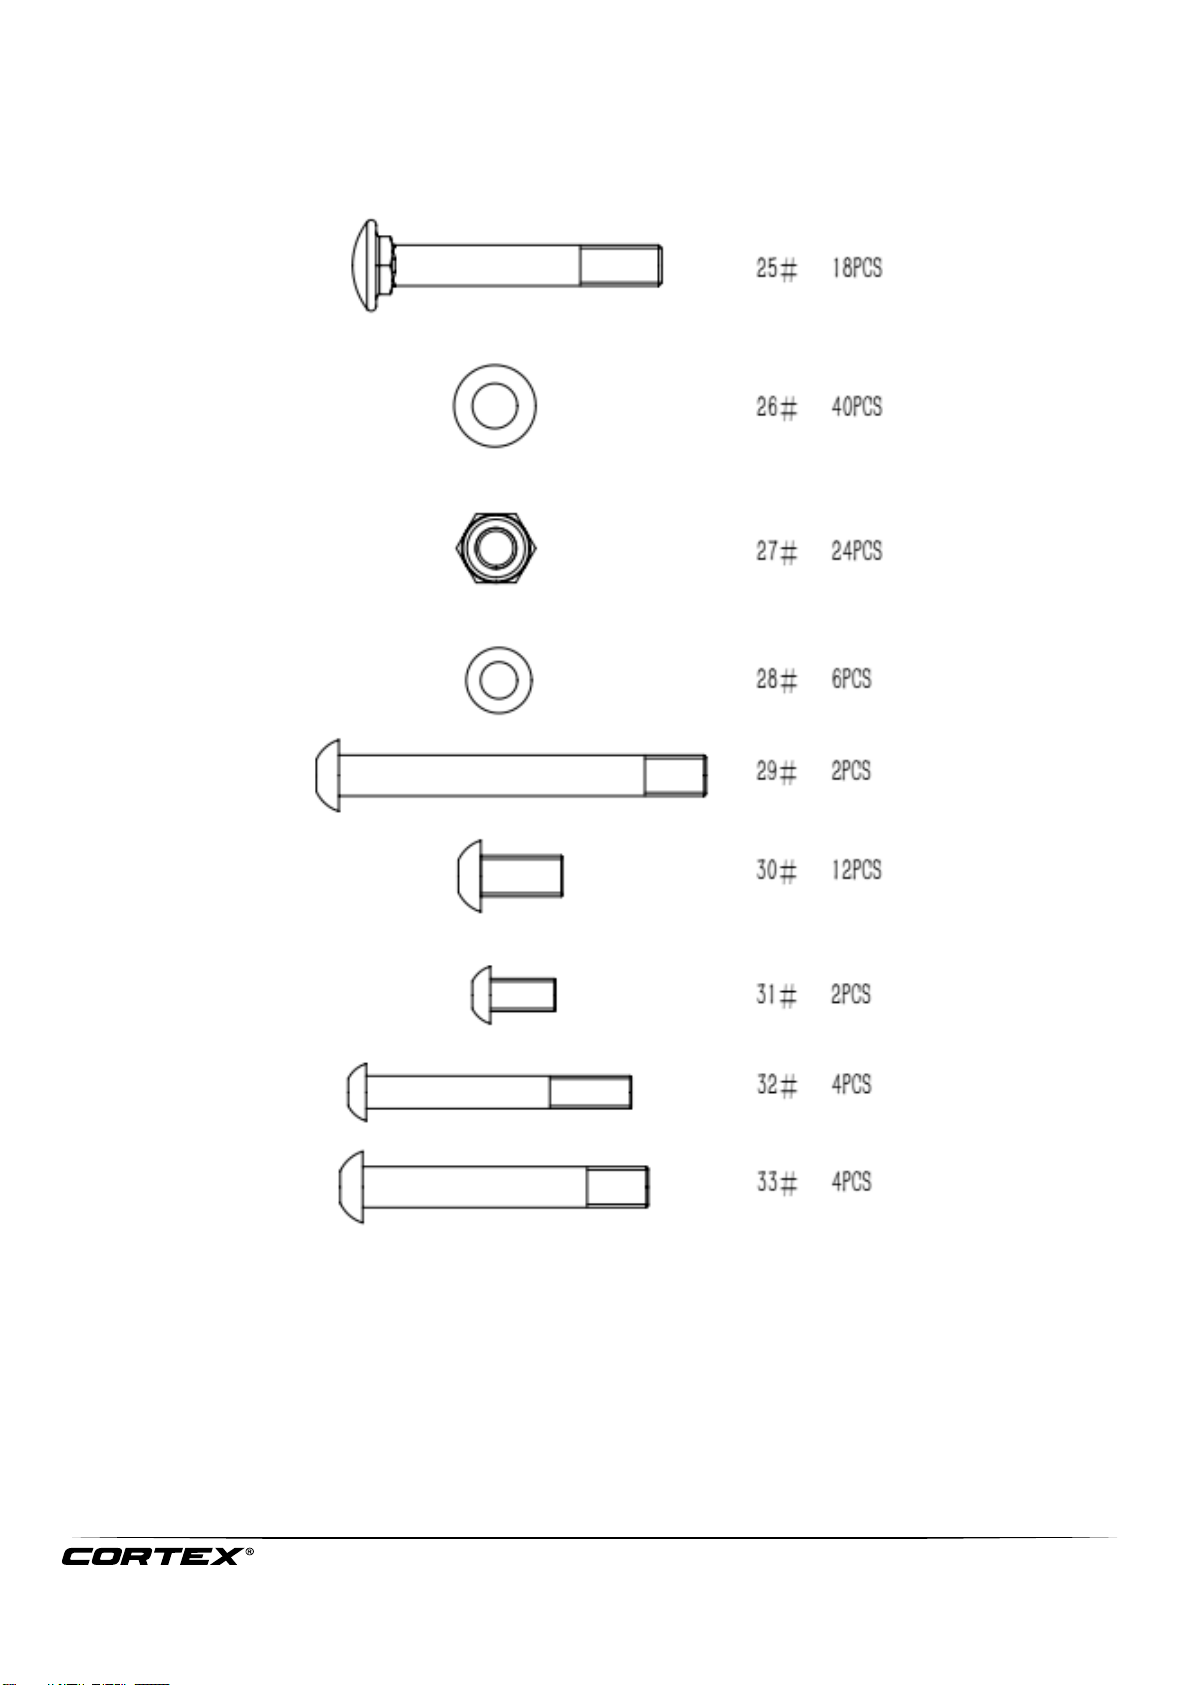
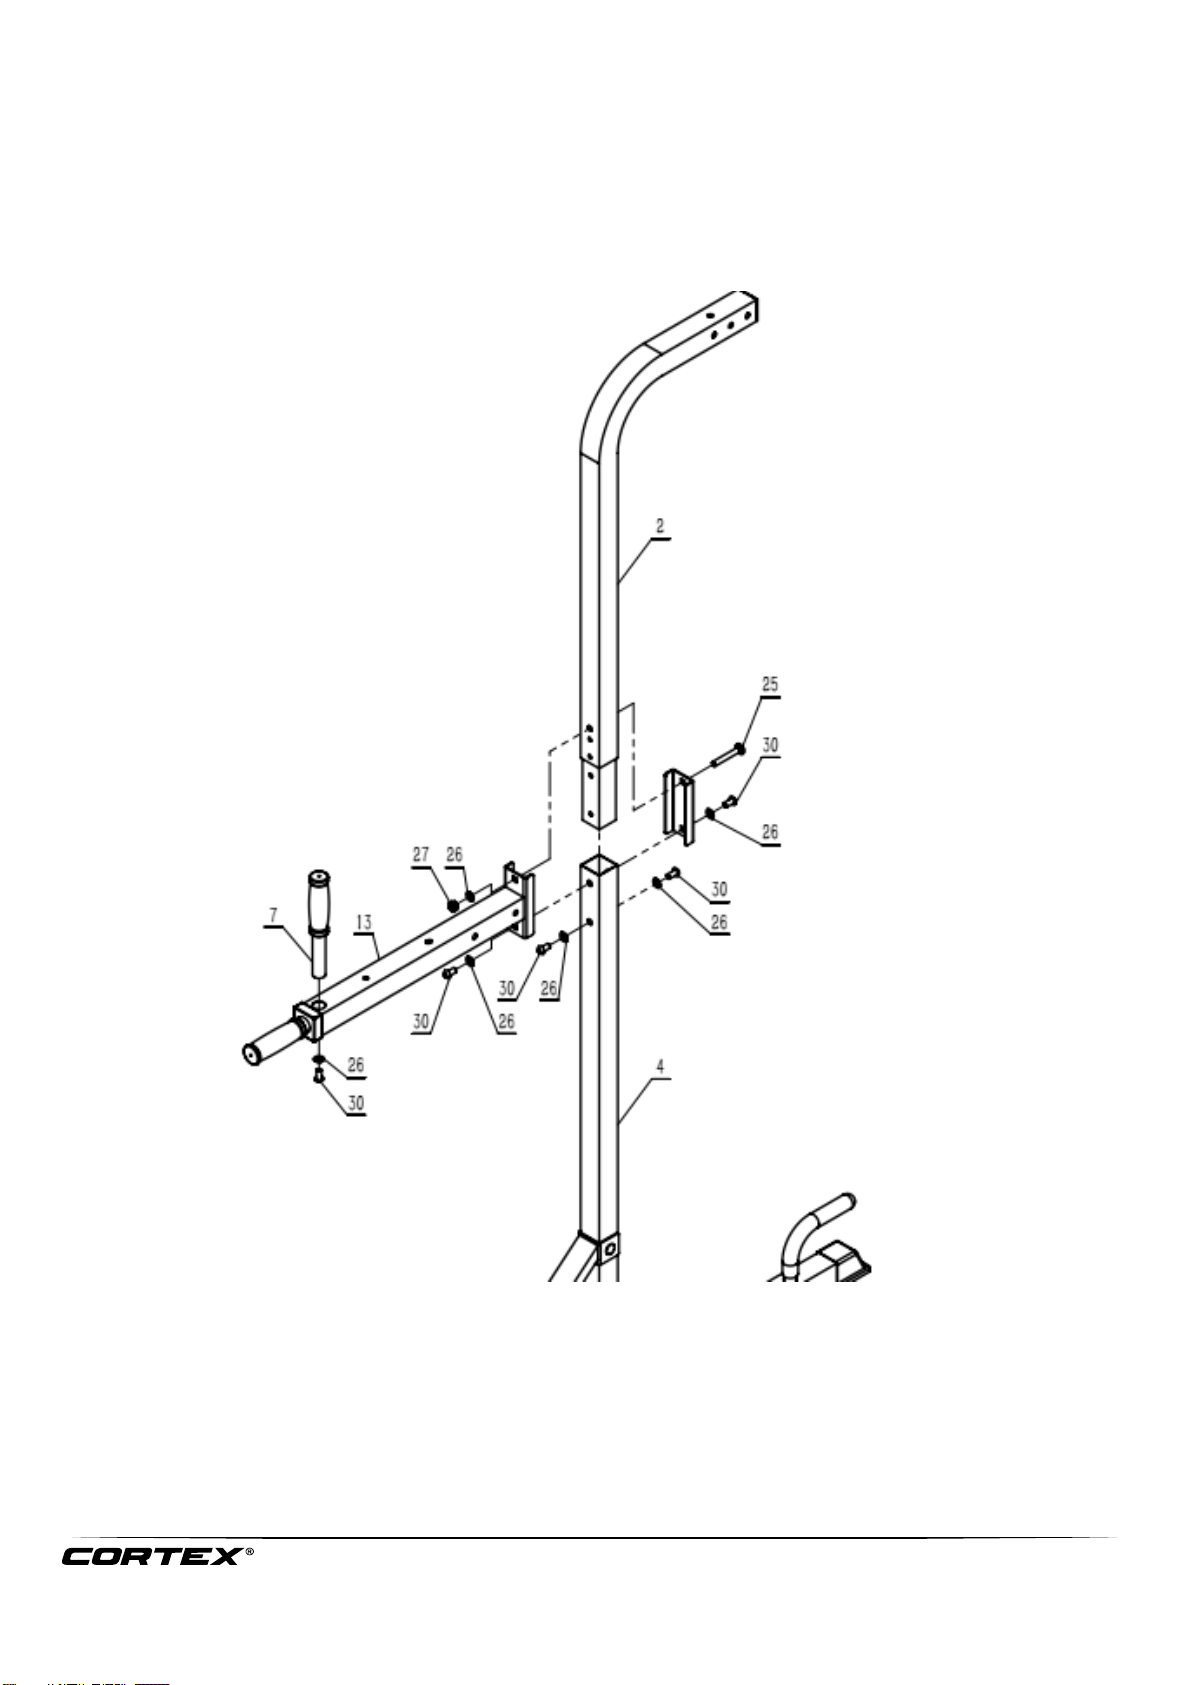
STEP 1
1. Secure the tube (#4) to the tube (#5) with hex bolt M10x70 (#33), washer Φ10 (#26) and nut M10 (#27).
2. Attach the tube (#19) to the upright tube (#4) and tube (#5), use carriage bolt M10x70 (#25), washer
Φ10 (#26) and nut M10 (#27).
8
PT-1
STEP 2
1. Insert the tube (#2) to the tube (#4), attach the tube (#13) to the both tubes. Secure with carriage bolt
M10x70 (#25), hex bolt M10x20 (#30), Φ10washer (#26) and M10 nut (#27) and bracket.
2. Connect the bar (#7) to the tube (#13). Secure with hex bolt M10x20 (#30), washer Φ10 (#26).
9
PT-1
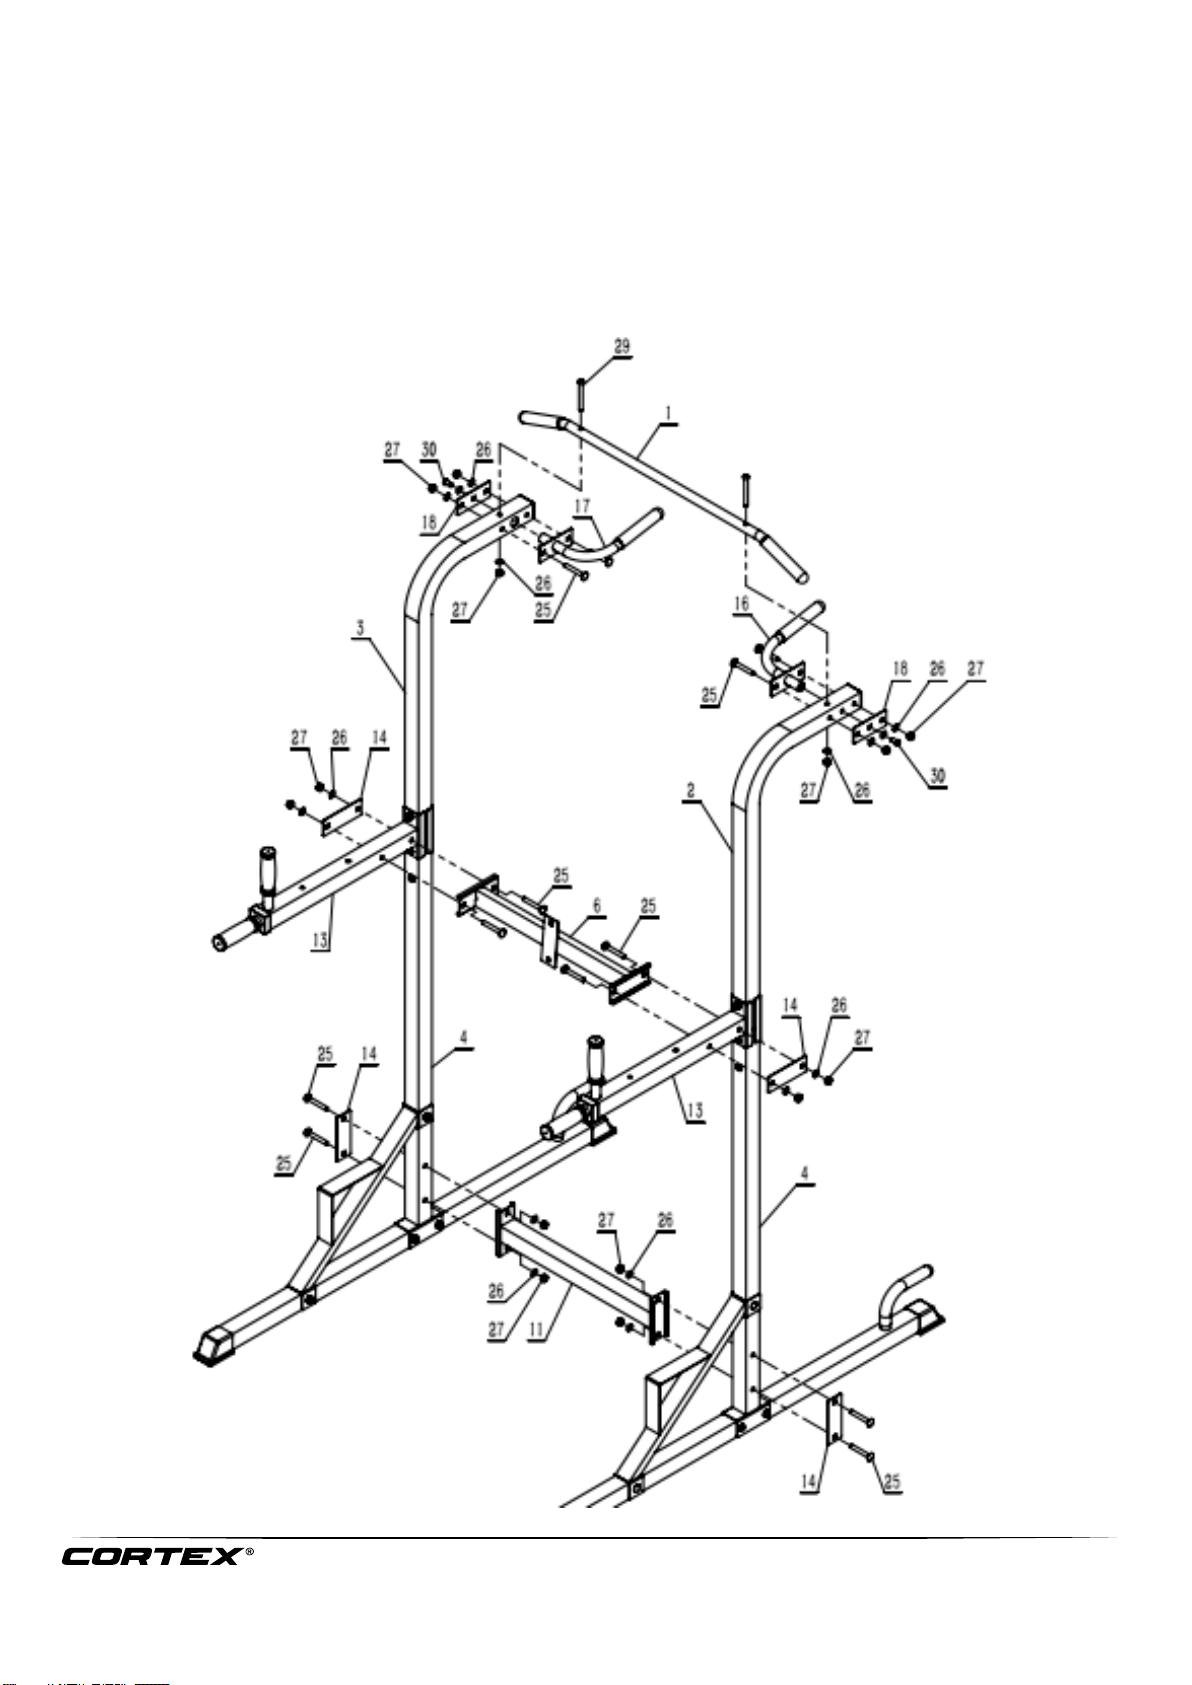
STEP 3
1. Attach the bars (#16) and (#17) to the upright tube (#2) and (#3). Secure with carriage bolt M10x70
(#25), washer Φ10 (#26), and M10 nut (#27), hex bolt M10x20 (#30) and bracket (#18).
2. Attach the bar (#1) to the upright tube (#2) and (#3). Secure with hex bolt M10x90 (#29), washer Φ10
(#26), and M10 nut (#27).
3. Attach the connection tube (#6) to the tube (#13). Secure with carriage bolt M10x70 (#25), washer Φ10
(#26),
4. M10 nut (#27) and bracket (#14).
4. Attach the connection tube (#11) to the tube (#4). Secure with carriage bolt M10x70 (#25), washer Φ10
(#26),
M10 nut (#27) and bracket (#14).
10
PT-1
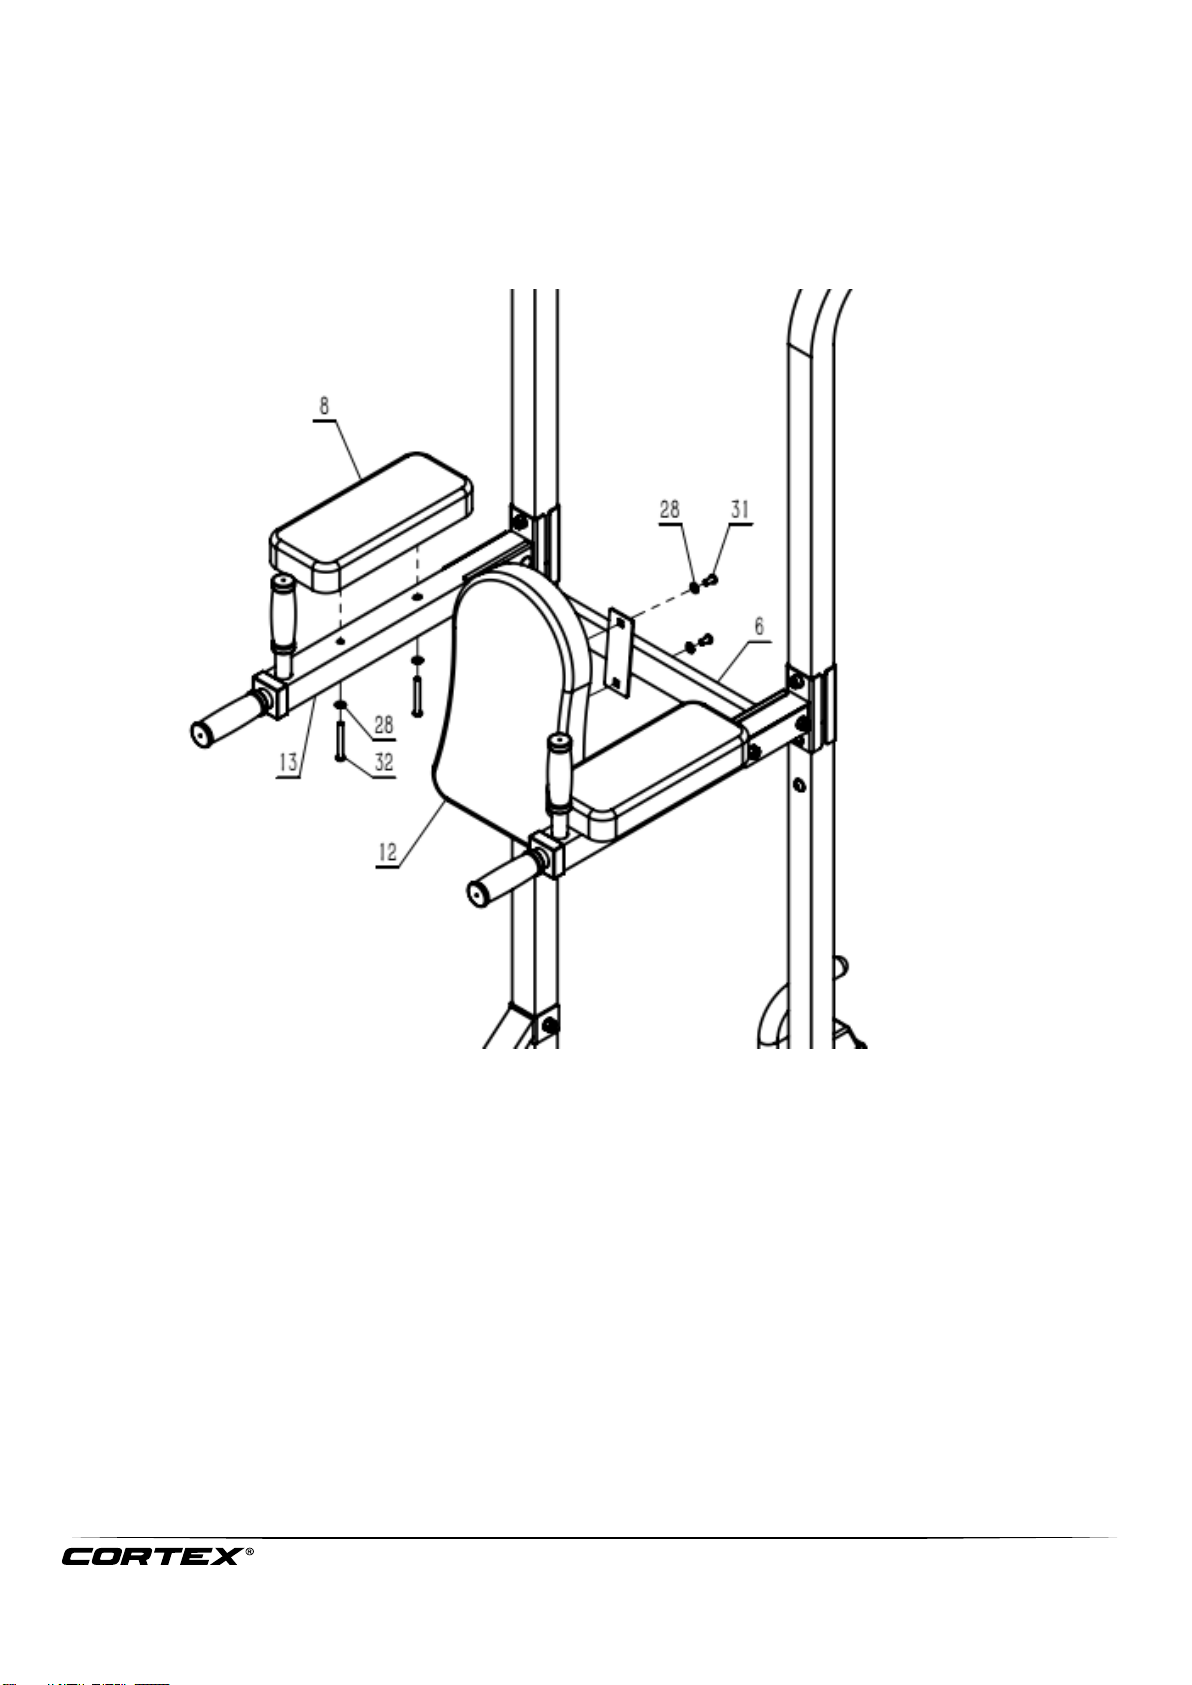
STEP 4
1. Attach the elbow pad (#8) to the machine, secure with hex bolt M8x65 (#32), washers (#28).
2. Attach the back pad (#12) to the machine, secure with hex bolt M8x15 (#31), washers (#28).

11
PT-1
4. WARRANTY
AUSTRALIAN CONSUMER LAW
Many of our products come with a guarantee or warranty from the manufacturer. In addition, they come with
guarantees that cannot be excluded under the Australian Consumer Law. You are entitled to a replacement or
refund for a major failure and compensation for any other reasonably foreseeable loss or damage.
You are entitled to have the goods repaired or replaced if the goods fail to be of acceptable quality and the
failure does not amount to a major failure. Full details of your consumer rights may be found at
www.consumerlaw.gov.au
Please visit our website to view our full warranty terms and conditions:
http://www.lifespanfitness.com.au/warranty-repairs
Warranty and Support:
Please email us at support@lifespanfitness.com.au for all warranty or support issues.
For all warranty or support related enquiries an email must be sent before contacting us via any other means.