Loading ...
Loading ...
Loading ...
14
English
SCART OUT
(TV1)
HDMI OUT
COMPONENT
VIDEO OUT
TO SUBWOOFER
TV AUDIO IN
(TV 2)
HDMI OUT
Step 2: Connecting to TV
This connection enables you to view the
video playback from this unit. You only
need to choose one of the options
below to make the video connection.
– For a standard TV, follow option 1.
– For a HDMI TV, follow option 2.
– For a progressive scan TV, follow
option 3.
Before you start ...
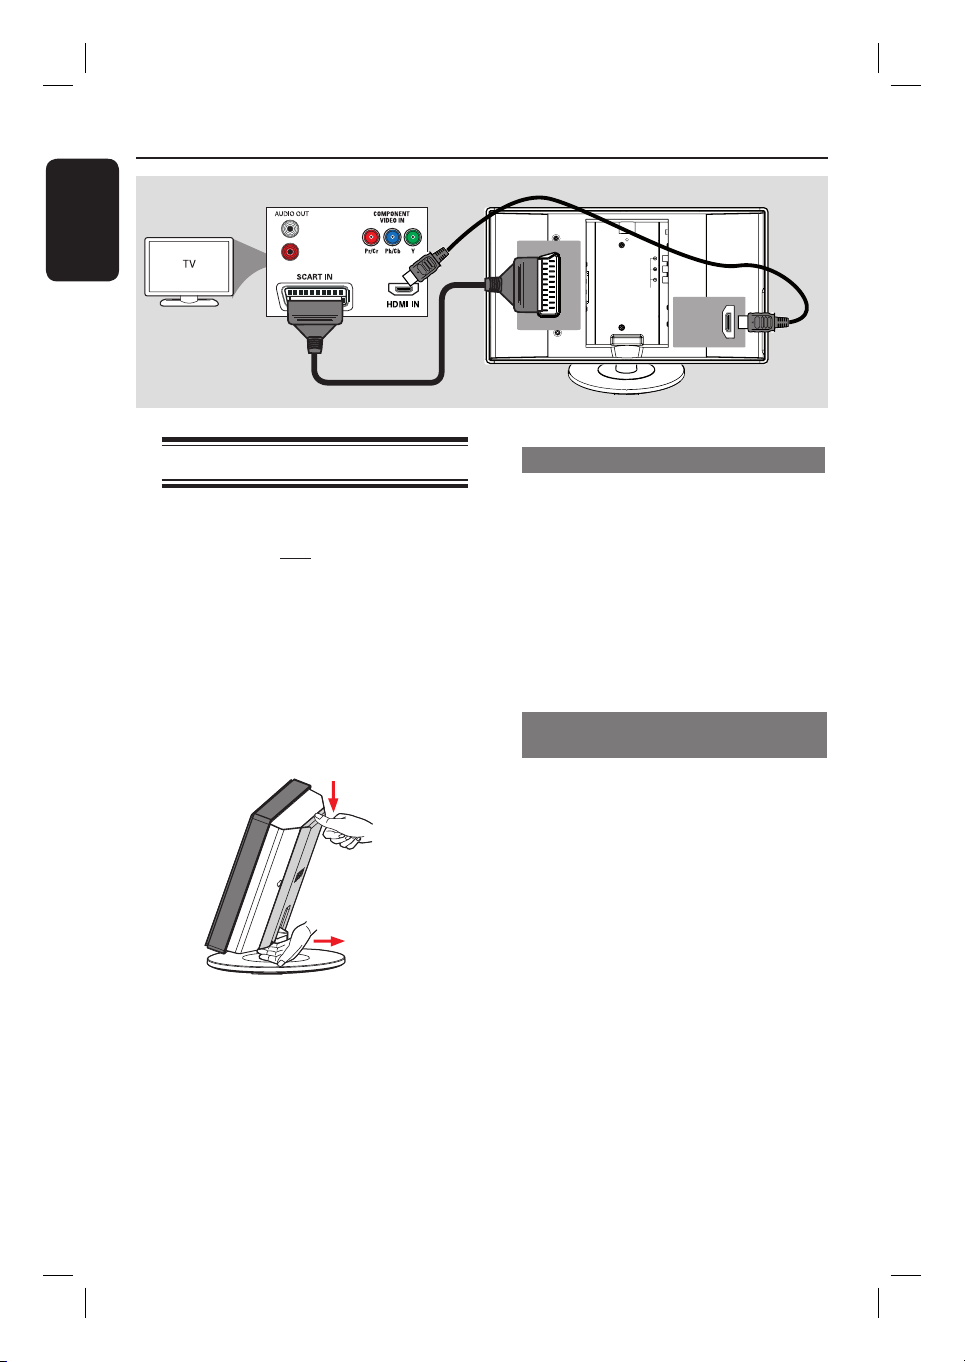
Remove the main unit’s rear cover by
pushing down from the cover top.
Helpful Hint:
– It is important to connect this unit directly
to the TV in order to enjoy optimum video
quality.
Basic Connections (continued)
Option 1
Option 2
Option 1: Using the Scart socket
Use the scart cable to connect the
SCART OUT (TV1) socket on the
main unit to the corresponding SCART
input socket on the TV.
Helpful Hint:
– To hear the TV programmes through this
Home Theatre System, press TV button on
the remote control to select ‘TV1’.
Option 2: Connecting to a HDMI-
compatible TV
HDMI (High De nition Multimedia
Interface) is a digital interface that allows
pure digital video transmission without
the loss of image quality.
A Use a HDMI cable (not supplied) to
connect the HDMI OUT on the main
unit to the HDMI IN on a HDMI-
compatible device (e.g., HDMI TV, HDCP
compliant DVI TV).
B When you have completed the necessary
connections, installation and set-up, see
‘Audio Setup Page and Video Setup Page’
for optimum HDMI audio and video
settings.
Helpful Hint:
– The HDMI is backward compatible with
some DVI devices using an appropriate
adaptor plug.
Loading ...
Loading ...
Loading ...