Loading ...
Loading ...
Loading ...
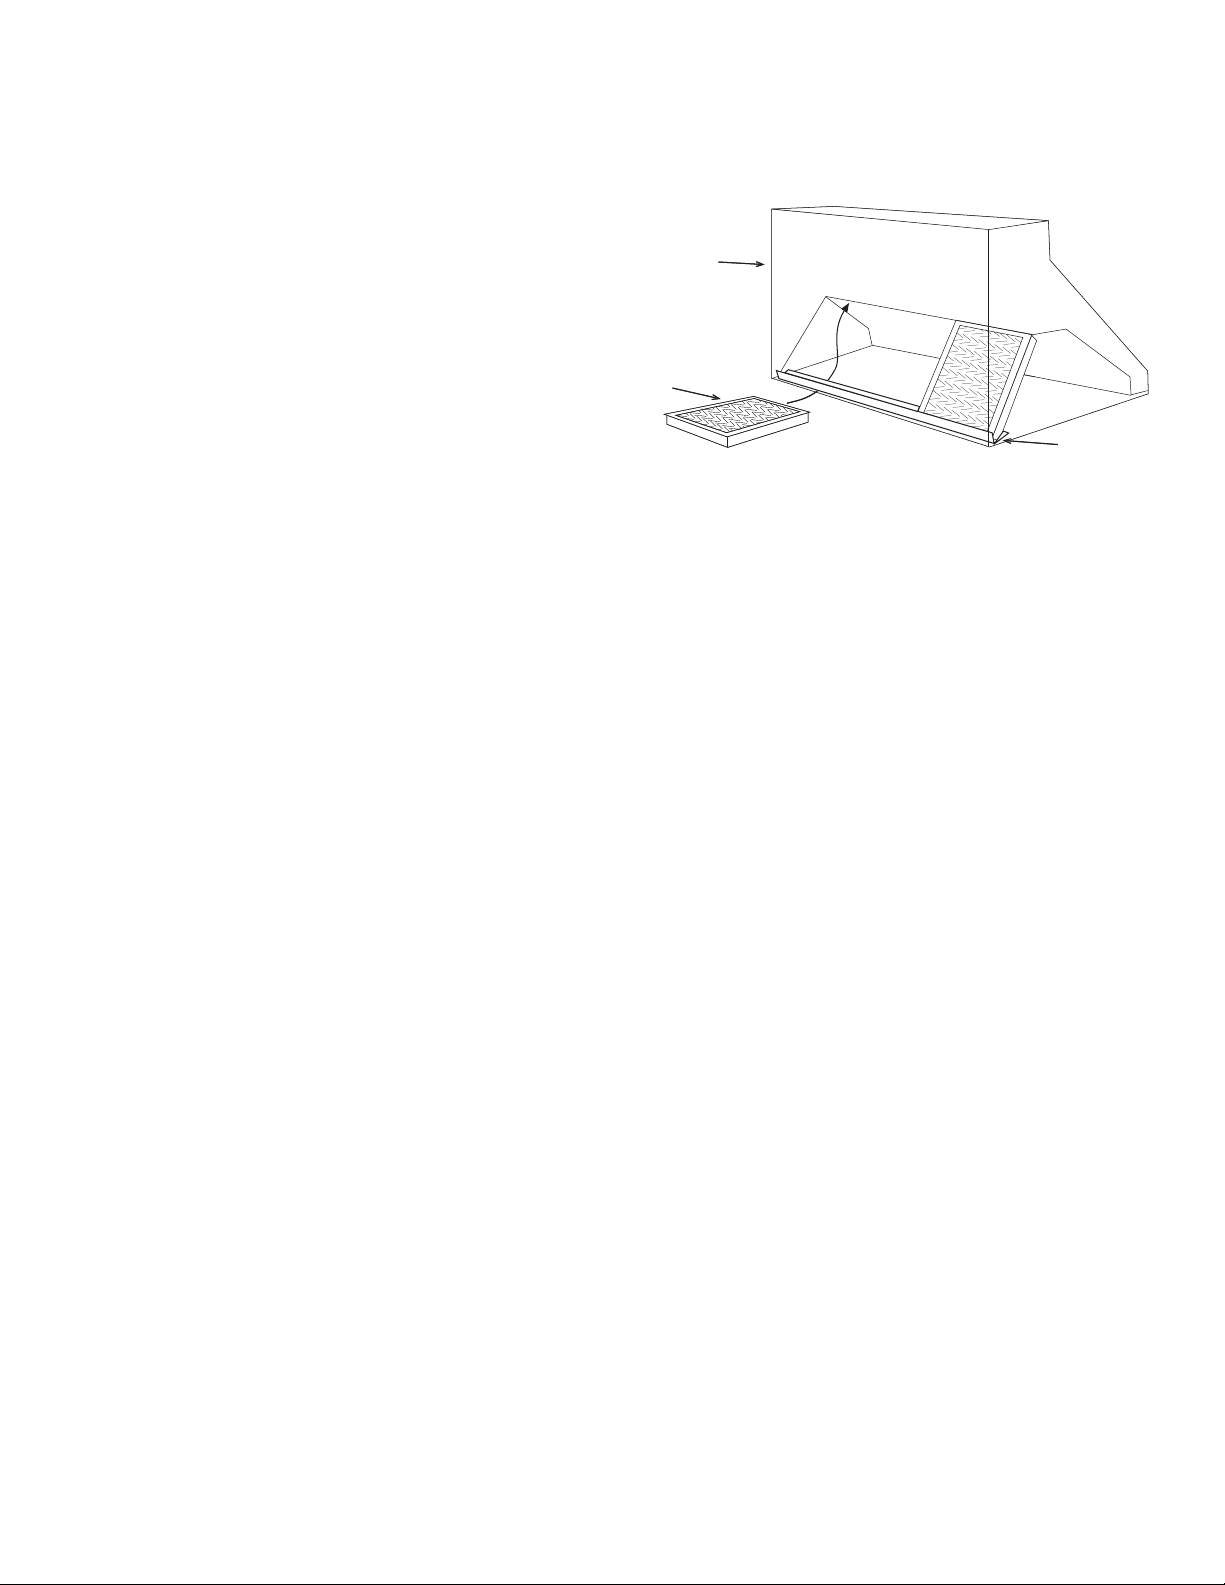
Hood Assembly
Bae/Mesh
lter
grease trough
Hood Assembly
Bae/Mesh
lter
grease trough
19
BAFFLE FILTERS, GREASE TROUGHS AND LIGHTS
Bae Filters
Your bae lters come with “gripper” knobs to aid in lter
placement and removal. Grab the “gripper” knobs with
your thumb and index nger. Simultaneously, slide and
force the rst bae lter in an upward (slightly pitched)
direction towards the ceiling. (Note: spring clips have been
attached within the framework to prevent the bae lters
from rattling when fan is operating. ese spring clips will
make it dicult to insert and remove bae lters.) As the
bae lter is forced upward towards the ceiling,
simultaneously swing the lower portion of the lter down
and out of the framework. Remove the remaining bae
lters in the same fashion. e rst bae lter removed
may be dicult.......... the remaining lters will follow with
ease.
Bae lters may be washed in your dishwasher. Simply
place on the lower rack of dishwasher using a normal
cleaning cycle.
To re-install your new/clean bae lters within the hood
cavity, begin the above process but in reverse. First, place
the clean “grease trough(s)” in the cavity framework
followed by the rst of the bae lters keeping in mind the
rst of the bae lters will be easy to re-install............. the
last bae lter will be dicult due to the tight t and
limited space.
Grease Troughs
e “grease trough” rests within the lowest portion of the
rectangular open framework. Check for grease build-up
each month. e “grease trough(s)” may be wiped free of
excess grease and placed on top-shelf of your dishwasher for
cleaning.
Halogen Lights
Halogen lights are included with the purchase of your
hood. ey are packaged in a cardboard box and taped
within the interior hood cavity behind the bae lters. To
purchase halogen bulbs through Prizer Hoods, you may
contact our Customer Service Department or visit your
local home improvement store replacing with a PAR 20 -
Medium Base, 50 watt, 120 volt, Halogen Flood. Be sure
to take your old halogen bulb with you to ensure your new
bulb is similar in length with the same bulb specications.
Controls
Always “turn-on” the hood fan prior to cooking in order to
establish an airow in the kitchen. Allow the fan to remain
operating after cooking for a few minutes to clear the air.
is measure will ensure the kitchen remains smoke-free
and fresher smelling.
Fan
e hood’s fan is controlled by a three-speed switch.
Speeds: OFF, LOW, MEDIUM, HIGH are printed next to
the fan control knob and correspond to the fan speed.
Hood Lighting
e halogen lights are controlled by a single light switch.
e lighting has a LOW setting (ambient lighting) and a
HIGH setting (brilliant lighting).
Cleaning Your Stainless Steel Hood
Keep your hood free of grease build-up under the hood’s
surface as well as exterior surfaces. Do not use abrasive
cloths, steel wool, scrubbing pads or scouring powders. Do
not use paper towels or any other coarse cloths for cleaning
stainless steel. Have prepared, a supply of pre-washed,
(100% cotton) annel cleaning cloths or micro-ber
cleaning cloths. You may purchase 100% cotton annel by
the yard at your local fabric store. Pre-wash annel in hot
water using laundry detergent without fabric softeners and
place in dryer without fabric softening sheets.
We recommend using a stainless steel cleaning spray to
maintain the beautiful luster of your stainless steel hood.
Spray the cleaning/polishing solution directly onto a
cleaning cloth as supposed to spraying the surface of the
hood.
“Clean Source” stainless spray may be purchased by
contacting our Customer Service Department.
Loading ...