Loading ...
Loading ...
Loading ...
3
©
2015 DJI. All Rights Reserved.
The arm xation screws (M3×14 hexagon) should be adjusted using an appropriate
hex key.
1) Loosen the two arm xation screws (M3×14 hexagon) on the arm of the powertrain.
2) Pull the cables of the powertrain through the frame arm tube. Then insert the frame
arm tube into the powertrain arm.
3) Align the components so that the propeller will be oriented upward after assembly is
complete.
4) Tighten the two screws (M3×14 hexagon) on the arm of the powertrain.
4. System Connection
Tools Required
Tools: Electric soldering iron and soldering tin
Use: Soldering each powertrain’s power cables
ESC LED Indicator
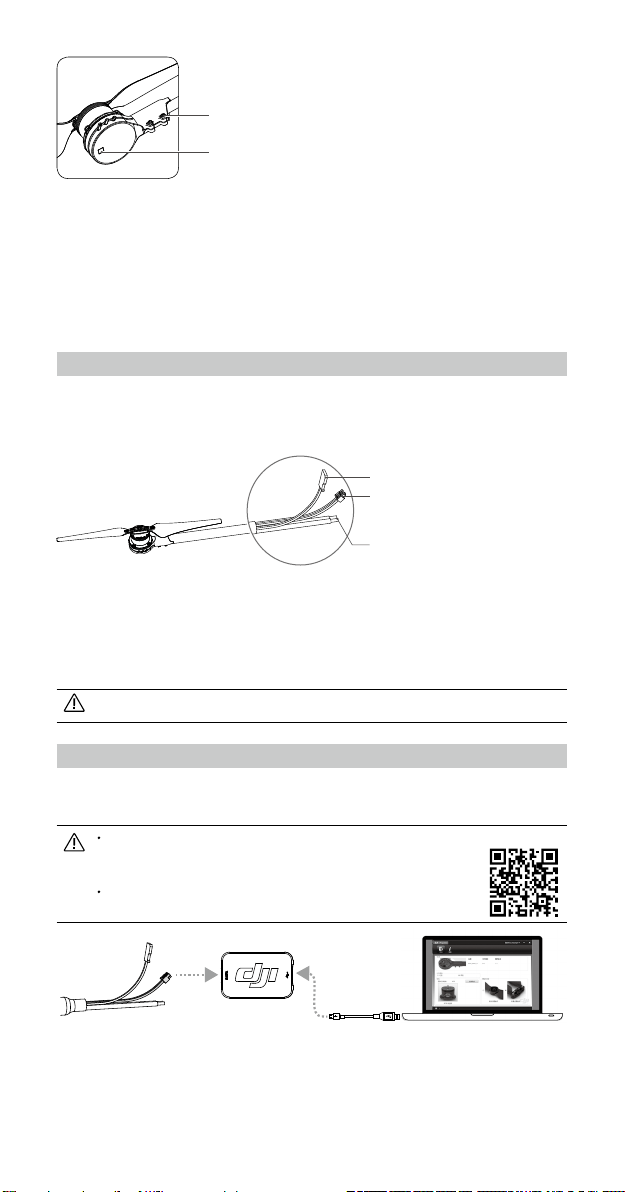
Screws for Arms (M3×14 hexagon)
JST 3-pin Cable
(Communication / Updating ESC
rmware)
Power Cables
(Red = Positive, Black = Negative)
Signal Cable (To your controller)
Powertrain Updater Computer
1) Solder the power cables of each powertrain to the frame’s power system. Make sure
that the solder points are strong and that there is no potential for short-circuits. The
red cable should be afxed to the positive terminal and the black cable should be
afxed to the negative terminal.
2) Connect the signal cable to your controller.
Make sure there are no short-circuits or open circuits.
5. Using the DJI ESC Assistant
The DJI ESC Assistant is used to upgrade ESC rmware, congure the propulsion
system, etc.
An Updater is required and is not included with the E1200 Pro. To use the
DJI ESC Assistant, connect the powertrain to a
computer through the Updater, as shown below.
Download the ESC Assistant:
http://www.dji.com/product/e1200/download
Before using the Updater, unplug any other serial devices that are connected to your
computer, then follow the instructions below:
1) Download the ESC Assistant from the DJI website. Run the installer and follow the
prompts to complete the installation process.
Loading ...
Loading ...
Loading ...