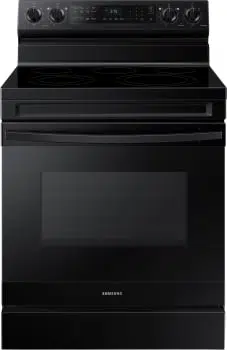
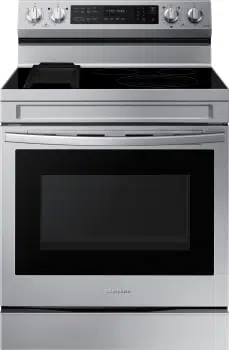
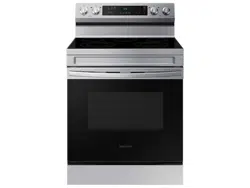
01. Oven control panel (See page 27 for more information)
02. * Surface control knobs (See page 23 for more information)
03. Glass surface
04. Oven door
05. Storage drawer
06. Automatic oven light switch
07. * Oven light
08. Shelf position
09. Gasket
What’s included
Surface cooking
About induction cooktop cooking
BEFORE COOKING
• Do not use the Induction cooktop surface as a cutting board.
• Do not place or store items that can melt or catch fire on the Induction cooktop, even when it is not being used.
• Turn the induction cooktop on only after placing the cookware on it.
• Do not store heavy items above the cooktop surface. They could fall and damage it.
DURING COOKING
• Do not place aluminum foil or plastic items, such as salt and pepper shakers, spoon holders, or plastic wrappings on the range when it is in use. The hot air from the vent could melt plastics or ignite flammable items.
• Make sure the correct surface unit is turned on.
• Never cook directly on the glass. Always use cookware.
• Always place the pan in the center of the surface unit you are cooking on.
• Never leave surface units unattended while using a high heat setting. Boilovers cause smoking and greasy spillovers that may catch on fire.
• Turn the surface units off before removing cookware.
• Do not use plastic wrap to cover food. Plastic may melt onto the surface and be very difficult to remove.
AFTER COOKING
• Do not touch the surface units until they have cooled down.
• The surface may still be hot and burns may occur if you touch the glass surface before it has cooled down sufficiently.
• Immediately clean spills on the cooking area to prevent a tough cleaning chore later.
• If cabinet storage is provided directly above the cooking surface, make sure that the items are infrequently used and can be safely stored in an area subjected to heat. Temperatures may be unsafe for items, such as volatile liquids, cleaners, or aerosol sprays.
About the radiant surface elements
The temperature rises gradually and evenly. As the temperature rises, the radiant element will glow red. To maintain the selected setting, the element will cycle on and off. The heating element retains enough heat to provide a uniform and consistent heat during the off cycle. For efficient cooking, turn off the element several minutes before cooking is complete. This will allow residual heat to complete the cooking process.
Location of the induction cooktop elements and controls
The radiant control knobs operate the radiant surface elements on the cooktop as shown below.
01. Left Rear: 6", 1200 W
02. Left Front: 6"/9”, 1400 W / 3300 W
03. Right Front: 6"/9”, 1400 W / 3300 W
04. Right Rear: 6", 1200 W
05. Hot surface indicator
06. Cooktop On/Off lamp
Hot surface indicator
• Comes on when the unit is turned on or hot to the touch.
• Stays on even after the unit is turned off.
• Glows until the unit is cooled to approximately 150 °F.
Cooktop on/off lamp
• The lamp turns on when the surface control knobs are not in off position.
• The lamp turns off when the surface control knobs are in off position.
Cooking areas
• The cooking areas on your range are identified by permanent circles on the glass cooking surface. For the most efficient cooking, fit the pan size to the element size.
• Pans should not extend more than ½˝ to 1˝ beyond the cooking area.
• When a control is turned on, you can see a glow through the glass cooking surface. The element will cycle on and off to maintain the preset heat setting, even at high settings.
• For more information on selecting proper types of cookware, refer to the section "Using the proper cookware" on page 25.
How to set the appliance for surface cooking
Single surface unit control knob (Left Rear, Right Rear)
1. Push the knob in.
2. Turn in either direction to the setting you want.
• At both the off and high settings, the knob clicks into position.
Dual surface unit control knob (Left Front, Right Front)
1. Push the knob in.
2. Turn in either direction to the setting you want.
• To use the single surface unit, turn the control knob to the single burner (A) setting.
• To use the dual surface unit, turn the control knob to the dual burner (B) setting.
Recommended settings
Using the proper cookware
Using the right cookware can prevent many problems, such as uneven cooking or extended cooking times. Using the proper pots and pans will reduce cooking times and cook food more evenly.
Check for flatness by rotating a ruler across the bottom of the cookware.
CORRECT
Flat bottom and straight sides.
• Tight fitting lids.
• Weight of handle does not tilt pan.
• Pan is well balanced.
• Pan size matches the amount of food to be prepared and the size of the surface element.
• Made of a material that conducts heat well.
Always match pot diameter to element surface diameter.
INCORRECT
Curved and warped pan bottoms.
Pan overhangs element by more than one-half inch.
Pan is smaller than element.
Heavy handle tilts pan.
Choosing the proper cookware
What your cookware is made of determines how evenly and quickly heat is transferred from the surface element to the pan bottom.
• ALUMINUM - Excellent heat conductor. Some types of food will cause the aluminum to darken. (Anodized aluminum cookware resists staining & pitting). If aluminum pans are slid across the ceramic cooktop, they may leave metal marks that resemble scratches. Remove these marks as soon as the cooktop cools down.
• COPPER - Excellent heat conductor but discolors easily. May leave metal marks on ceramic glass (to remove, see above.)
• STAINLESS STEEL - Slow heat conductor with uneven cooking results. It's durable, easy to clean, and resists staining.
• CAST IRON - A poor conductor; retains heat very well. Cooks evenly once cooking temperature is reached. Not recommended for use on ceramic cooktops.
• ENAMELWARE - Heating characteristics will vary depending on the base material. Porcelain enamel coating must be smooth to avoid scratching ceramic cooktops.
• GLASS - Slow heat conductor. Not recommended for ceramic cooktop surfaces because it may scratch the surface.
Protecting the cooktop
Cleaning
• Clean the cooktop before using it for the first time.
• Clean your cooktop daily or after each use. This will keep your cooktop looking good and can prevent damage.
• If a spillover occurs while you are cooking, immediately clean the spill from the cooking area while it is hot to prevent a tough cleaning chore later. Using extreme care, wipe the spill with a clean, dry towel.
• Do not allow spills to remain on the cooking area or the cooktop trim for a long period of time.
• Do not use abrasive cleansing powders or scouring pads, which will scratch the cooktop.
• Do not use chlorine bleach, ammonia, or other cleansers not specifically recommended for use on a glass-ceramic surface.
Preventing marks and scratches
• Do not use glass cookware. It may scratch the cooktop.
• Do not place a trivet or wok ring between the cooktop and the pan. These items can mark or scratch the cooktop.
• Make sure the cooktop and the pan bottom are clean.
• Do not slide metal pans across the cooktop.
Preventing stains
• Do not use a soiled dish cloth or sponge to clean the cooktop surface. A film will remain, which may cause stains on the cooking surface after the area is heated.
• Continuously cooking on a soiled surface can result in a permanent stain.
Preventing other damage
• Do not allow plastic, sugar, or foods with high sugar content to melt onto the hot cooktop. Should this happen, clean immediately.
• Do not let a pan boil dry as this will damage the cooktop and the pan.
• Do not use the cooktop as a work surface or cutting board.
• Do not cook food directly on the cooktop. Always use the proper cookware
Operating the oven
The oven control panel
01. Display: Shows the time of day, oven temperature, what mode the oven is operating in, and the time set for the timer or automatic oven operations.
02. Bake: Use to select the bake function of the oven.
03. Broil: Use to select the broil function of the oven.
04. Keep Warm: Use to select the keep warm function of the single oven to keep cooked foods warm.
05. Bread Proof: Use to select the bread proof function of the oven.
06. Steam Clean: Use to select the steam cleaning function of the oven.
07. Timer: Use to set or cancel the kitchen timer. The kitchen timer does not start or stop cooking. Press and hold for 3 seconds to turn off the timer.
08. Cook Time: Press and then use the / to set the amount of time you want your food to cook. The oven will shut off when the cooking time has run out.
09. Delay Start: Press to set the oven to start and stop automatically at a time you set.
10. Smart Control: Use to select the smart control feature.
11. : Use to raise or lower the temperature and increase or decrease times.
12. Lamp: Press to turn the oven light on or off.
13. Clock / Setting: Use to set the time of day. Use to bring up the user preference menu in the display. (Press for 3 seconds.)
14. START / SET: Use to start any cooking or cleaning function in the oven.
15. OFF / CLEAR: Press to cancel all oven operations except the clock and timer. Press to cancel a previously entered temperature or time.
16. Oven lock: Use to disable all oven functions.
Oven lock
Lock the oven controls, cooktop, and oven door so they cannot be activated accidentally. Oven lock can only be activated in standby mode.
How to activate the oven lock feature
Press Oven lock for 3 seconds. The display will show the Lock icon as well as the current time. All functions must be cancelled before Oven lock is activated. This function is available only when the oven temperature is under 400 °F.
How to unlock the Oven
Press Oven lock for 3 seconds. The Lock icon will disappear from the display.
Setting the clock
The clock must be set to the correct time of day for the automatic oven timing functions to work properly.
• The time of day cannot be changed during timed cooking, delay-timed cooking.
How to set the clock
1. Press Clock .
2. Enter the current time using the
3. Press Clock or START/SET to save the changes.
Setting the kitchen timer
The kitchen timer serves as an extra timer that will beep when the set time has elapsed. It does not start or stop cooking functions. You can use the kitchen timer with any of the other oven functions.
How to set the timer
1. Press Timer.
2. Enter a desired time using the
3. When done, press START/SET.
4. To cancel the Timer settings, press and hold Timer for 3 seconds.
5. When the set time elapses, the oven beeps and displays the “End” message. Press Timer to delete the message..
Timed cooking
In timed cooking, the oven turns on immediately and cooks for the length of time you select. At the end of the cooking time, the oven turns off automatically.
• You can use the timed cooking feature only with another cooking operation (bake).
How to set the oven for timed cooking
1. Start the cooking operation you want, e.g., Bake. The default temperature is 350 °F.
2. Press Cook Time.
• You can set the Cook Time at any time. (After selecting the cook mode, during preheating, after preheating.)
3. Enter the cooking time you want, e.g., 45 min, using the number pad. You can set the cooking time for any amount of time from 1 minute to 9 hours and 59 minutes.
4. Press START/SET. The temperature display will start to change once the oven temperature reaches 175 °F. The oven will continue to cook until the set amount of time has elapsed, then turn off automatically unless you set the keep warm feature. (Refer to the section on the keep warm feature on page 33.)
5. You can cancel a cook time at any time by setting the cook time to 0 minutes. (Press Cook Time -> set cook time to 0 min -> press START/SET)
Delay start
In a delay timed cooking, the oven’s timer turns the oven on and off at times you select in advance.
• You can use the delay start feature only with another cooking operation (bake).
• You can set the oven for a delay start before setting other cooking operations.
• The clock must be set to the current time
How to set the oven for delay start
1. Position the oven rack(s) and place the food in the oven.
2. Press the pad for the cooking operation you want, e.g., Bake. The default temperature is 350 °F.
3. Enter the temperature you want, e.g., 375 °F, using the
4. Set the cooking time if you want. (Refer to the section on the timed cooking feature on page 28).
5. Press Delay Start.
6. Enter the time you want the oven to turn on, e.g., 4:30, using the
7. Press START/SET. At the set time, a short beep will sound. The oven will begin to bake
Turning the oven light on and off
• The oven light turns on automatically when the door is opened.
• The oven light turns off automatically when the door is closed.
• You can turn the oven light on and off manually by pressing the pad.
Minimum and maximum settings
All of the features listed in the table below have minimum and maximum time or temperature settings. A beep will sound each time a pad on the control panel is pressed and the entry is accepted. An error tone will sound in the form of a long beep if the entered temperature or time is below the minimum or above the maximum setting for the feature.
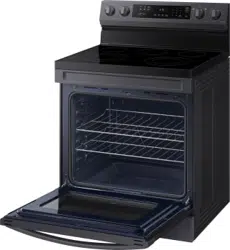
Using the oven racks
Oven rack positions
Recommended rack position for cooking
Rack and Pan placement
Centering the baking pans in the oven as much as possible will produce better results. If baking with more than one pan, place the pans so each has at least 1˝ to 1½˝ of air space around it. When baking on a single oven rack, place the oven rack in position 3 or 4. See the figure
Cakes place the oven racks in positions 3 and 5, Cookies place the racks in positions 2 and 5.
Using Multiple Oven Racks
Before using the racks
The oven has two racks. Each rack has stops that need to be placed correctly on the supports. These stops will keep the rack from coming completely out.
REMOVING THE RACKS
1. Pull the rack straight out until it stops.
2. Lift up the front of the rack, and then pull it out.
REPLACING THE RACKS
1. Place the end of the rack on the support.
2. Tilt the front end up and push the rack in
Baking
The oven can be programmed to bake at any temperature from 175 °F to 550 °F. Baking temperature and time will vary depending on the ingredients and the size and shape of the baking pan used. Dark or nonstick coatings may cook faster with more browning.
How to set the temperature
1. Press Bake. The default temperature is 350 °F.
2. Enter the temperature you want on the, e.g., 3, 7, 5.
3. Press START/SET. The temperature display will start to change once the oven temperature reaches 175 °F.
4. If you want to cancel baking or if you have finished, press OFF/CLEAR.
• Place food in the oven after preheating if the recipe calls for it. Preheating is very important for good results when baking cakes, cookies, pastry, and breads. After the oven has reached the desired temperature, the range will beep several times.
How to adjust the temperature while cooking
1. Press Bake. The display will show the present temperature, e.g., 375 °F.
2. Enter the temperature you want, e.g., 425 °F, using the number pad.
3. Complete the entry by pressing START/SET.
Broiling
Broiling is a method of cooking tender cuts of meat by direct heat under the broil element of the oven. The high heat cooks quickly and gives a rich, brown outer appearance. Broil mode is best for meats, fish, and poultry up to 1" thick. Always preheat the oven for 4 minutes before broiling.
How to set the oven for broiling
1. Press Broil once for Hi or twice for Lo. Use Lo to cook foods such as poultry or thick cuts of meat thoroughly without over-browning them.
2. To start broiling, press START/SET. Broil one side until the food is browned. Turn over and broil the other side. 3. Press OFF/CLEAR once you have finished cooking or if you want to cancel broiling.
Broil stop position
Leave the door open at the broil stop position. The door will stay open by itself, yet the proper temperature is maintained in the oven.
Broiling Recommendation Guide
The size, weight, thickness, starting temperature, and your doneness preference will affect broiling times. This guide is based on meats at refrigerator temperature. Always use a broiler pan and its grid when broiling. Always preheat the oven for 4 minutes before broiling.
Using the bread proof function
Bread Proof
The Bread Proof function automatically provides the optimum temperature for the bread proof process and, therefore does not have a temperature adjustment. If you press Bread Proof when the oven temperature is above 95 °F, Hot will appear in the display. Because these functions produce the best results when started while the oven is cool, we recommend that you wait until the oven has cooled down and Hot disappears from the display.
1. Press Bread Proof.
2. Press START/SET.
3. Press OFF/CLEAR at any time to turn off the Bread Proof feature.
Using the keep warm feature
When cooking is finished, Keep Warm will hold the food at a safe serving temperature for up to 3 hours. After 3 hours, the feature will shut off automatically. You can use the keep warm feature without any other cooking operations, or you can set it to activate after a timed or delay timed cooking operation. You should not use this feature to reheat cold food.
How to use the keep warm feature
1. Press Keep Warm.
2. Press START/SET.
3. Press OFF/CLEAR at any time to turn the feature off.
How to set the oven to activate the keep warm mode after a timed cooking
1. Set Timed Cooking to start cooking. (Refer to the section on the timed cooking feature on page 32.)
2. Press Keep Warm to use the feature.
3. Cooking mode is switched directly to Keep Warm mode after the Timed cooking period has ended. In this case, you can turn off Keep Warm by pressing OFF/CLEAR.
• Press Keep Warm once again to cancel Keep Warm setting during cooking mode operation.
Using the smart control feature
Functions that can be operated from the SmartThings app may not work smoothly if communication condition becomes poor or the product is installed in a place with a weak Wi-Fi signal. Please refer to the following table for the main functions that can be operated from the app
How to connect the oven
1. Download and open the SmartThings app on your smart device.
2. Follow the app’s on-screen instructions to connect your range.
3. Once the process is complete, the connected icon located on your range displays and the app will confirm you are connected.
4. If the connection icon does not turn on, follow the instruction in the app to reconnect.
To start the oven remotely
1. Press Smart Control appears in the display. The oven can now be started remotely with a connected device
Oven remote control
• Transfer the oven setting (mode, time, temperature) from the device to the oven.
• Remotely start the oven (Only available for Electric range).
• Turn the oven off remotely.
• Once cooking starts, you can change the time, temperature remotely.
Using the voice control
To use the Range’s Voice Control function, you need Bixby / Amazon Alexa App / Google Assistant App on your mobile device. Refer to the table below for all available functions.
Bixby
Start conversation with Bixby on SAMSUNG mobile by saying “Hi Bixby” or by pressing the side key.
Amazon Alexa & Google Assistant
Samsung smart home appliances are supported by SmartThings skill in Alexa & action in Google Assistant.
Installation Guide
Here’s how to link SmartThings account into Amazon Alexa or Google Assistant. SmartThings App and Alexa App(or Google Assistant App) Should be installed on your phone.
1. Setup the supported devices to SmartThings.
2. After device setup, tap + button on the screen.
3. Tap ‘Voice assistant’ and link your Samsung account to Amazon Alexa. (or Google Assistant)
4. Check the devices are visible on Amazon Alexa app. Then account linking is complete. (Check the devices are visible and set the location(home&room) of devices in Google home app. Then account linking is complete.)
Using the options function
This function enables you to control various electronic control options. Refer to the following table for available options. The option menu is only available when the oven is not being used (not cooking).
Temp Adjust
The temperature in the oven has been calibrated at the factory. When first using the oven, be sure to follow recipe times and temperatures. If you think the oven is too hot or too cool, you can correct the temperature in the oven. Before correcting, test a recipe by using a temperature setting that is higher or lower than the recommended temperature. The baking results should help you to decide how much of an adjustment is needed. The oven temperature can be adjusted ±35 °F (±19 °C ).
How to correct the oven temperature
1. Press Options for 3 seconds,
2. Press ∧ or ∨ to select 1, and then press START/SET.
3. Press ∧ or ∨ to select the desired temperature you want to adjust. (-35~35)
4. Press START/SET to save the changes.
Temp Unit (Fahrenheit or Celsius temperature selection)
You can program the oven control to display the temperature in Fahrenheit or Celsius. The oven has been preset at the factory to display in Fahrenheit.
How to change the display from Fahrenheit to Celsius or Celsius to Fahrenheit
1. Press Options for 3 seconds,
2. Press ∧ or ∨ to select 2, and then Press START/SET.
3. Press ∧ or∨ to select F (Fahrenheit) or C (Celsius).
4. Press START/SET to save the changes.
12-hour energy saving
If you accidently leave the oven on, this feature will automatically turn off the oven after 12-hours during baking functions or after 3 hours during a broil function. (Default setting : on)
How to turn the 12-hour energy saving feature on or off
1. Press Options for 3 seconds,
2. Press ∧or ∨ to select 3, and then press START/SET.
3. Press ∧ or ∨ to select --Hr (Off) or 12Hr (On).
4. Press START/SET to save the changes.
Sound On/Off
Using Sound On/OFF, you can set the oven controls to operate silently.
How to turn the sound on or off
1. Press Options for 3 seconds
2. Press ∧ or ∨ to select 4, and then press START/SET.
3. Press ∧ or ∨ to select ON or OFF.
4. Press START/SET to save the changes.
Wi-Fi On/Off
You can turn the range’s Wi-Fi connection on or off.
How to turn the Wi-Fi on or off
1. Press Options for 3 seconds
2. Press ∧ or ∨ to select 5, and then press START/SET.
3. Press ∧ or ∨ to select ON or OFF.
4. Press START/SET to save the changes.
Demo mode
This option is for use by retail establishments for display purposes only. (The heating element does not operate)
How to enable or disable the demo mode
1. Press Options for 3 seconds
2. Press ∧ or ∨ to select 0 and then press START/SET.
3. Press ∧ or ∨ to select ON or OFF.
4. Press START/SET to save the changes.
Using the Sabbath feature
(For use on the Jewish Sabbath & Holidays)
You can use the Sabbath feature with baking only. The oven temperature may be set higher or lower after you set the Sabbath feature. (The oven temperature adjustment feature should be used only during Jewish holidays). The display, however, will not change and tones will not sound when a change occurs. Once the oven is properly set for baking with the Sabbath feature active, the oven will remain on continuously until the Sabbath feature is cancelled. This will override the factory preset 12-hour energy saving feature. If the oven light is needed during the Sabbath, press before activating the Sabbath feature. Once the oven light is turned on and the Sabbath feature is active, the oven light will remain on until the Sabbath feature is turned off. If the oven light needs to be off, be sure to turn the oven light off before activating the Sabbath feature.
How to use the Sabbath feature
1. Press Bake. The default temperature is 350 °F.
2. Enter the temperature you want, e.g., 375 °F,
3. Press START/SET. The temperature display will start to change once the oven temperature reaches 175 °F.
4. Press Bake and Timer at the same time for 3 seconds. The display will show SAb. Once SAb appears in the display, the oven will not beep or display any further changes. You may change the oven temperature once baking has started. Remember that the oven will not beep or display any further changes once the Sabbath feature is engaged.
5. You can turn the oven off at any time by pressing OFF/CLEAR. This will turn only the oven off. If you want to deactivate the Sabbath feature, hold down Bake and ∧ at the same time for 3 seconds. Sab will disappear from the display
Maintaining your appliance
Self-cleaning
How to set the oven for steam-cleaning
For light cleaning, the steam-cleaning function saves time and energy.
1. Remove all accessories from the oven.
2. Pour approximately 10 oz. (300 ml) of water onto the bottom of the empty oven and then close the oven door. Use normal water only, not distilled water.
3. Press Steam Clean.
4. Press START/SET. When the operation is complete, the display will blink and a beep will sound.
5. Press OFF/CLEAR.
6. Clean the oven’s interior. There will be a significant amount of water remaining on the bottom of the oven after a steam-cleaning cycle. Remove the residual water with a sponge or soft dry cloth.
After a self-cleaning cycle
• Take care when opening the door before a steam-cleaning procedure has ended. The water on the bottom is hot.
• Open the oven door and remove the remaining water with a sponge. Do not leave the residual water in the oven for any length of time. Wipe the oven clean and dry with a soft cloth. Do not forget to wipe under the oven door seal.
• Use a detergent-soaked sponge, a soft brush, or a nylon scrubber to wipe the oven interior. Remove stubborn residue with a nylon scourer. You can remove lime deposits with a cloth soaked in vinegar.
• If the oven remains dirty, you can repeat the procedure once the oven has cooled.
• For heavy residue, such as grease left over from roasting, we recommend that you rub detergent into the residue before activating the steam-cleaning function.
• After cleaning, leave the oven door ajar at a 15° angle to allow the interior enamel surface to dry thoroughly
Care and cleaning of the oven
Vent
• The oven vent is located above the left rear surface unit.
• This area could become hot during oven use.
• It is normal for steam to come out of the vent.
• The vent is important for proper air circulation. Never block this vent.
Cleaning painted parts and decorative trim
• For general cleaning, use a cloth with hot, soapy water.
• For more difficult residue and built-up grease, apply a liquid detergent directly onto the area and leave for 30 to 60 minutes. Wipe with a damp cloth and dry. Do not use abrasive cleaners on any of these surfaces. They can scratch.
Cleaning stainless steel surfaces
1. Shake the bottle of STAINLESS STEEL APPLIANCE CLEANER or POLISH well.
2. Place a small amount of STAINLESS STEEL APPLIANCE CLEANER or POLISH on a damp cloth or damp paper towel.
3. Clean a small area, rubbing with the grain of the stainless steel if applicable.
4. Dry and buff with a clean, dry paper towel or soft cloth.
5. Repeat as necessary.
Oven racks
• Do not clean in a dishwasher.
• If the rack becomes hard to remove or replace, lightly wipe the oven rack guides with cooking oil. Do not wipe cooking oil on the slides. • If the rack becomes difficult to slide, the rack may need to be lubricated using a graphite lubricant.
• To order graphite lubricant., call Samsung customer care at 1-800-SAMSUNG (726-7864) or visit our homepage (www.samsung.com/us/support, www. samsung.com/ca/support, or www.samsung.com/ca_fr/support) and reference part number DG81-01629A. • If you want to buy directly, connect to http://www.samsungparts.com/Default. aspx.
Air fry tray
To keep the Air fry tray clean, remove them from the cavity, and soak them in Lukewarm soapy water. Then, scour soil off of the Air fry tray using a plastic scouring pad.
Oven door
• Use soap and water to thoroughly clean the top, sides, and front of the oven door. Rinse well. You may use a glass cleaner on the outside glass of the oven door. DO NOT immerse the door in water. DO NOT spray or allow water or the glass cleaner to enter the door vents. DO NOT use oven cleaners, cleaning powders, or any harsh abrasive cleaning materials on the outside of the oven door.
• DO NOT clean the oven door gasket. The oven door gasket is made of a woven material, which is essential for a good seal. Care should be taken not to rub, damage, or remove this gasket.
Care and cleaning of the glass cooktop
Normal daily use cleaning
Use only a ceramic cooktop cleaner. Other creams may not be as effective. By following these steps, you can maintain and protect the surface of your glass cooktop.
1. Before using the cooktop for the first time, clean it with a ceramic cooktop cleaner. This helps protect the top and makes cleanup easier.
2. Daily use of a ceramic cooktop cleaner will help keep the cooktop looking new.
3. Shake the cleaning cream well. Apply a few drops of cleaner directly to the cooktop.
4. Use a paper towel or a cleaning pad for ceramic cooktops to clean the entire cooktop surface.
5. Use a dry cloth or paper towel to remove all cleaning residue. No need to rinse.
Removing burned-on residue
1. Allow the cooktop to cool.
2. Spread a few drops of ceramic cooktop cleaner on the entire burned residue area.
3. Using a cleaning pad for ceramic cooktops, rub the residue area, applying pressure as needed.
4. If any residue remains, repeat the steps listed above as needed.
5. For additional protection, after all residue has been removed, polish the entire surface by applying ceramic cooktop cleaner with a paper towel.
Removing heavy, burned-on residue
1. Allow the cooktop to cool.
2. Use a single-edge razor-blade scraper at approximately a 45° angle against the glass surface and scrape the soil. It will be necessary to apply pressure to remove the residue.
3. After scraping with the razor scraper, spread a few drops of ceramic cooktop cleaner on the entire burned residue area. Use a cleaning pad to remove any remaining residue. (Do not scrape the seal.)
4. For additional protection, after all residue has been removed, polish the entire surface by applying ceramic cooktop cleaner with a paper towel.
Removing metal marks and scratches
1. Be careful not to slide pots and pans across your cooktop. It will leave marks on the cooktop surface. You can remove these marks by applying ceramic cooktop cleaner with a cleaning pad for ceramic cooktops.
2. If pots with a thin overlay of aluminum or copper are allowed to boil dry, the overlay may leave black discoloration on the cooktop. You should remove this discoloration immediately or it may become permanent.
Cleaning the cooktop seal
To clean the seal around the edges of the glass, lay a wet cloth on it for a few minutes, then wipe clean with a nonabrasive cleaner.
Potential for permanent damage to the glass surface
• Sugary spillovers (such as jellies, fudge, candy, syrups) or melted plastics can cause pitting of the surface of your cooktop. This is not covered under the warranty. You should clean the spill while it is still hot. Take special care when removing hot substances. Refer to the section below.
• When using a scraper, be sure it is new and the razor blade is still sharp. Do not use a dull or nicked blade.
Cleaning sugary spills and melted plastic
1. Turn off all surface units. Remove hot pans.
2. Wearing an oven mitt, use a single-edge razor blade scraper to move the spill to a cool area of the cooktop. Remove the spill with paper towels.
3. Any remaining spillover should be left until the surface of the cooktop has cooled.
4. Don’t use the surface units again until all of the residue has been completely removed.
Removing and reinstalling the oven door
How to remove the door
CAUTION :
• The door is very heavy. Be careful when removing and lifting the door. Do not lift the door by the handle.
• Turn the power OFF before removing the door.
1. Open the door completely.
2. Pull the hinge locks down toward the door frame to the unlocked position
3. Firmly grasp both sides of the door at the top.
4. Close the door to the door removal position, which is approximately
5 degrees from vertical (Fig. 1).
5. Lift door up and out until the hinge arm is clear of the slot (Fig. 2).
How to re-install the door
1. Firmly grasp both sides of the door at the top.
2. With the door at the same angle as the removal position, slide the indentation of the hinge arm into the bottom edge of the hinge slot. The notch in the hinge arm must be fully inserted into the bottom of the slot.
3. Open the door fully. If the door will not open fully, the indentation is not inserted correctly in the bottom edge of the slot.
4. Push the hinge locks up against the front frame of the oven cavity to the locked position.
5. Close the oven door.
Removing and reinstalling the storage drawer
1. Slide open the drawer until it stops.
2. Locate the roller guide clips on either side. Using both hands, pull down the left clip while lifting the right clip, and then remove the drawer.
3. Clean the drawer in warm, soapy water using a cloth or soft brush. Then, rinse and dry it thoroughly.
4. Put the drawer in the roller guides on either side, and then snap the clips into place.
Changing the oven light
The oven light is a standard 40-watt appliance bulb. It will come on when the oven door is open. When the oven door is closed, press the pad to turn it on or off. It will not work during a self-cleaning cycle.
1. Make sure the oven and the bulb are cool.
2. Unplug the range or disconnect the power.
3. Turn the glass bulb cover in the back of the oven counterclockwise to remove.
4. Turn the bulb counterclockwise to remove it from its socket.
5. Insert a new 40 watt appliance bulb, and then turn it clockwise to tighten. Replace the bulb cover by turning clockwise.
6. Plug in the range or reconnect the power.
Troubleshooting
Installation
Problem
Possible cause
Solution
The range is not level
The appliance has been installed improperly.
• Place the oven rack in the center of the oven. Place a level on the oven rack. Adjust the leveling legs at the base of the range until the oven rack is level.
• Insure the floor is level and strong and stable enough to adequately support the range.
The floor is sagging or sloping.
Contact a carpenter to correct the situation
The kitchen cabinets are not properly aligned and make the range appear to be not level.
Insure the cabinets are square and provide sufficient room for installation.
The appliance must be accessed for servicing and cannot be moved easily.
The kitchen cabinets are not square and too close to the appliance.
Contact a builder or installer to make the appliance accessible
Carpet is interfering with movement of the range.
Provide sufficient space so the range can be lifted over the carpet.
CONTROL DISPLAY
Problem
Possible cause
Solution
The display goes blank.
A fuse in your home may be blown or the circuit breaker tripped.
Replace the fuse or reset the circuit breaker.
The display flashes
There was a power failure.
Reset the clock
COOKTOP
Problem
Possible cause
Solution
The surface units will not maintain a rolling boil or will not cook fast enough.
You may be using inappropriate cookware.
Use pans that are flat and match the diameter of the surface unit selected.
In some areas, the power (voltage) may be low.
Cover the pan with a lid until the desired heat is obtained
The surface units will not turn on.
A fuse in your home may be blown or a circuit breaker may have tripped.
Replace the fuse or reset the circuit breaker.
The cooktop controls are set improperly.
Check if the correct control is set for the surface unit you are using.
Areas of discoloration on the cooktop
Food spillover was not cleaned.
Refer to the section on the care and cleaning of the glass cooktop on page 41
The surface is hot and the model features a lightcolored cooktop
This is normal. The surface may appear discolored when it is hot. This is temporary and will disappear as the glass cools.
The surface unit frequently cycles on and off.
The element will cycle on and off to maintain the power setting.
This is normal operation, and not a system failure. Use the range as usual.
The surface unit stops glowing when changed to a lower setting.
This is normal. The unit is still on and hot.
Scratches or abrasions on the cooktop surface.
The cooktop is being cleaned improperly.
Scratches are not removable. Tiny scratches will become less visible in time as a result of cleaning. Use ceramic glass top cleaning cream. Do not use chemical or corrosive agents. These agents may damage the surface of the product.
Cookware with rough bottoms was used on the cooktop or there were coarse particles (e.g., salt or sand) present between the cookware and the surface of the cooktop
To avoid scratches, follow the recommended cleaning procedures. Make sure cookware bottoms are clean before use, and use cookware with smooth bottoms.
Cookware has been slid across the cooktop surface.
Brown streaks or specks.
Boilovers have been cooked onto the surface.
• Wait until the surface cools down. Then, use a single-edge razor-blade scraper at approximately a 45° angle against the glass surface to remove the soil.
• See the section on the care and cleaning of the glass cooktop on page 41
Areas of discoloration with metallic sheen.
Mineral deposits from water and food have been left on the surface of the cooktop
• Remove using a ceramic-glass cooktop cleaning cream.
• Use cookware with clean, dry bottoms. Clean the cooktop with a ceramic cleaning agent regularly every week.
"Cracking" or "popping" sound.
This is the sound of the metal heating and cooling during both the cooking and self-cleaning functions.
This is normal operation, and not a system failure. Use the range as usual.
OVEN
Problem
Possible cause
Solution
The oven will not turn on.
The range is not completely plugged into the electrical outlet.
Make sure the electrical plug is inserted into a live, properly grounded outlet.
A fuse in your home may be blown or a circuit breaker may have tripped
Replace the fuse or reset the circuit breaker.
The oven controls have been set improperly
See the chapter on operating the oven starting on page 27
The oven is too hot.
Allow the oven to cool.
Incomplete service wiring.
Call for service
Power outage.
Check to see if the house lights will turn on. If necessary, call your local electric company for service.
The oven light will not turn on.
The light bulb is loose or defective.
Tighten or replace the bulb.
The switch operating the light is broken.
Call for service
The appliance will not turn on.
Incomplete service wiring.The appliance is not completely plugged into the electrical outlet or a fuse in your home may be blown or a circuit breaker may have tripped.
Make sure the power cord is plugged into a live, properly grounded outlet. Check the fuse and circuit breakers.
Incomplete service wiring.
Call for service.
Power outage.
Check to see if the house lights will turn on. If necessary, call your local electric company for service.
The oven smokes excessively during broiling
The oven controls have not been set properly.
Refer to the section on using the broiler starting on page 32
The meat has been placed too close to the element.
Reposition the rack to provide proper clearance between the meat and the element. Preheat the broil element for searing.
The meat has not been properly prepared.
Remove the excess fat from the meat. Cut away fatty edges that may curl, leaving the lean intact.
Grease has built up on oven surfaces.
Regular cleaning is necessary when broiling frequently
Food does not bake or roast properly.
The oven controls have not been set correctly.
See the chapter on operating the oven starting on page 27.
The oven rack has been positioned incorrectly or is not level
See the section on using the oven racks on page 30
Incorrect cookware or cookware of improper size is being used.
The oven sensor needs to be adjusted.
See the section on adjusting the thermostat on page 36
Food does not broil properly.
The serving size may not be appropriate.
Refer to the cooking guide for serving sizes on page 32, and then try again.
The rack has not been properly positioned.
See the broiling recommendation guide on page 32.
The cookware is not suited for broiling
Use suitable cookware.
In some areas, the power (voltage) may be low.
• Preheat the broil element for 10 minutes.
• See the broiling recommendation guide on page 32
The oven temperature is too hot or too cold.
The oven sensor needs to be adjusted.
See the section on adjusting the thermostat on page 36.
Steam is coming out of the vent.
As the number of racks or amount of food being cooked increases, the amount of visible steam will increase.
This is normal operation and not a system failure. Use the range as usual.
Strong odor.
An odor coming from the insulation around the inside of the oven is normal for the first few times the oven is used.
Operate the oven empty on the bake setting at 400 °F for 1 hour
Oven racks are difficult to slide.
The shiny, silver-colored racks were cleaned in a selfcleaning cycle.
Apply a small amount of vegetable oil to a paper towel, and then wipe the edges of the oven racks with the paper towel.
DRAWER
Problem
Possible cause
Solution
The drawer does not slide smoothly or drags.
The drawer is out of alignment.
Fully extend the drawer and push it all the way in. See the page 45.
The drawer is overloaded or the load is unbalanced
Reduce weight. Redistribute drawer contents.
Excessive condensation in the drawer
There is liquid present in the drawer.
Remove the liquid.
Uncovered foods.
Cover food with a lid
Information codes
Displayed Code
Possible cause
Solution
C-d0
There is a short in the control key.
Press OFF/CLEAR, and then restart the oven. If the problem persists, disconnect all power to the range for at least 30 seconds and then reconnect the power. If this does not solve the problem, call for service.
C-20
The oven sensor is open when the oven is operating.
press OFF/CLEAR, and then restart the oven. If the problem persists, disconnect all power to the range for at least 30 seconds and then reconnect the power. If this does not solve the problem, call for service.Press OFF/CLEAR, and then restart the oven. If the problem persists, disconnect all power to the range for at least 30 seconds and then reconnect the power. If this does not solve the problem, call for service.
There is a short in the Oven sensor.
C-21
This code occurs if the internal temperature rises abnormally high.
C-30
The main PCB sensor is open when the oven is operating.
There is a short in the main PCB sensor
C-31
This code occurs if the PCB temperature rises abnormally high.
Call for service.
bAd LinE
This error message appears if the power cord is installed improperly.
If the power connection is plugged in improperly, “bAd LinE” appears on the display. Reconnect the power connection properly, and the message disappears.
I have the specifications for the burners listed as: Left Front - 6"/9", 3300W, Rapid Boil™; Left Rear - 6", 1200W; Right Front - 6"/9", 3300W, Rapid Boil™; Right Rear - 6", 1200W.


 : Use to raise or lower the temperature and increase or decrease times.
 for 3 seconds. The display will show the Lock
  .
.
 pad.
pad.


 , e.g., 3, 7, 5.


 icon located on your range displays and the app will confirm you are connected.


 Options for 3 seconds,
 before activating the Sabbath feature. Once the oven light is turned on and the Sabbath feature is active, the oven light will remain on until the Sabbath feature is turned off. If the oven light needs to be off, be sure to turn the oven light off before activating the Sabbath feature.


 pad to turn it on or off. It will not work during a self-cleaning cycle.