Read This Manual
Inside you’ll find many helpful hints on how to use and maintain your air conditioner properly. Just a little preventive care on your part can save you a great deal of time and money over the life of your air conditioner. You’ll find many answers to common problems in the troubleshooting tips - you should be able to fix most of them quickly before calling service. These instructions may not cover every possible condition of use, so common sense and attention to safety is required when installing, operating and maintaining this product.
Safety Precautions
To prevent injury to the user or other people and property damage, the instructions shown here must be followed. Incorrect operation due to ignoring of instructions may cause harm or damage. The level of risk is shown by the following indications.
-787147.png) This symbol indicates a hazardous situation which, if not avoided, could result in death or serious injury
This symbol indicates a hazardous situation which, if not avoided, could result in death or serious injury
-766024.png) This symbol indicates a hazardous situation, which, if not avoided, could result in minor or moderate injury.
This symbol indicates a hazardous situation, which, if not avoided, could result in minor or moderate injury.
-343102.png) This symbol addresses practices not related to physical injury
This symbol addresses practices not related to physical injury
Operation of Current Device
-442371.png)
The power supply cord contains a current device that senses damage to the power cord. Test your power supply cord as follows:
1. Plug in the air conditioner.
2. The power supply cord will have TWO buttons on the plug head. Press the TEST button. You will notice a click as the RESET button pops out.
3. Press the RESET Button. You will notice a click as the button engages.
4. The power supply cord is now supplying electricity to the unit. (On some products this is also indicated by a light on the plug head.)
-118132.png)
NOTICE
The power supply cord with this air conditioner contains a current detection device designed to reduce the risk of fire.
In the event that the power supply cord is damaged, it can not be repaired. It must be replaced with a cord from the manufacturer.
NOTICE
• Do not use this device to turn the unit on or off.
• Always make sure the RESET button is pushed in for correct operation.
• The power supply must be replaced if it fails to reset when either the TEST button is pushed, or it can not be reset. Please contact Customer Service.
EXPLANATION OF SYMBOLS DISPLAYED ON THE UNIT
-96389.png)
-200593.png) WARNING
WARNING
• Do not try to accelerate the defrosting process or methods of cleaning that are not recommended by the manufacturer.
• The appliance shall be stored in a room without a continuously operating ignition source (for example, open flames or an operating gas appliance) or an ignition source (for example, an operating electric heater) close to the appliance. The appliance shall also be stored in a room without ignition sources.
• Do not pierce or burn.
• Be aware that the refrigerants may not contain an odor.
• Compliance with national gas regulations shall be observed.
• Keep ventilation openings clear of obstruction.
• The appliance shall be stored in a well-ventilated area where the room size corresponds to the room area as specied for operation.
• Unit is only to be serviced by a Midea authorized servicer, please call Customer Service at 1-866-646-4332 for support.
• Flammable refrigerant R32 is used within air conditioner. Please follow the instructions carefully to handle, install, clean, and service the air conditioner to avoid damage or hazard. Do not dispose of air conditioner in regular trash. Contact qualified agency for proper disposal.
• No open fire or devices that generate spark/arcing shall be around the air conditioner to avoid causing ignition of the flammable refrigerant used. Please follow the instructions carefully to store or maintain the air conditioner to prevent mechanical damage from occurring.
• Be aware that refrigerants may not contain an odor.
Operating Instructions
Normal Sounds
-333392.png)
Sound Performance
The following table shows the sound performance data for these window air conditioners. Please use your specific model number to reference the correct sound power number in the table.
-430471.png)
per ISO 3744 at low fan speed
Air Conditioner Operation
-994337.png) WARNING
WARNING
To reduce the risk of fire, electrical shock, or injury to people or property, read the SAFETY PRECAUTIONS before operating this appliance.
NOTICE
The cool circuit has an automatic 3 minutes time delayed start if the unit is turned off and on quickly. This prevents overheating of the compressor and possible circuit breaker tripping.
To begin operating the air conditioner, follow these steps:
1. Plug in the air conditioner (be sure to follow the power cord instructions on Page 6).
2. Turn the power on to the air conditioner, using the ON/OFF button.
3. Set the thermostat to the coldest temperature setting.
4. Select the Cool mode setting.
5. Adjust the louver for comfortable air flow (see Air Directional Louvers).
6. Once the room has cooled, adjust the thermostat to the setting you find most comfortable.
7. Make sure the air flow inside and outside is not obstructed by anything.
-793528.png)
NOTICE
• The relative humidity of room should be less than 80%. If the unit is used in a condition with a relative humidity over 80%, there will be condensed water on the surface of the unit.
• Performance may be reduced outside of these operating temperatures.
Air Directional Louvers
The louvers will allow you to direct the air flow up or down (on some models) and left or right throughout the room as needed. Pivot horizontal louvers until the desired up/down direction is obtained. Move the louvers from side to side until the desired left/right direction is obtained.
-959779.png)
Before you begin, thoroughly familiarize yourself with the control panel as shown below and all its functions, then follow the symbol for the functions you desire. The unit can be controlled by the unit control panel, with the remote control, smart phone app, or voice control
ELECTRONIC CONTROL OPERATING INSTRUCTIONS
-444182.png)
1. (ON/OFF) Button
Press ON/OFF button to turn unit on or off.
2. (CONNECT) Button
For the first time using the WiFi function, press the button for 3 seconds to initiate the WiFi connection mode. The LED DISPLAY shows ‘AP’ to indicate you can set up the WiFi connection. Please also refer to the included WiFi manual for further instructions.
If connection (router) is successful within 8 minutes, the unit will exit WiFi connection mode automatically and the CONNECT indicator illuminates.
If connection failed within 8 minutes, the unit exits WiFi connection mode automatically.
After WiFi connection is successful, you can press and hold CONNECT and DOWN ( ) buttons at the same time for 3 seconds to turn off WiFi function and the LED DISPLAY shows ‘OF’ for 3 seconds, press CONNECT and UP ( ) buttons at the same time to turn on WiFi function and the LED DISPLAY shows ‘On’ for 3 seconds.
3. (TIMER) Button
• Press Timer button, the TIMER ON or TIMER OFF indicator light illuminates. lt indicates the Auto Start or Auto Stop program is initiated. For some units, continuing to press the Timer button will cancel the timer settings.
• Press or hold the UP ( ) or DOWN ( ) button to change the Auto time by 0.5 hour increments, up to 10 hours, then at 1 hour increments up to 24 hours. The display will count down the time remaining until start.
• The selected time will register in 5 seconds, and the system will automatically revert back to display the previous temperature setting or room temperature when the unit is on. When the unit is off, there is no display.
• Turning the unit ON or OFF at any time or adjusting the timer setting to 0.0 will cancel the Auto Start/Stop timed program.
4. (EC0) Button
Press ECO button to initiate this function. This function is available on COOL, DRY, and AUTO (only AUTO-COOLING and AUTO-FAN) modes.
The fan will continue to run for 3 minutes after the compressor shuts off. The fan then cycles on for 2 minutes at 10 minute intervals until the room temperature is above the set temperature, at which time the compressor turns back on and Cooling Starts.
5. (MODE) Button
• To choose operating mode, press MODE button. Each time you press the button, a mode is selected in a sequence that goes from Auto, Cool, Dry and Fan. The indicator light beside the button will be illuminated and remain on once that mode is selected.
• The unit will automatically initiate the Energy Saver function under Cool, Dry, and Auto (only Auto-Cooling and Auto-Fan) modes.
To operate on AUTO feature
• When you set the air conditioner to AUTO mode, it will automatically select cooling or fan only operation, depending on what temperature you have selected and the current room temperature.
• The air conditioner will control room temperature automatically according based on the temperature you’ve set.
• In this mode, the fan speed cannot be adjusted, it starts automatically at a speed according to the room temperature.
To operate on COOL mode:
• Choose Cool Mode to set the cooling function. Use the UP ( ) or DOWN ( ) buttons to choose the desired temperature. When Cool Mode is selected, the fan speed can be adjusted by pressing the FAN button.
To operate on DRY mode:
• In this mode, the air conditioner will generally operate as a dehumidifier. Since the conditioned space is a closed or sealed area, some degree of cooling will continue. On Dry mode, the fan speed is not adjustable.
To operate on FAN mode:
• Use this function only when cooling is not desired, such as for room air circulation or to exhaust stale air (on some models). (Remember to open the vent during this function, but keep it closed during cooling for maximum cooling efficiency.) You can choose any fan speed you prefer.
• In Fan Only mode, the temperature can not be adjusted
6. (UP/DOWN) Button
Press UP ( ) or DOWN ( ) button to change temperature setting.
7. (FAN SPEED) Button
Press FAN button to select the Fan Speed in four steps - Auto, Low, Med or High. Each time the button is pressed, the fan speed mode is shifted.
8. (SLEEP) Button
Press SLEEP button to initiate the sleep mode. In this mode the selected temperature will increase (in cooling mode) by 2°F/1 (or 2)°C 30 minutes after the mode is selected. The temperature will then increase (in cooling mode) by another 2°F/1(or 2)°C after an additional 30 minutes.
This new temperature will be maintained for 7 hours before it returns to the originally selected temperature. This ends the Sleep mode and the unit will continue to operate as originally programmed. The Sleep mode program can be cancelled at any time during operation by pressing the SLEEP button again.
-671606.png)
9. (SWING) Button
Used to initiate the Auto swing feature. When the operation is ON, pressing the SWING button can stop the louver at the desired angle. Press SWING button for 3 seconds to initiate the lter feature. This feature is a reminder to clean the Air Filter for more ecient operation. The LED (the light above the button) will illuminate after 250 hours of operation.
LED Display:
Shows the set temperature in “°C” or “°F” and the Auto-timer settings. While on Fan Only mode, it shows the room temperature. If the room temperature is too high or low, it will display “ HI” or “ LO”. To convert from one to the other, press and hold the UP ( ) and DOWN ( ) buttons at the same time for 3 seconds.
-483072.png)
Installation Instructions
NOTICE
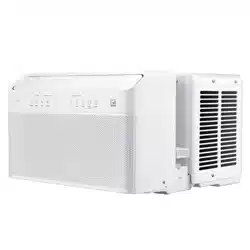
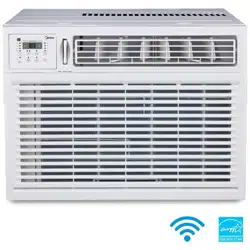
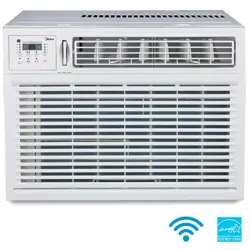
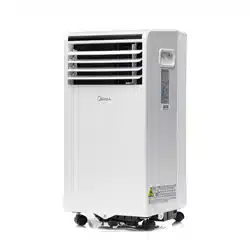
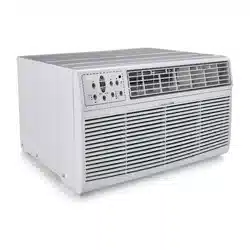
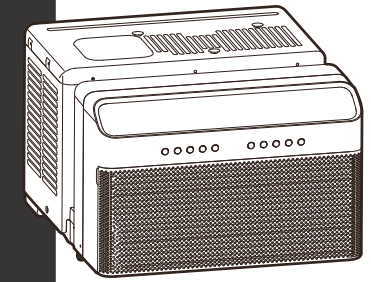
- The unit you purchased may look like the following:
NOTICE
All the illustrations in this manual are for explanation purpose only. The actual installation may vary
WARNING - Before You Begin
Read these instructions completely and carefully.
• IMPORTANT - Save these instructions.
• IMPORTANT - Observe all governing codes and ordinances.
We recommend that two people install this product.
Proper installation is the responsibility of the installer.
Product failure due to improper installation is not covered under the Limited Warranty.
You MUST use all supplied parts and use proper installation procedures as described in these instructions when installing this air conditioner.
Do not, under any circumstances, cut or remove the third (ground) prong from the power cord.
Do not change the plug on the power cord of the air conditioner.
Aluminum house wiring may present special problems - consult a qualified electrician.
When handling unit, be careful to avoid cuts from sharp metal edges and aluminum fins on front and rear coils.
Please wear cut-resistant gloves.
WINDOW REQUIREMENTS
Your air conditioner is designed to install in standard double hung windows with opening widths of 22 to 36 inches (558mm to 914mm) and a window height of 13.75” (349mm).
-89042.png)
Tools You Will Need
-304640.png)
-993297.png)
1. INSTALL THE SUPPORT BRACKET
Lower sash must open sufficiently to allow a clear vertical opening of 13.5 inches. Side louvers and the rear of the AC must have clear air space to allow enough airflow through the condenser for heat removal. The rear of the unit must be outdoors, not inside a building or garage
WARNING
Bracket should only be used for its intended purpose. If not, the warranty will be voided.
NOTICE
Save carton and these Installation Instructions for future reference. The carton is the best way to store unit during winter, or when not in use.
Remove the air conditioner and hardware from the carton and place on a flat surface.
Required Installation Hardware
-366436.png)
NOTICE
If any piece of hardware is missing, DO NOT INSTALL THE PRODUCT, and call customer service at 1-866-646-4332.
Optional Installation Hardware
-973200.png)
-424644.png)
-130146.png)
On a flat surface such as a table, press the spring push pin and adjust the Left Extension Arm to the Left side of the Horizontal Bracket. Then install the Right Extension Arm into the Right side of the Horizontal Bracket. These will be adjusted in a later step.
For windows where the front of the bracket to sit on the window sill, adjust the extension arms to your window sill width. For windows where the front of the bracket will rest against the vinyl lip, these arms will be adjusted in a later step.
NOTICE
The Angled Support Arms should come installed into the Main Supports from the factory. The small tabs on the sides of the Angle Support Arms must sit on the inside bottom of the Main Support.
-626816.png)
A. Before placing the bracket in the window, allow the Angled Support Arms to rotate down and make sure they don’t fall out of the Main support arms. Place the support bracket assembly in your window opening on the bottom windowsill. The Horizontal Bracket and Extension Arms must be located on the indoor side of your window frame.
For installations where the bracket sits on the window sill, secure the bracket to the window (reference Step E)
-73182.png)
-590601.png)
-866459.png)
-410198.png)
B. Move the Angled Support Arms toward the exterior wall until the Angled Support Feet touch the wall. Place a level on a flat area of the bracket and adjust the Angled Support Arms so the bracket is tilted downwards toward the outdoors to allow condensate to drain out. The proper angle is when the level reads 1/4 bubble (reference image for 1/4 bubble).
-819803.png)
C. Insert the Main Support Pin through the Main Support holes and Angled Support Arm holes to secure the Angled Support Arm. Repeat for the other Angled Support Arm using the numbers stamped on the Main Support to help place both Angled Support Arms in equal locations.
-502949.png)
D. After securing both Angled Support Arms, check the level and ensure the bracket feels secure. Minor adjustments may be needed. Once secured, insert the Cotter Pins into the Main Support Pins.
-760313.png)
E. Center the Support Bracket with the center of the window. Note, due to the design of the Air Conditioner, the Support Bracket is biased to the left. Once centered, extend the Left and Right Extension Arms until they touch the side of the windowsill and are in front of the side window frame. Secure the bracket to the window with a screw at the end of each extension arm as shown. Holes at the end or bottom of the Extension Arms can be used to secure the Support Bracket to the window.
Care and Cleaning
Air Filter Cleaning
The air filter should be checked at least once every two weeks to see if cleaning is necessary. Trapped particles in the filter can build up and cause an accumulation of frost on the cooling coils and reduce performance. \
• Grasp the filter by the center and pull up and out
• Wash the filter using warm water. Rinse filter thoroughly.
• Gently shake excess water from the filter. Be sure the filter is thoroughly dry before replacing.
• Instead of washing, you may also vacuum the filter clean rather than washing.
[image]
NOTICE
Never use hot water over 104°F (40°C) to clean the air filter. Never attempt to operate the unit without the air filter.
Cabinet Cleaning
• Be sure to unplug the air conditioner to prevent shock or fire hazard. The cabinet and front may be dusted with an oil-free cloth or washed with a cloth dampened in a solution of warm water and mild liquid dishwashing detergent. Rinse thoroughly and wipe dry.
• Never use harsh cleansers, wax, or polish on the air conditioner.
• Be sure to wring excess water from the cloth before wiping around the controls. Excess water in or around the controls will cause damage to the air conditioner.
• Plug in air conditioner.
Winter Storage
If you plan to store the air conditioner during the winter, remove it carefully from the window according to the installation instructions. Be careful not to spill any potentially standing water from the unit’s base pan. If water is present, carefully drain it. Cover the unit with plastic or return it to the original carton.
Troubleshooting Tips
Before calling for service, review this list. It may save you time and expense. This list includes common occurrences that are not the result of defective workmanship or materials in this appliance.
Air conditioner does not start.
- Wall plug disconnected. Push plug firmly into wall outlet.
- Circuit breaker tripped. Reset circuit breaker.
- Check if the light on the plug is on. If it is off, press the RESET button.
- Power is OFF. Turn power ON.
- Unit turned off and then on quickly. Turn unit off and wait 3 minutes before restarting.
Air from unit does not feel cold enough.
- Room temperature below 62°F (17°C). Cooling may not occur until room temperature rises above 62°F (17°C).
- Temperature sensor behind the air filter is touching the cold coil.
- Try to move it so it does not contact the cold coil.
- Reset to a lower temperature.
- Compressor shut-off by changing modes. Wait approximately 3 minutes and listen for compressor to restart when set in the COOL mode.
- Check for potential obstructions blocking the outdoor intake/ exhaust. Clear any obstructions.
Air conditioner cooling, but room is too warm- ice forming on cooling coil behind air filter
- Outdoor temperature below 64°F (18°C). To defrost the coil, set to FAN ONLY mode.
- Air filter may be dirty. Clean filter. Refer to Care and Cleaning section. To defrost, set to FAN ONLY mode.
- Thermostat set too cold for night-time cooling. To defrost the coil, set to FAN ONLY mode. Then, set temperature to a higher setting.
Air conditioner cooling, but room is too warm- NO ice forming on cooling coil behind air filter
- Dirty or restricted air filter. Clean filter. Refer to Care and Cleaning section. To defrost, set to FAN ONLY mode.
- Temperature is set too high, set temperature to a lower setting.
- Air directional louvers positioned improperly. Position louvers for better air distribution.
- Front of unit is blocked by drapes, blinds, furniture, etc. - restricts air distribution. Clear obstruction in front of unit.
- Any open doors, windows, or registers may allow cold air to escape.
- Close any doors, windows, or registers.
- The room may be too warm. Allow additional time to remove “stored heat” from walls, ceiling, floor and furniture.
Air conditioner turns on and off rapidly
- Dirty air filter- air restricted. Clean air filter.
- Outside temperature extremely hot. Set FAN speed to a higher setting to bring air past cooling coils more frequently.
- Check for potential obstructions blocking the outdoor intake/ exhaust. Clear any obstructions.
Noise when unit is cooling.
- Air movement sound. This is normal. If too loud, set to a slower FAN setting.
- Window vibration - poor installation. Refer to installation instructions or check with installer
Water dripping INSIDE when unit is cooling.
- Improper installation. Tilt air conditioner slightly to the outside to allow water drainage.
- Refer to installation instructions - check with installer.
Water dripping OUTSIDE when unit is cooling.
- Unit removing large quantity of moisture from humid room. This is normal during excessively humid days.
Remote sensing deactivating prematurely (some models).
- Remote control not located within range. Place remote control within 20 feet & 180°, radius of the front of the unit, and pointed in the general direction of the air conditioner unit.
- Remote control signal obstructed. Remove obstruction
Room too cold.
- Temperature setting too low. Increase temperature setting.
Noise when unit starts.
- A “da-da” sound may occur for thirty seconds when the unit is turned on due to the compressor starting. It is normal.
Window does not insert into the U-shaped slot.
- Ensure that the “U-shaped” slot is in line with the window, if not, align the slot with the window.
- Ensure that the unit is not slanted too much to cause interference with the top of the unit. Reference steps on pages 15-23 for those instructions.