Loading ...
Loading ...
Loading ...
10
5. Using a TORX
®
T20
®
bit and driver, install the 2 - 8 x 80 mm
hanger bolts. Leave a 1
1
/
4
" (31.8 mm) gap between the wall
and the end of the hanger bolt for sliding the range hood into
place.
1¹⁄₄
"
(3.18 cm)
Vent Cover Bracket Installation
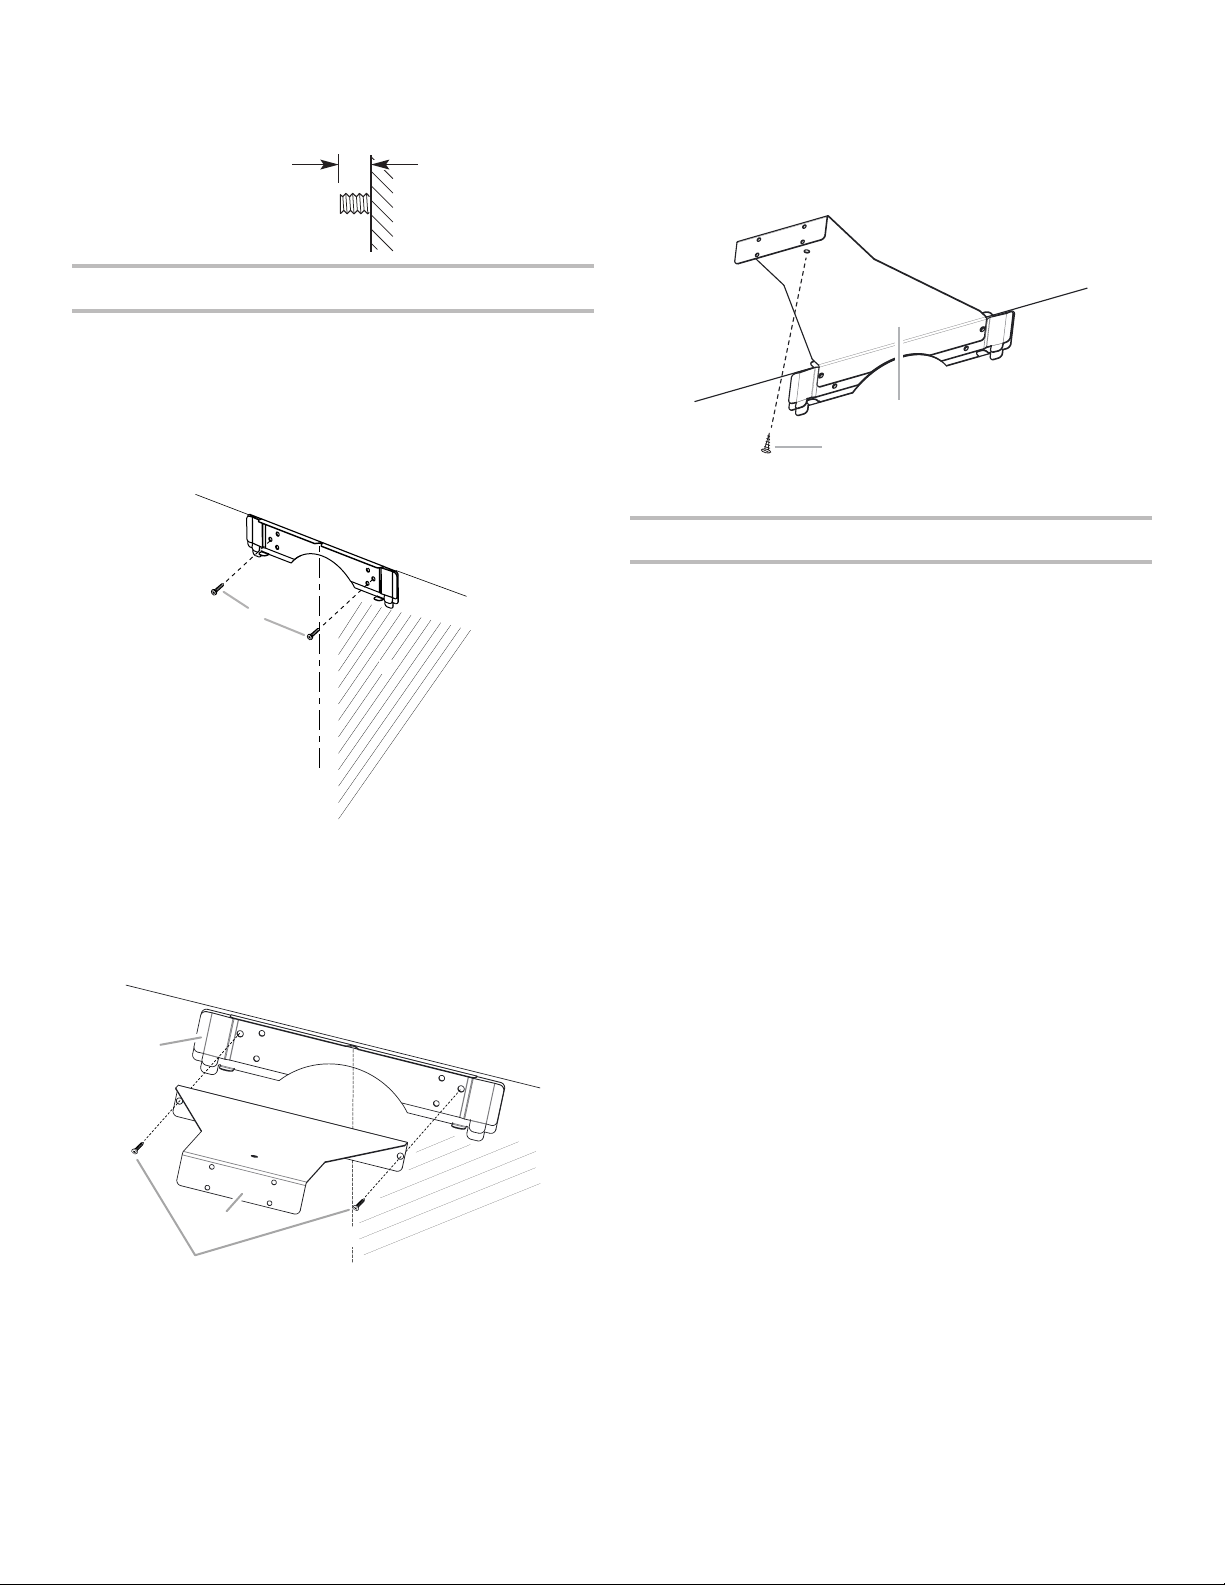
1. Use chimney cover mounting bracket centered on the
centerline of the wall and flush to the ceiling to mark the
center points of the outermost holes for mounting screws.
Mark and drill 2 -
3
/
16
" (4.8 mm) holes.
2. Install the 5 mm wall anchors.
For Vented Installations Only:
1. Attach the chimney cover bracket to the wall using
2 - 5 x 40 mm screws (D).
A
C
B
D
A. Ceiling
B. Wall
C. Centerline
D. 5 x 40 mm screws (2)
For Non-Vented (recirculating) Installations Only:
1. Attach the chimney cover bracket and air deflector bracket
to the wall using the (2) 5 x 40 mm screws (D).
A. Ceiling
B. Wall
C. Centerline for range hood
A
F
B
D
E
C
2. Install the 5 x 40 mm screw through the top of the air
deflector bracket into the ceiling.
NOTE: To use the optional 5 mm wall anchor supplied with
the recirculation kit in the ceiling, locate and mark the hole
through the top of the air deflector bracket. Remove the
bracket and drill a
3
/
16
" (4.8 mm) hole and install the 5 mm
wall anchor.
A. Ceiling
B. Wall
Complete Preparation
1. Determine and make all necessary cuts in the wall for the
vent system. Install the vent system before installing the
hood. See the “Venting Requirements” section.
For Vented Installations Only:
■ Using a jigsaw or keyhole saw, cut a 6
1
/
2
" (16.5 cm) diameter
hole in the wall or ceiling for the vent duct.
■ Install the vent duct system through the hole.
Seal all connections with vent clamps.
For Use with Grounded Power Supply Cord:
■ This range hood is equipped with a power supply cord
having a 3 prong grounding plug.
■ A 3 prong receptacle is required to be located at a maximum
distance of 40" (101.6 cm) above the range hood terminal
box. If a mating outlet is not available, it is the responsibility
of the customer to have a properly grounded outlet installed
by a qualified electrician.
For Use with a Hard Wire Home Power Supply Cable:
■ Determine the required height for the home power supply
cable and drill a 1
1
/
4
" (3.2 cm) hole at this location.
■ Run the home power supply cable according to the National
Electrical Code or CSA Standards and local codes and
ordinances. There must be enough
1
/
2
" conduit and wires
from the fused disconnect (or circuit breaker) box to make
the connection in the hood’s electrical terminal box.
NOTE: Do not reconnect power until installation is complete.
2. Use caulk to seal all openings.
A
B
C
D
D. 5 x 40 mm screws (2)
E. Air deflector bracket
F. Chimney cover bracket
C. Air deflector bracket
D. 5 x 40 mm screw
Loading ...
Loading ...
Loading ...