Loading ...
Loading ...
Loading ...

7
MAINTENANCE
-Anaccuratemaintenanceguaranteesgood
functioningandlong-lastingperformance.
-Particularcareisduetothegreaselterpa-
nel.Itcanberemovedbypushingitsspecial
handle toward the back-side of the cooker
hoodandturningthelterdownwardssoto
unfastenitfromitsslot(Fig.3).
Toinsertthelterjustperformtheopposite
operation.
After 30 hours working, the push button
controlpanelwillsignalthesaturationofthe
greaselterbylightingallthebuttons.Press
thetimerbuttontoreset.
The grease lter needs cleaning by regular
hand-washing or in dishwashers every two
monthsatleastordependingonitsuse.
-Incasetheapplianceisusedinitsltering
version,theactivecoallter(Fig.7)needsto
be periodically replaced. The coal lter can
be removed by removing the grease lter
rst(Fig.3),andbypullingitsspecialplastic
tongue until it is unfastened from its slot.
Re-insert the coal lter by operating in the
oppositeway.
Thecoallterneedsreplacingdependingon
theuse,buthowevereverysixmonthsatle-
ast.
-Howtoremovetheoilcollector.Afterha-
vingremovedthegreaseltersandeventually
theactivecoallters,pleaseholdtheoiltank
upbyonehandandioosenthethreehandles
bytheotherhandasshoweding.8.Thenlet
thetankslidedownwardsmakingattentionin
ordertoavoidtheleakofoil.
Mod. S906-S907 (g. 10)
A:Lightswitchon/o
B:Motorswitchonspeed1/o
C:Motorswitchonspeed2
D:Motorswitchonspeed3
E:Motorswitchonspeed4
F:10-minutestimer
WORKING
INSTALLATION
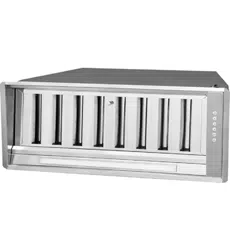
SL907
Before installing the appliance, make sure
thatnoneofthepartsisdamagedinanyway.
Incaseofdamagedparts,contactyourretai-
leranddonotproceedwithinstallation.
Read all of the following instructions with
carebeforeinstallingtheappliance.
-Useanairoutletpipeoftheshortestpos-
siblelength.
-Limitthenumberofpipebends.
-Useamaterialapprovedbystandardsand
regulations.
-Avoidanysuddenchangesinpipesection
(recommendedconstantdiameter:Ø150mm
/Ø200mmorequalsurfacearea).
Beforecarryingoutinstallation,pleaseremo-
vethegreaselterinordertoavoidpossible
damagestothe appliance. Please follow the
following steps to remove the metal grease
lter:openthelightedpanelrst,byturning
itdownwards(g.12),thenremovethegre-
aselterbyoperatingonitshandleandma-
kingthelterrotatedownwards,disengaging
itfromitsseat.
Makea hole on thesurfaceof the following
dimensions(dis.16):
270mmx498mmforSL907 52cmmodel
270mmx675mmforSL907 70cmmodel
InserttheSL907unit,makingsurethepush‐
buttonpanelisplacedontheright,looking
attheproductfromthefrontofthecook‐top.
Make the electric connection and connect
theair‐outletangetoasuitableexhausting
pipe.
Fixtheunitbyusingthefourscrewsprovided
andtightenthemasshowning.13.
Insert the grease lter again and close the
perimeterpanel.
Loading ...
Loading ...
Loading ...
