Loading ...
Loading ...
Loading ...
Customer ServiceTroubleshooting Tips
Operating InstructionsSafety Instructions
Installation Instructions
Preparing to install the refrigerator.
Read these instructions completely and carefully.
Water Supply to the Icemaker
(on some models)
If the refrigerator has an icemaker, it will have to be
connected to a cold water line.
A water supply kit (containing copper tubing, shut-
off valve, fittings and instructions) is available
at extra cost from your dealer or from Parts and
Accessories, 800-626-2002.
Refrigerator Location
Do not install the refrigerator where the tempera-
ture will go below 60°F (16°C)
because it will not run often enough to maintain
proper temperatures.
Install it on a floor strong enough to support it
fully loaded.
Clearances
Allow the following clearances for ease of installa-
tion, proper air circulation and
plumbing and electrical connections:
Sides 5/8″(15 mm)
Top 1″(25 mm)
If built-in, allow 7/8
″
(22 mm) for hinge covers.
Back 1″(25 mm)
If the refrigerator is against a wall
on either side, allow the following
door clearances for a 90° door open-
ing:
22′– 25′models 3/4″(19 mm)
27′models 1
1
/
2
″(38 mm)
Rollers
The rollers have 3 purposes:
Rollers adjust so the door closes easily when
opened about halfway. [Raise the front about
5/8″(15 mm) from the floor.]
To assure that the doors will close automatically
from a halfway open position, there is a built-in tilt
from the front to the back of the cabinet. Side-by-
side refrigerators also have specially designed door
hinges that lift both doors slightly when opened,
allowing the force of gravity to help close them
securely.
Rollers adjust so the refrigerator is firmly posi-
tioned on the floor and does not wobble.
Rollers allow you to move the refrigerator away
from the wall for cleaning.
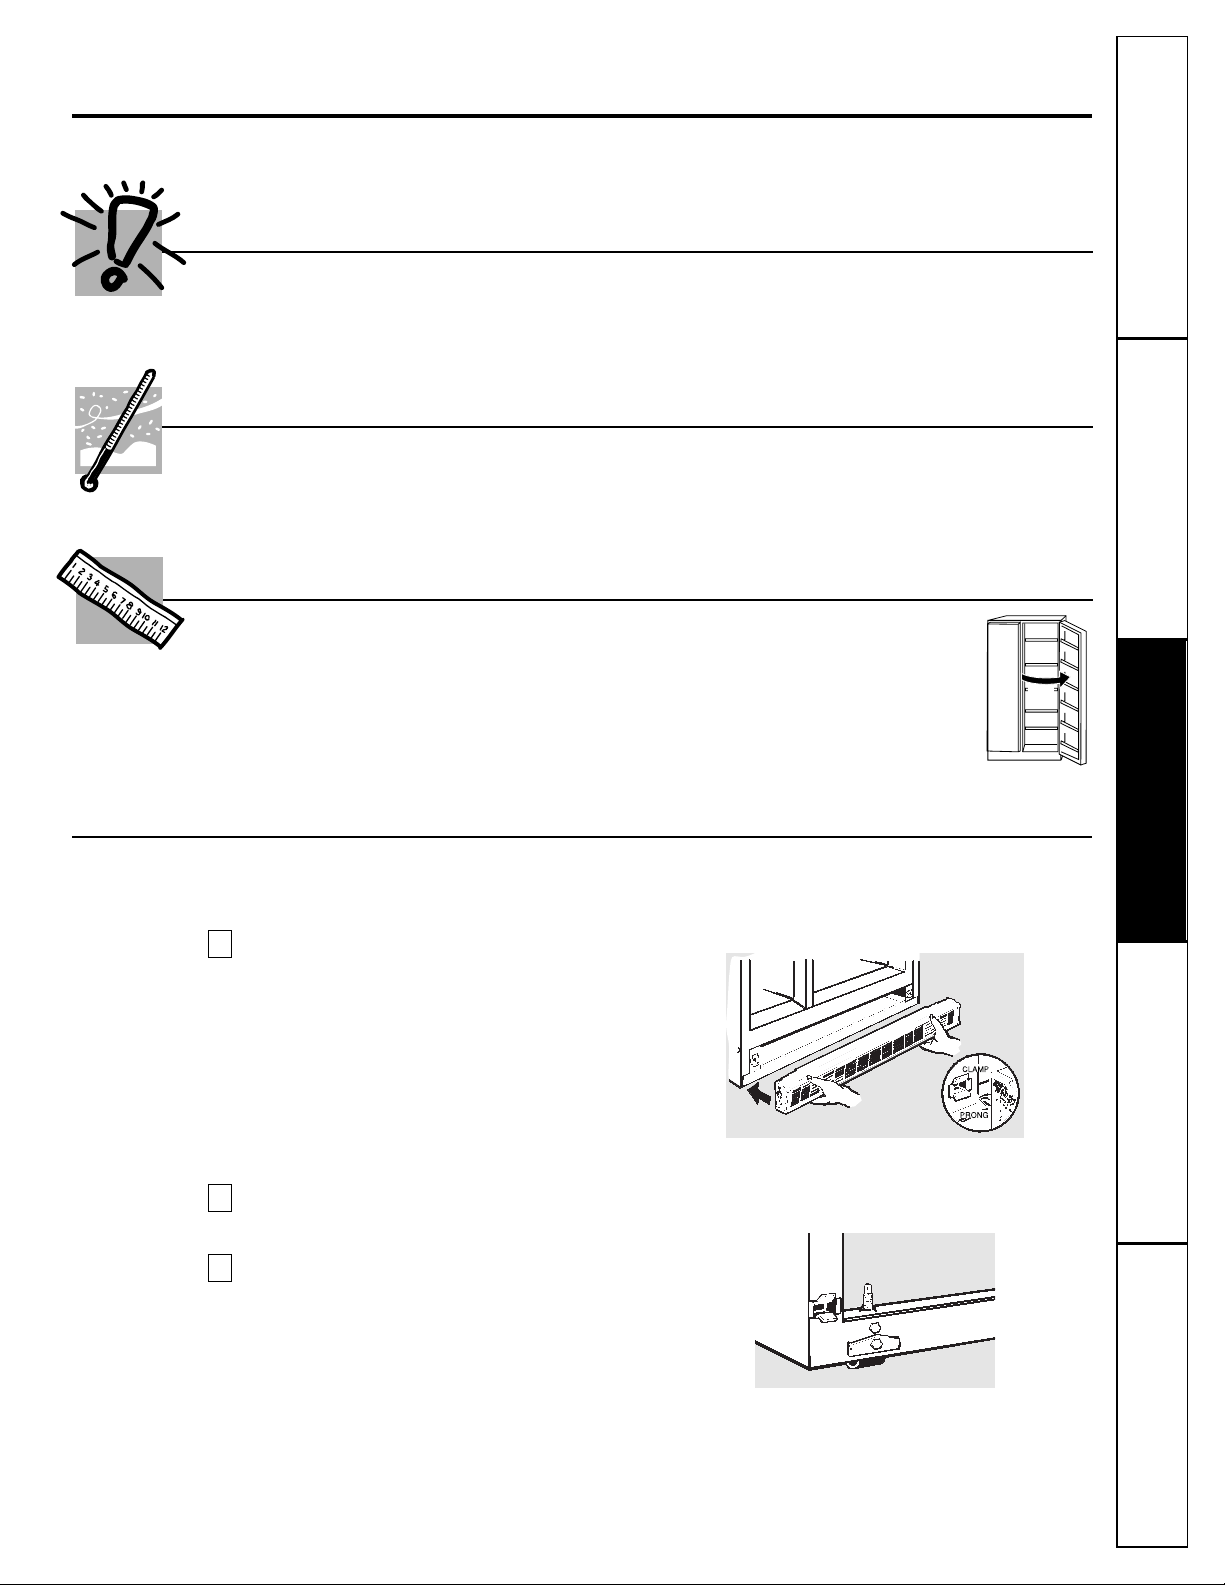
To adjust the rollers,
remove the base grille by pulling
it out at the bottom.
Turn the roller adjusting screws
clockwise to raise
the refrigerator,
counterclockwise to lower
it. Use
an adjustable wrench (3/8″hex head bolt) or pliers.
To replace base grille,
align prongs on back of grille
with clamps in cabinet and push forward until grille
snaps into place.
3
2
1
17
90°
Loading ...
Loading ...
Loading ...