Loading ...
Loading ...
Loading ...
8
Slide the battery cover in the direction of the arrow until it is
completely removed. Insert 2 AAA batteries (1.5V) oriented
so that their polarity is correct. Slide the battery cover back
into position.
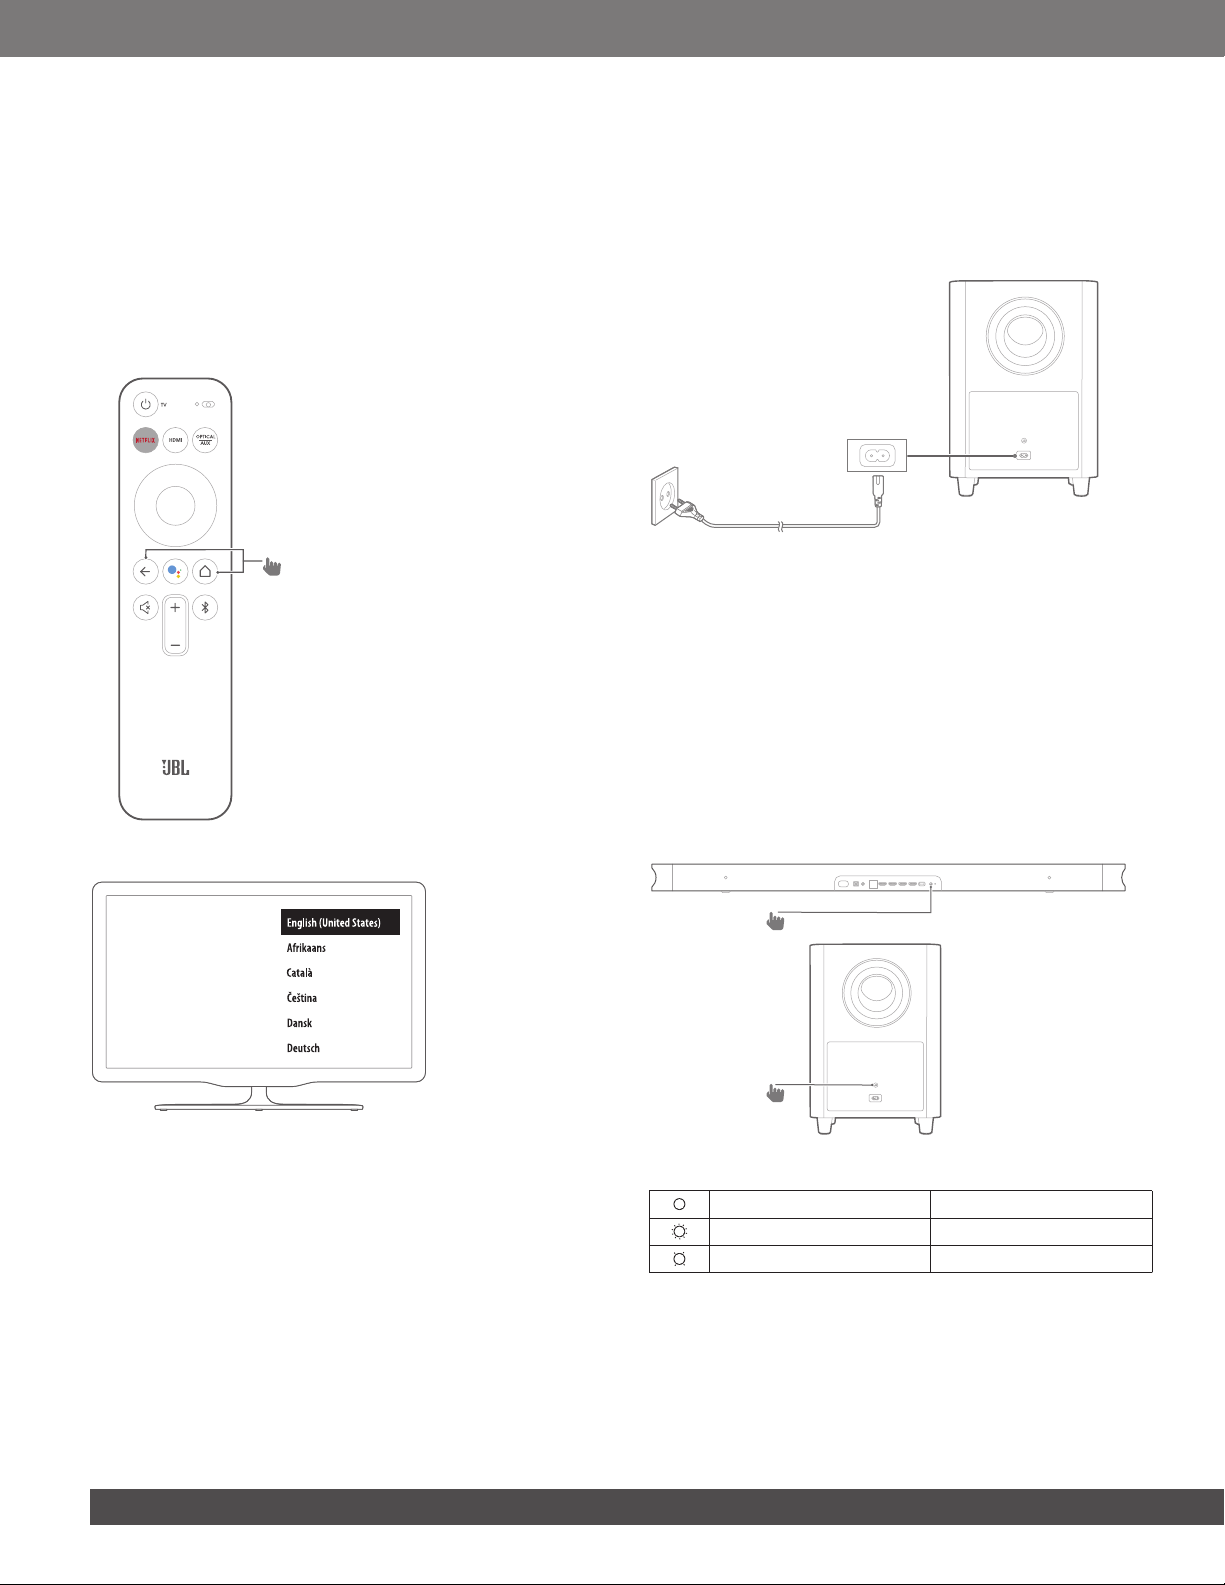
6. Connect your remote control during initial device setup.
During setup, the device will prompt you to connect your
remote. Press and hold the HOME + BACK buttons on your
remote for three seconds to put your remote into pairing
mode. When the remote is successfully paired, you will see
an indication of success. If you see an error indication, please
try again.
7. Continue to follow the Android TV setup on your TV.
Welcome
6.2 Power on the JBL SW10 subwoofer (Sold
separately)
1. Plug one end of the power cord into the POWER connector
on the back of the subwoofer.
2. Plug the other end of the power cord into an AC (mains) outlet.
6.3 Pair with the JBL SW10 wireless subwoofer
(Optional)
To manually pair with the subwoofer:
1. Power on both the LINK BAR and the SW10 Wireless
Subwoofer.
2. Press the SUBWOOFER PAIRING button on the LINK BAR
and PAIRING button on the subwoofer to enter pairing mode.
The JBL SW10 wireless subwoofer (sold separately) automatically
connects with the LINK BAR if both units are being paired before.
If successfully paired, the LED indicator on both the LINK BAR
and SW10 subwoofer lights white continuously.
Subwoofer LED behavior
White (Constant) Connected
White (Flashing fast) Pairing
White (Flashing slowly) Disconnected
Loading ...
Loading ...
Loading ...