Loading ...
Loading ...
Loading ...
4
Quick Installation Guide
8 Disconnect the wires and remove the old wall plate.
Use a screwdriver to release wires from terminals. Then, use a wire label to
identify each wire as it’s disconnected. The letter on the wire label should match
the letter on the terminal.
Tip: To prevent wires from falling back into the wall, wrap the wires around a
pencil.
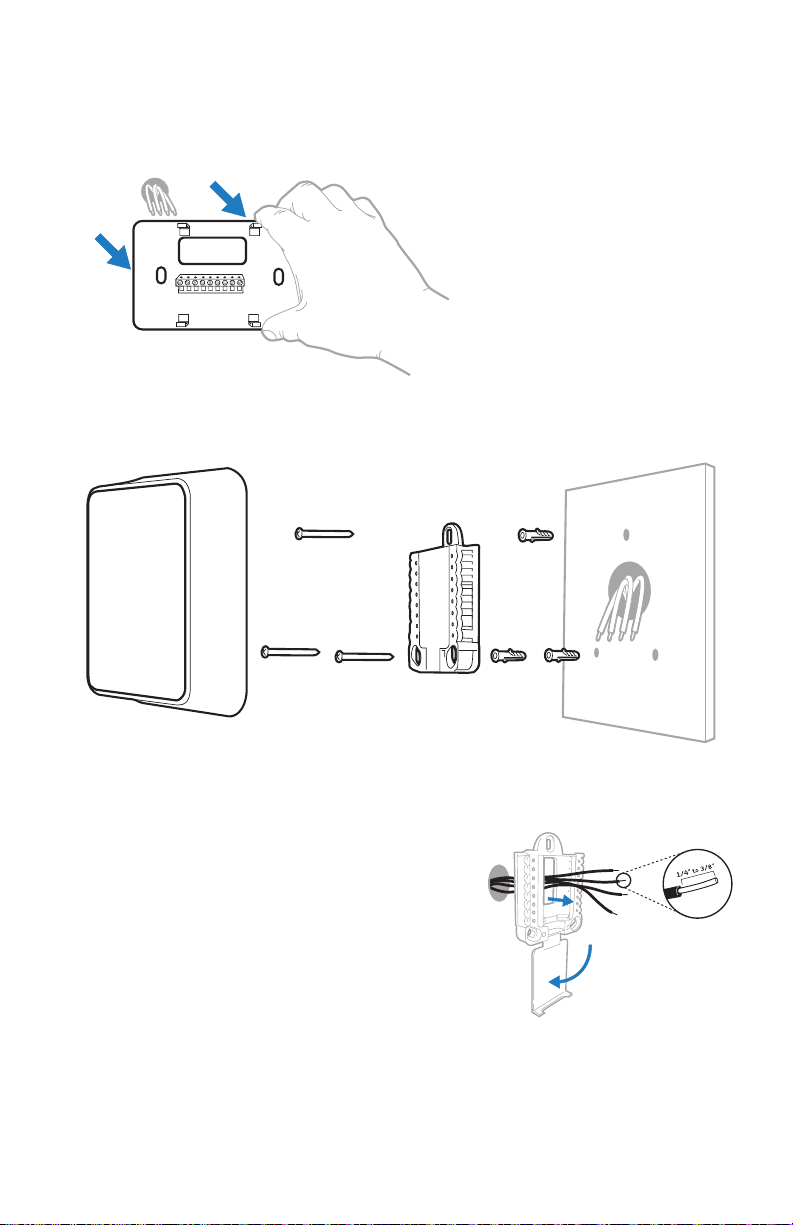
Installing your RTH8500 thermostat
9 Bundle and insert wires through the UWP.
Pull open the UWP and insert the bundle of
wires through the back of the UWP.
Make sure at least 1/4-inch of each wire
is exposed for easy insertion into the wire
terminals.
RTH8500
Thermostat
Screws
UWP
Mounting
System
Anchors Wall
Wiring Labels
Apply these wiring labels to
each wire with the appropriate
terminal designation as you
remove it from the existing
thermostat.
Étiquettes de fils
Lorsque vous retirez les fils
des bornes du thermostat
existant, collez ces étiquettes
sur chaque fil correspondant
à la lettre de la borne.
Rótulos para los cables
Coloque estos rótulos, con la
designación de las termina-
les, en cada cable al remover
los cables del termostato
actual.
690823EFS03 • Rev. 0516 • Printed in U.S.A.
B
G
R
V/VR
X
AUX
B
G
R
V/VR
X
AUX
Y2
H
RC
W
X1
Y2
H
RC
W
X1
C
L
RH
W1
X2
C
L
RH
W1
X2
E
O
T
W2
Y
E
O
T
W2
Y
F
P
U
W3
Y1
F
P
U
W3
Y1
Loading ...
Loading ...
Loading ...