Loading ...
Loading ...
Loading ...
7
3. Lift the freezer door off of the center hinge and set it aside.
4. Remove the washer from the top of the center hinge pin.
5. Using a hex-head socket wrench, remove the three screws
from the center hinge and remove the hinge. Set aside.
6. Lift the refrigerator door off of the bottom hinge and set it
aside.
7. Open refrigerator door and remove base grille from the
bottom front of the refrigerator.
8. Using a hex-head socket wrench, remove the two 5/16"
hex-head hinge screws attaching the bottom hinge to the
cabinet and remove the hinge from the bottom of the
refrigerator door.
Adjust the Doors
IMPORTANT: To comply with American Disabilities Act (ADA)
guidelines, fully retract the rollers into the cabinet to lower the
refrigerator.
Door Closing
Your refrigerator has two front adjustable levelers - one on the
right and one on the left. To avoid a hazard due to instability, if
your refrigerator seems unsteady or you want the doors to close
easier, adjust the refrigerator's tilt using the following instructions.
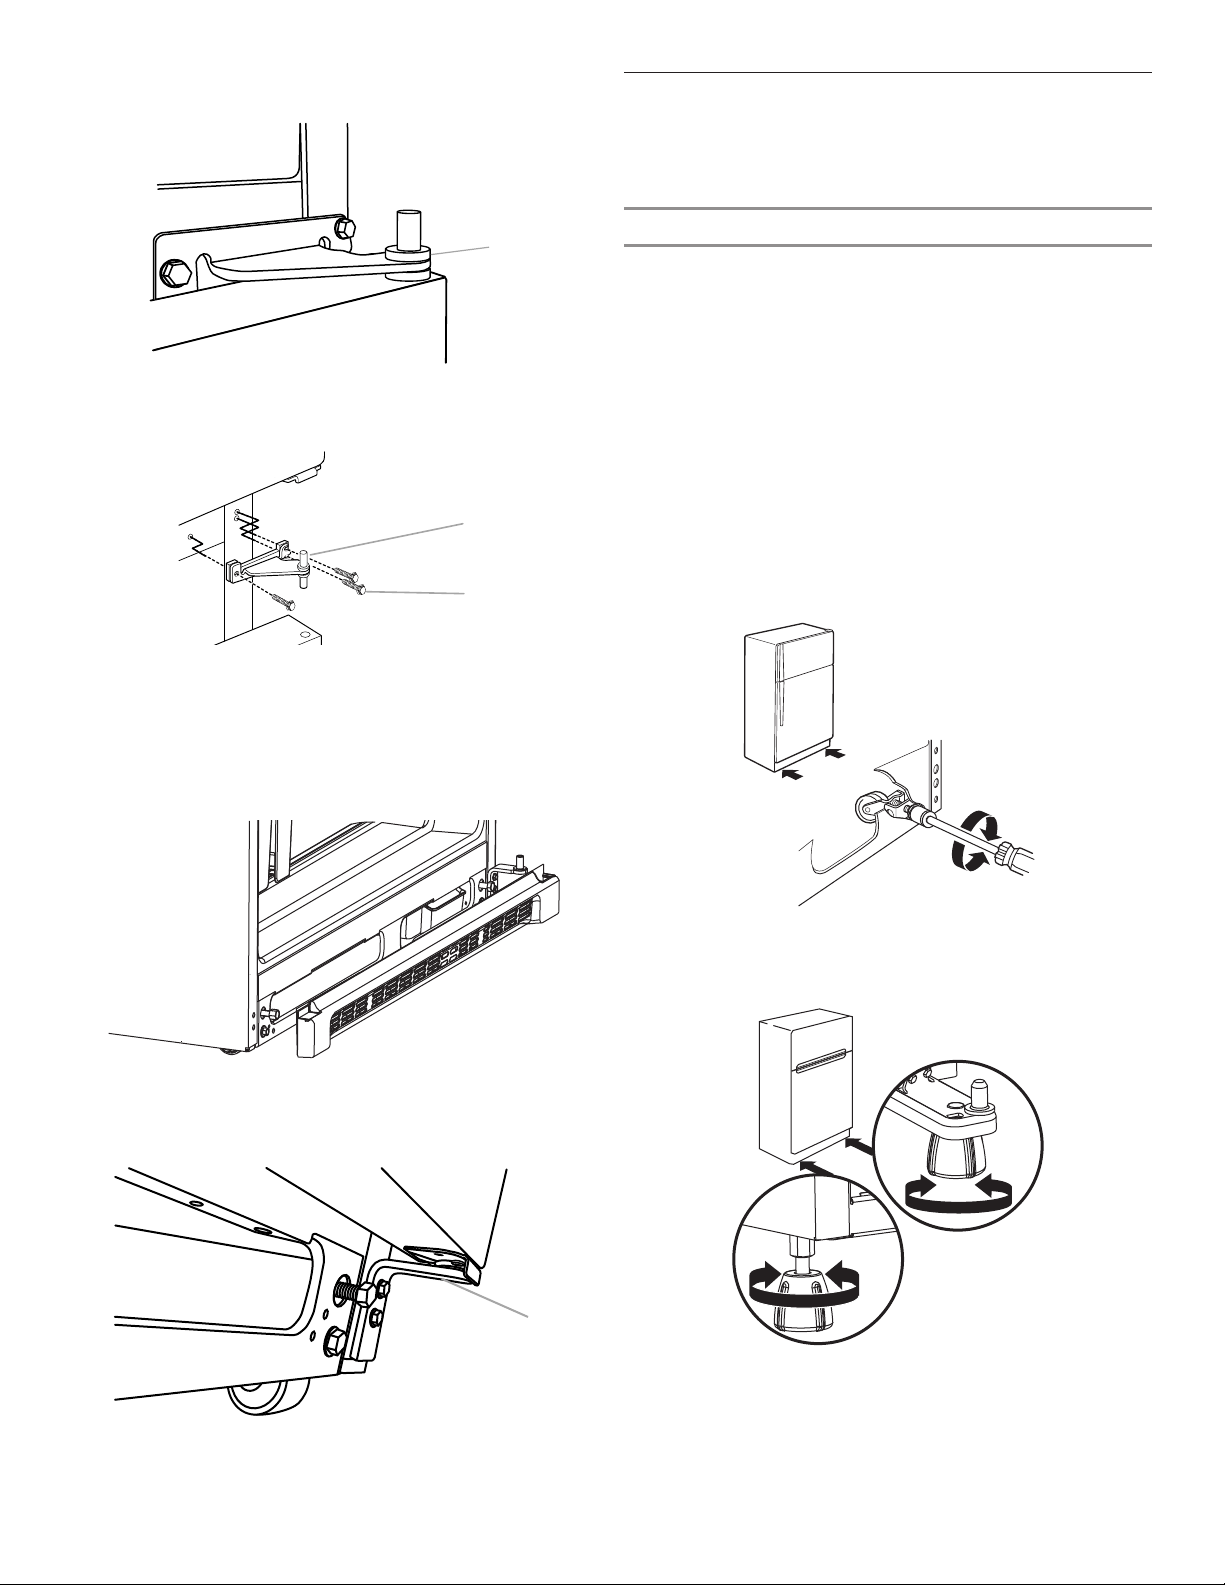
1. Remove the base grille. See the Base Grille graphic in
“Refrigerator Doors.” The two leveling screws are part of
the front roller assemblies, which are at the base of the
refrigerator on either side.
2. Use a socket driver to adjust the leveling screws. Turn the
leveling screw to the right to raise that side of the refrigerator
or turn the leveling screw to the left to lower that side. It may
take several turns of the leveling screws to adjust the tilt of
the refrigerator.
NOTE: Having someone push against the top of the
refrigerator takes some weight off the leveling screws and
rollers which makes it easier to adjust.
NOTE: On some models if your product has an extra leveler
adjust it, turning right or left to prevent product tipping.
A
A. Washer
A
B
A. Center hinge
B. 5/16" Hex-head hinge screws
A
A. Bottom hinge
Loading ...
Loading ...
Loading ...