Loading ...
Loading ...
Loading ...
5
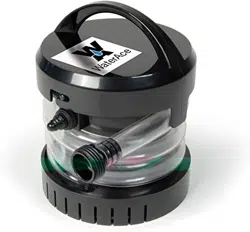
Filter Screen
Notch
Impeller Chamber Cap
V-Shape Protrusion
End of Ribbed
Section
Screws
Hose Opening
BATTERY & PUMP TIPS
1.Install fresh, name-brand alkaline batteries in this pump. While they may cost a bit more, tests
have shown that they will run this pump continuously for up to 5 hours, while standard “D”
batteries will only last a 1/2 hour or less.
2.Remove batteries from the pump when they are
discharged or if the pump will be stored for an extended
period. Discharged batteries occasionally leak, which will
destroy the electrical circuit of the pump.
3. Dispose of used batteries in a safe place. Follow battery
manufacture’s recommendations. Do not burn them because
they can explode. Do not throw in lakes, streams or rivers.
4. Keep the inside of the pump dry at all times. If it does
get wet inside, dry it immediately. A hair dryer held 12”
(30.48cm) away works well. Make certain the cover is tight
before immersing the pump. Keep the o-ring lubricated with
petroleum jelly.
SERVICING INSTRUCTIONS FOR CLEANING
OUT DEBRIS AND HOSE PLACEMENT
1.Turn the pump upside down and remove the lter screen by removing the four screws with a
Phillips screwdriver. Remove all debris.
2.Remove the impeller chamber cap by removing all four screws. Remove all possible debris (See Fig 3).
NOTE: the correct rotation of the impeller is counterclockwise, when viewing from the bottom of the
pump. If the impeller rotates clockwise, or not at all, check the batteries for correct insertion.
3. When replacing the hose, remove impeller chamber cap (See Step 2 above). Remove existing hose
and thread replacement hose clockwise through the hose opening in pump housing.
4.Place the end of the hose to the end of the ribbed section of the impeller chamber (See Figure 2).
Make sure there are no kinks in the hose.
5.To keep the hose in place, brace the hose with your thumb just outside the impeller chamber. Replace
the impeller chamber cover and secure it by bracing your thumb on top of it. Replace and install
screws. DO NOT OVER TIGHTEN.
6.Replace the lter screen by lining up the screw holes with the screw posts and the notch in the screen
with the V-shaped protrusion in the pump housing. Replace and install screws.
DO NOT OVER TIGHTEN.
This pump is intended for pumping water only. Do not use to pump gasoline,
diesel fuels or chemicals of any kind. Fluids other than water may destroy
this pump and /or create a re hazard. This portable pump is not intended for permanent installation in a
bilge or sump area. It should not be used in situations where risk of personal injury or property
damage could result from pump or battery failure. Do not
use any power source other than three “D” size alkaline
batteries to power the pump. Do not attempt to recharge
batteries while installed in this product.
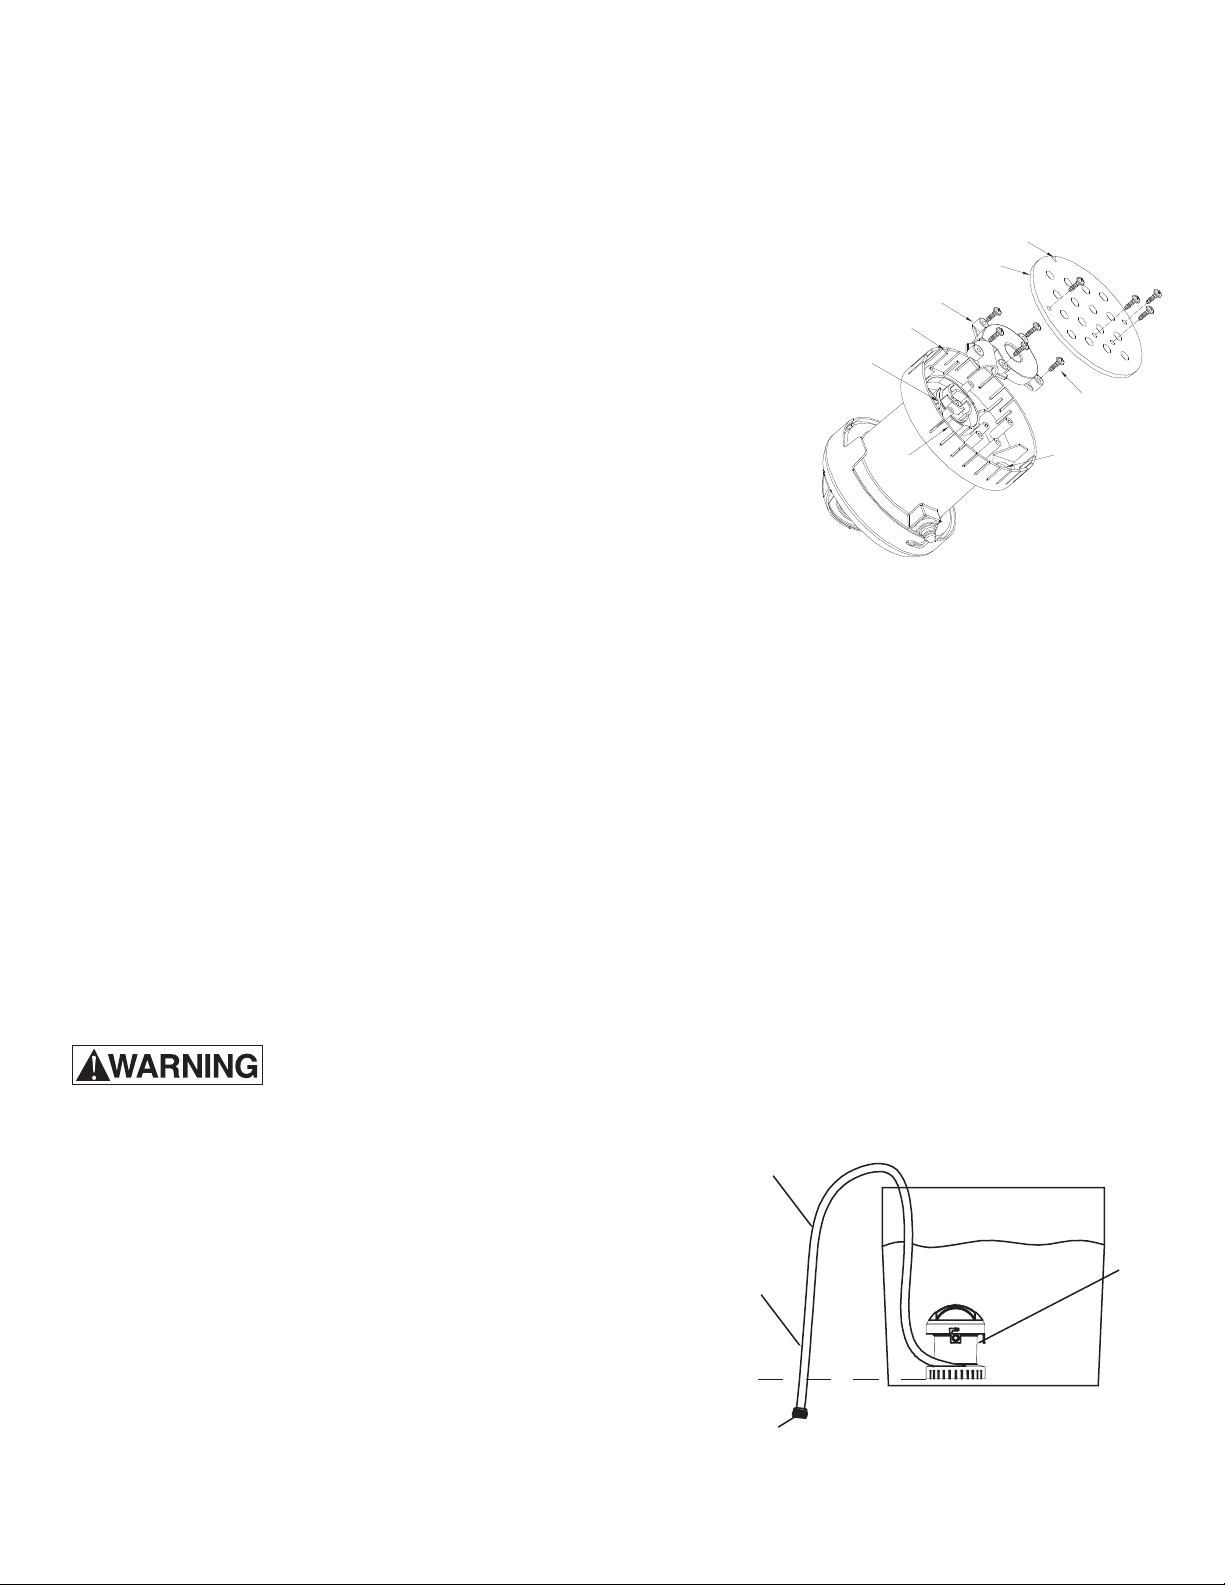
NOTE: To conserve batteries, you may use a siphon
action (see Figure 4). The discharge end of the hose
must be below the water level. To completely drain water,
it must be below the lowest water level. With the pump and
hose as shown, turn the pump on until water ows, then turn
the pump o. Water will continue to ow, but at a slower
rate. This method can also increase the pumping rate with
the pump turned on.
Figure 3
Figure 4
BSUP Pump
Hose
Keep end of hose between
lowest water level
Siphon
Action
Loading ...
Loading ...
Loading ...