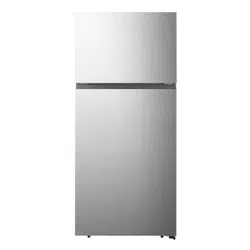
HRT180N6A*D

3
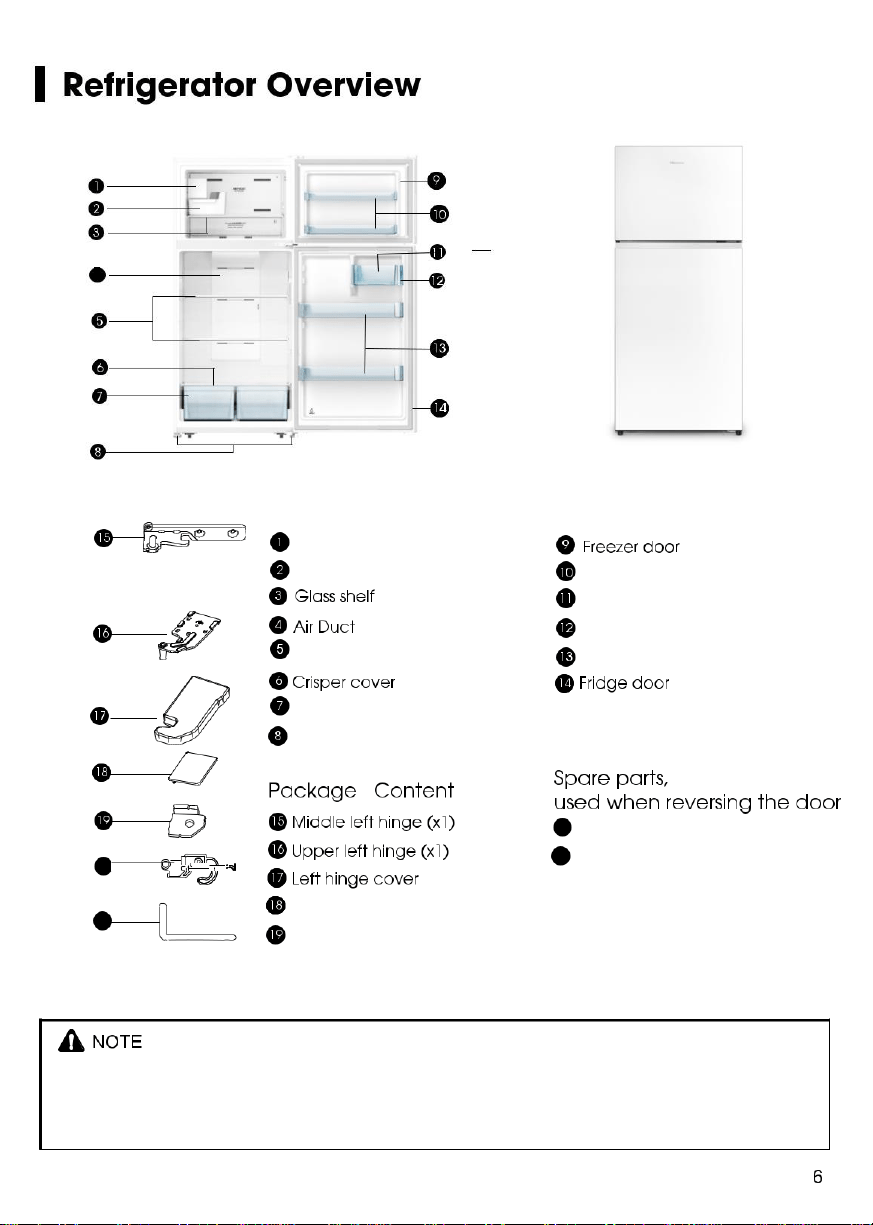
6
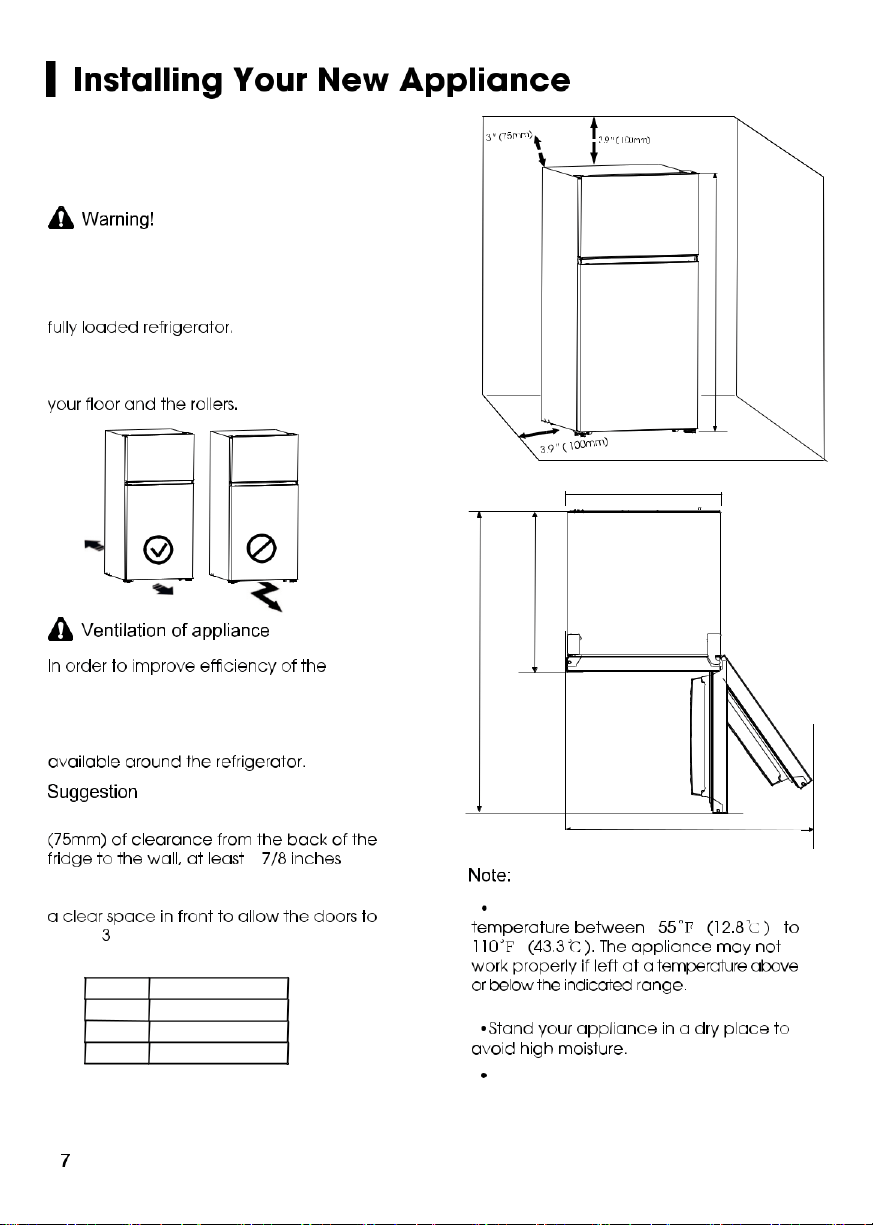
7
13
14
15
16
17
19
4
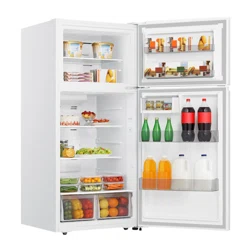
Automatic ice-maker part
Ice box
Shelf part
Crisper box part
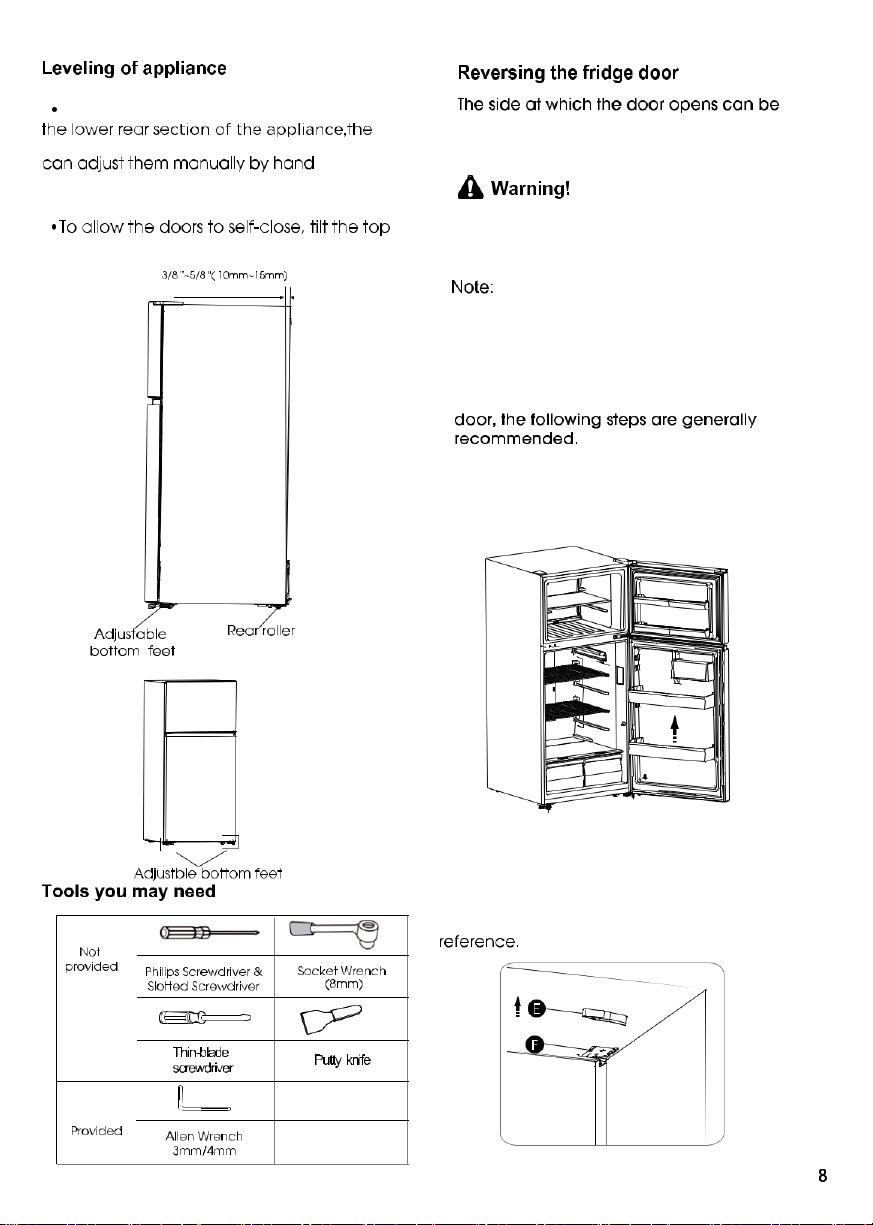
Ajustable bottom feet
20
Freezer door rack
Shelf cover
Upper rack
Lower rack
20 Door stopper
21 Screwdriver
21
Screw hole cover
Stopper block
66.5"(1690mm)
c
b
a
d
a
58.1 "(1476mm)
b
30.7 " (779mm)
c
29.5 "(750mm)
d
47.3 "(1201mm)
.
ML
L
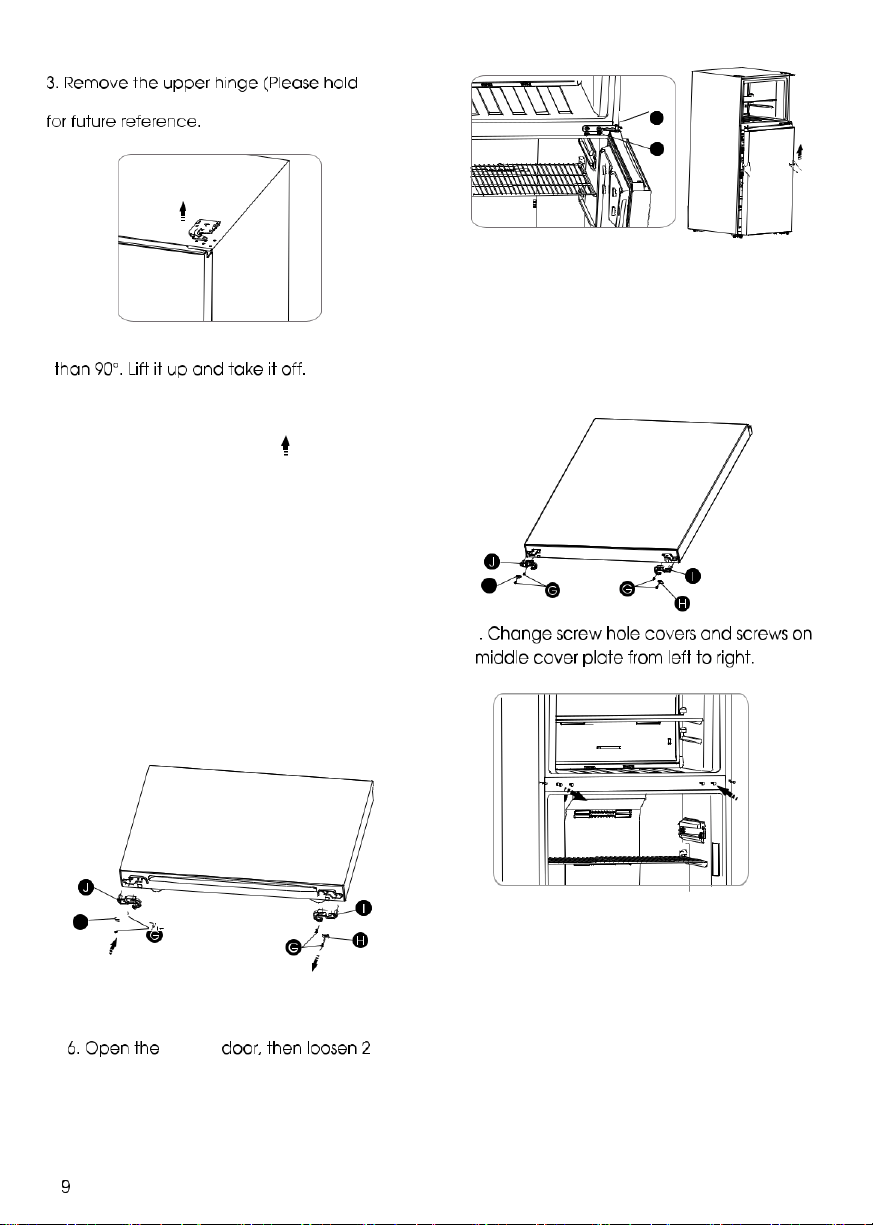
7. Place the fridge door on a smooth surface
with its panel upward.Loosen the two
screws(G)on the right bottom of the fridge door,
then take out the right stopper block(H) and the
right door stopper block(I) . Then insrall the left
stopper block(K) and the left door stopper(J).
5. Loosen the two screws(G) on the right
bottom of the freezer door,then take out the
right stopper block(H) and the right door
stopper(I).Then install the left stopper
block(K) and the left door stopper(J)
(provided in the plastic bag).
K
8
K
fridge
L
M
M
Remove the fridge door from the lower
hinge.
9. Lay the refrigerator on soft foam
packaging or similar material. Remove
both adjustable bottom feet parts, and
the lower hinge part by unscrewing the
special flange selg-tapping
screws.Loosen the lower hinge axis
then install it on the recerse hole site.
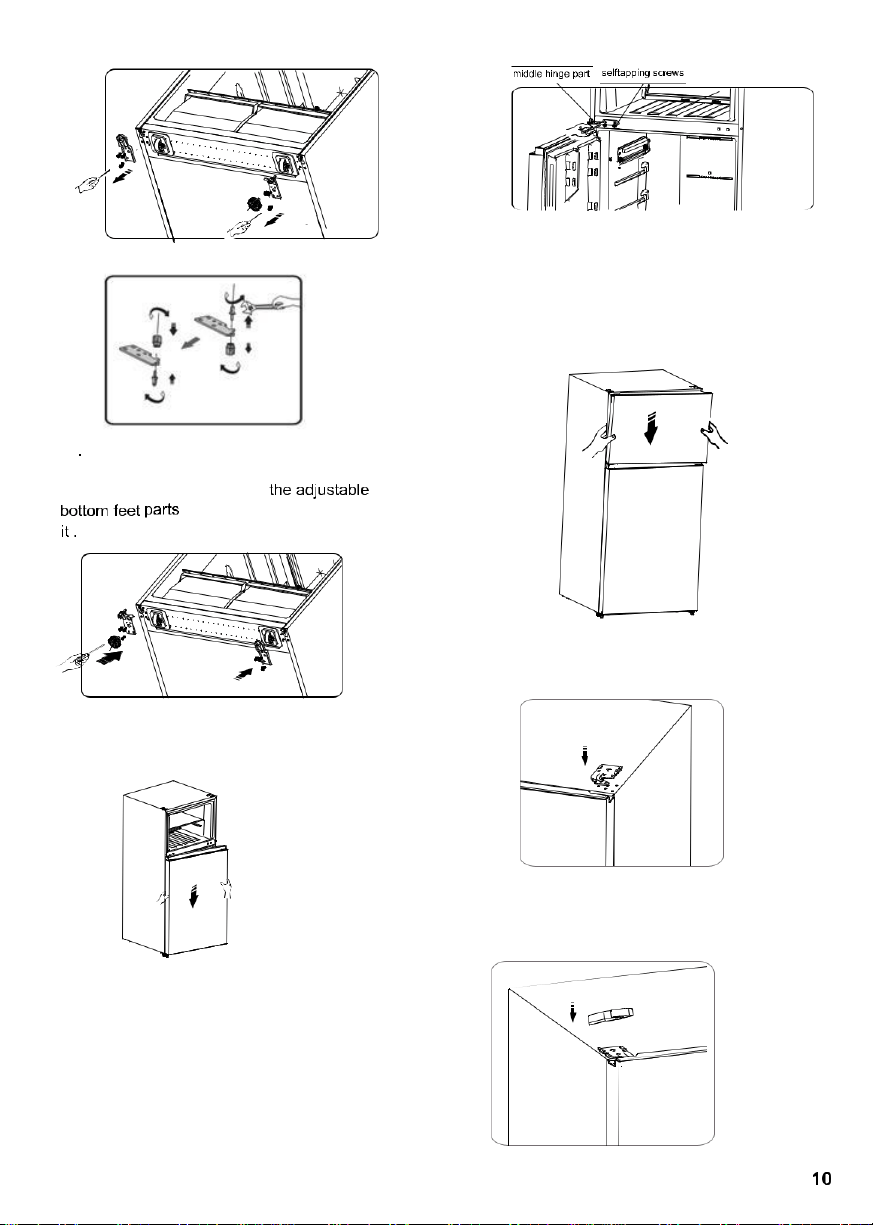
13.Transfer the freezer door to the
appropriate position. Secure the door’s
level, make the middle hinge axis into
the lower hole of the freezer door.
10
14.
11. Stand the refrigerator upright and
carefully slot the fridge door onto the
lower hinge pin and hold in position.
12. Upturn the middle hinge part the
direction 180 degree, transfer it and
adjust its position, make the middle
hinge axis into the upper hole of the
fridge door, tight the bolts.
15. Put out the upper hinge cover from
plastic bag provided, and intall them.
Installing the water lines
In order for the ice maker to operate properly, a
water line is required.
You may need to purchase a water purifying
system to do that.
The water connection must be made by a
qualified plumber.
If the refrigerator is installed in an area with low
water pressure (below 30psi/207KPa), you can
install a booster pump to compensate for the low
pressure.
-the maximum inlet water pressure is
87psi/600kPa;
-the minimum inlet water pressure is
30psi/207kPa.
Important:Operation outside the water
pressure range may cause malfunction and
severe,damaging water leaks.
(1) Connect Water Line to Household Water
Following are two methods of connecting to your
household water supply. Use the instructions
specific to your installation.
IMPORTANT: Turn off main water supply. Turn on
nearest faucet long enough to clear the line of water.
You will need the following tools(not supplied).
Phillips screwdriver
Flat-blade screwdriver
1/2" or adjustable wrench
Drill and 1/4" drill bit
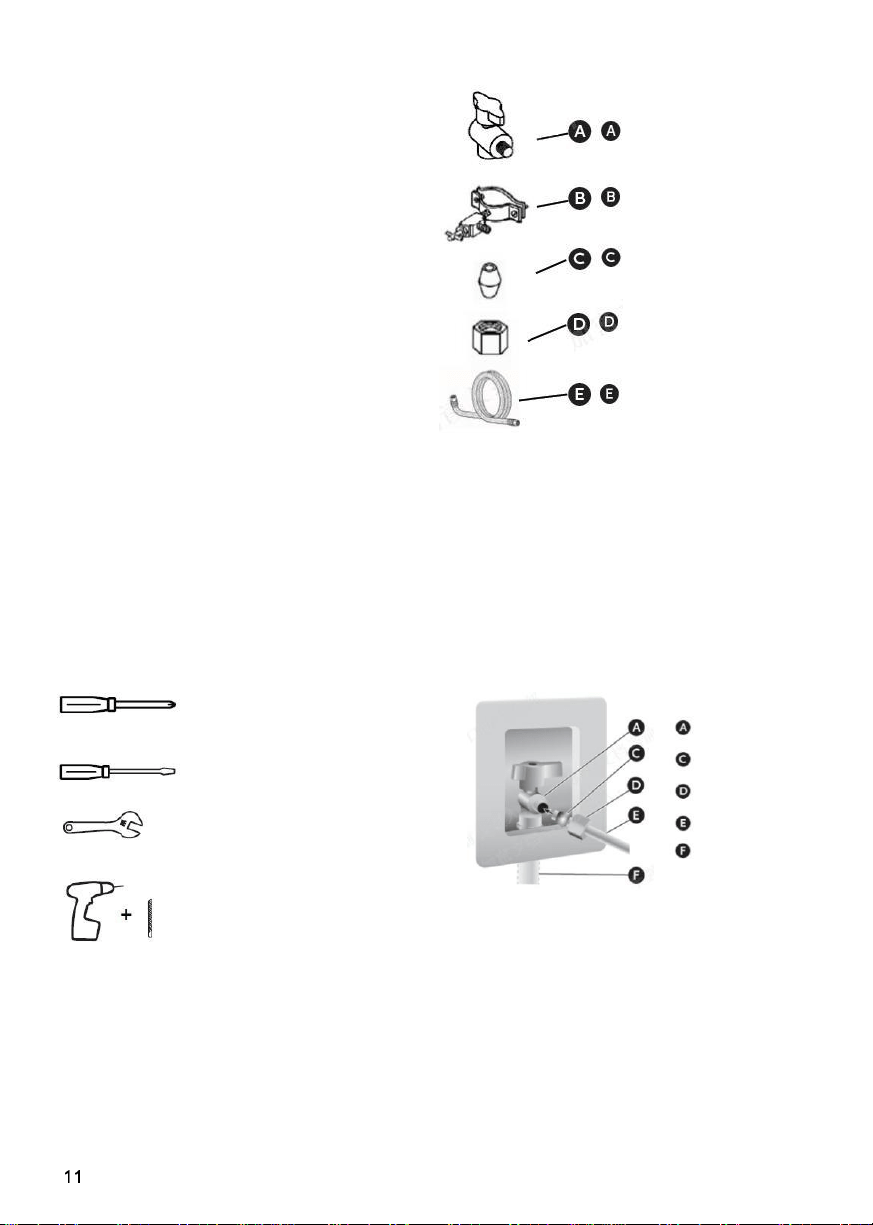
Quarter-turn shutoff valve 1
PCS
1/4" shutoff valve with
saddle clamp 1 PCS
Ferrule (sleeve) 2 PCS
1/4" compression nut 2 PCS
1/4" water line 1 PCS
Method 1: Quarter-turn Shutoff Valve
Gather the required tools and parts before
starting installation.
1. Use a quarter-turn shutoff valve or the
equivalent served by a household supply line.
NOTE: To allow sufficient water flow to the
refrigerator, a minimum 1/2" household supply
line is recommended.
2. Using the ferrule (sleeve) and 1/4" compression nut,
connect the 1/4" water line to the quarter-turn shutoff
valve.
NOTE: Do not overtighten.
Quarter-turn
Shutoff Valve
Ferrule (Sleeve)
1/4" compression nut
1/4" Water Line
Household Supply Line
3. Place the free end of the 1/4" water line into an
empty container or sink.
4. Turn on main water supply and open
quarter-turn shutoff valve to flush the 1/4" water line
of any contaminants. Run water until it is clear.

Method 2: Shutoff Valve With Saddle clamp
NOTE: Do not use a piercing-type or
3/16" (4.76 mm) saddle valve which reduces
water flow and clogs easier.
1. Find a 1/2" to 11/4" (12.7 mm to 31.8 mm)
vertical water inlet near the refrigerator.
IMPORTANT:
• Make sure it is a cold household supply line.
• Horizontal pipe will work, but the following
procedure must be followed: Drill on the top side
of the pipe, not the bottom. This will help keep
water away from the drill. This also keeps
normal sediment from collecting in the valve.
2. Determine the length of 1/4" water line you
need. Measure from the connection on the rear of
the refrigerator to the water pipe. Add 7 ft (2.1
m)to allow for cleaning. Use 1/4"
(6.35 mm) O.D. (outside diameter) water line.
3. Using a cordless drill, drill a 1/4" hole in the
household supply line you have selected.
4. Fasten the 1/4"shutoff valve to the household
supply line with the saddle clamp.Be sure the outlet
solidly in the end is 1/4" drilled hole in the
household supply line and that the washer is under
the saddle clamp.
Tighten the packing nut. Tighten the saddle clamp
screws slowly and evenly so the washer makes a
watertight seal. Do not overtighten.
7. Turn on main water supply and open shutoff
valve to flush the 1/4" water line of any
contaminants. Run water until it is clear. Connect
Water Line to Refrigerator.
(2) Connect Water Line to Refrigerator IMPORTANT:
If you turn the refrigerator on before the water is
connected, turn off the ice maker.
1. Unplug refrigerator or disconnect power.
2. Close shutoff valve.
3. Thread a 1/4" compression nut and ferrule
(sleeve) onto the free end of the 1/4" water line.
Ferrule (sleeve)
1/4" compression nut
1/4" water line
4. Insert the free end of the 1/4" water line into
the brass fitting attached to the water inlet on the
back of the refrigerator.
5. Slide the 1/4" compression nut over the ferrule
(sleeve) and screw the 1/4" compression nut onto
the brass ftting.
1/4" compression nut
1/4" water line
Ferrule (sleeve)
G
G Brass fitting
H
H Water inlet
Household Supply
Ferrule (sleeve)
Line
1/4" shutoff valve
1/4" compression nut
with saddle clamp
1/4" water line
5. Slip the ferrule(sleeve) and 1/4" compression nut
on the 1/4" water line as shown. Insert the end of
the tubing into the outlet end squarely as far as it
will go. Screw 1/4" compression nut onto outlet end
with adjustable wrench.
Do not overrighten or you may crush the
1/4" water line.
6. Place the free end of the 1/4" water line into an
empty container or sink.
6. Confrm 1/4" water line is secure by gently
pulling on it.
7. Turn on water supply and check for leaks.
Correct any leaks.
Note: these instruction do not caver after
market ice maker installation. Instructions in
after market ice maker kit should be used.
Display controls
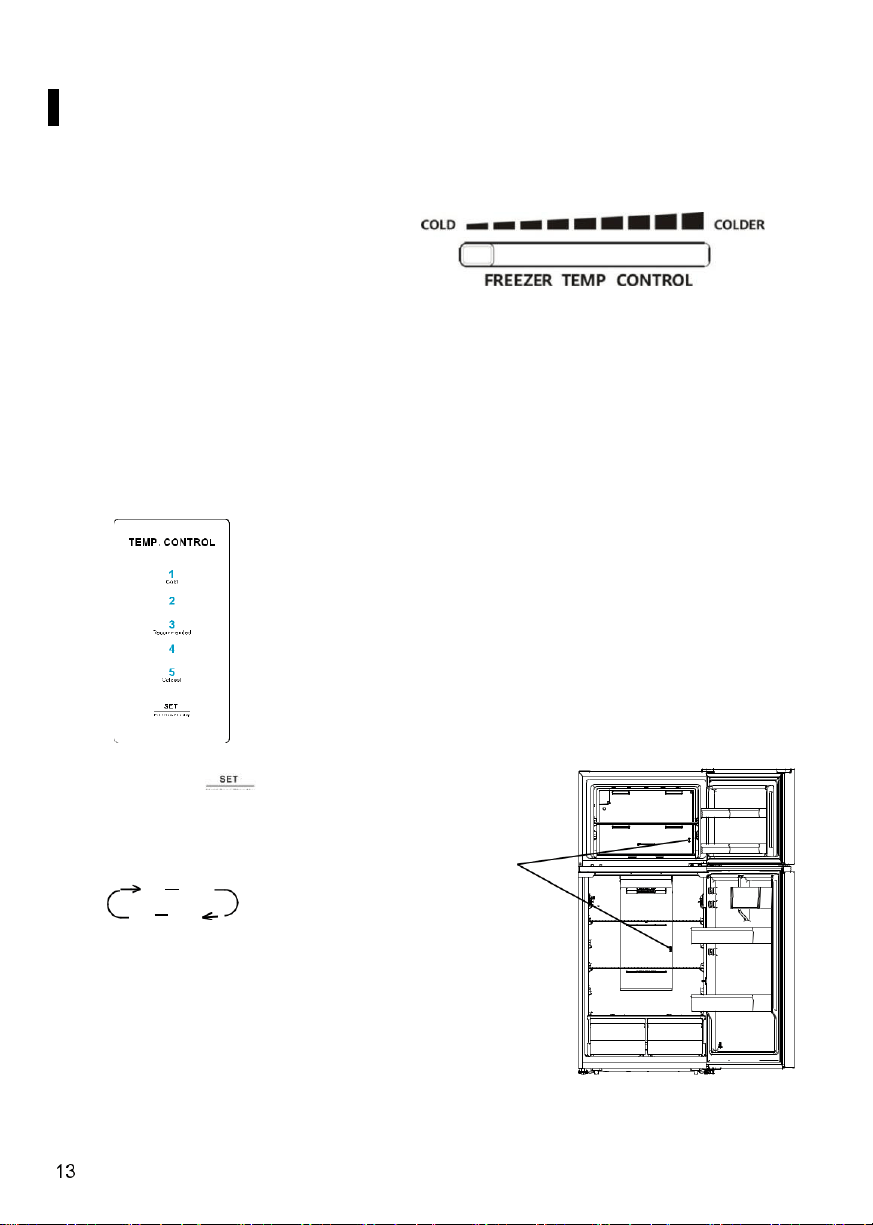
Controlling the temperature
We recommend that when you start your
refrigerator for the first time, the
temperature for the refrigerator is set to
39°F(4°C) and the freezer is set to
the middle position. If you want to change the
temperature, follow the instructions below.
Caution! When you set a temperature, you set
an average temperature for the whole
refrigerator cabinet. Temperatures inside each
compartment may vary from
the temperature displayed on the panel,
depending on how much food you store
and where you place them. Ambient
temperature may also affect the actual
temperature inside the appliance.
1. Fridge
You can press the “ ” button to
select atemperature setting. When
you press the butoncontinuously, the
temperatur will be set as the following
sequence.
4 5
3 2 1
Important!
High ambient temperatures(e.g. on hot
summer days) and a colder setting on the
temperature regulator can cause the
compressor to tun continuously or even
non-stop!
So we do not advise the user set the
temperature at “5”or “1”in normal.
2. Freezer
In case of using the refrigerator usual
condition. Please set the temperature
regulator at the middle position.
In case of a little frozen food in chamber.
Please set the temperature controller at
“COLD” position.
Important!
So we do not advise the user set the
temperature control knob at “COLDER” or
“COLD” in normal. When you turn the
more energy efficiency. Otherwise, it
would result the energy-consuming.
Important!
Don’t place too much food directly against the
air outlet of the temperature sensor part in Wind
channel cover of the refrigerator compartment,
as it affects that the appliance can’t operate
correctly.
temperature
sensot part
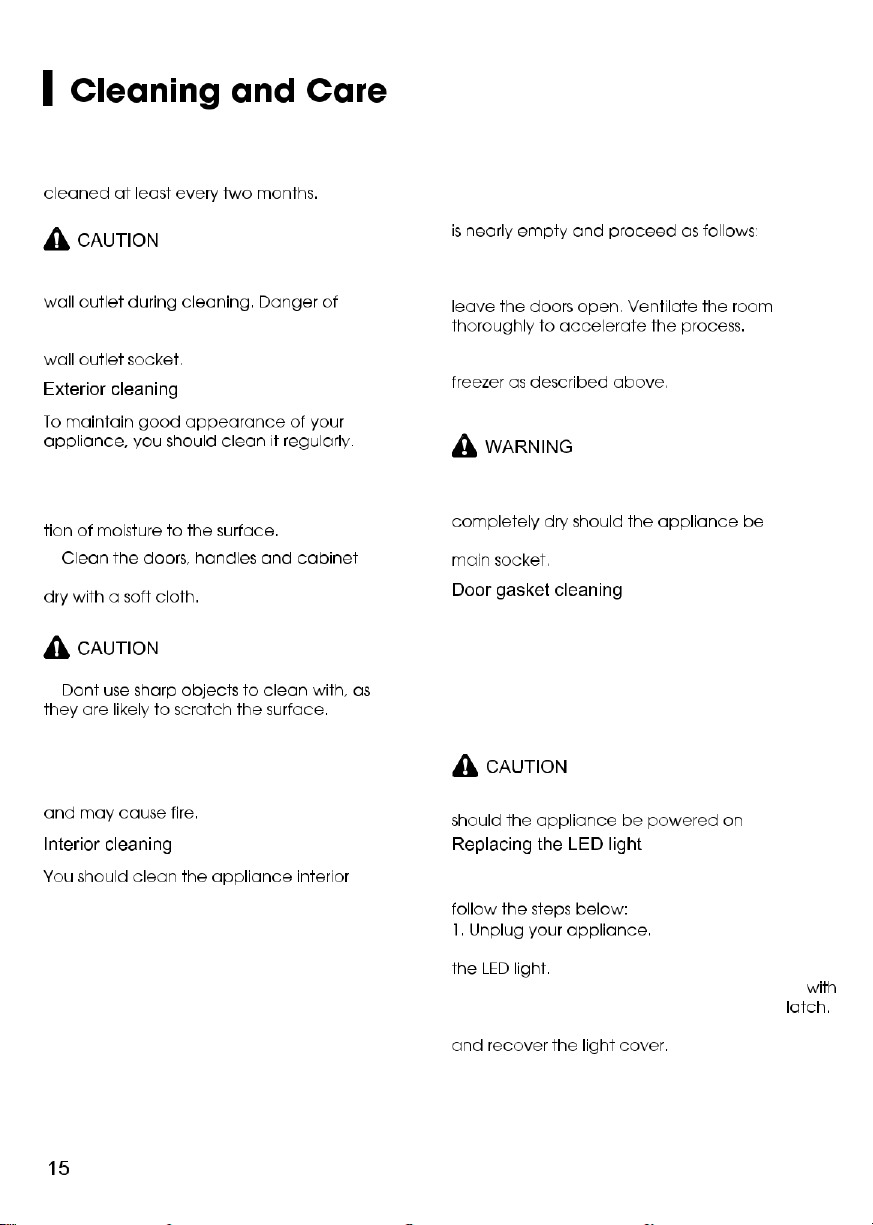
1. Shelf parts and door ranks
seceral shelf parts and seceral diffenrent
2. Using the freezer compartment
The freezer compartment is provided with a
glass shelf.
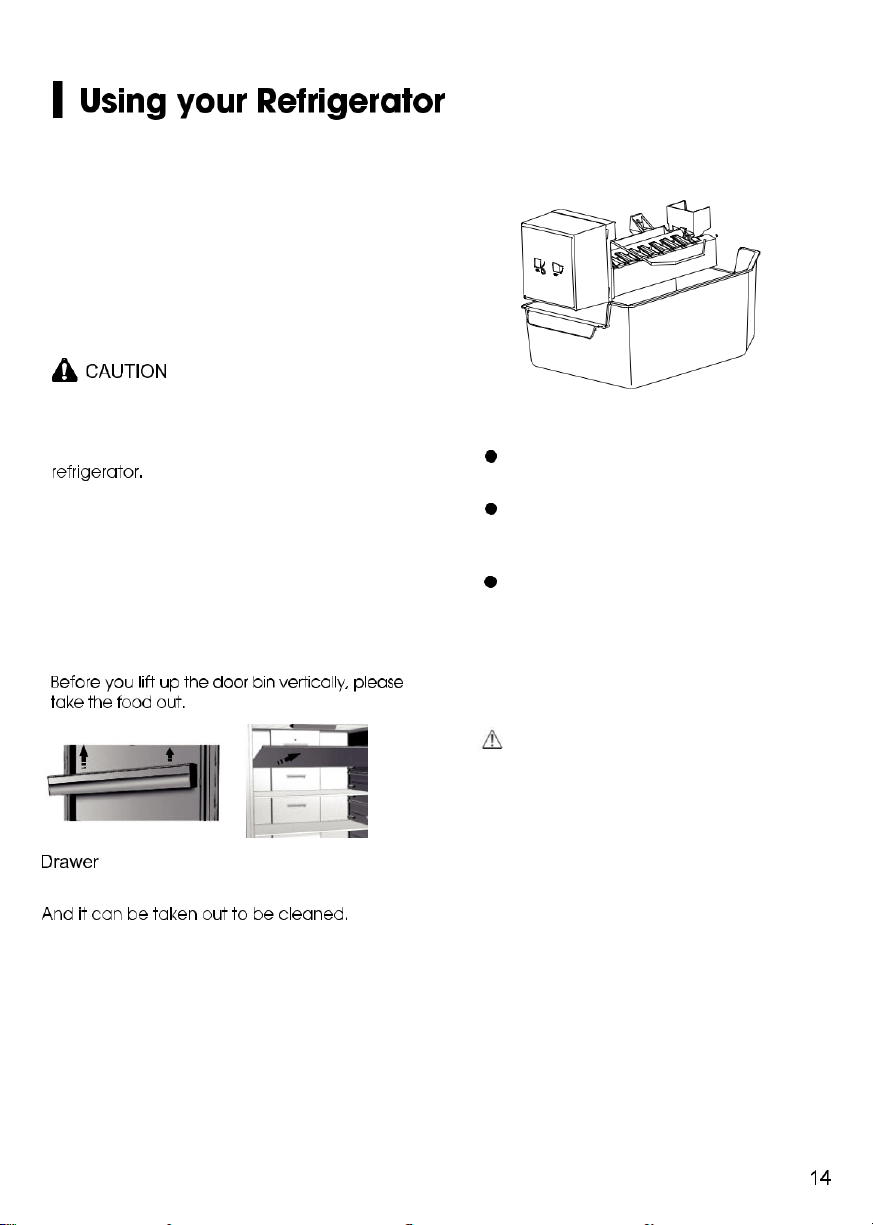
3. Automatic ice-maker part (If you
have installed it. )
Note:
When the ice maker dumps ice into the
ice box, any sounds are part of normal
operation.
If ice is not dispensed for a long period of
time, it may clump in the Ice box. If this
occurs, please remove all the ice and empty
the box.
In case of prolonged absence and the
ice maker is not used, close the water valve
to prevent leaks.
It is recommended that the first several ice
charges be discarded to ensure highest
quality of Ice.
Do not store cans or containers that will
burst when frozen.
CAUTION
Do not allow your children to touch the ice
maker. This could cause injury.
About the ice maker
PROBLEM
POSSIBLE CAUSE(S)
SOLUTION
The ice
Ice maker is not turned on
Press and hold FREEZER for 3 seconds to turn
On/Off the ice maker. See “Using the Controls.”
maker is not
Wait 24 hours after installation for ice
producing ice,
New installation
enough ice,
production to begin.
or cubes are
Kink in the water line
Straighten the water supply line.
hollow.
Inadequate water pressure
Contact a licensed, qualified plumber.
19

20