Loading ...
Loading ...
Loading ...
7
Electrical Requirements
The unit requires a 120 volt, 60 Hz, 15 AMP (minimum)
circuit. It is recommended that the unit be installed to a
separate circuit that serves only this appliance.
This appliance is fitted with a 3-prong grounded electri-
cal plug. Do not modify the plug or use an adapter. If
the plug does not fit with the available receptacle, have
a licensed electrician install a properly grounded outlet
before proceeding with the installation. The power cord
length is approximately 46".
Installer - show the owner the location of the circuit
breaker or fuse. Mark it for easy reference.
Note: If you have any questions about the grounding or
electrical instructions, consult a qualified electrician or
service person.
* Can also be installed using an electrical outlet in an
adjacent cabinet within the area where the provided
electrical cord can reach.
Always check electrical codes for requirements.
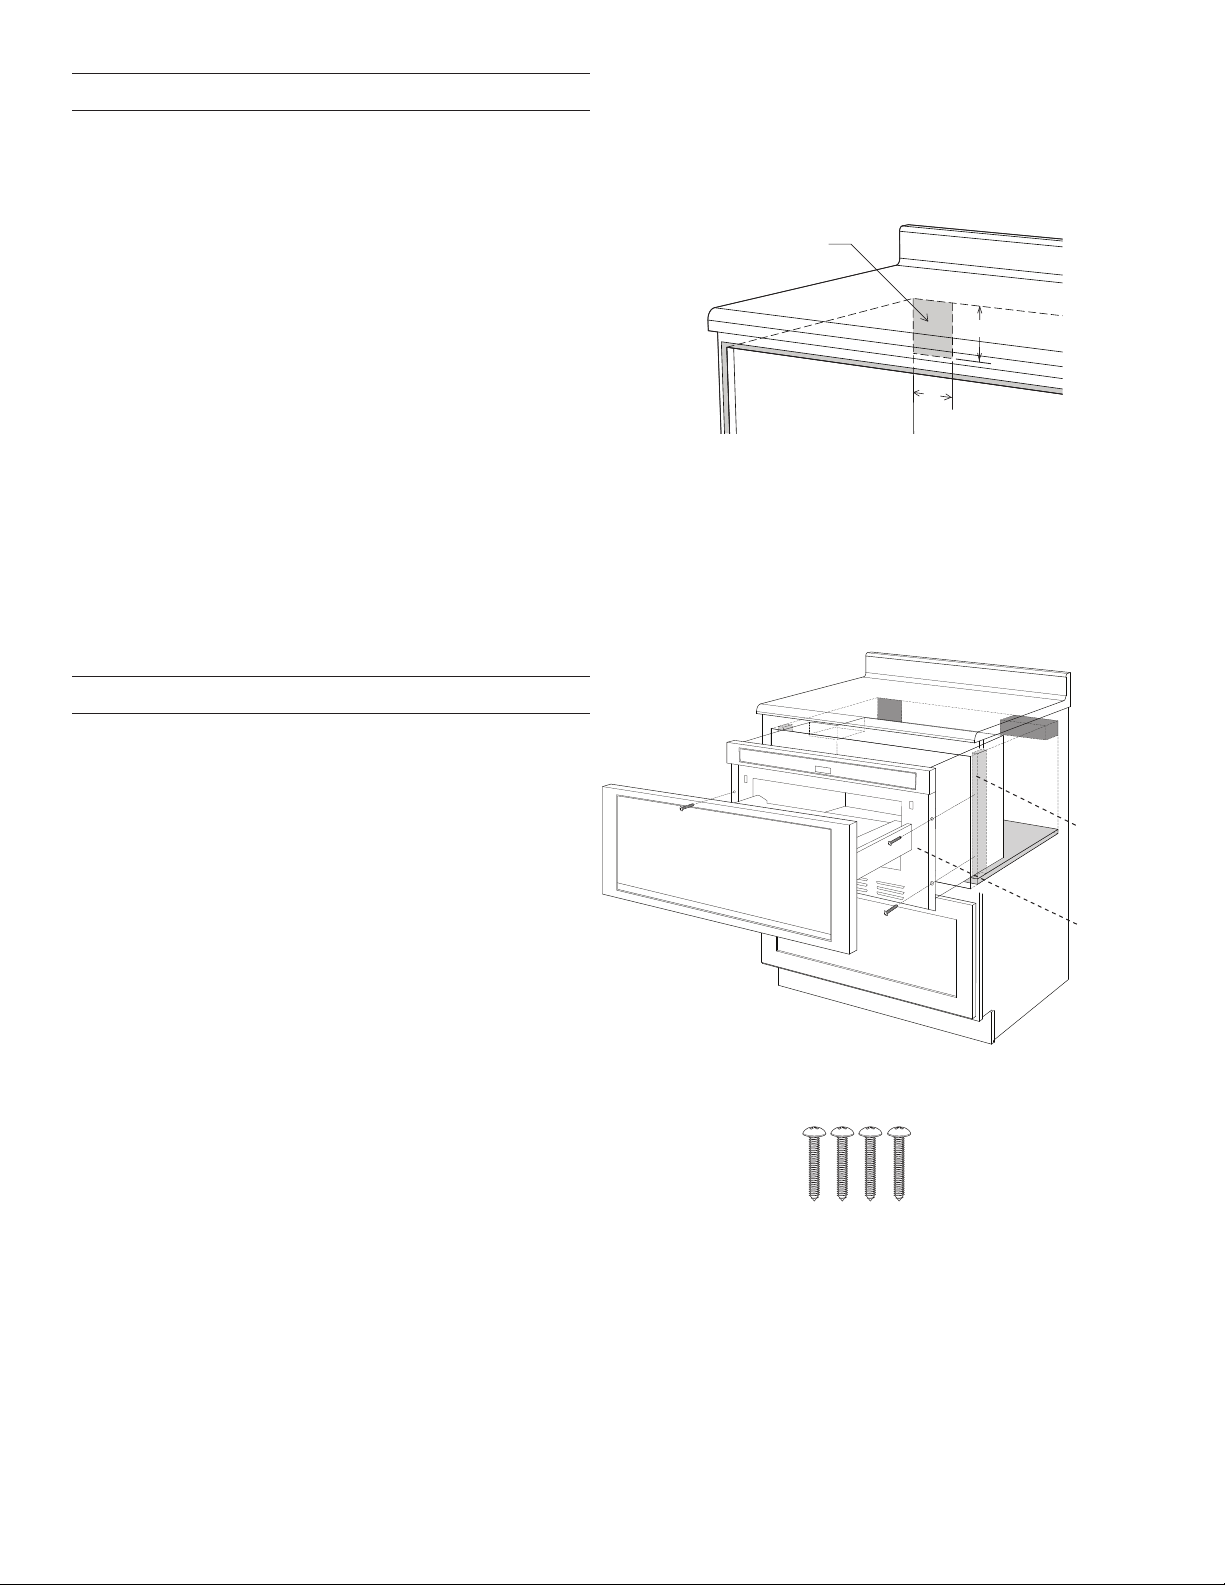
Drawer Installation
1 Place the drawer adjacent to the wall or cabinet open-
ing. Plug the power supply cord into the electrical
outlet.
2 Carefully guide the drawer into the prepared opening.
Avoid pinching the cord between the oven and the
wall.
3 Slide the drawer all the way until the mounting flange
makes contact with the face of the cabinet for stan-
dard installation or side cleats for flush installation.
See Figure 7A.
4 Open the drawer. Using the 4 holes on the drawer as
a template, pre drill the cabinet using a 1/16" bit. See
Figure 7A.
5 Secure the drawer with the 4 screws supplied. See
Figure 7B.
Figure 6
4"
5"
Suggested electrical
outlet location*
Anti-Tip
block
6"
3
1
/2"
4 Screws
Parts supplied
Figure 7B
Mounting
flange
Figure 7A
Cleat
Loading ...
Loading ...
Loading ...