Loading ...
Loading ...
Loading ...
HOW TO
DISASSEMBLE
AND REASSEMBLE
THE LID
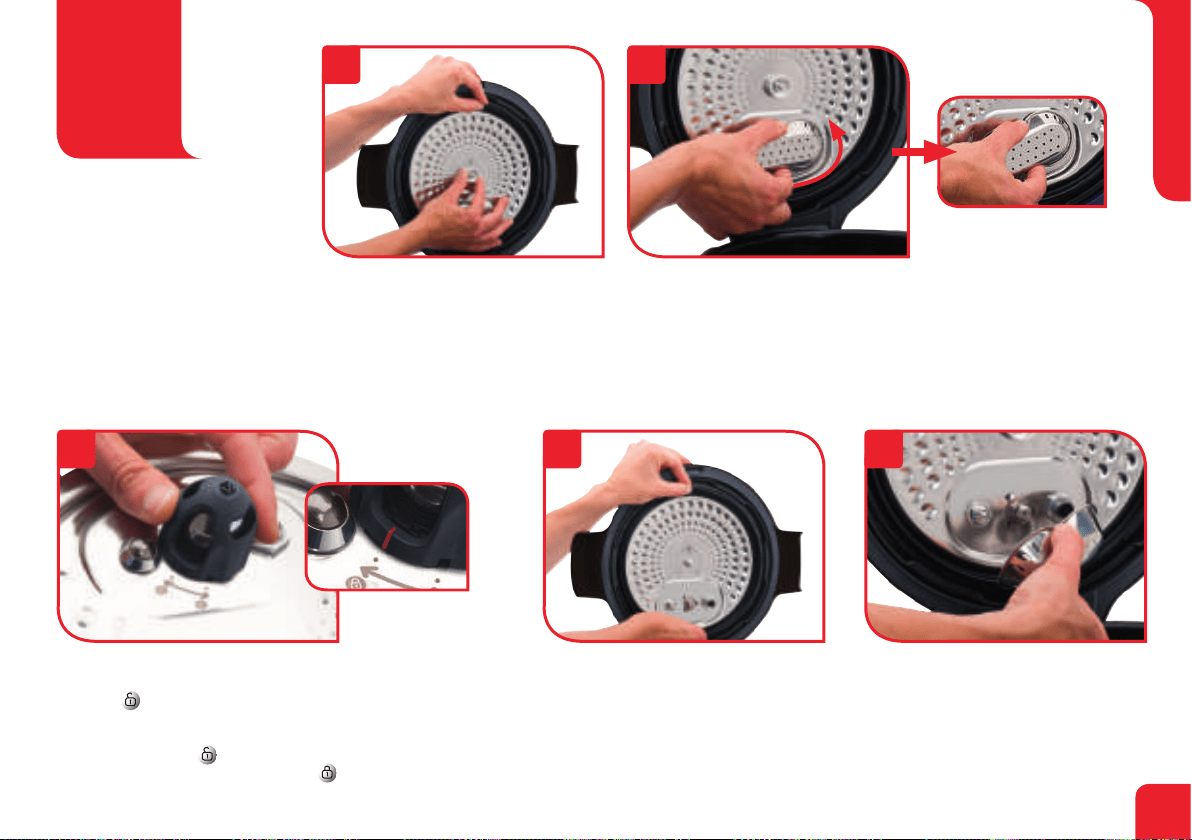
HOW TO DISASSEMBLE
THE METAL LID:
Grip the lid sub-assembly holding it by the seal,
and unscrew the central nut in an anti-clockwise
direction. Remove the nut then the lid.
PUTTING THE METAL LID
SUB-ASSEMBLY BACK IN TO PLACE:
Grip the lid sub-assembly by the seal as shown
in the picture.
Line up the lid with the central axis and press
it flat against the sub-assembly.
Put the nut back on and turn it clockwise,
tightening it as far as it will go.
HOW TO TAKE THE VALVE COVER OFF:
Clasp the valve cover by its middle part (as shown) ;
Then turn it slightly to unclip it.
Clean the valve cover, paying special attention to the inside
(check that there is no left over food).
PUTTING THE VALVE COVER BACK:
Take the valve cover as shown in the picture
(gripping the middle).
Line up the interior circular shape with the three
hooks and then push so that the valve cover clips
on (you should hear a “click” sound).
The valve cover must be right up against
the inside of the lid.
ACCESSING THE DECOMPRESSION BALL:
Turn the ball cover, anti-clockwise, so the I marker is positioned on the
pictogram . Lift the cover up. Remove the ball, and gently clean it, along
with its cover, with water and some washing-up liquid. Dry the ball using a
soft cloth, then put it back in position. Put the ball cover back in place, and
the marker I in position . Lock it by turning the ball cover clockwise, so
the I marker is positioned on the pictogram .
3 4 5
1 2
5
BEFORE USE
Loading ...
Loading ...
Loading ...