User Manual Philips BT5501/13 Beard Trimmer

Documents for Philips BT5501/13

The following documents are available:
User Manual Other Documents
  • User manual - (German) Download
  • Important Information Manual - (German) Download
  • Important Information Manual - (English) Download
  • User manual - (English) Download
  • User manual - (Spanish) Download
  • Important Information Manual - (Spanish) Download
  • User manual - (Italian) Download
  • Important Information Manual - (Italian) Download
  • Important Information Manual - (Portuguese) Download
  • User manual - (Portuguese) Download
Photos
BT5501/13 photo

User Manual

For BT5501/13. Also, The document are for others Philips models: BT5502, BT5503, BT5504, BT5509

BT5501
BT5502
BT5503
BT5504
BT5509
Loading ...
Loading ...
Loading ...

Specifications

Philips BT5501/13 Questions and Answers


#1 Can I rinse my Philips Groomer with water?

ou can rinse your Philips Groomer or Trimmer only if it is waterproof. You can check that by looking at the signs and symbols printed on your groomer's box or body.

Crossed-out tap symbol
If you see a crossed-out tap symbol on the box or body of your groomer, it means that the groomer is not washable and should be cleaned without water.
Tap symbol
A tap symbol printed on your grooming device indicates that it is washable and its parts (cutters and combs) can be cleaned with water. However, this does not mean that you can use it to clip or trim your hair in the shower or bath.
Bath or shower symbol
If you see a shower or bath symbol printed on your groomer, it means that your device is waterproof. It can be safely cleaned with water and used while taking a shower or a bath. For safety reasons, these waterproof groomers can only be used cordless and will not turn on if they are connected to the power supply.

Note: Please keep in mind that the symbols on your Philips Groomer vary per model type. If you are still unsure whether it is safe to clean your Philips Groomer with water then please contact us for further support.

#2 How do I clean my Philips Groomer?

To maintain optimum performance of your Philips Groomer, it is important to clean the product after each use. Do not use corrosive detergents, scouring pads or cloths, petrol, acetone etc. to clean the groomer.

See the following instructions on how to clean your Philips Groomer below.
Washable groomers
Washable groomers have a water tap printed on the back of the handle or located in the user manual. Washable groomers with a water tap can be cleaned with water, however this does not mean that you can use it to clip or trim your hair in the shower or bath. To clean these devices, take off the attachments and cutter and clean the area underneath with water. Do not use soapy water or any cleaning detergents, as this can remove the protective oil on the cutter and effect its performance. Wash and dry the attachments separately before reattaching them to the groomer. Never immerse the appliance in water.

Showerproof groomers
Showerproof groomers have a shower/bath symbol and can be safely cleaned with water and used while taking a shower or bath. For safety reasons, these waterproof groomers can only be used cordless and will not turn on if they are connected to the power supply.

Before cleaning, ensure the power is off and the appliance is disconnected from the wall socket. To clean these devices, take off any comb and the cutting unit of the device. Clean the comb and cutting unit under a warm tap. Shake off excess water and allow the parts to air dry completely. Never dry the cutting unit with a towel or tissue as this may cause damage.

Do not use soapy water or any cleaning detergents, as this can remove the protective grease on the cutter and effect its performance.

For more detailed instructions of your model, please refer to the user manual.

Non-washable groomers
These groomers have a crossed-out tap symbol (Image 1) located in the user manual or printed on the back of the handle. These appliances cannot be washed with water. Before cleaning, ensure the power is off and the appliance is disconnected from the wall socket. Remove the grooming comb and the cutting unit off the appliance. Clean the cutting unit and the inside of the appliance with the cleaning brush provided or a cotton bud.

For more detailed instructions of your model, refer to the user manual.

Oiling your groomer after cleaning
We recommend oiling your groomer regularly. You can apply a few drops of oil on the teeth of the cutting element of your groomer. You can use the oil provided in the packaging or any other sewing machine oil.

If the groomer you own has an oil reminder (Image 2), an image of an oil drop will light up as a reminder for you to oil your groomer after it has been properly cleaned.

Oil your groomers with the oil provided in the package or sewing machine oil.

For more detailed instructions of your model refer to the user manual.

#3 How to trim a beard ?

A beard can be a thing of beauty. Keep yours in line with our ultimate beard trimming guide, packed with tips.

What does beard trimming involve?
If you follow the proper way to trim a beard, you'll be aiming for an even length all over, and a proper beard neckline, cheek line, moustache and lip line. Here's how to achieve that.

Step 1 : The all-over beard trim
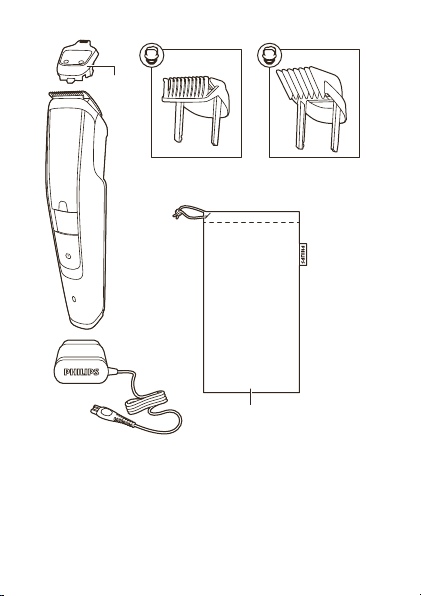
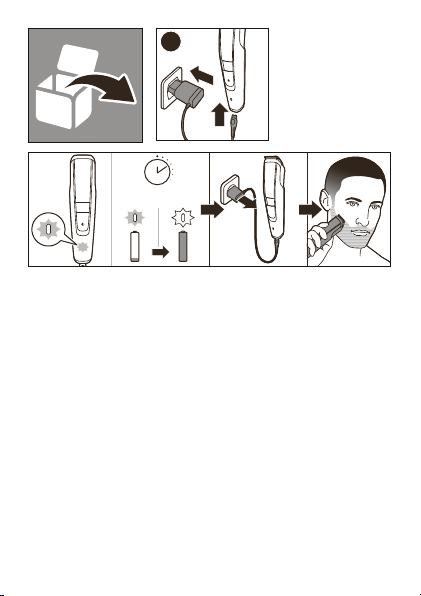
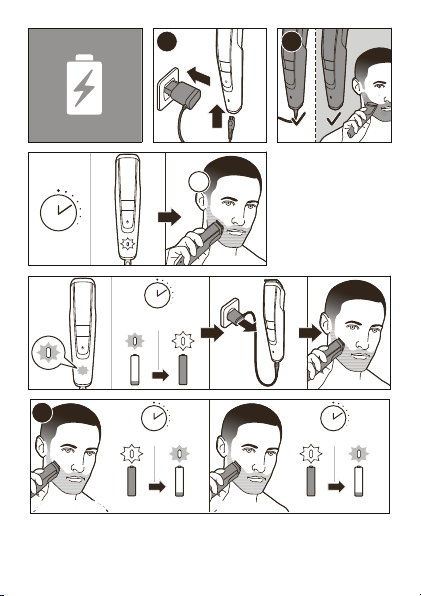
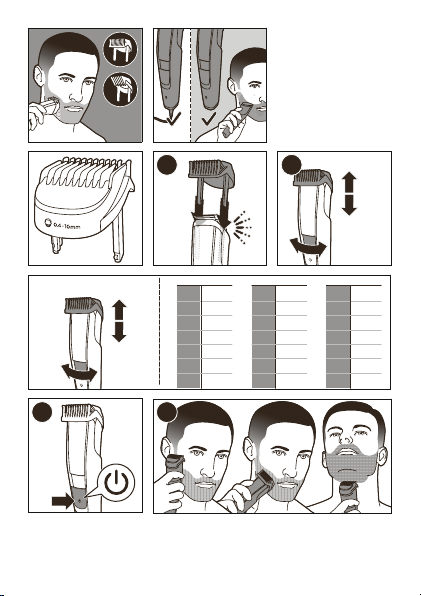
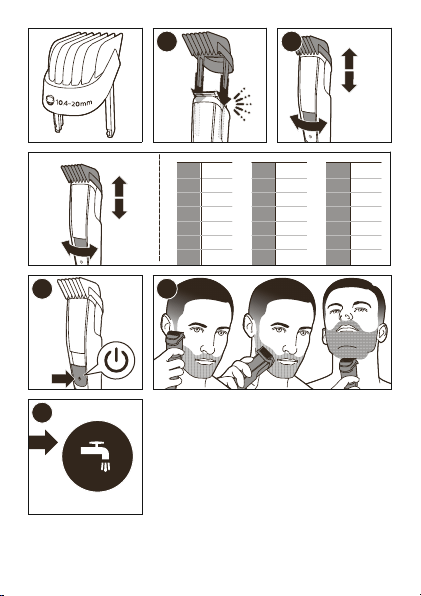
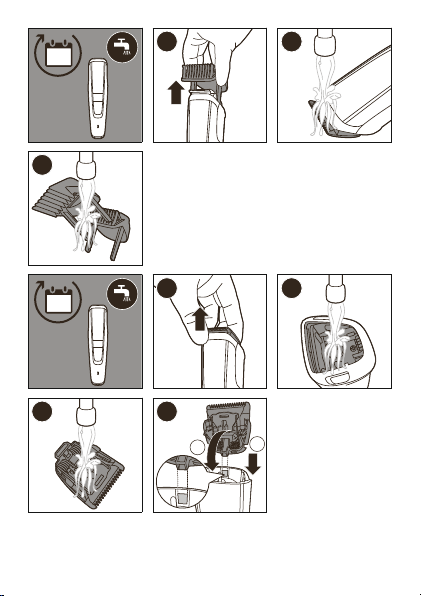
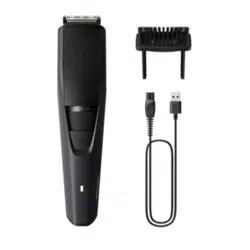
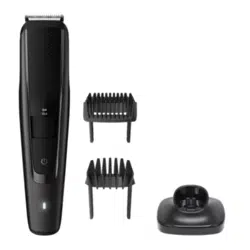
Wash and dry your beard and face. If your beard trimmer or multigroomer comes with multiple click-on beard combs, you can use these to get the desired hair length. The numbers on the combs indicate the length of the remaining hair after trimming. Simply click-on the appropriate comb onto the appliance and start trimming. If your appliance comes with an adjustable comb, set the right setting first. When you trim for the first time, you may start by using the comb with the maximum trimming length setting or the highest length setting to familiarise yourself with the product first.

Go against the direction of hair growth to remove excess bulk. Repeat using shorter trim settings until you're happy with the length.

Step 2 : Define your neckline
For the perfect beard neckline, put a finger horizontally just above your Adam's Apple and trim a vertical strip below this line. Work outwards under your jawline to one side, then return to the centre and work your way to the other side. You're only excused this step if you're sporting stubble: if you're trimming a full beard, the neckline matters. Struggling? Our beard neckline guide here can give you more details.

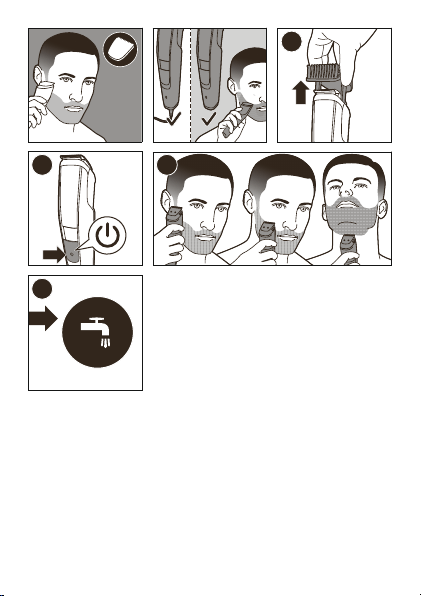
Step 3 : Follow your beard trim through with a shave
Shave off the trimmed hairs located below your new beard neckline. You can remove these hairs by using a Philips electric shaver, trimmer without a comb or a manual blade. When using the trimmer, place the flat side of the cutting element against your skin and make strokes against the direction of hair growth to trim hair close to the skin.
Step 4: Choose your cheek line
If you're happy with a natural beard cheek line, leave it as it is. For an edgier, crisper look, go for a straight or slightly rounded line to the bottom of your sideburns. You can shape your cheek line by holding the cutting element perpendicular to the skin and move it upwards or downwards with gentle pressure. The lower your cheek line, the more length you'll give to your face. Get tips on cheek line shaping here.

Step 5: Shape up your moustache
You can trim your moustache to the same length as your beard, or leave it slightly longer to make it stand out more. For a nice, clean lip line, close your mouth and smile. Keep your moustache clean and trim the bottom (without the trimmer comb) to create a 1 mm clear line above your lips (optional).