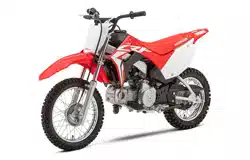
Honda CRF300LR/LRA Scooter 2021
Product's Documents
Below are documents related to this product, you can read online or download:
- Owner's manual - (English) Read Online | Download pdf
Owner Manual Scooter
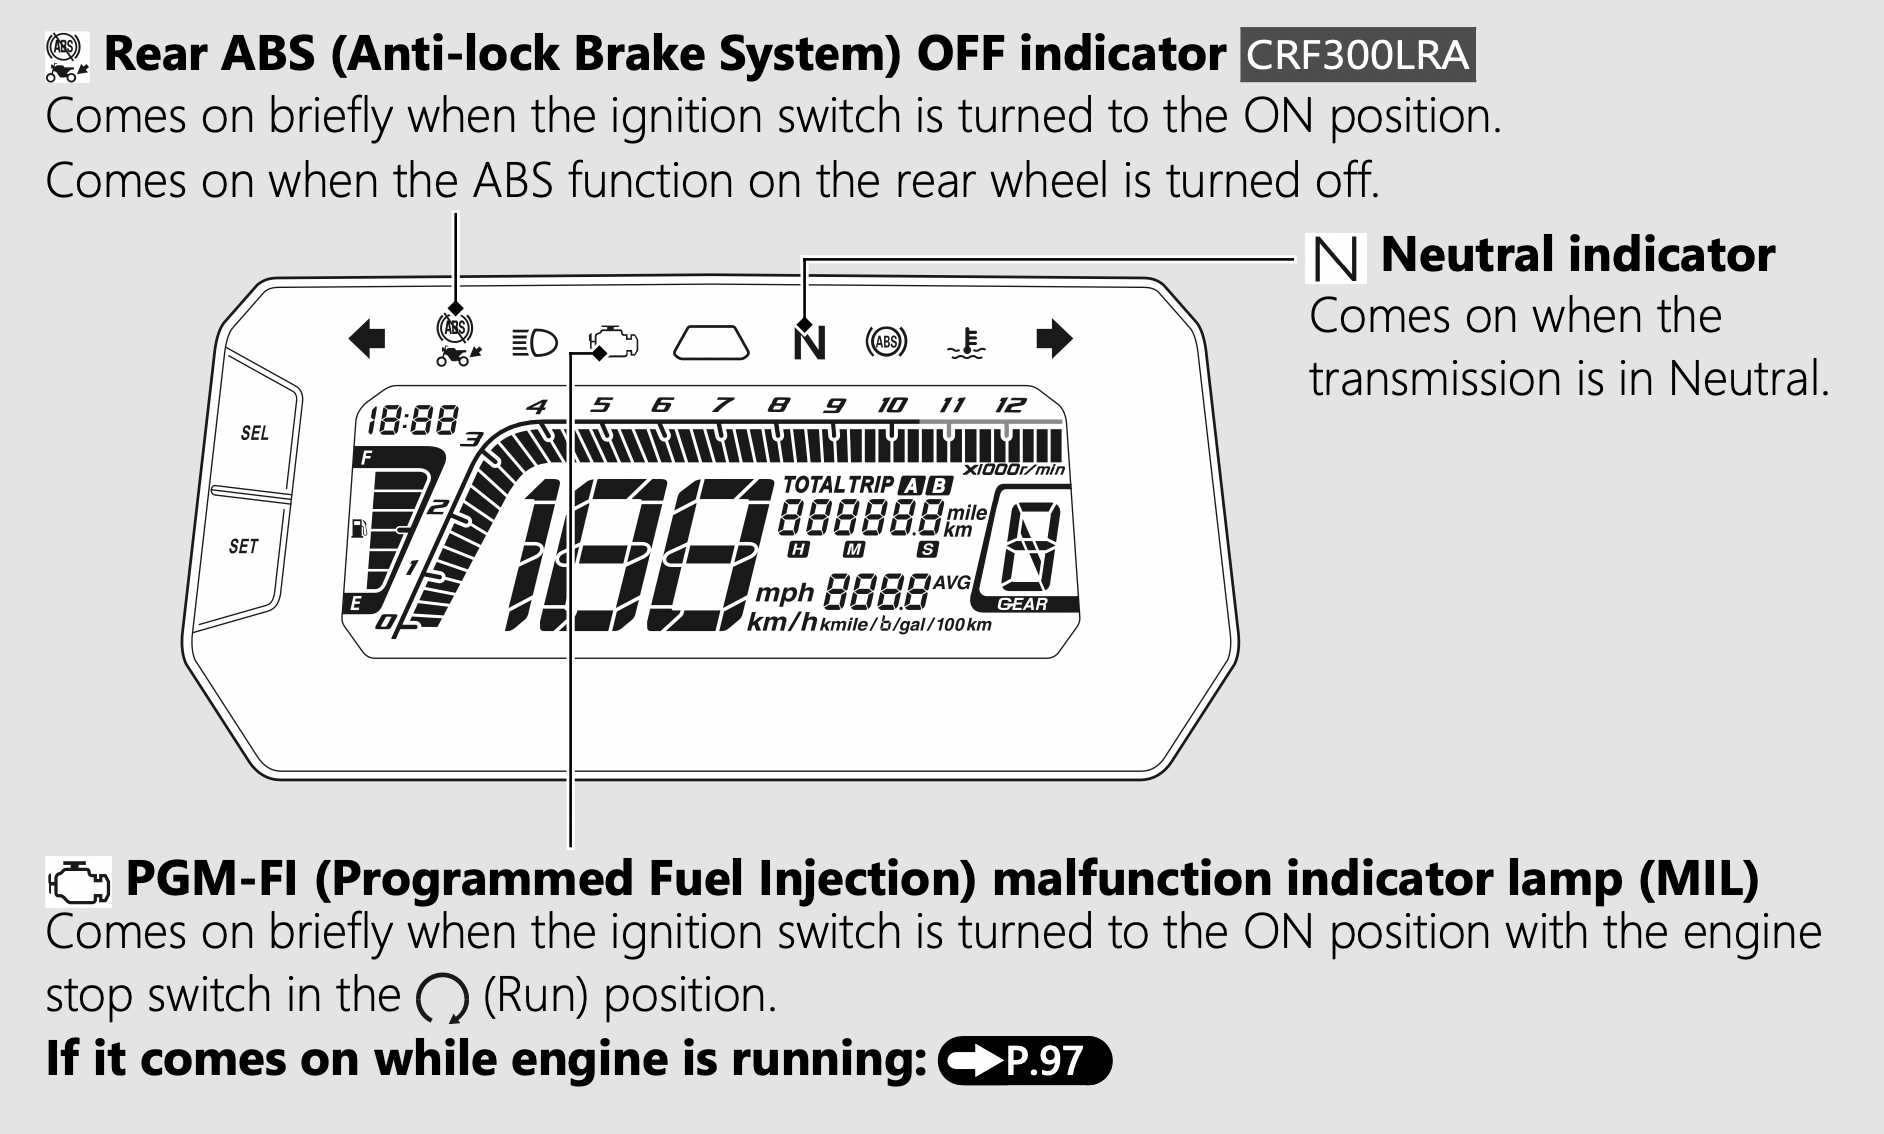
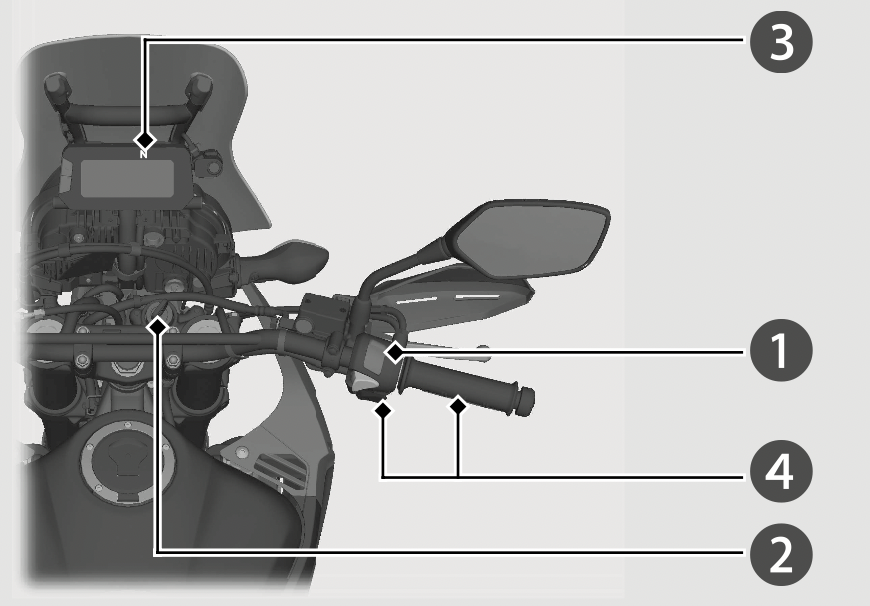
If one of these indicators does not come on when it should, have your dealer check for problems.
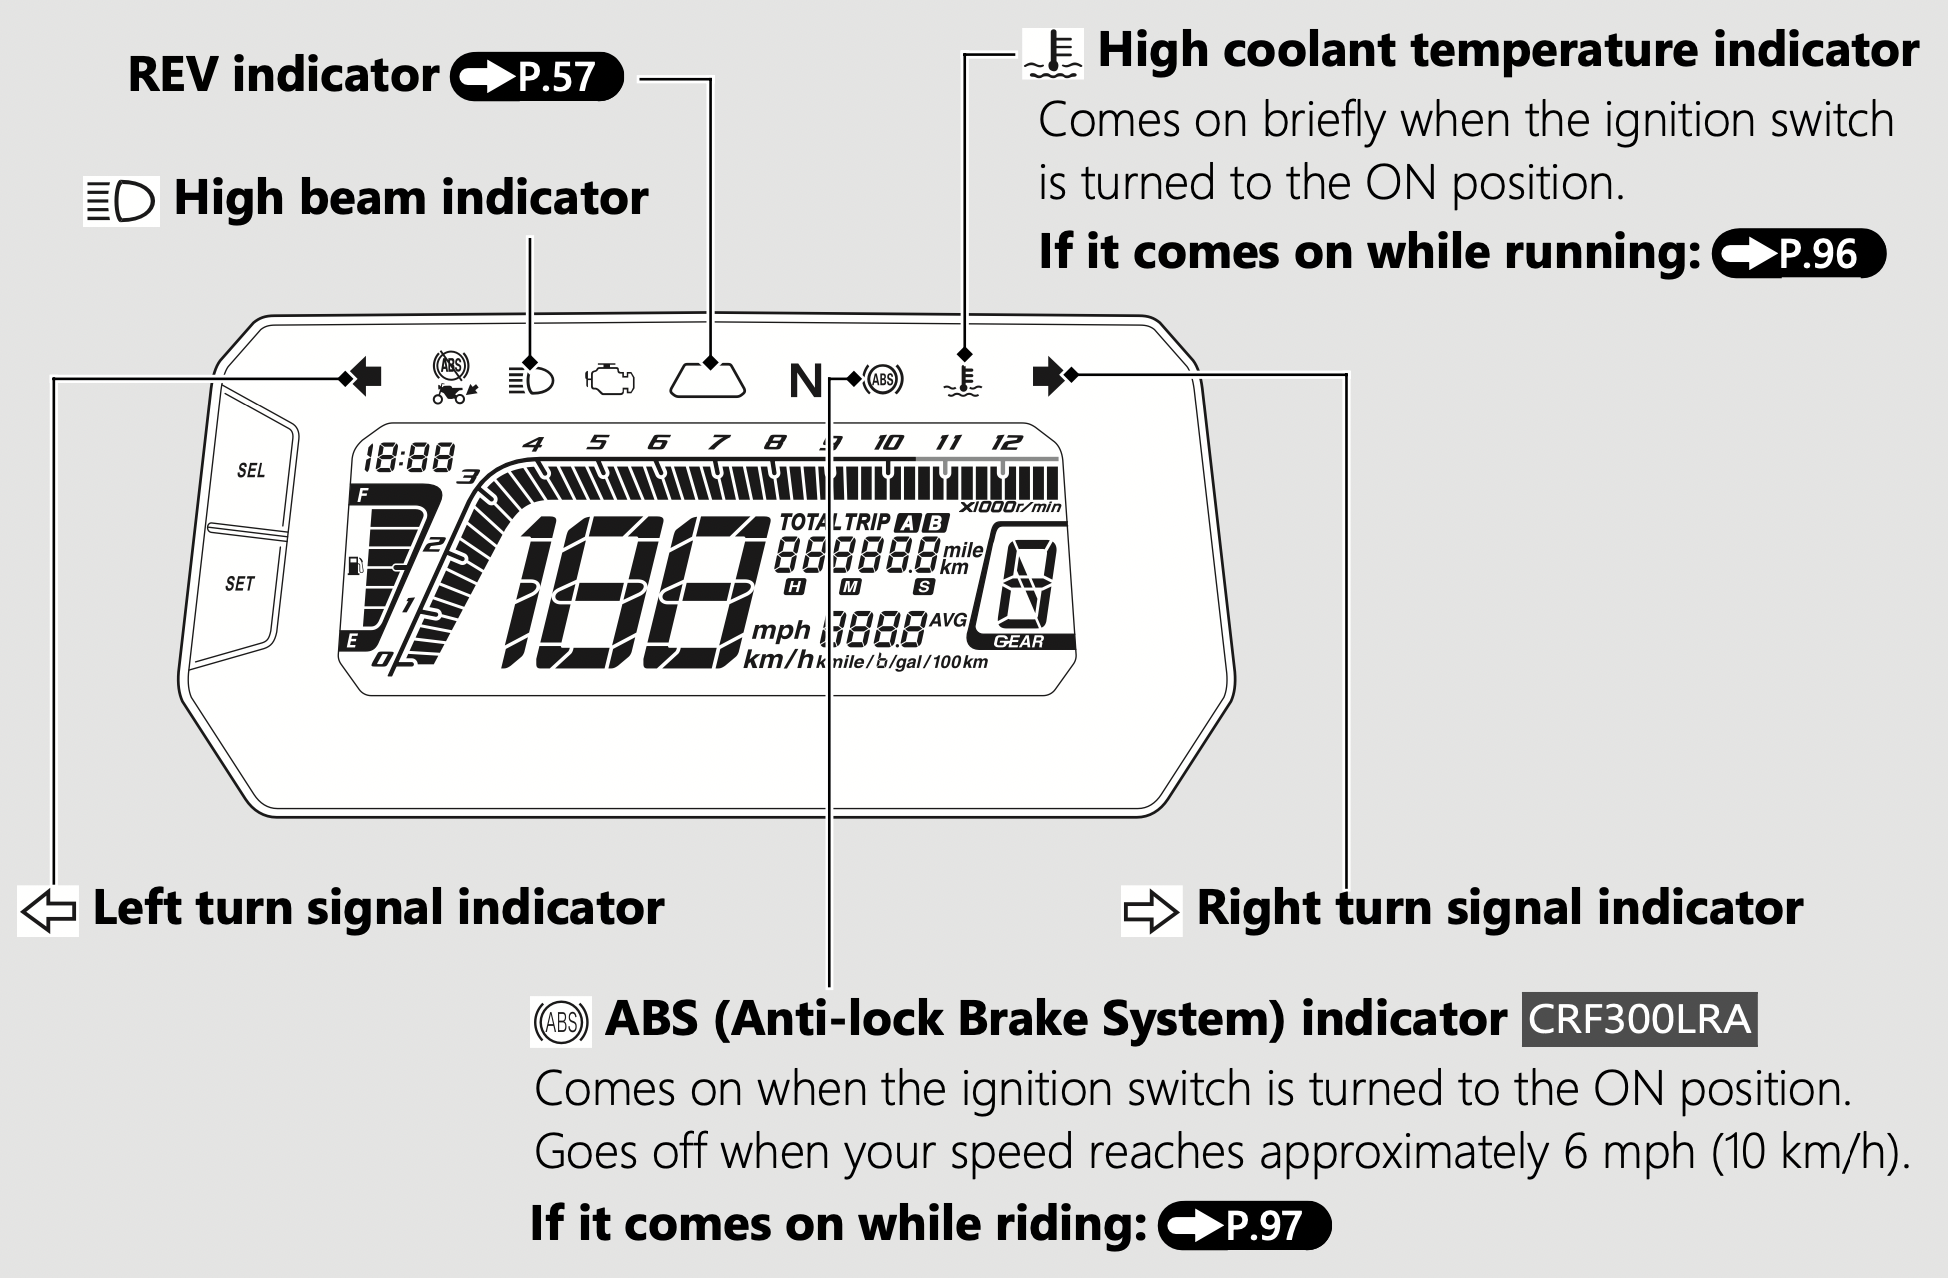
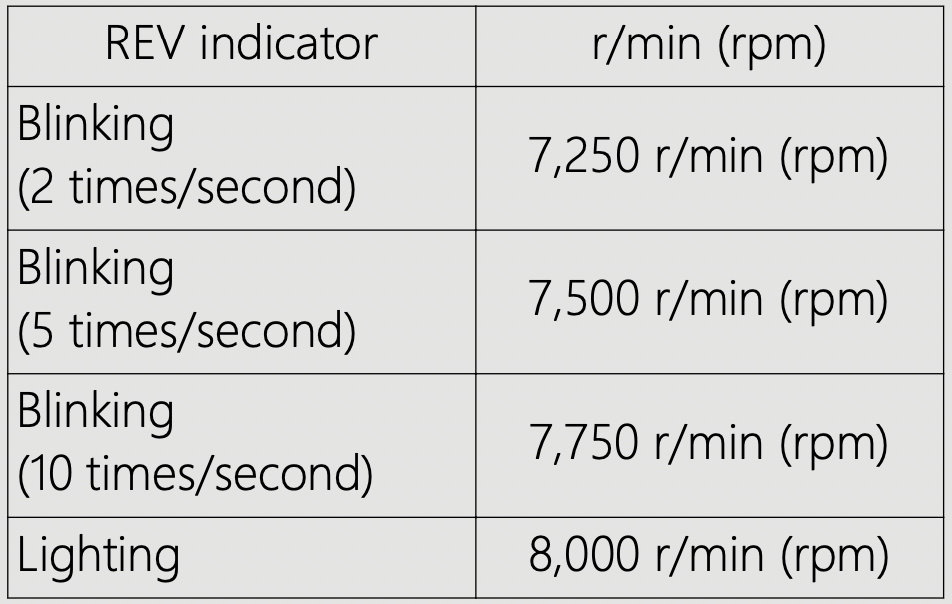
REV Indicator
Initial setting
blinking RPM: 8,000 r/min (rpm)
interval RPM: 250 r/min(rpm)

Steering Lock
Lock the steering when parking to help prevent theft.
A U-shaped wheel lock or similar device is also recommended.
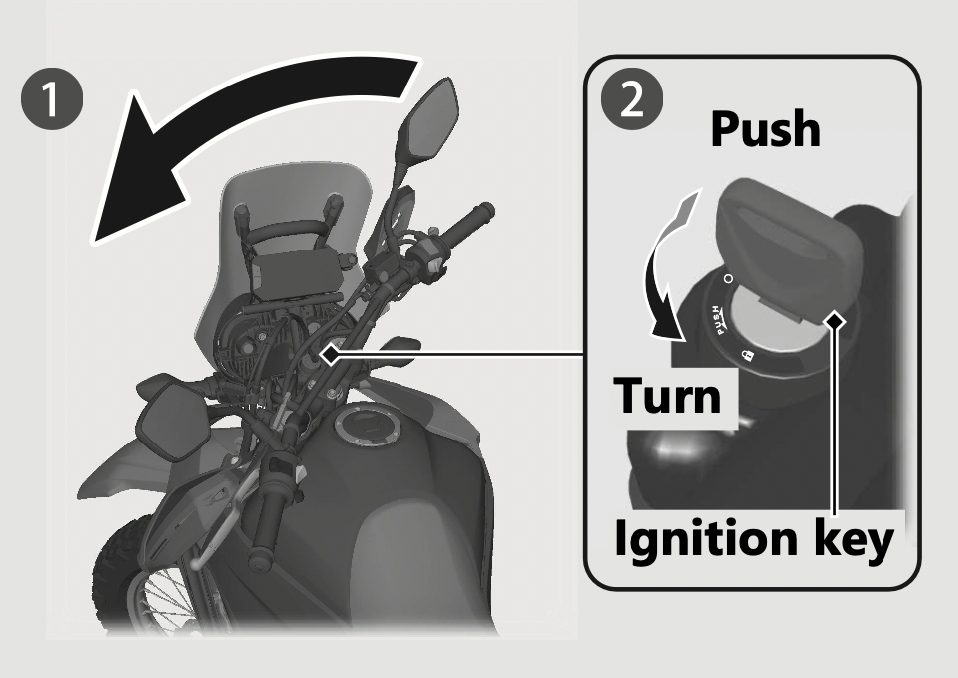
Locking
Unlocking
Insert the key, push it in, and turn the ignition switch to the OFF position.
Start your engine using the following procedure, regardless of whether the engine is cold or warm.
NOTICE
 (Run)position.
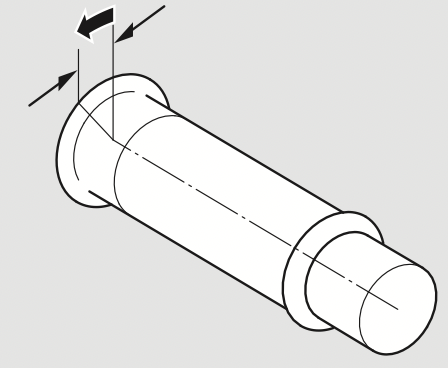
 indicator to come on). Alternatively, pull in the clutch lever to start your vehicle with the transmission in gear so long as the side stand is raised.
About 1/8 in (3 mm), without free play
If the engine does not start:
If Engine Will Not Start P.95
Starter Motor Operates But Engine Does Not Start
Check the following items:
Starter Motor Does Not Operate
Check the following items:
 (Run) position. P.43
If the problem continues, have your vehicle inspected by your dealer.
The engine is overheating when the following occurs:
Extended fast idling may cause the high coolant temperature indicator to come on.
NOTICE: Continuing to ride with an overheated engine can cause serious damage to the engine.
PGM-FI (Programmed FuelInjection) Malfunction Indicator Lamp (MIL)
If the indicator comes on while riding, you may have a serious problem with the PGM-FI system. Reduce speed and have your vehicle inspected by your dealer as soon as possible.
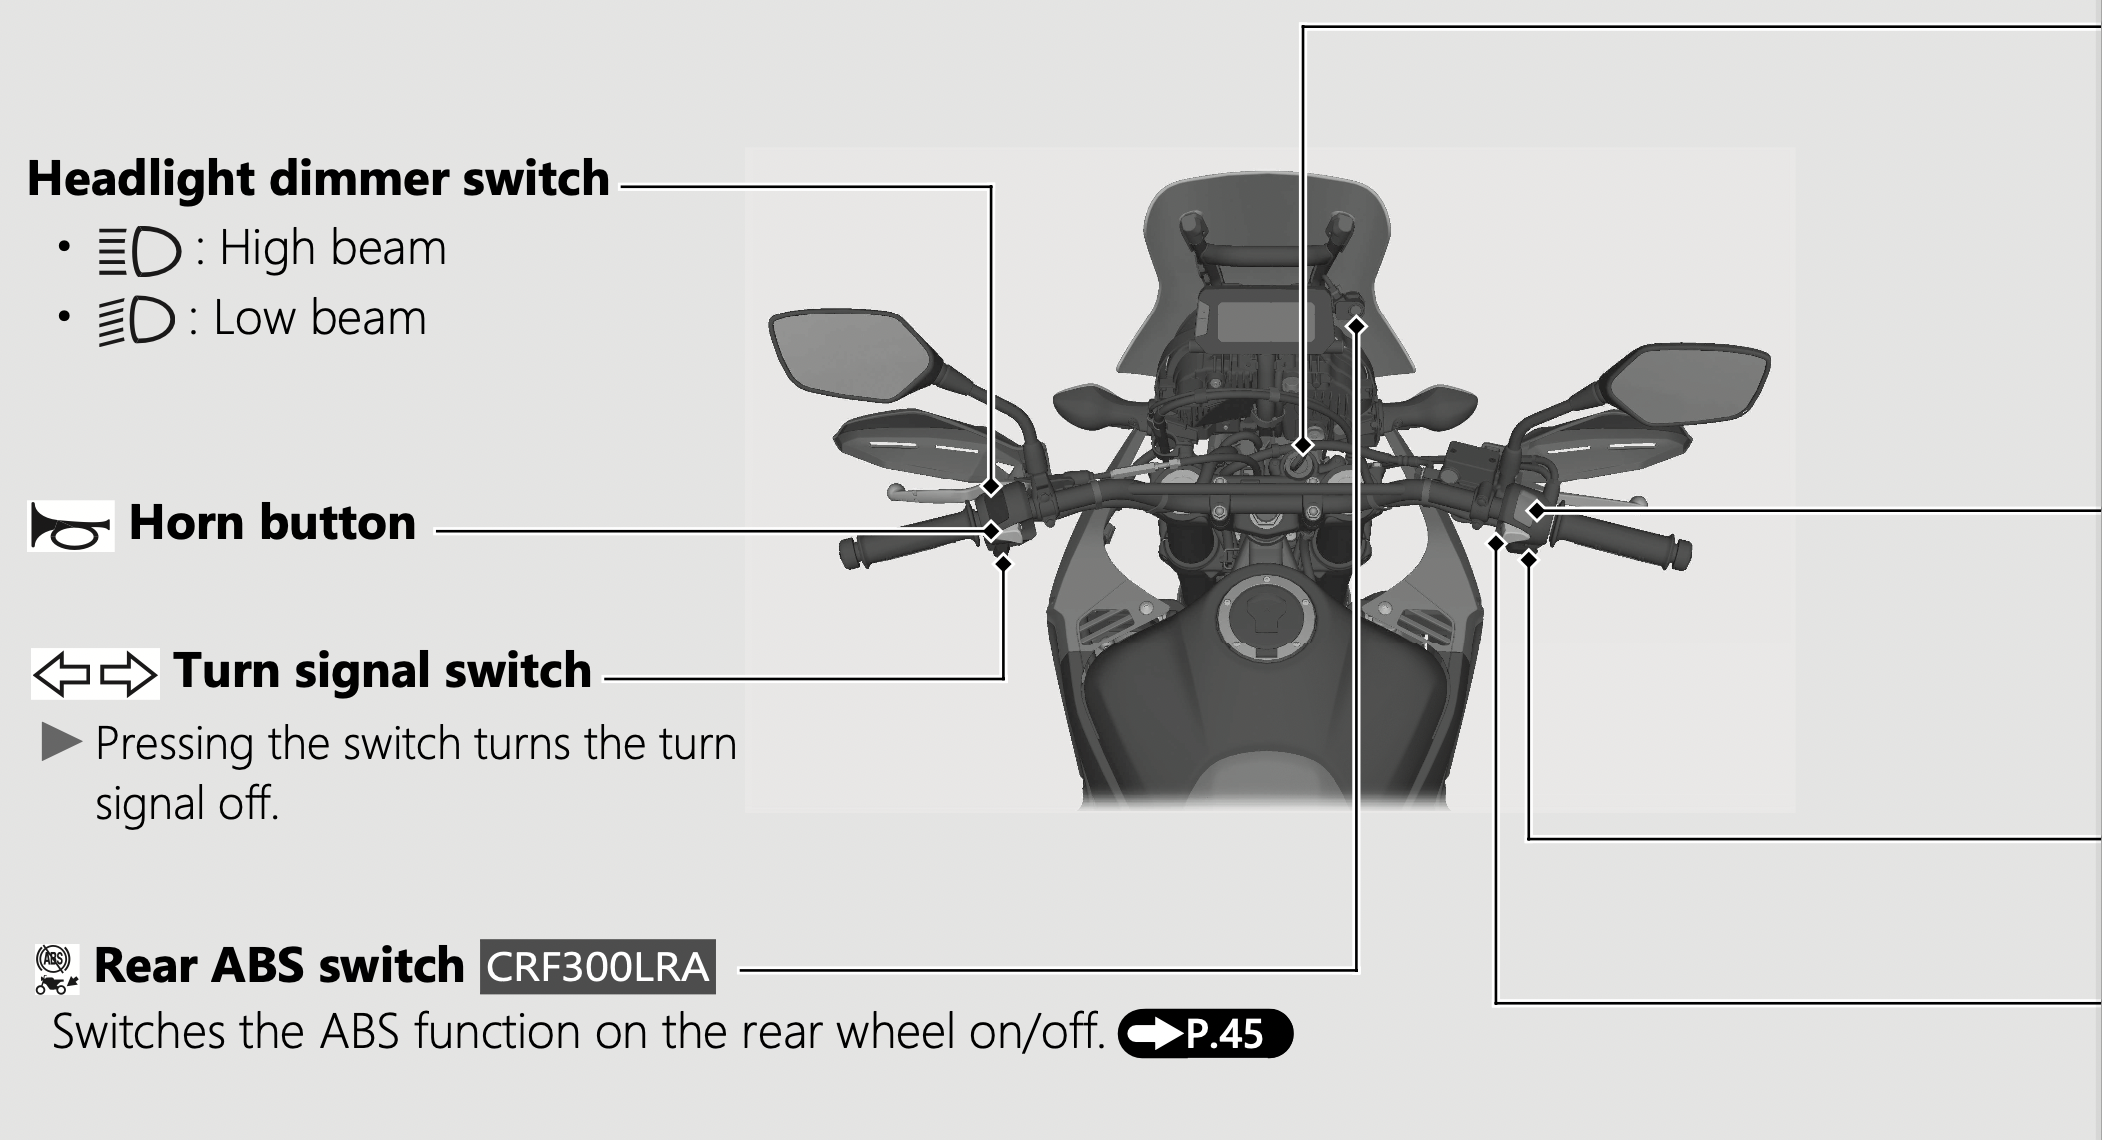
ABS (Anti-lock Brake System) Indicator
CRF300LRA
If the indicator operates in one of the following ways, you may have a serious problem with the ABS. Reduce your speed and have your vehicle inspected by your dealer as soon as possible.
If the ABS indicator stays on, your brakes will continue to work as a conventional system, but without the anti-locking function.
The ABS indicator may flash if you turn the rear wheel while the rear wheel is lifted off the ground. In this case, turn the ignition switch to the OFF position, and then to the ON position again. The ABS indicator will go off after your speed reaches 19 mph (30km/h).
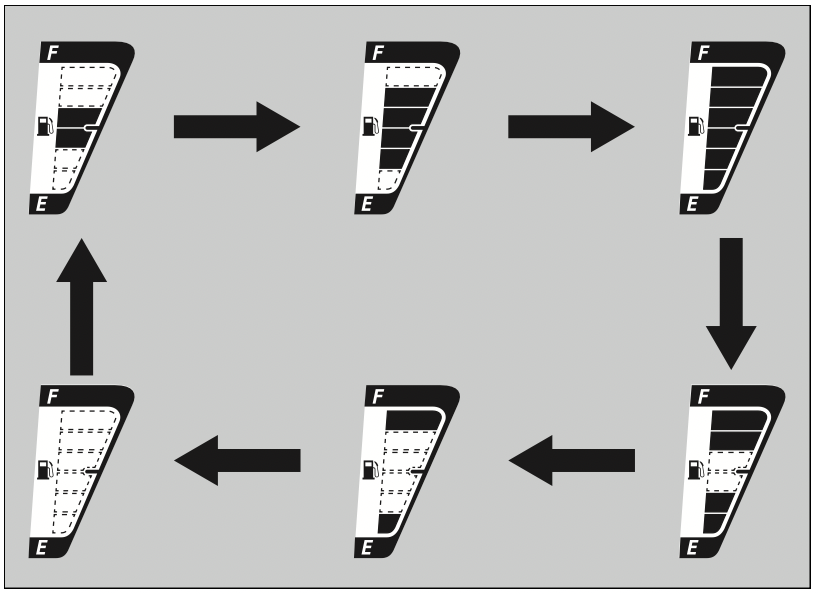
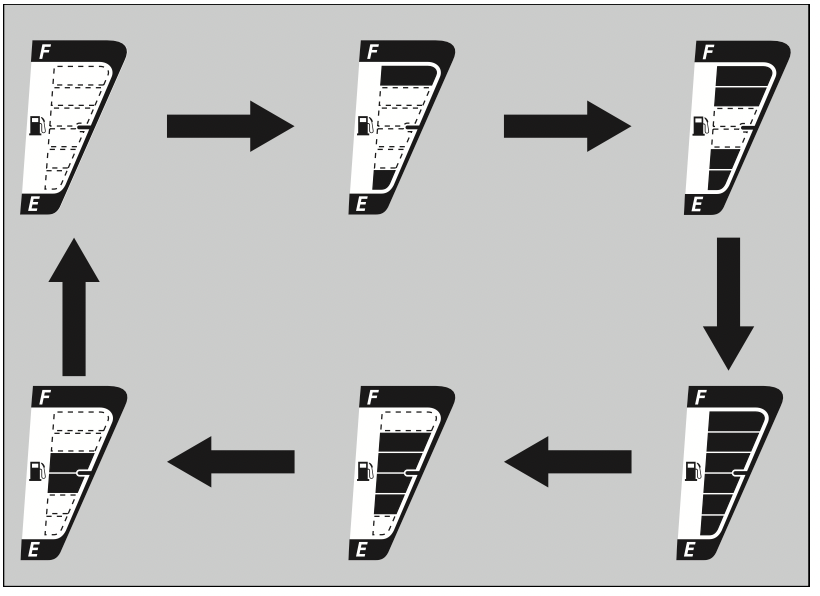
Fuel Gauge Failure Indication
If the fuel system has an error, the fuel gauge indicators will be displayed as shown in the illustration.
If this occurs, see your dealer as soon as possible.
Repairing a puncture or removing a wheel requires special tools and technical expertise.
We recommend you have this type of service performed by your dealer.
After an emergency repair, always have the tire inspected/replaced by your dealer.
Tube Repair and Replacement
If a tube is punctured or damaged, you should replace it as soon as possible. A tube that is repaired may not have the same reliability as a new one, and it may fail while you are riding.
If you need to make a temporary repair by patching a tube or using an aerosol sealant, ride cautiously at reduced speed and have the tube replaced before you ride again.
Anytime a tube is replaced, the tire should be carefully inspected as described.
WARNING
Battery Goes Dead
Charge the battery using a motorcycle battery charger.
Remove the battery from the vehicle before charging.
Do not use an automobile-type battery charger, as these can overheat a motorcycle battery and cause permanent damage. If the battery does not recover after recharging, contact your dealer.
NOTICE: Jump starting using an automobile battery can damage your vehicle's electrical system and is not recommended.
Bump starting is also not recommended.
Burned-out Light Bulb
Follow the procedure below to replace a burned-out light bulb.
Turn the ignition switch to the OFF or LOCK position.
Allow the bulb to cool before replacing it. Do not use bulbs other than those specified. Check the replacement bulb for correct operation before riding.
For the light bulb wattage, see "Specifications." P.134
The headlights, license plate light uses several LEDs. If there is an LED which is not turned on, see your dealer for servicing.
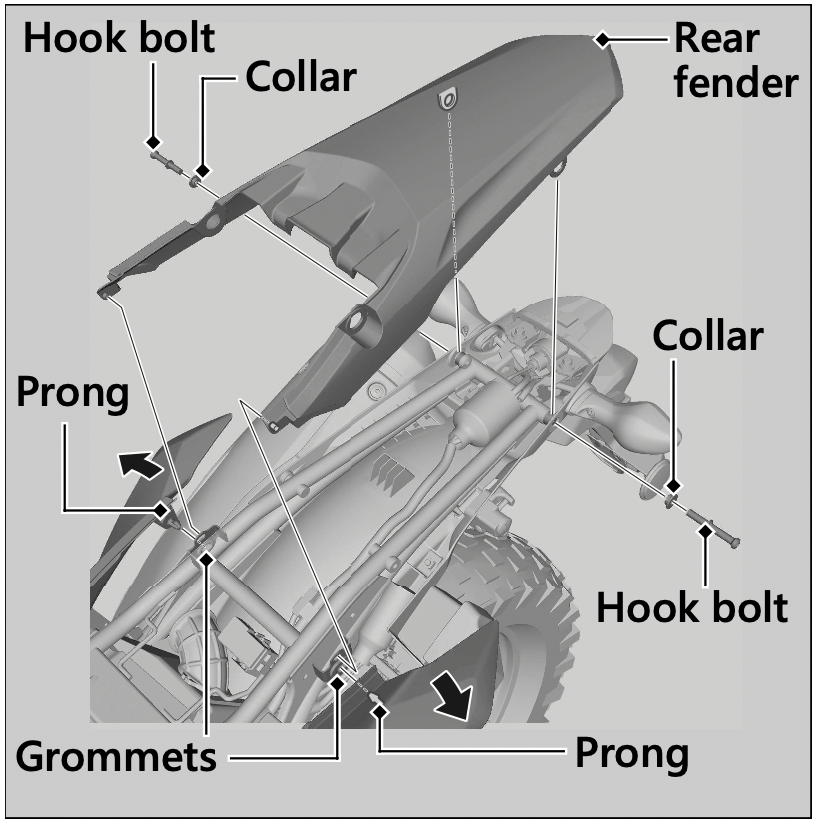
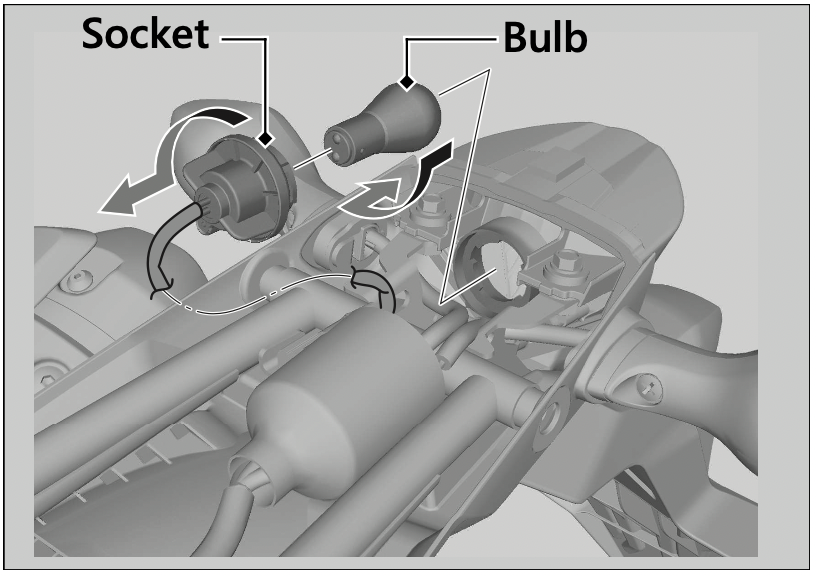
Brake light/Taillight Bulb
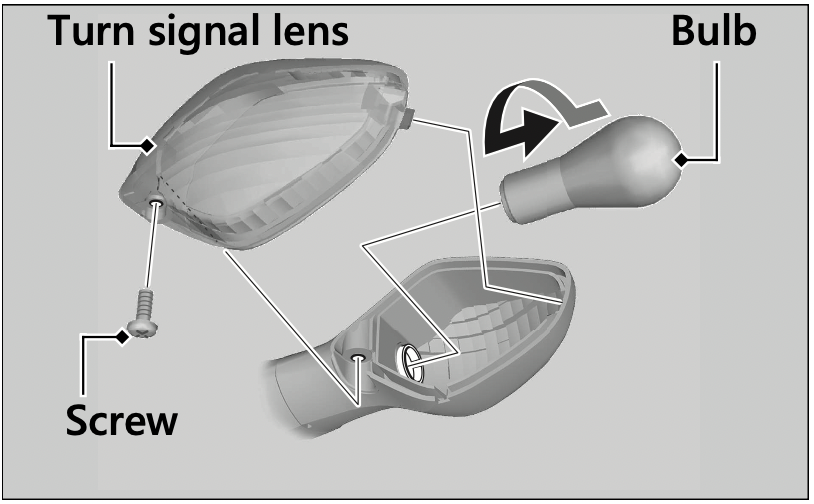
Front/Rear Turn Signal Bulb
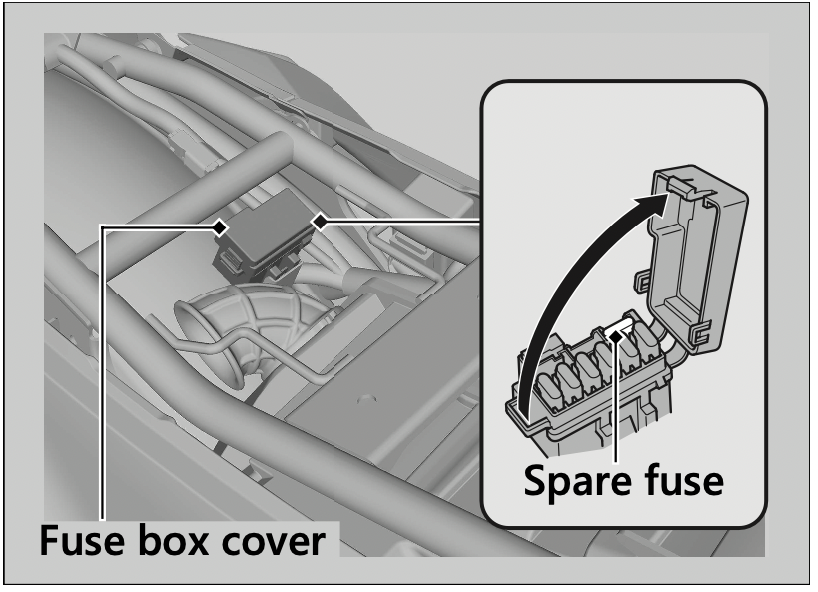
Blown Fuse
Before handling fuses, see "Inspecting and Replacing Fuses." P.65
Fuse Box A
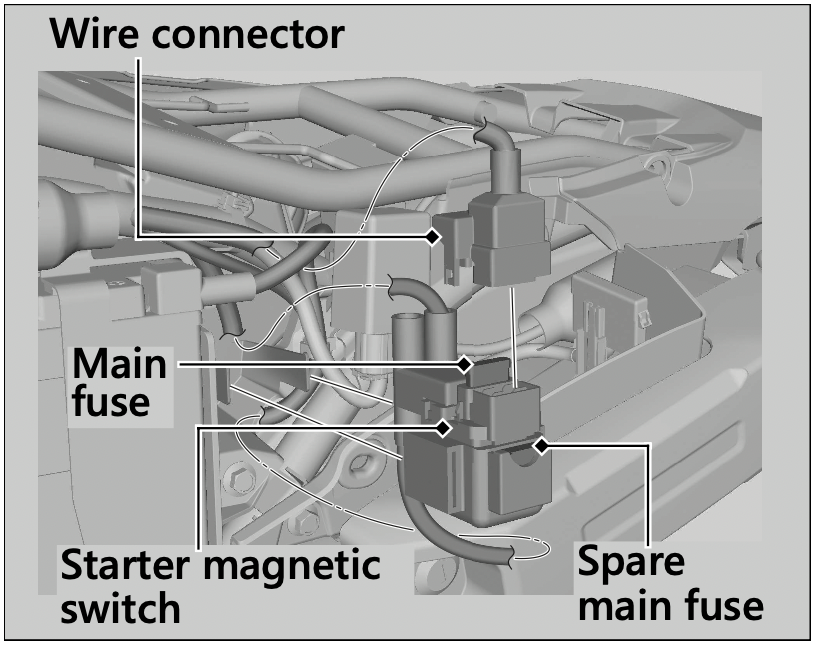
Main Fuse
Fuse Box B
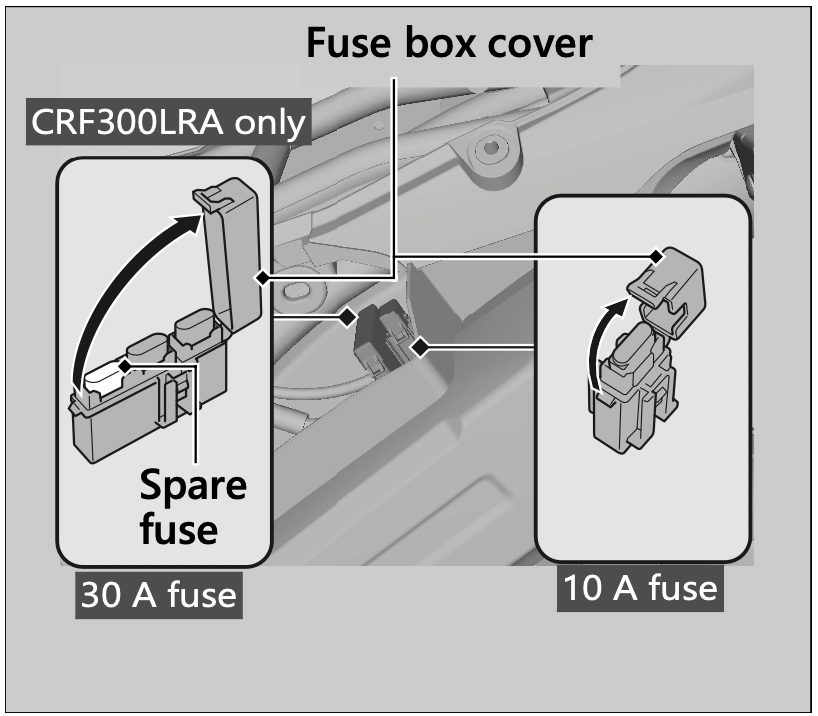
NOTICE: If a fuse fails repeatedly, you likely have an electrical problem. Have your vehicle inspected by your dealer.
If the fuel pump filter is clogged, unstable engine operation will occur intermittently while riding.
Even if this symptom occurs, you can continue to ride your vehicle.
If unstable engine operation occurs even if sufficient fuel is available, have your vehicle inspected by your dealer as soon as possible.