Loading ...
Loading ...
Loading ...
7
(ENG) DVQX1303
• When carrying, the lens hood can
be temporarily attached in the
reverse direction.
• Do not carry the lens by holding
only the lens hood.
Attaching/Removing the
1.4k Teleconverter
• The teleconverter can be used in combination with
this lens (H-ES200). (As of November 2017)
• For the most up-to-date information on compatible lenses
other than this lens, check the Panasonic website.
• Do not attach any parts other than a compatible lens.
Doing so may damage the lens or teleconverter or
adversely affect its performance.
• Before attaching or removing the teleconverter, verify
that the digital camera is turned off.
• Remove the lens cap and the lens rear cap.
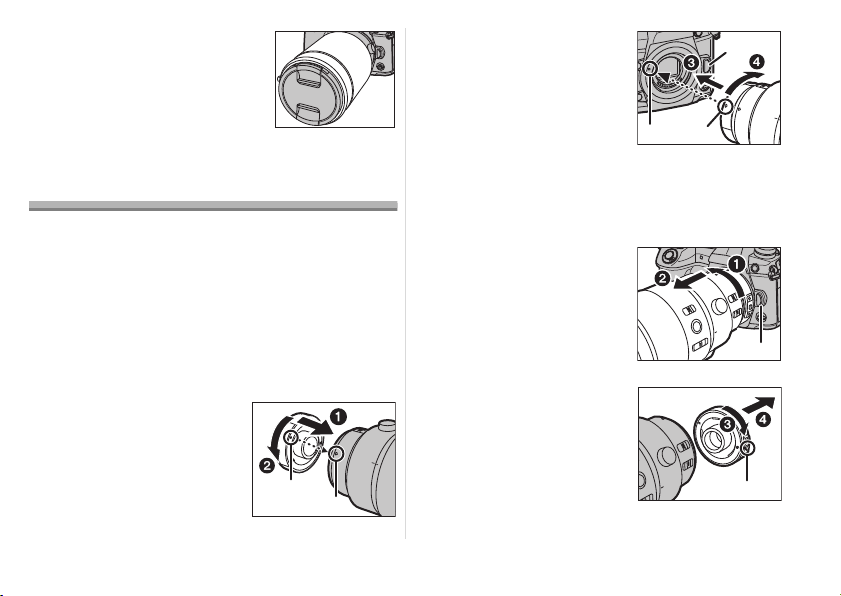
∫ To attach the teleconverter
1
Align the fitting mark
A
on the teleconverter with
the lens fitting mark
B
on
the lens (
1
), and rotate the
teleconverter in the arrow
direction until a clicking
sound is heard. (
2
)
2
Align the lens fitting mark
C
on the teleconverter with
the lens fitting mark
D
on
the digital camera (
3
),
and
rotate the lens in the arrow
direction until a clicking
sound is heard. (
4
)
• When attaching the lens to the digital camera, do not
press the lens release button
E and the lens release
button on the teleconverter.
∫ To remove the teleconverter
1
While pressing and
holding the lens release
button
E
on the digital
camera, rotate the lens
fitted with the
teleconverter in the arrow
direction until it stops and
remove it (
1
,
2
).
2
While pressing and
holding the lens release
button
F
on the
teleconverter, rotate the
teleconverter in the arrow
direction until it stops and
remove it (
3
,
4
).
DVQX1303_ENG_SPA.book 7 ページ 2017年10月20日 金曜日 午後4時0分
Loading ...
Loading ...
Loading ...