Loading ...
Loading ...
Loading ...
Application Guide - 12
Design Worksheet, EdgeMax EM180 & Mixed EM90/EM180 Systems
Design Worksheet
Use the following worksheet to create a design using EdgeMax loudspeakers.
Step 1: Confirm that the EdgeMax loudspeaker will meet your loudness requirement.
A. On the chart below, locate the loudspeaker mounting height for this design.
B. Draw a line down to the desired maximum SPL.
C. Draw a horizontal line across the chart at your desired SPL level.
D. Loudspeakers listed below the line will meet your loudness requirement.
Step 2: Confirm that the EdgeMax loudspeaker will meet your response requirement.
Step 3: Using the graph paper on the last page, create a sketch or drawing of the room.
Step 4: Using the chart below, determine the Usable Throw Distance for the loudspeaker
mounting height that will be used with your design.
NOTE: EdgeMax loudspeakers have a usable
Frequency Response down to 50 Hz, so additional
subwoofers may not be required. However, if
designers find a need for additional bass, the MB210
compact subwoofer can be used.
Full Range Extended Range
FreeSpace DS 16
FreeSpace DS 40
FreeSpace DS 100
EdgeMax EM90/EM180
FreeSpace 3 System
1.) Locate the mounting height you will be using for the design.
2.) Determine the usable throw distance for the desired coverage requirement.
NOTE: For rectangular rooms, one dimension, (length or width), cannot exceed
the maximum.
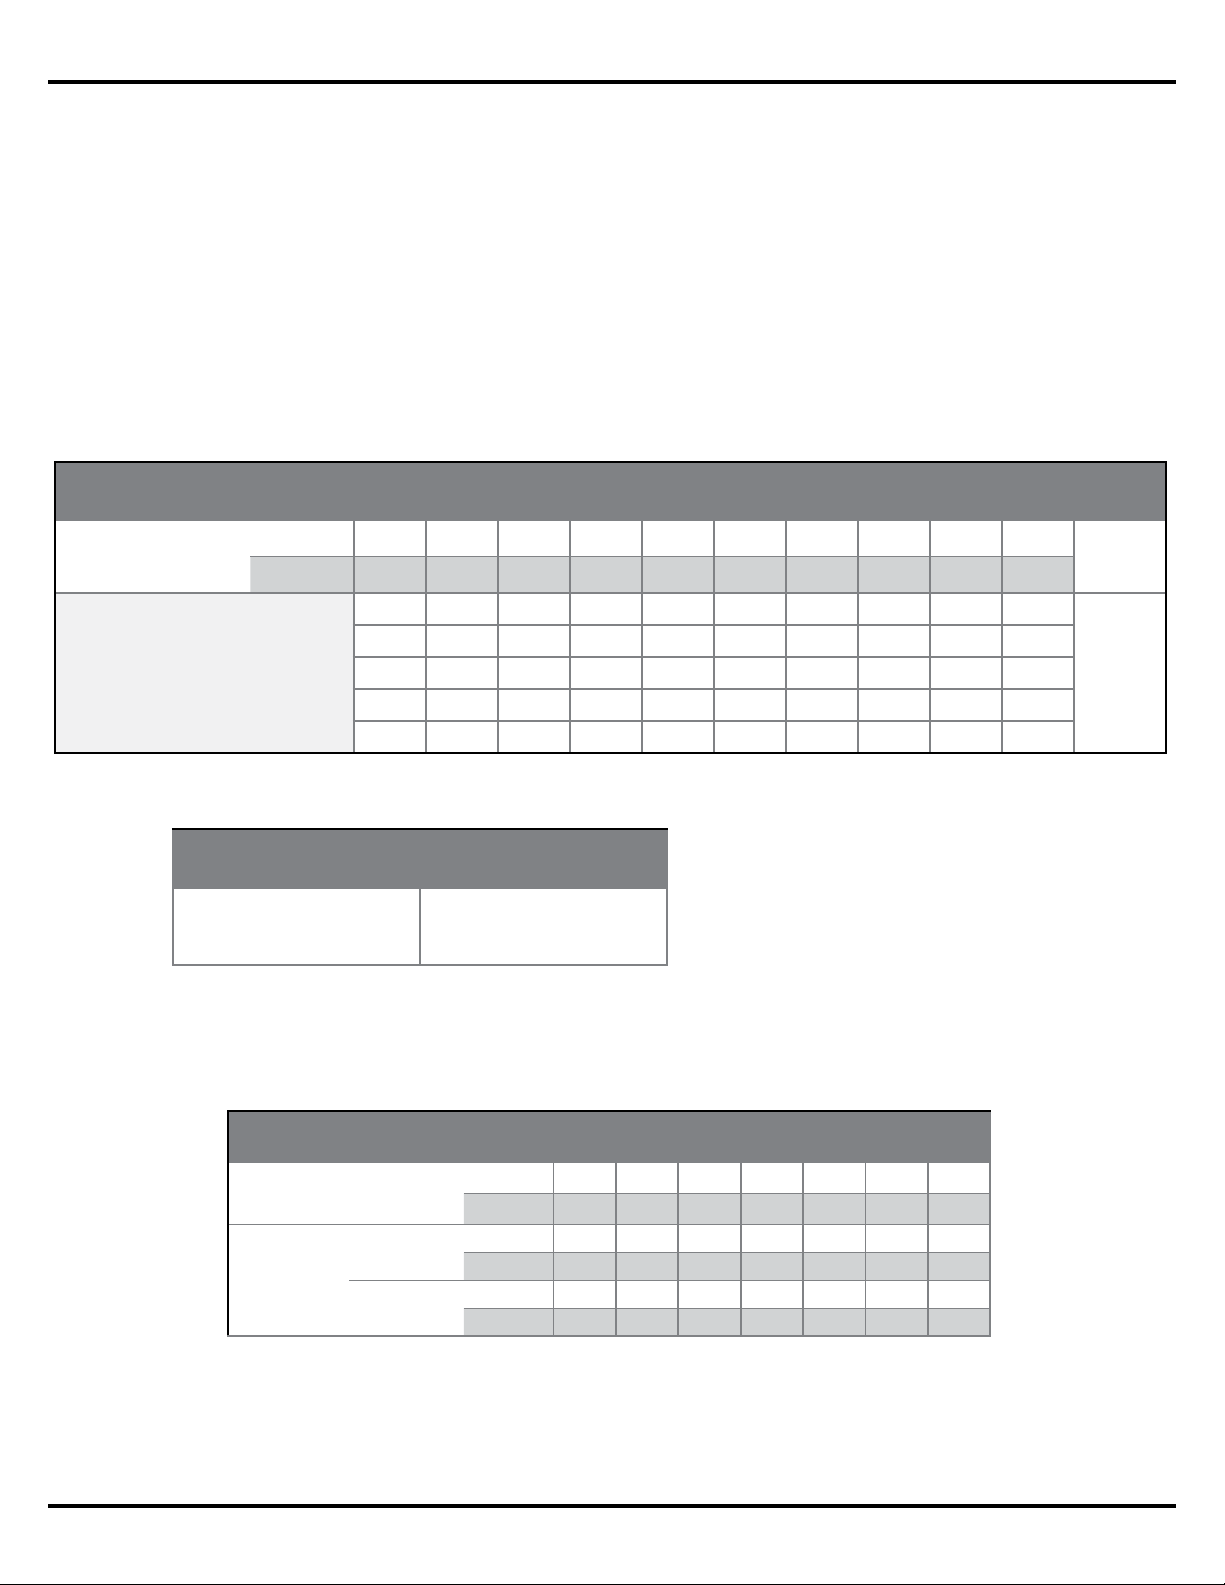
Maximum Continuous Output Level
Loudspeaker
Mounting Height
m 2.4 3.0 3.7 4.3 4.9 5.5 6.1 6.7 7.9 9.8
ft 8 10 12 14 16 18 20 22 26 32
DS 16F 99 96 93 91 89 88 87 86 84 82
dB
SPL
DS 40F 106 103 100 98 96 95 94 93 91 89
DS 100F 108 107 104 102 100 99 98 97 95 93
EM90 111 109 106 104 102 100 99 98 96 95
EM180 108 106 103 101 99 97 96 95 93 92
Usable Throw Distance, EdgeMax EM90 & EM180
Mounting Height
m 2.7 3.0 3.7 4.3 4.9 5.5 6.1
ft 9 10 12 14 16 18 20
Coverage
Quality
Premium
m 2 2 3 4 5 6 7
ft 7 8 11 15 18 21 24
Standard
m 3 4 6 8 9 11 13
ft 11 14 19 25 30 35 40
Loading ...
Loading ...
Loading ...