
Loading ...
Loading ...
Loading ...
11
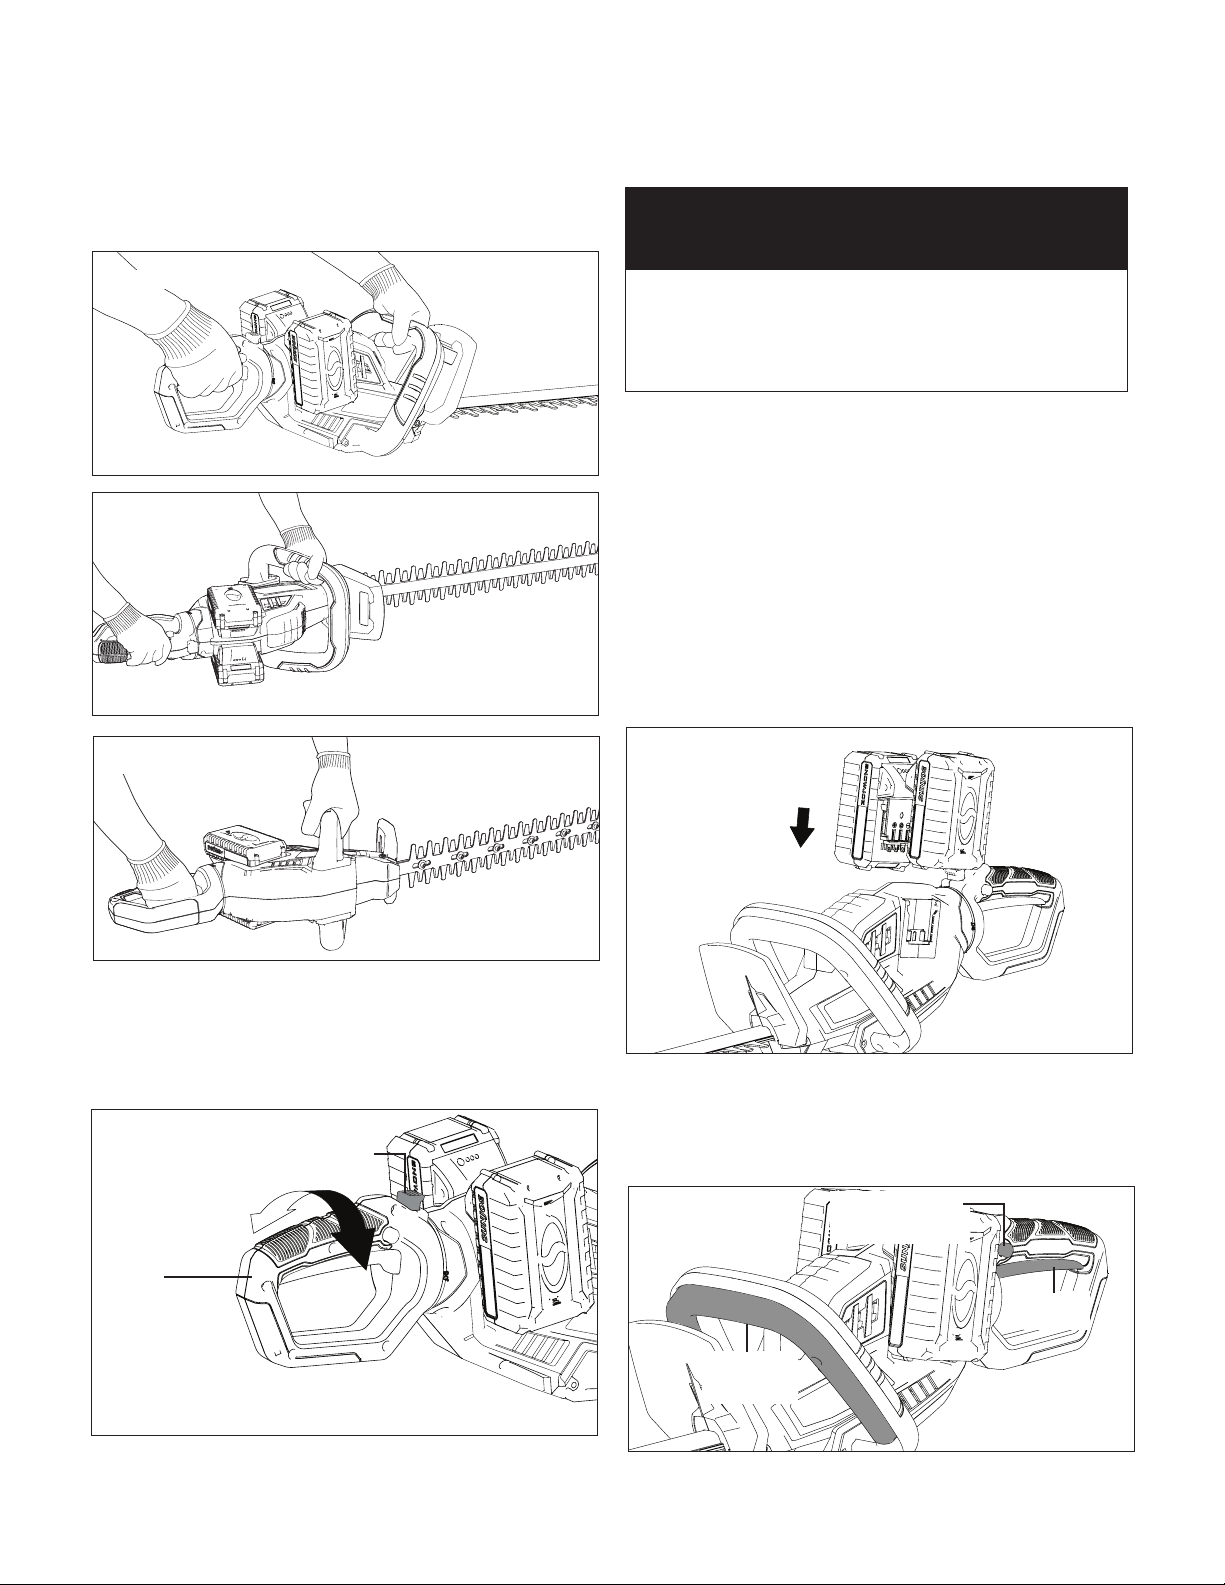
The secondary switch on the front handle can be activated
on all three sides, together with the 180 degree rotatable rear
handle, providing comfortable grip when performing cutting
operations in dierent positions (Figs. 4A, 4B & 4C).
To rotate the rear handle, follow the instruction below:
1. Stop the machine. Wait until the unit comes to a
complete stop.
2. Press and hold the handle lock button, and rotate the rear
handle clockwise or counterclockwise as needed (Fig. 5).
3. Hold the unit as indicated above and resume working.
Starting + Stopping
mWARNING! Ensure the blade does not touch any
objects before turning on the hedge trimmer.
mCAUTION! Starting, stopping, and restarting an DC
motor repeatedly within a few seconds can generate a great
deal of heat and damage the motor. To protect the life of your
cordless hedge trimmer, always wait at least ve seconds after
stopping before restarting the hedge trimmer.
This hedge trimmer is equipped with two switches. Both
switches need to be pressed to start the hedge trimmer. Follow
the instruction below.
1. Insert the batteries in the battery compartment (Fig. 6).
2. To start the tool, hold the tool as described in gs. 7A,7B
& 7C, then press and hold the safety button on either side,
and squeeze the On/O switch and secondary switch at
the same time. Wait for the tool to reach a stable speed,
and release the safety button (Fig. 7).
3. To turn the tool OFF, move the hedge trimmer away from
cutting area, and release one of the switches (Fig. 7).
Fig. 4A
Fig. 4B
Fig. 4C
Fig. 5
Rear
handle
Handle lock button
In order to operate this cordless hedge trimmer you will need
an 24V iON+ System battery and charger. See page 15 for
battery and charger options and specications, or for more
information visit sunjoe.com.
TOOL ONLY
BATTERY + CHARGER SOLD SEPARATELY
Fig. 6
Fig. 7
On/O
switch
Safety button
(on both sides)
Secondary
switch
Loading ...
Loading ...
Loading ...