Loading ...
Loading ...
Loading ...
Page 14
POOL PATROL PA-25 & PA-30
the mode button down while turning on the receiver. Once the receiver is
turned on, release the mode button. The unit has now changed modes.
SN mode
In this mode the receiver will accept any Pool Patrol transmitter.
ID mode
In this mode the receiver will only accept the transmissions from only
those ID codes the receiver has learned. It locks out all other
transmitters.
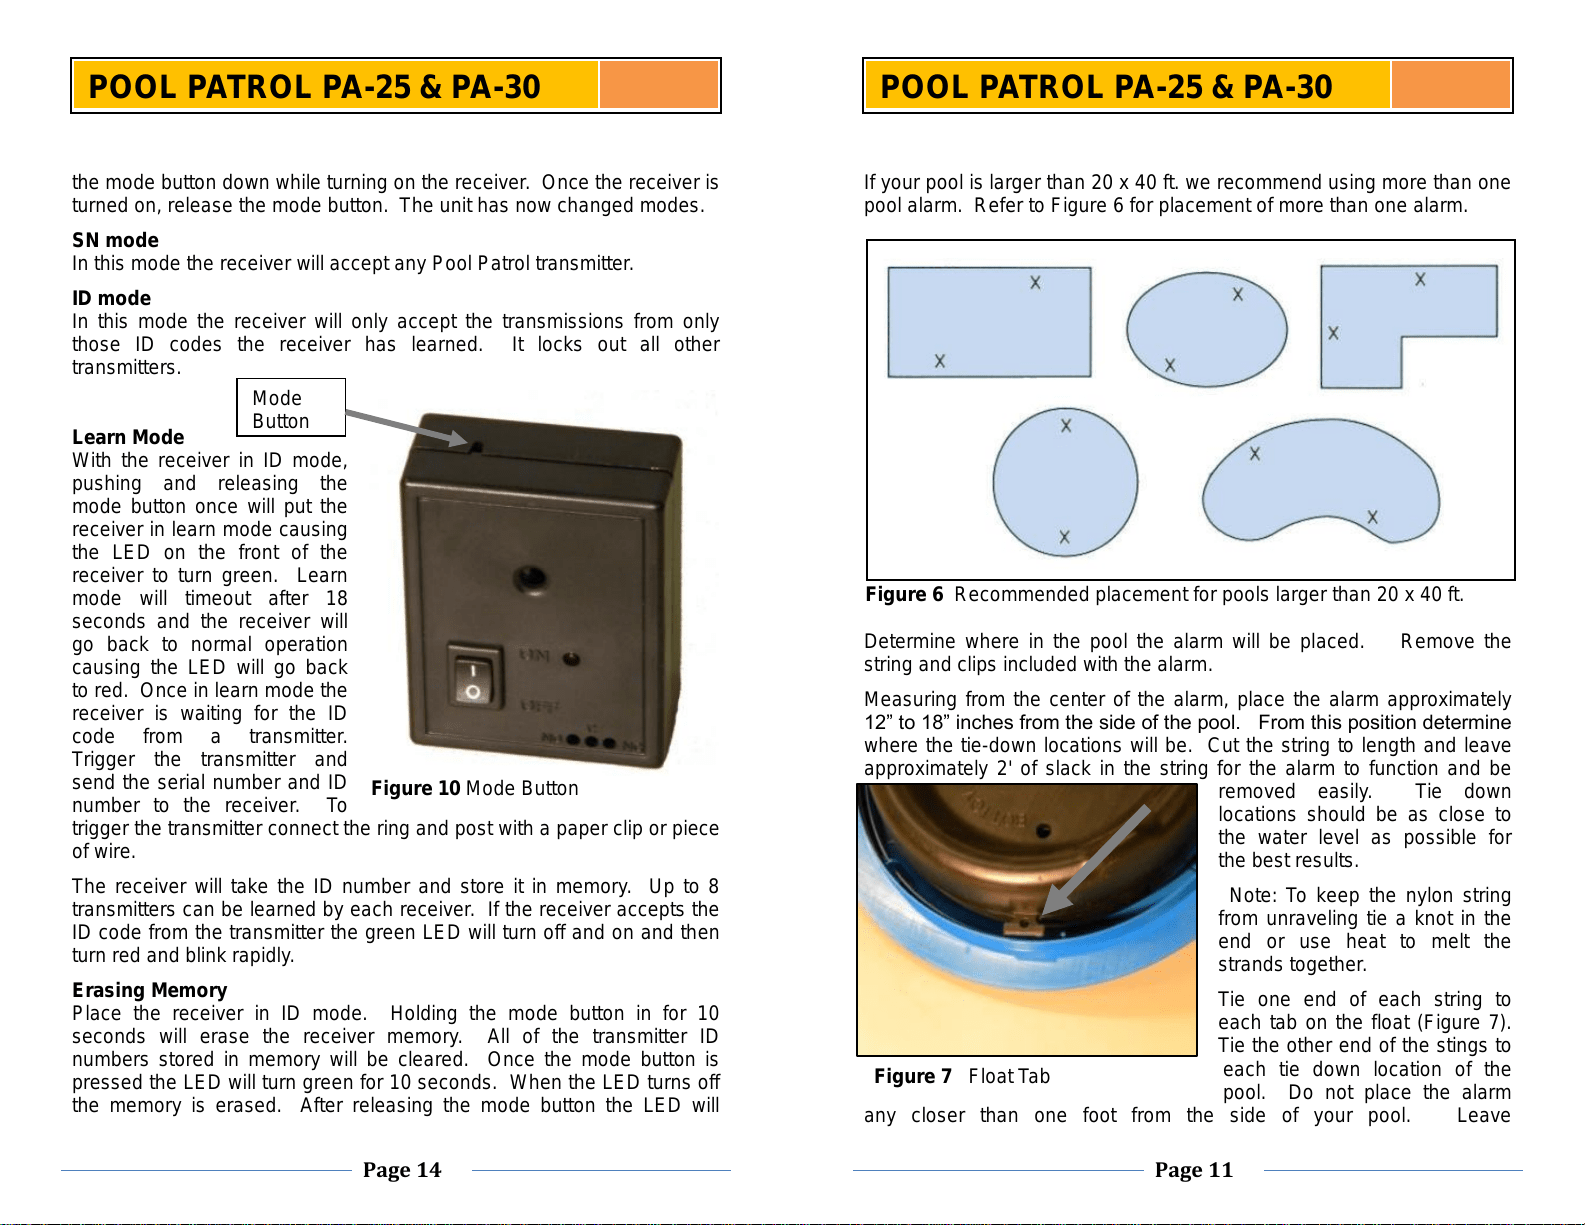
Learn Mode
With the receiver in ID mode,
pushing and releasing the
mode button once will put the
receiver in learn mode causing
the LED on the front of the
receiver to turn green. Learn
mode will timeout after 18
seconds and the receiver will
go back to normal operation
causing the LED will go back
to red. Once in learn mode the
receiver is waiting for the ID
code from a transmitter.
Trigger the transmitter and
send the serial number and ID
number to the receiver. To
trigger the transmitter connect the ring and post with a paper clip or piece
of wire.
The receiver will take the ID number and store it in memory. Up to 8
transmitters can be learned by each receiver. If the receiver accepts the
ID code from the transmitter the green LED will turn off and on and then
turn red and blink rapidly.
Erasing Memory
Place the receiver in ID mode. Holding the mode button in for 10
seconds will erase the receiver memory. All of the transmitter ID
numbers stored in memory will be cleared. Once the mode button is
pressed the LED will turn green for 10 seconds. When the LED turns off
the memory is erased. After releasing the mode button the LED will
Figure 10 Mode Button
Mode
Button
Page 11
POOL PATROL PA-25 & PA-30
If your pool is larger than 20 x 40 ft. we recommend using more than one
pool alarm. Refer to Figure 6 for placement of more than one alarm.
Determine where in the pool the alarm will be placed. Remove the
string and clips included with the alarm.
Measuring from the center of the alarm, place the alarm approximately
12” to 18” inches from the side of the pool. From this position determine
where the tie-down locations will be. Cut the string to length and leave
approximately 2' of slack in the string for the alarm to function and be
removed easily. Tie down
locations should be as close to
the water level as possible for
the best results.
Note: To keep the nylon string
from unraveling tie a knot in the
end or use heat to melt the
strands together.
Tie one end of each string to
each tab on the float (Figure 7).
Tie the other end of the stings to
each tie down location of the
pool. Do not place the alarm
any closer than one foot from the side of your pool. Leave
Figure 7 Float Tab
Figure 6 Recommended placement for pools larger than 20 x 40 ft.
Loading ...