Note to installer: Ensure that you are referencing the product manual for full details on each of
the installation steps, warnings and considerations. This list is to be used to confirm the steps as
you move through the installation. Please leave this sheet with the user.
*Do not attempt any modifications, repairs or replacements on this unit without first discussing
with Thermablaster Technical Support. Doing so will void the product’s warranty. Professional
Installation is required by all local and National codes
Unit is not to be used as a central heating system
Company:
Installer:
Contact Info:
Date:
Installed by:
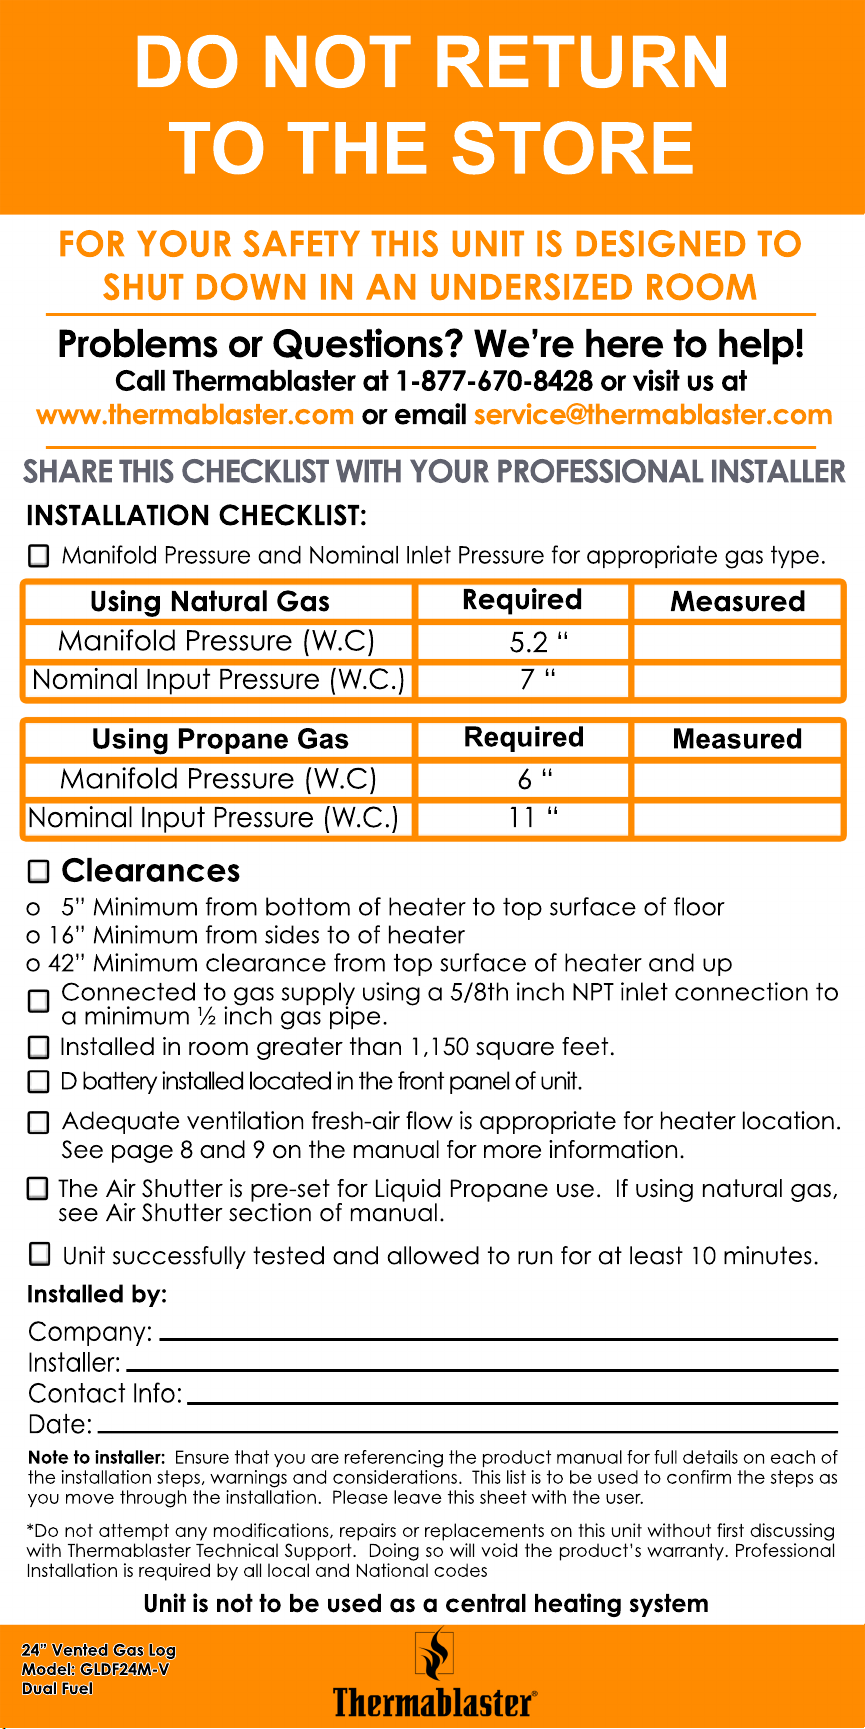
The Air Shutter is pre-set for Liquid Propane use. If using natural gas,
see Air Shutter section of manual.
Unit successfully tested and allowed to run for at least 10 minutes.
Adequate ventilation fresh-air flow is appropriate for heater location.
See page 8 and 9 on the manual for more information.
D battery installed located in the front panel of unit.
24” Vented Gas Log
Model: GLDF24M-V
Dual Fuel
Installed in room greater than 1,150 square feet.
o 5” Minimum from bottom of heater to top surface of floor
o 16” Minimum from sides to of heater
o 42” Minimum clearance from top surface of heater and up
Clearances
Connected to gas supply using a 5/8th inch NPT inlet connection to
a minimum ½ inch gas pipe.
Using Propane Gas
Nominal Input Pressure (W.C.)
6 “
11 “
Required
Measured
Manifold Pressure (W.C)
Using Natural Gas
Nominal Input Pressure (W.C.)
5.2 “
7 “
Required
Measured
Manifold Pressure (W.C)
Manifold Pressure and Nominal Inlet Pressure for appropriate gas type.
INSTALLATION CHECKLIST:
SHARE THIS CHECKLIST WITH YOUR PROFESSIONAL INSTALLER
Problems or Questions? We’re here to help!
Call Thermablaster at 1-877-670-8428 or visit us at
www.thermablaster.com or email service@thermablaster.com
FOR YOUR SAFETY THIS UNIT IS DESIGNED TO
SHUT DOWN IN AN UNDERSIZED ROOM
DO NOT RETURN
TO THE STORE
Activating your warranty only takes a moment and ensures that we
are able to offer the best service possible to you. Visit us at
www.thermablaster.com or you can use the mail in form at the back
of the product manual.
REGISTER TODAY!
24 “ Vented Gas Log
Model: GLDF24M-V
Dual Fuel
Adjustable temperature settings determine the length of time that
the heater will operate at maximum BTU to achieve desired temperature,
not the actual flame height.
During first seasonal use, gas smell is expected to be more noticeable than in
standard operation.
Operation Notes:
To stop the heater, shut off the safety valve on the gas inlet line. Then,
turn the heater’s Gas Valve Button to the OFF position.
Shutdown Process:
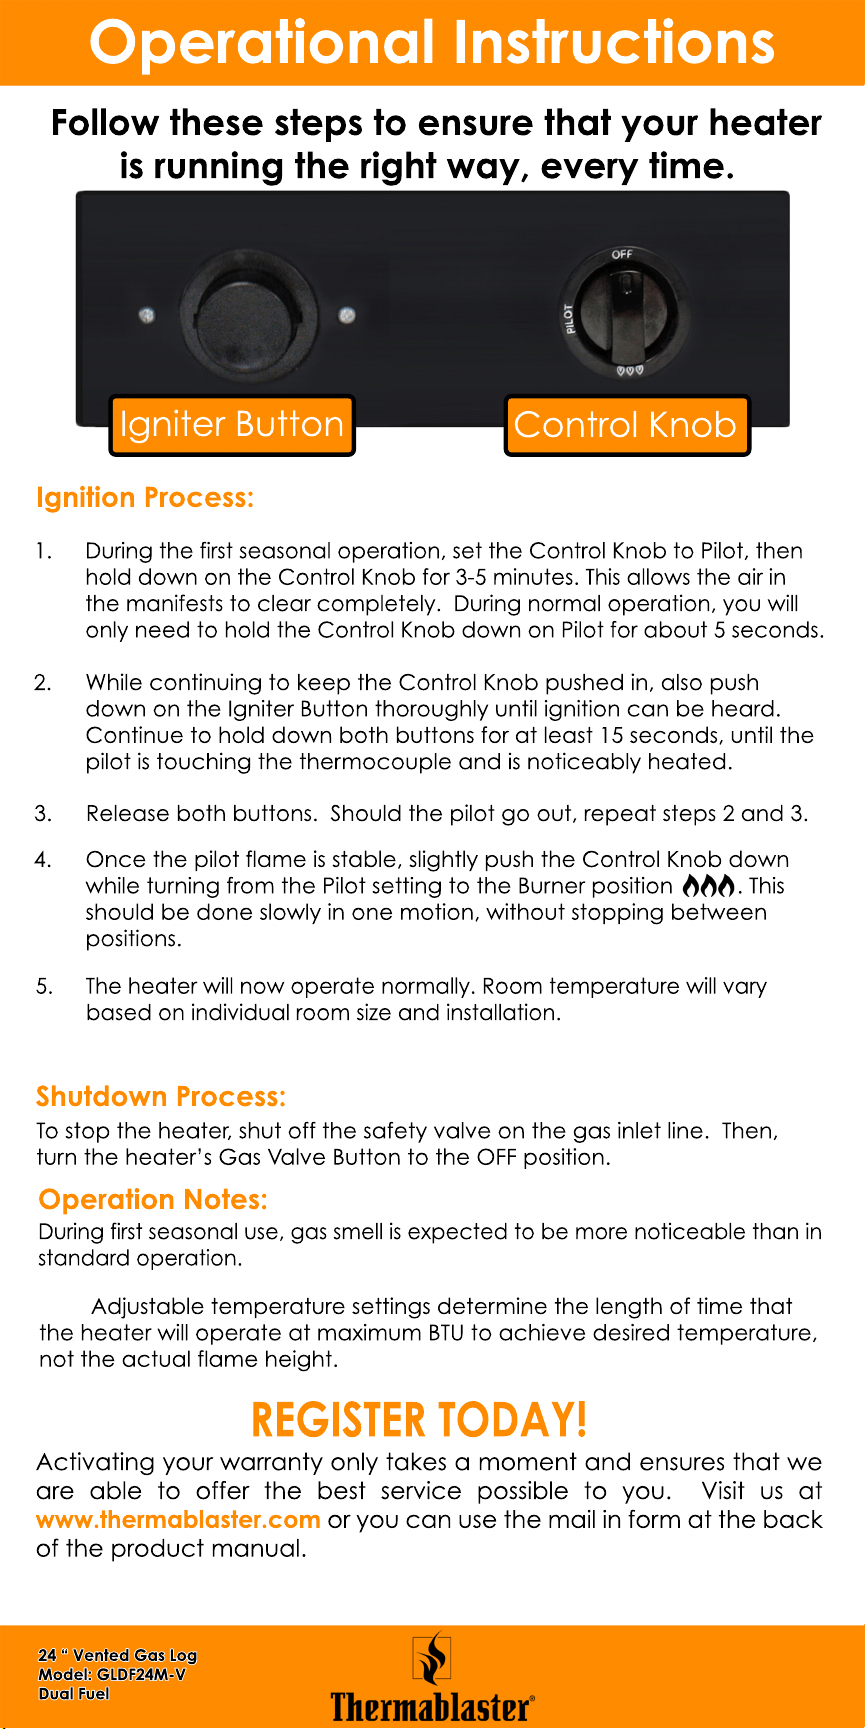
5. The heater will now operate normally. Room temperature will vary
based on individual room size and installation.
4. Once the pilot flame is stable, slightly push the Control Knob down
while turning from the Pilot setting to the Burner position . This
should be done slowly in one motion, without stopping between
positions.
3. Release both buttons. Should the pilot go out, repeat steps 2 and 3.
2. While continuing to keep the Control Knob pushed in, also push
down on the Igniter Button thoroughly until ignition can be heard.
Continue to hold down both buttons for at least 15 seconds, until the
pilot is touching the thermocouple and is noticeably heated.
1. During the first seasonal operation, set the Control Knob to Pilot, then
hold down on the Control Knob for 3-5 minutes. This allows the air in
the manifests to clear completely. During normal operation, you will
only need to hold the Control Knob down on Pilot for about 5 seconds.
Ignition Process:
Follow these steps to ensure that your heater
is running the right way, every time.
Operational Instructions
Igniter Button
Control Knob