
Loading ...
Loading ...
Loading ...
12
GB
CAM (Conditional Access Module)
• Provides access to pay TV services. For
details, refer to the instruction manual
supplied with your CAM.
• Do not insert the smart card directly into
the
TV CAM slot. It must be fitted into the
Conditional Access Module provided by
your authorised dealer.
• CAM is not supported in some countries/
ar
eas. Check with your authorised dealer.
• A CAM message may appear when you
s
witch to a digital programme after using
the Internet video.
CENTER SPEAKER IN
• To use your TV speakers as the centre
speaker, connect the output of your AV
receiver to the CENTER SPEAKER IN on
your TV.
• Before connecting cables, disconnect the
m
ains lead of both TV and AV receiver.
• Make sure the [Speakers] is set to [Audio
sy
stem]: Press ACTION MENU, then select
[Speakers] [Audio system].
To prevent hiss when not connecting the
CE
NTER SPEAKER IN to an AV receiver,
change the following setting. Press HOME,
select [Settings] [Sound] then disable [TV
centre speaker mode].
(RF input), (Satellite input)
• Connections for terrestrial/cable and
satellite. Connection steps: SUB. MAIN
Antenna
• For SUB. jack, connect only when you are
us
ing twin tuner mode except for Single
Cable Distribution EN50494.
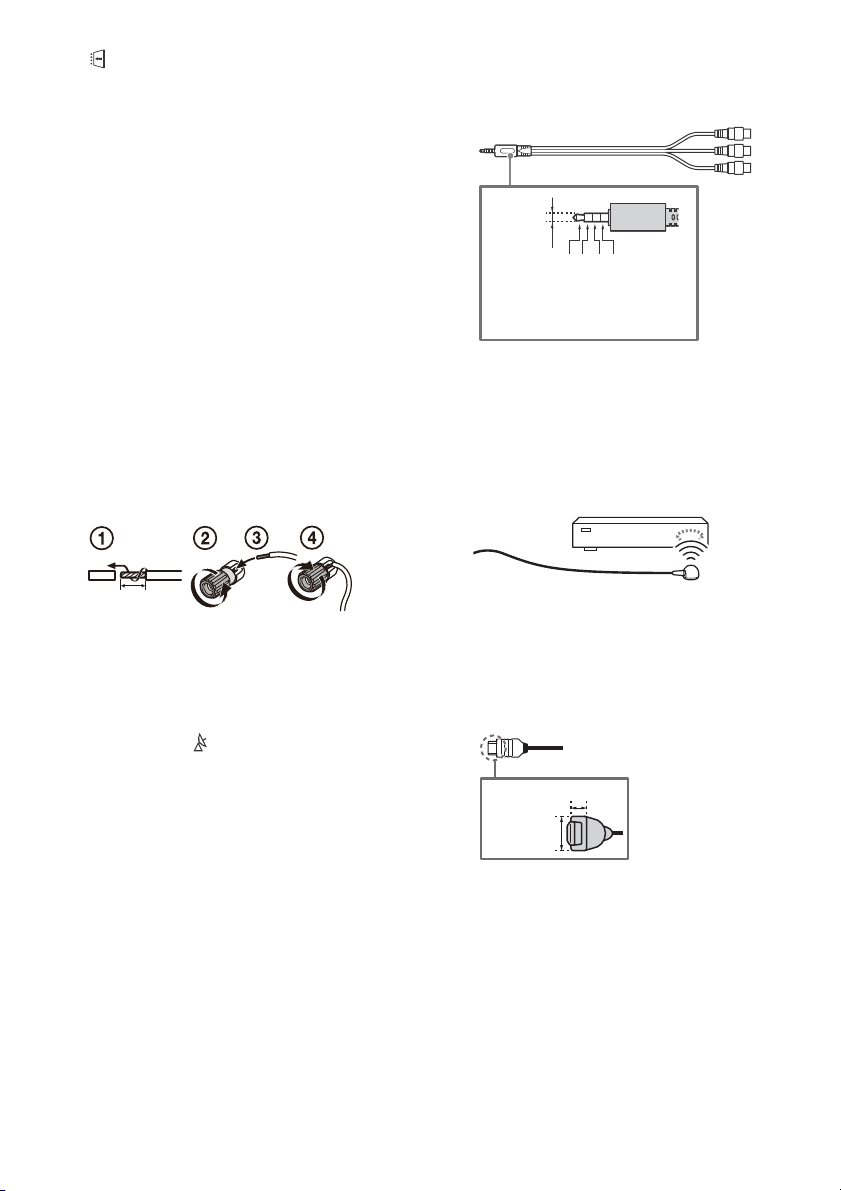
/ AV IN
• For a composite connection, use an
Analogue Extension Cable (not supplied).
•
IR BLASTER*
2
• Use your Sony remote control to control
your External Box (cable/satellite box).
Connect the IR Blaster Cable*
2
to the IR
Blaster port on your TV. Place the other
end as shown below.
• To perform IR Blaster setup, press HO
ME
and select [Settings] [External inputs]
[IR Blaster setup].
HDMI IN 1/2/3/4
• HDMI interface can transfer the digital
video and audio on a single cable.
•
• To enjoy high quality 4K 50p/60p
contents, connect a Premium High Speed
HDMI cable and set the [HDMI signal
format] to [Enhanced format].
Do this setting individually for each
c
onnected HDMI IN terminal. For details of
supported formats, refer to the
“Specifications“ in this manual (page 22-
24).
10 mm
3.5 mm
1234
1: L
2: Video
3: Ground
4: R
< 12 mm
< 21 mm
Loading ...
Loading ...
Loading ...