Loading ...
Loading ...
Loading ...
5
Introduction
• This single-serve Coffee Maker uses a pressurized system to brew a perfect single hot beverage.
• The adjustable drip tray accommodates most cup sizes, mugs, tall travel mugs or tumblers.
• Use the ground coffee adaptor (included) to create special blends of your favorite coffee. For added
personalization, add a dash of your favorite spice, from cinnamon, orange peel, cardamom or vanilla bean
to name a few.
• Using the reusable ground coffee adaptor is an environmentally-friendly choice that will also save
you money!
Before Using for the First Time
CAUTION: To protect against electrical shock, do not immerse the Coffee Maker or allow the power cord
to
come into contact with water or other liquids.
1. Remove all packing material and labels from the inside and outside of the Coffee Maker.
Place the unit on a at, clean surface.
2. Make sure to remove both adaptors from the inner packaging.
3. Before use, thoroughly clean both adaptors with warm soapy water.
4. To clean the inside of the unit, it is recommended to brew two full cycles of water only.
5. Using the desired cup, mug, or tumbler as your measure, add water to the water tank.
6. Select the desired height for the drip tray, depending on the size of the cup, mug, or tumbler being used.
7. Place the empty cup, mug, or tumbler in position on the drip tray cover.
NOTE: Do not add any adaptor for this initial cleaning.
8. Press either the or button.
9. The red PREHEAT indicator light will begin to ash as the Coffee Maker begins heating the water.
10. When water has reached the optimum temperature, the PREHEAT light will go out and the blue BREW
light will illuminate. Water will begin to stream through the nozzle. At the end of the cycle, the Coffee
Maker and all indicator lights will automatically turn OFF.
IMPORTANT: Repeat this process twice to thoroughly clean the machine before using for the rst time.
11. Unplug the Coffee Maker when not in use.
Brewing Instructions
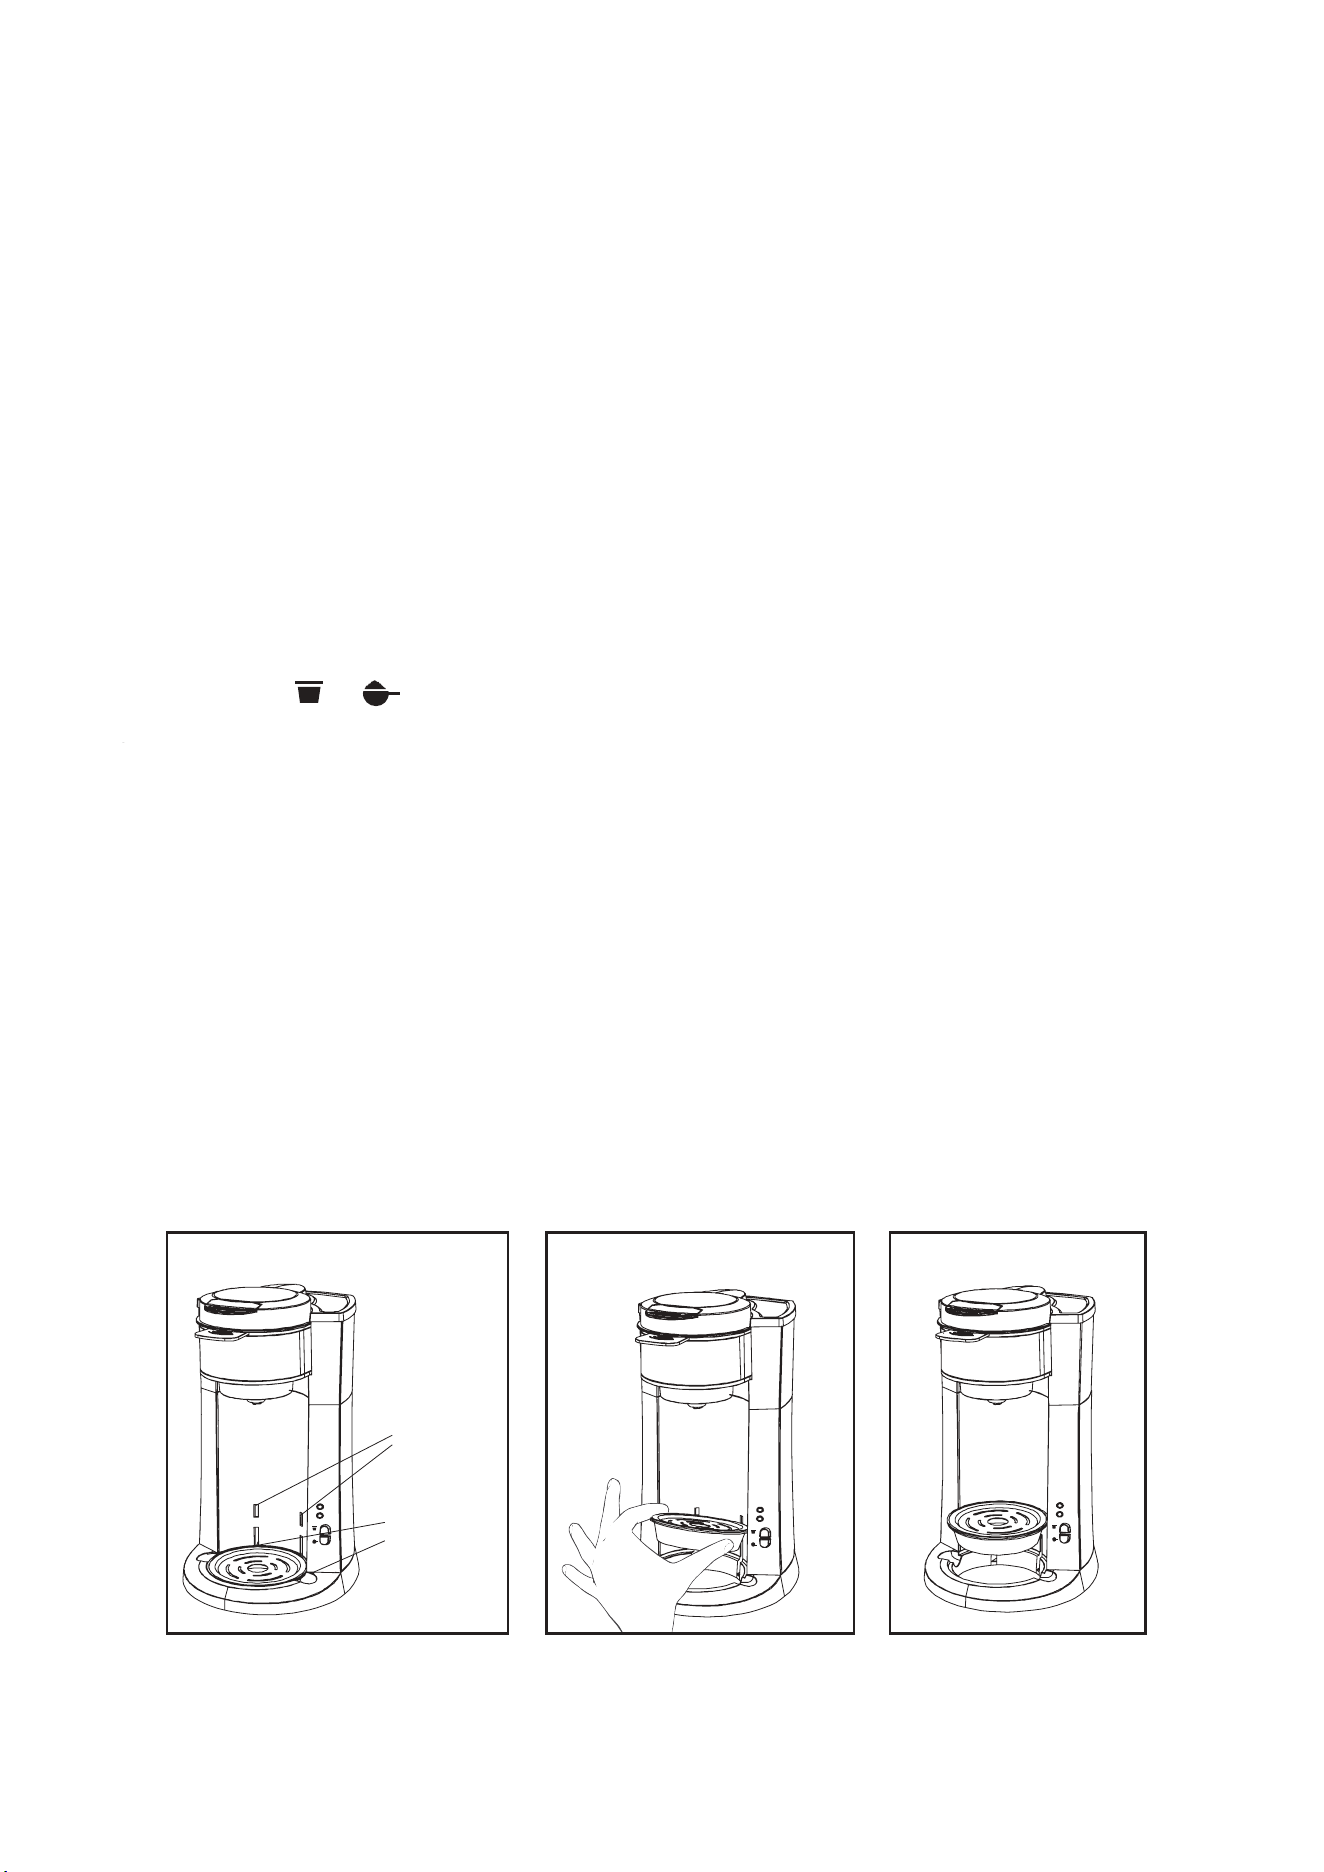
The drip tray adjusts to two heights to accommodate shorter cups or mugs to taller travel mugs/tumblers.
For taller travel mugs and tumblers, make sure the drip tray and cover are properly placed in the lower
position.
(See Figure 2.) When brewing a smaller cup, raise the drip tray to the upper level to avoid splatter. (See Figure 4.)
Adjusting the Drip Tray
1. Grasp the drip tray and cover from the base cut-outs. (See Figure 2.)
2. Holding on to both pieces, slightly tilt upwards and slide out from the unit. (See Figure 3.)
3. Using the tab on the back of the drip tray as your guide, again slightly tilt both pieces upwards and glide
the tabs into the upper slots on the Coffee Maker body. (See Figure 4.) Press down on the drip tray
with
your hand to make sure it is rmly and properly attached before placing the cup or mug on top.
BREW
PREHEAT
BREW
PREHEAT
Figure 2 Figure 3
Figure 4
BREW
PREHEAT
Upper
Slots
Base
Cut-Outs
Loading ...
Loading ...
Loading ...