Loading ...
Loading ...
Loading ...
35
Instructions for the installer
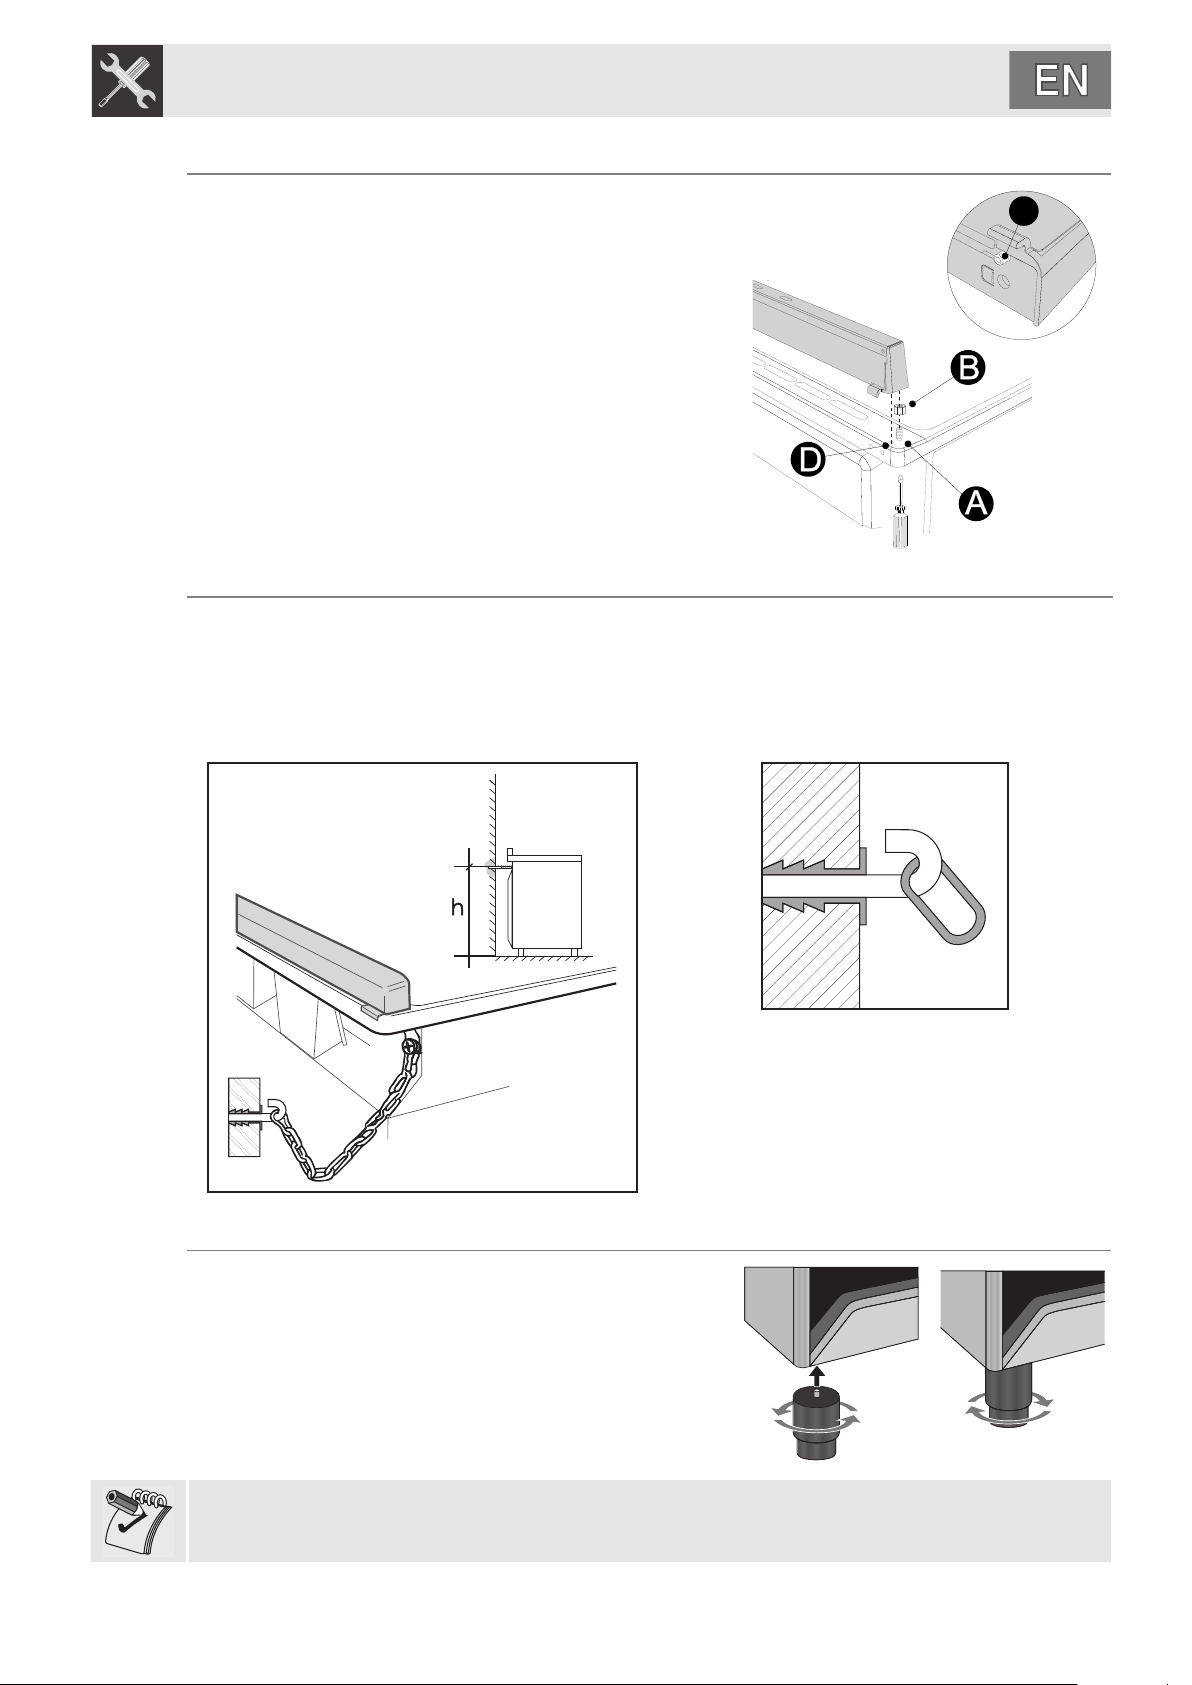
11.5 Positioning the skirt (on some models only)
The skirt must always be positioned and secured correctly on
the appliance.
1 Unscrew the 2 nuts (B) on the back of the worktop.
2 Position the skirt above the worktop, taking care to align
the pins (C ) with the holes (D).
3 Secure the skirt to the worktop by tightening screws (A).
11.6 Wall fixing
1 Attach the chain to the cooker
2 Stretch out the chain attached to the cooker horizontally so that the other end touches the wall.
3 Mar k the wall in the position where the hole is to be drilled.
4 Dr ill the hole, insert a wall plug and attach the chain.
5 Once the chain is in position, push the cooker against the wall and reduce the amount of chain links
to keep the chain tight to prevent any excess movement.
11.7 Positioning and levelling the appliance
After making the electrical and/or gas connections, level the
appliance on the floor by means of its four adjustable feet.
First insert the front feet and then the rear feet.
The appliance must be properly levelled to ensure better
stability. Screw or unscrew the bottom part of the foot until the
appliance is stable and level on the floor.
To prevent possible damage to the appliance, we recommend to screw first the front feet and then the
rear ones.
C
Loading ...
Loading ...
Loading ...