
Loading ...
Loading ...
Loading ...
17
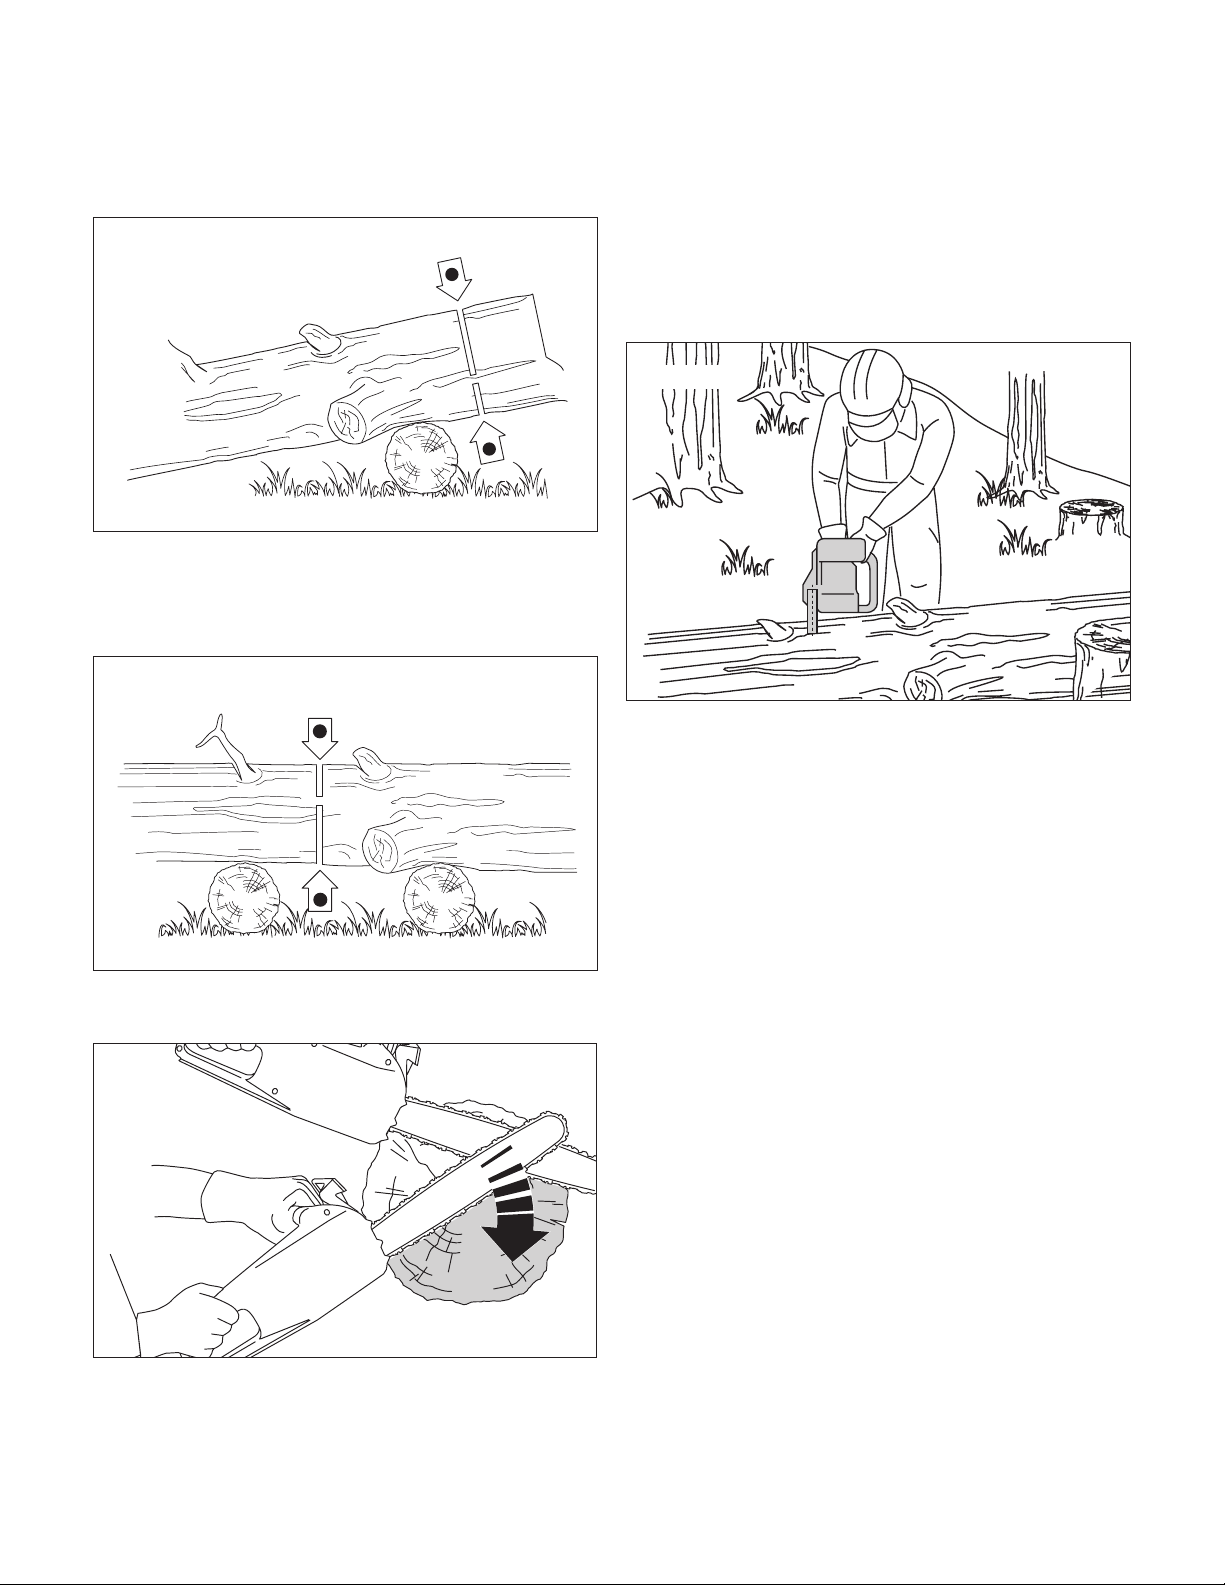
ii) When the log is supported on one end (Fig. 19B), cut 1/3
the diameter from the underside (underbuck). Then make
the nished cut by overbucking to meet the rst cut.
iii) When the log is supported on both ends (Fig. 19C), cut
1/3 the diameter from the top (overbuck). Then make the
nished cut by underbucking the lower 2/3 to meet the
rst cut.
iv) It is easier to saw a log using the spiked bumper
(Fig. 19D).
– Dig the spiked bumper into the log and use it as a
pivot. Cut with an arched motion to make the bar
penetrate the wood.
– Repeat several times if necessary, changing the point
where you plant the spiked bumper.
– When bucking on a slope, always stand on the uphill
side of the log (Fig. 20). When “cutting through” the
log, maintain control by releasing the cutting pressure
near the end of the cut without relaxing your grip on
the chain saw handles. Do not let the chain contact
the ground.
After completing the cut, wait for the saw chain to stop before
you move the chain saw. Always stop the motor before moving
from tree to tree.
End of Operations
When you have nished your work:
• Switch o the motor and remove the battery from its
housing.
• Wait for the chain to stop and allow the machine to cool.
• Remove any traces of sawdust or oil deposits from the
chain.
• If there is excessive dirt or resin build-up, disassemble the
chain and place it in a container with a suitable cleanser.
Then rinse it with clean water and treat it with a suitable
anticorrosive spray before reassembling it on the machine.
• Fit the cutting bar sheath onto the bar before storing.
mWARNING! Let the motor cool completely before
storing the chain saw in any enclosure.
To reduce re hazards, clean the machine thoroughly to
remove sawdust, branches, leaves, or excess grease. Never
leave containers with cut debris inside the storage area.
1
2
Fig. 19B
1
2
Fig. 19C
Fig. 19D
Fig. 20
Loading ...
Loading ...
Loading ...