
Owner’s Manual and
Installation Instruction
Manual del propietario y
instrucciones de instalación
ESAQ406
Room Air Conditioner
Acondicionadores de Aire Para Sala
49-5000454 Rev. 0 01-20 GEA
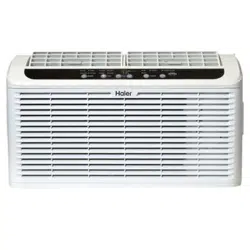
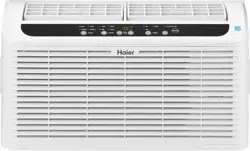
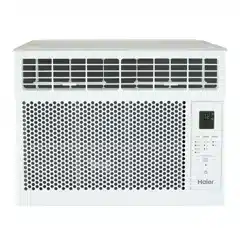
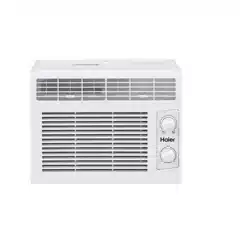
Design may vary by model number.
Some models may have an
additional letter after the model
number
El diseño puede variar según el
número de modelo
Algunos modelos pueden tener una
letra adicional después del número del
modelo

2 49-5000454 Rev. 0

49-5000454 Rev. 0 3
TABLE OF CONTENTS
SAFTEY INFORMATION ...........................................................................................4
CONTROL PANEL .................................................................................................5
CONTROLS ......................................................................................................5
AIR CONDITIONER CARE ........................................................................................ 9
INSTALLATION INSTRUCTIONS ..................................................................................10
TROUBLESHOOTING . . . . . . . . . . . . . . . . . . . . . . . . . . . . . . . . . . . . . . . . . . . . . . . . . . . . . . . . . . . . . . . . . . . . . . . . . . . . . . . . . . . . . . . . . . . 15
LIMITED WARRANTY ............................................................................................18
RECORD KEEPING
Thank you for purchasing this Haier product. This user manual
will help you get the best performance from your new air
conditioner.
For future reference, record the model and serial number
located on the side of the air conditioner, and the date of
purchase.
Staple your proof of purchase to this manual to aid in
obtaining warranty service if needed.
____________________________________________________
Model number
____________________________________________________
Serial number
____________________________________________________
Date of purchase
HAIER WEBSITE
Have a question or need assistance with your appliance? Try the Haier Website 24 hours a day, any day of the year! You
can also shop for more great Haier products and take advantage of all our on-line support services designed for your
convenience. In the US: Haierappliances.com
4 49-5000454 Rev. 0
READ AND SAVE THESE INSTRUCTIONS
WARNING
For your safety, the information in this manual must be followed to minimize the risk of fire, electric
shock or personal injury.
• Use this appliance only for its intended purpose as
described in this Owner’s Manual.
• This air conditioner must be properly installed in
accordance with the Installation Instructions before it is
used.
• Never unplug your air conditioner by pulling on the power
cord. Always grip plug firmly and pull straight out from the
receptacle.
• Replace immediately all electric service cords that have
become frayed or otherwise damaged. A damaged power
supply cord must be replaced with a new power supply cord
obtained from the manufacturer and not repaired. Do not
use a cord that shows cracks or abrasion damage along its
length or at either the plug or connector end.
• Turn the unit OFF and unplug your air conditioner before
cleaning.
• For your safety…do not store or use combustible materials,
gasoline or other flammable vapors or liquids in the vicinity
of this or any other appliance.
• If the receptacle does not match the plug, the receptacle
must be changed out by a qualified electrician.
• Do not use means to accelerate the defrosting process
or to clean, other than those recommended by the
manufacturer.
• The appliance shall be stored in a room without
continuously operating ignition sources (for example: open
flames, an operating gas appliance or an operating electric
heater.
• Do not pierce or burn refrigerant tubing. Be aware that
refrigerants may not contain an odor.
• Keep ventilation openings clear of obstruction.
• When handling, installing, and operating the appliance, care
should be taken to avoid damage to the refrigerant tubing.
• Do not drill holes in the unit.
• Maintenance, cleaning, and service should only be
performed by technicians properly trained and qualified in
the use of flammable refrigerants.
• Haier Appliances does not support any servicing of the air
conditioner.
• Dispose of air conditioner in accordance with Federal and
Local Regulations. Flammable refrigerants require special
disposal procedures. Contact your local authorities for the
environmentally safe disposal of your air conditioner.
WARNING
Risk of Fire or Explosion. This unit contains flammable refrigerant.
Additional safety precautions must be followed.
WARNING
USE OF EXTENSION CORDS
RISK OF FIRE. Could cause serious injury or death.
• DO NOT use an extension cord with this Window Air
Conditioner.
• DO NOT use surge protectors or multi-outlet adaptors
with this Window Air Conditioner.
HOW TO CONNECT ELECTRICITY
Do not, under any circumstances, cut or remove the third
(ground) prong from the power cord. For personal safety, this
appliance must be properly grounded.
DO NOT use an adapter plug with this appliance.
The power cord of this appliance is equipped with a 3-prong
(grounding) plug which mates with a standard 3-prong
(grounding) wall outlet to minimize the possibility of electric
shock hazard from this appliance.
Power cord includes a current interrupter device. A test
and reset button is provided on the plug case. The device
should be tested on a periodic basis by first pressing the
TESTåø÷÷òñäñç÷ëèñ÷ëèRESETåø÷÷òñúëìïèóïøêêèç
into the outlet. If the TESTåø÷÷òñçòèöñò÷÷õìóòõìé÷ëè
RESETåø÷÷òñúìïïñò÷ö÷äüèñêäêèççìöæòñ÷ìñøèøöèòé÷ëèäìõ
conditioner and contact a qualified service technician.
Have the wall outlet and circuit checked by a qualified
electrician to make sure the outlet is properly grounded.
Where a 2-prong wall outlet is encountered, it is your
personal responsibility and obligation to have it replaced with
a properly grounded 3-prong wall outlet.
The air conditioner should always be plugged into its own
individual electrical outlet which has a voltage rating that
matches the rating plate.
This provides the best performance and also prevents
overloading house wiring circuits which could cause a fire
hazard from overheated wires.
See the Installation Instructions, Electrical Requirements
section for specific electrical connection requirements.
IMPORTANT SAFETY INFORMATION
READ ALL INSTRUCTIONS BEFORE USING THE APPLIANCE
SAFETY INFORMATION

49-5000454 Rev. 0 5
This section explains how to operate this air conditioner.
IMPORTANT:
When you turn off the air conditioner, either at the control panel
or with the remote control, wait at least 3 minutes before turning
it back on. This prevents the compressor from overloading. This
3 minute delay also applies when switching from cool mode to
fan and back.
NOTE: There is a built in 3 minute delay. You may notice the
compressor might not start right away. This was designated to
protect the unit.
Do not operate your air conditioner in the Cool Mode when
the outside temperature is below 61° F (16° C). This inside
evaporator coil will freeze up, and the air conditioner will not
operate properly.
NOTE: When the air conditioner is first plugged in, the LED
display will show “88” for 3 seconds. After the air conditioner
is turned on for the first time, the display will show the
temperature 72° F and the fan will automatically set the Quiet
speed and the Mode indicator will show ENERGY SAVE.
NOTE: To switch the temperature display between Fahrenheit
(°F) and Celsius (°C), the air conditioner must be plugged in
and turned on. On the control panel on the front of the air
conditioner press the UP and DOWN button at the same time
and hold for 3 seconds. Press F/C button on remote control to
switch between Fahrenheit (°F) and Celsius (°C).
NOTE: Each time this ENERGY STAR qualified air conditioner
is turned on, it will operate in energy save mode per the EPA
requirements. You can select any other mode to satisfy your
needs.
Features and appearance will vary.
Controls
1. MODE
1. Press MODE until you see the indicator light come on next
to the desired setting.
2. Choose Fan, Cool, Energy save (E-Save), or Dehum.
Fan - Only the fan runs. Press FAN SPEED to select High,
Med or Quiet fan speed. The display shows the current room
temperature.
NOTE: in fan mode, the temperature cannot be set.
E-Save - In this this mode the fan runs only when cooling is
needed. The fan will run for 3 minutes after the compressor
shuts off. The fan then cycles on for 2 minutes at 10 minute
intervals until the temperature in the room is above the set
temperature. The compressor then turns back on.
Cool - Cools the room. Press FAN SPEED to select High,
Med, Quiet or Auto Cool fan speed. Press the TEMP/TIME ^
or v arrow button to adjust the temperature. The fan will run
continuously in cool mode.
Dehum - Aids in removing humidity from the room. Dehum
mode cannot be used to cool room.
NOTE: In Dehum mode, when the set temperature is close to
ambient temperature, the compressor may stop and the fan
will run in Quiet speed only.
2. FAN SPEED
1. Press FAN SPEED until you see the indicator light come on
next to the desired setting.
2. Choose High, Med, Quiet, or Auto.
HIGH – For maximum cooling.
MED – For normal cooling.
QUIET – For minimum cooling and noise.
AUTO – Adjusts the fan speed automatically to provide ideal
cooling based on the room temperature.
CONTROL PANEL
Temp.
Time
FAN
E-SAVE
COOL
DEHUM.
HIGH
MED
QUIET ON SLEEP CLEAN FILTER
OFF
MODE SPEED TIMER
FILTER
RESET
POWER
Hr
°F/°C
AUTO

6 49-5000454 Rev. 0
3. Delay
Delay ON—When the air conditioner is off, it can be set
to automatically come on in 1 to 24 hours at its previous
mode and fan settings.
Delay OFF—When the air conditioner is on,
it can be set to automatically turn off in 1 to
24 hours.
How to set:
Press the Delay 1–24hr pad on the unit or the remote
control. Each touch of the Increase ^ / Decrease v pads on
the unit or the remote control will set the timer in 1-hour
intervals.
To review the remaining time on the Delay 1–24hr timer,
press the Delay 1–24hr pad on the unit or the remote
control. Use the Increase ^ / Decrease v pads on the unit
or on the remote control to set a new time if desired.
To cancel the timer, press Decrease v pad on the unit
or the remote control until the set time is zero. After 3
seconds the light on the Delay 1-24 hour pad goes off.
4. TEMP/TIME
1. Press the TEMP/TIME ^ button to raise the temperature.
Each time you press the TEMP/TIME ^ button, the
temperature will go up by 1° F until it reaches 86° F (30° C).
2. Press the TEMP/TIME v button to lower the temperature.
Each time you press the TEMP/TIME v button, the
temperature will go down by 1° F until it reaches 61° F (16°
C).
NOTE: Under Fan mode, the display will show the current
temperature. Under Energy Save, Cool or Dehum mode, the
display will show the set temperature.
5. FILTER RESET
This feature automatically notifies you that the air filter must
be cleaned. The indicator light will come on after 240 hours
of operation. Clean the air filter (refer to Care and Cleaning
section), place it back in the front panel, and press the Filter
Reset button. The light will turn off.
6. WiFi Connect
Enables connection of the air conditioner to hte home WiFi.
Download App for details at:
haierappliances.com
CONTROLS
49-5000454 Rev. 0 7
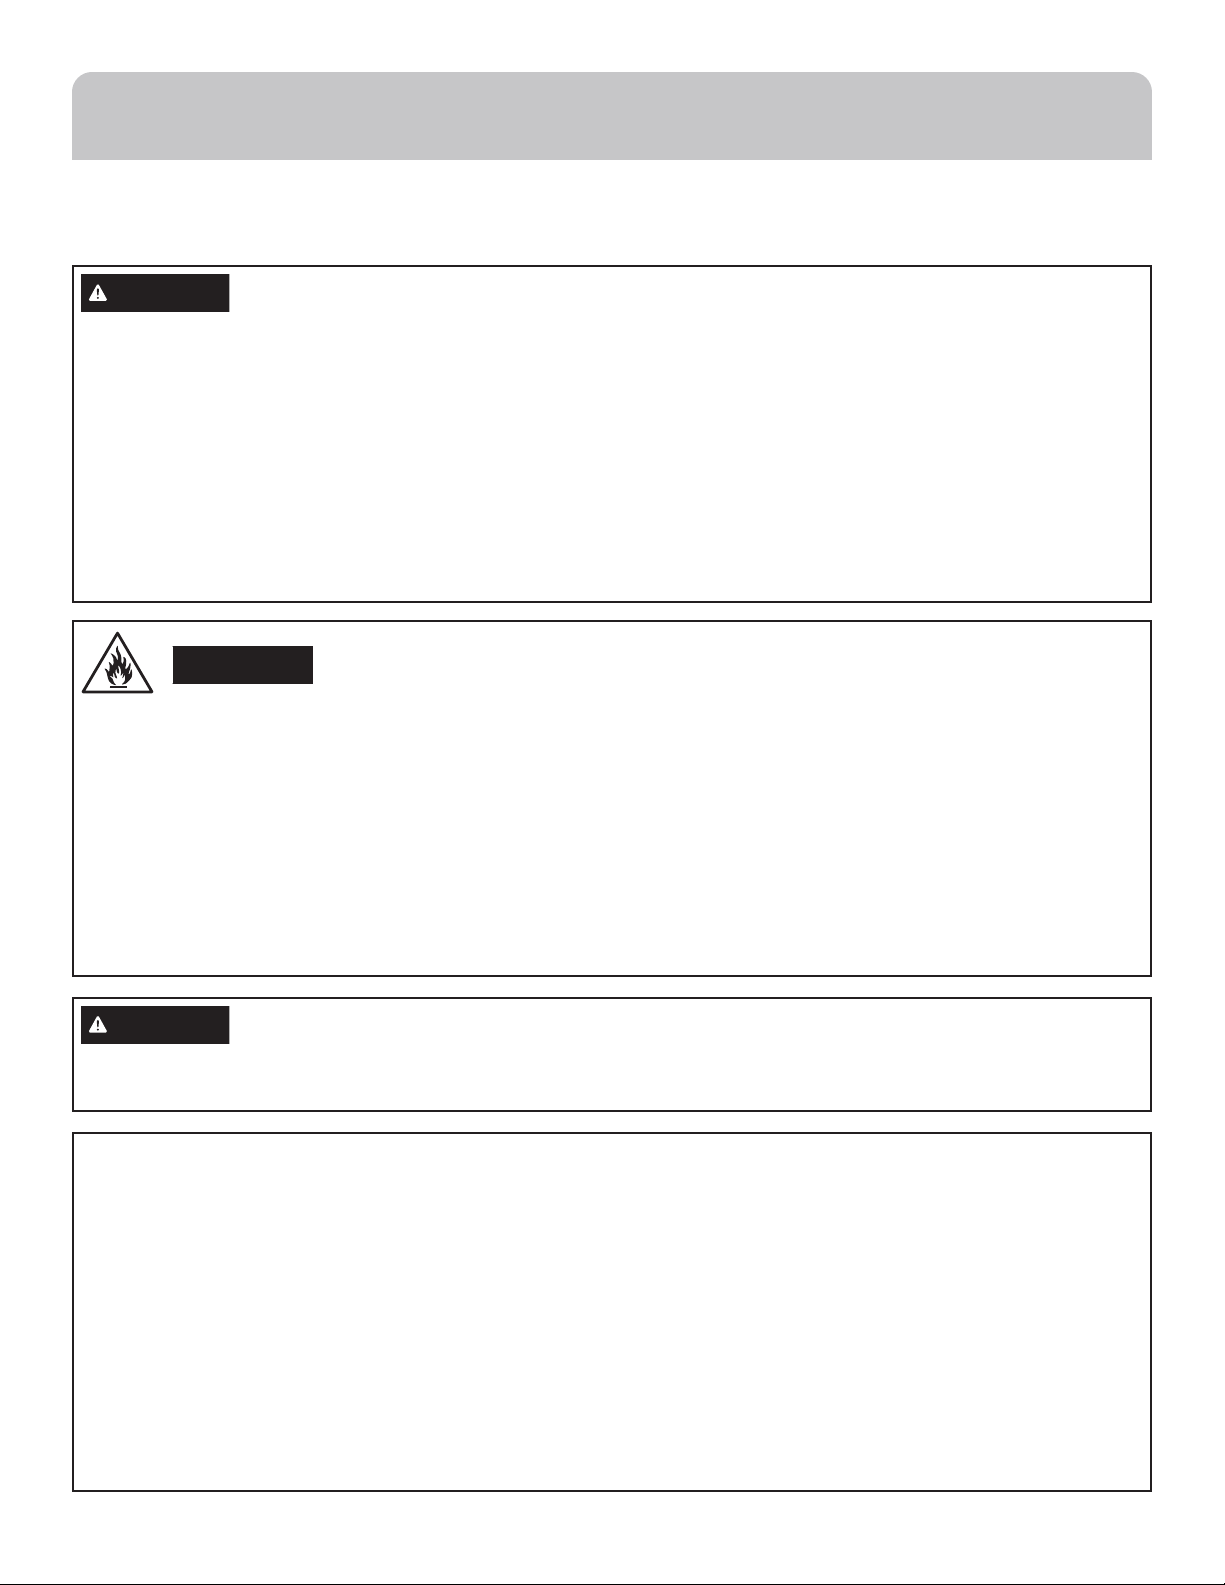
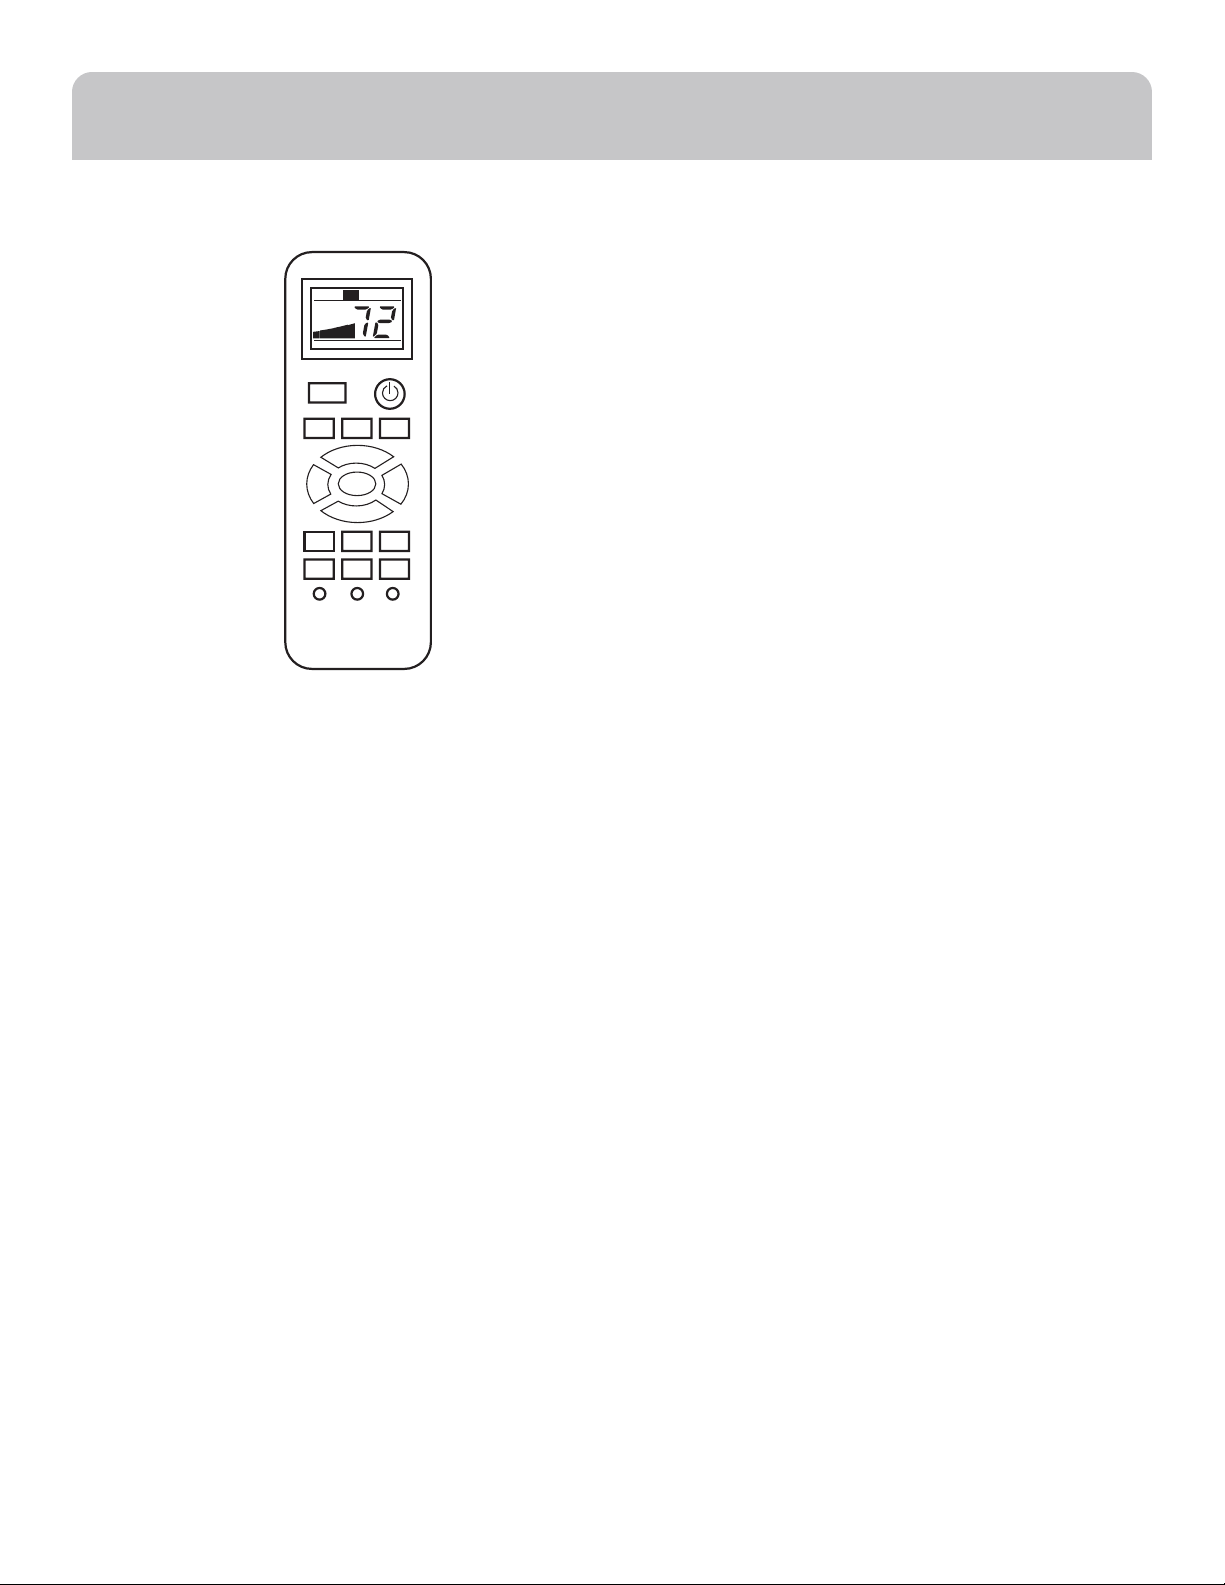
Using the Remote Control
Remote Control may differ in appearance from the image show.
NOTE: Please remove the back of the controller and insert two
AAA batteries. Replace batteries after 6 months of use or when
remote control starts to lose power.
NOTE: DO NOT mix old and new batteries.
1. POWER
Press the power button to turn on the air conditioner.
When you first press the power button, the air conditioner
will operate in Energy Save mode, Quiet fan speed and
temperature of 72°F. You can select any other mode to
satisfy your needs .
2. SPEED
High - Press HIGH button to choose high fan speed.
Med - Press MED button to choose medium fan speed.
Quiet - Press QUIET button to choose quiet fan speed.
Auto Cool - Press AUTO button to choose auto cool fan
speed.
3. MODE
Fan- Press the FAN button to activate fan mode.
Cool - Press the COOL button to activate cool mode.
E-Save Press the ENERGY SAVE button to activate mode.
Dehum - Press the DEHUM button to activate dehum mode.
4. TIMER
To set the air conditioner to turn off after a set amount of
time between 1 hour and 24 hours (unit must be ON):
1. Press TIMER ON/OFF button on the remote control to
select the time off function.
2. Press the TIMER UP or TIMER DOWN arrow button to
change the delay time from 1 hour to 24 hours. Timer OFF
indicator light on the air conditioner panel will illuminate.
3. The buzzer beeps twice after 5 seconds, then Timer OFF
countdown will initiate.
To clear TIMER Program:
NOTE: Air conditioner can be either on or off.
Press TIMER ON/OFF button until Timer indicator light turns
off.
5. TEMP UP/TEMP DOWN
• Press the TEMP UP button to raise the temperature. Each
time you press the TEMP UP button, the temperature will
go up 1° F until it reaches 86°F (30°C).
• Press the TEMP DOWN button to lower the temperature.
Each time you press the TEMP DOWN button, the
temperature will go down 1° F until it reaches 61°F (16°C).
6. SLEEP
1. Press SLEEP button on the remote control to choose
Sleep mode. This display will show (08) and the indicator
light will turn on.
2. The temperature will increase by 2° F one hour after the
mode is chosen. The temperature then increases another
2° F after one hour. The until will hold this temperature for
six hours then stop.
3. To turn off Sleep mode, press the SLEEP button until the
indicator light is off.
7. FAHRENHEIT/CELSIUS
• Press the F/C button to choose between Fahrenheit and
Celsius.
8. LOCK
• Press the LOCK button on the remote control to disable
button functionality. Press the LOCK button again to
activate the remote control functionality.
9. LIGHT
• When you press the LIGHT button, the display on the unit
will turn off, but the unit is still operating normally. When
you press the LIGHT button again or press any button on
the remote control, the display will be illuminated again.
10. RESET
• Press the RESET button to reset the unit to factory
settings.
DEHUM
TIMER
UP
SLEEP
LOCK
TIMER
ON/OFF
F/C
TIMER
DOWN
LIGHT RESET
TEMP DOWN
QUIET
HIGH MED AUTO
COOLFAN
ENERGY
SAVE
TEMP UP
CONTROLS
8 49-5000454 Rev. 0
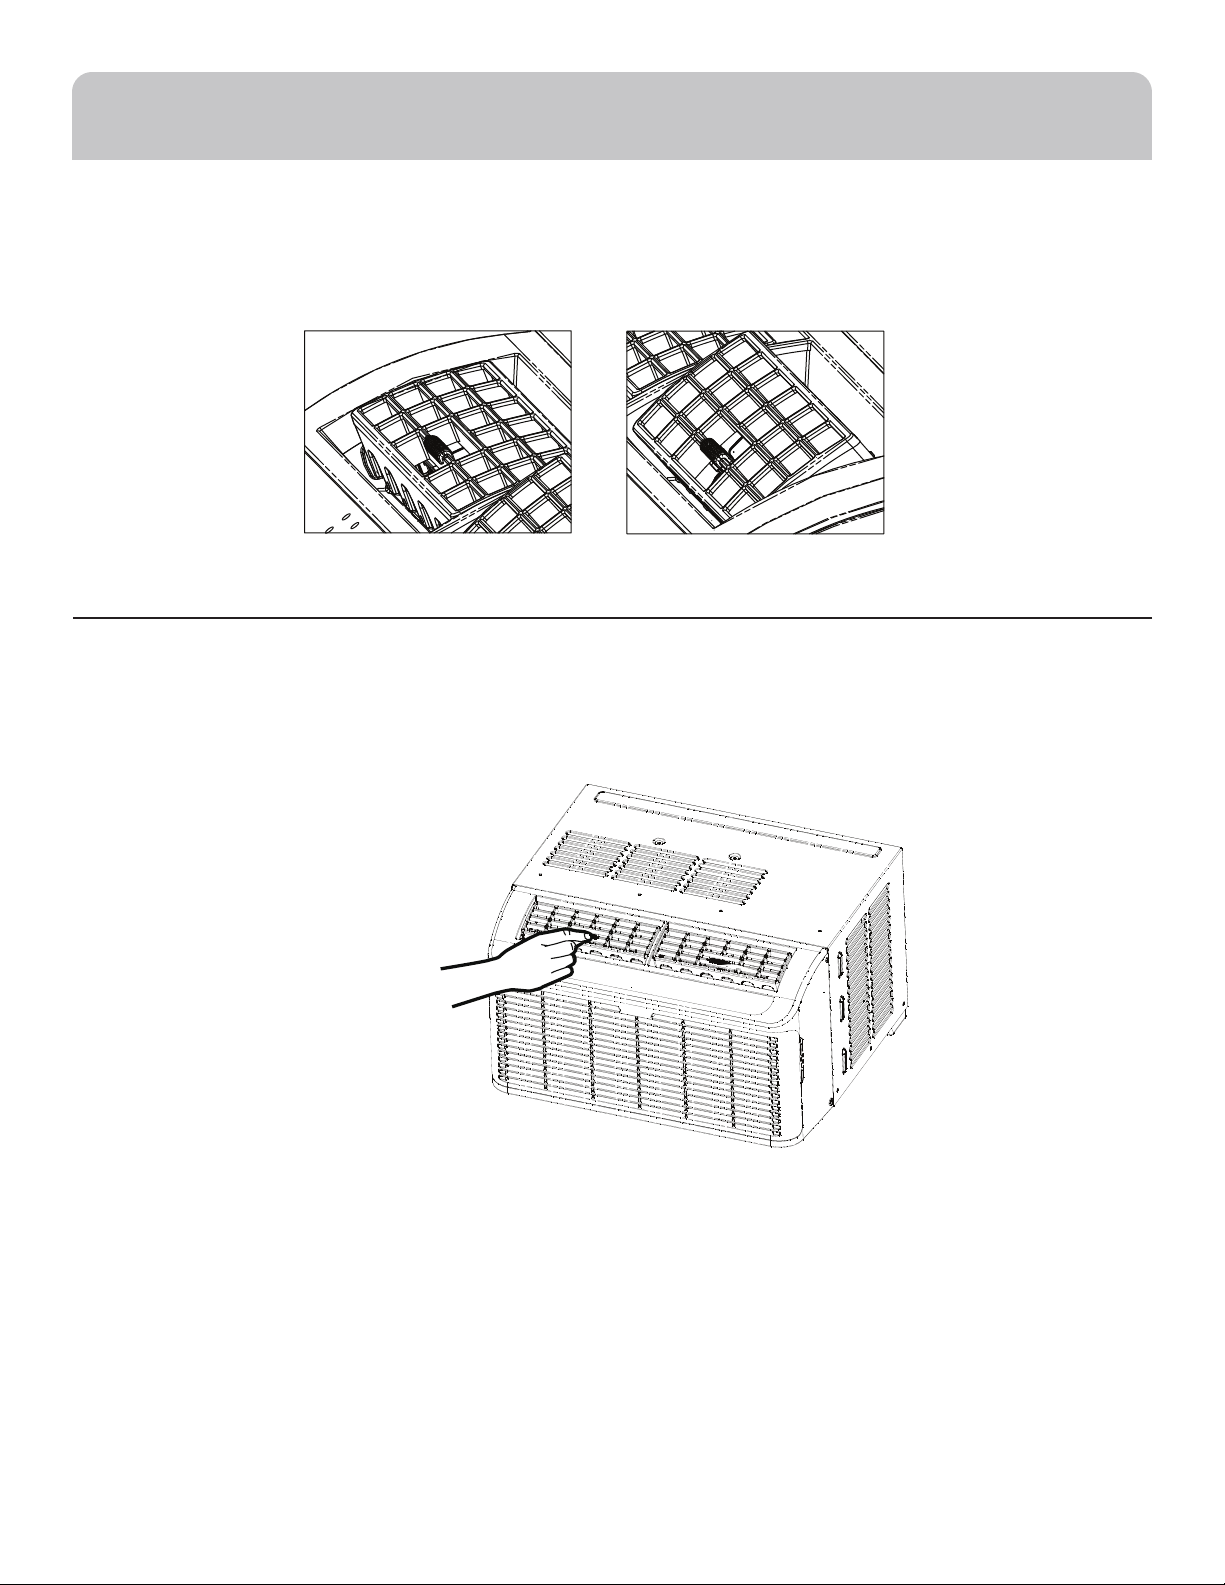
Air Direction
COOL MIN:
To reduce cooling capacity, point air directional louvers up.
COOL MAX:
To maximize cooling capacity, point air directional louvers
down.
Changing the Air Direction
2-Way Air Flow: The air directional louvers let you control
the direction of the airflow. The airflow can be directed up
to down.
CONTROLS
49-5000454 Rev. 0 9
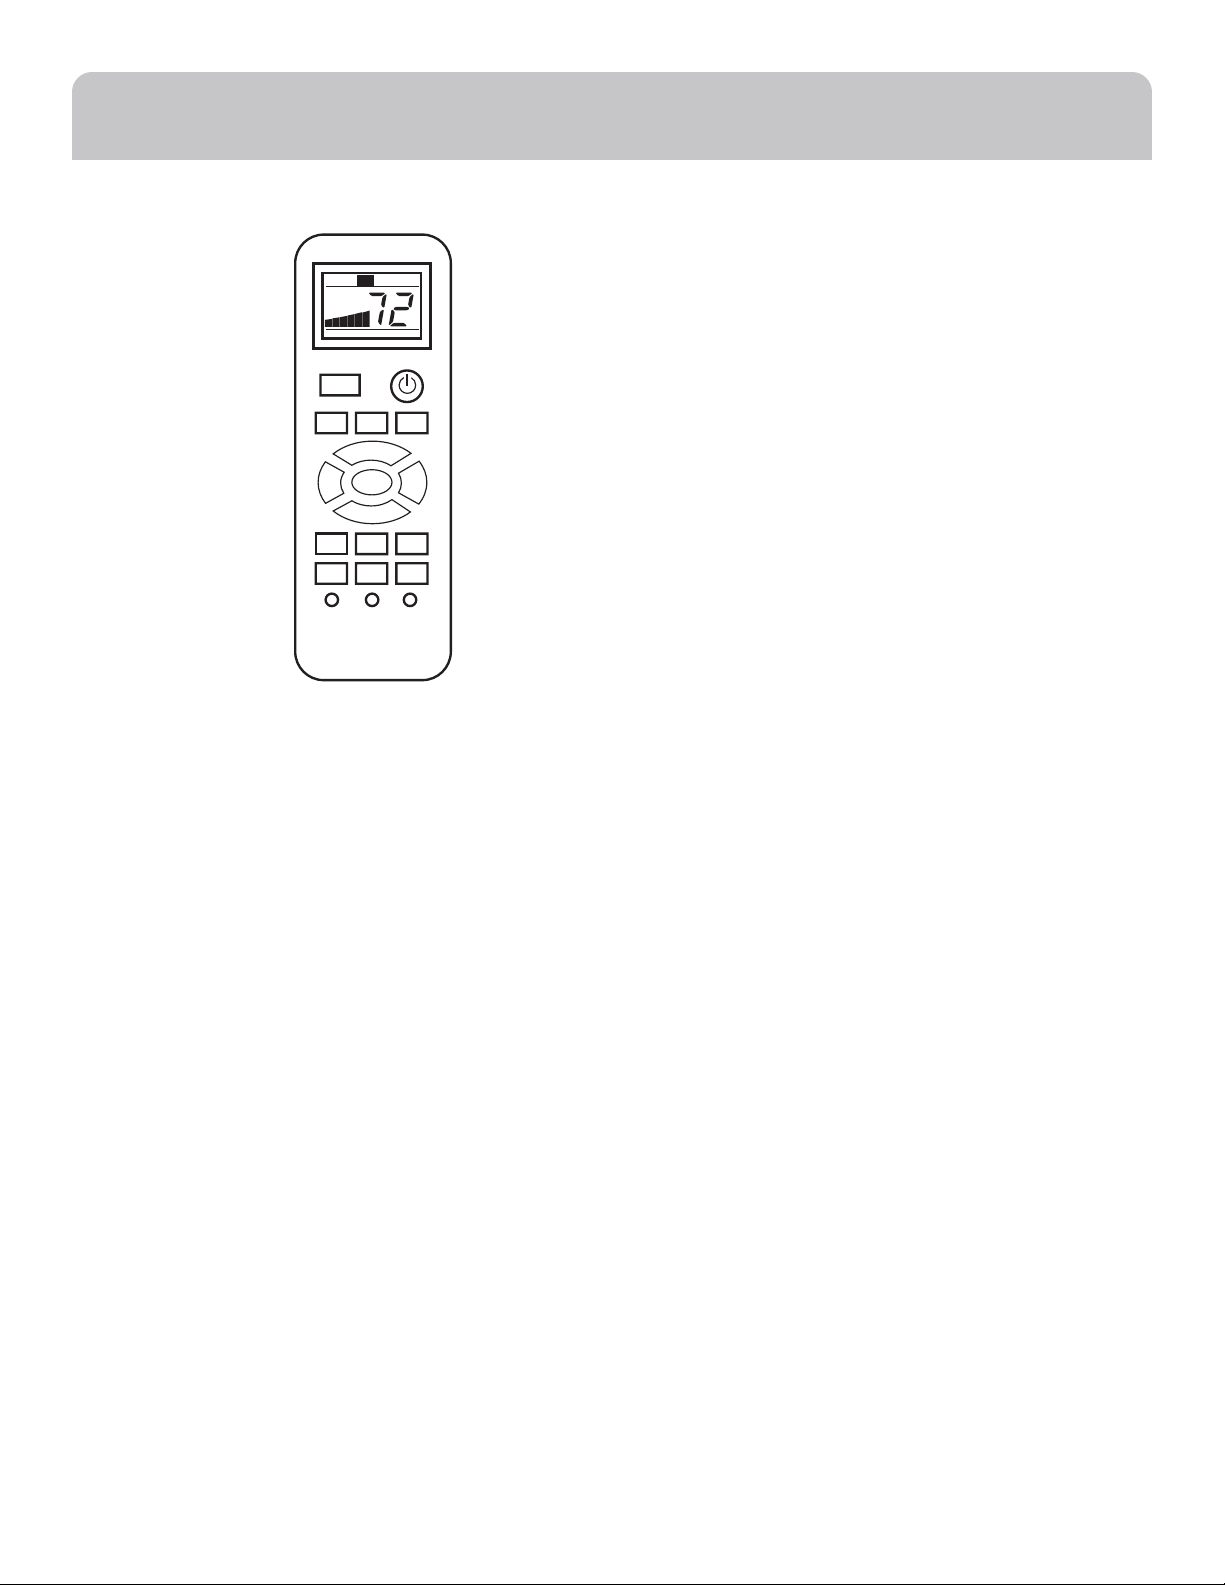
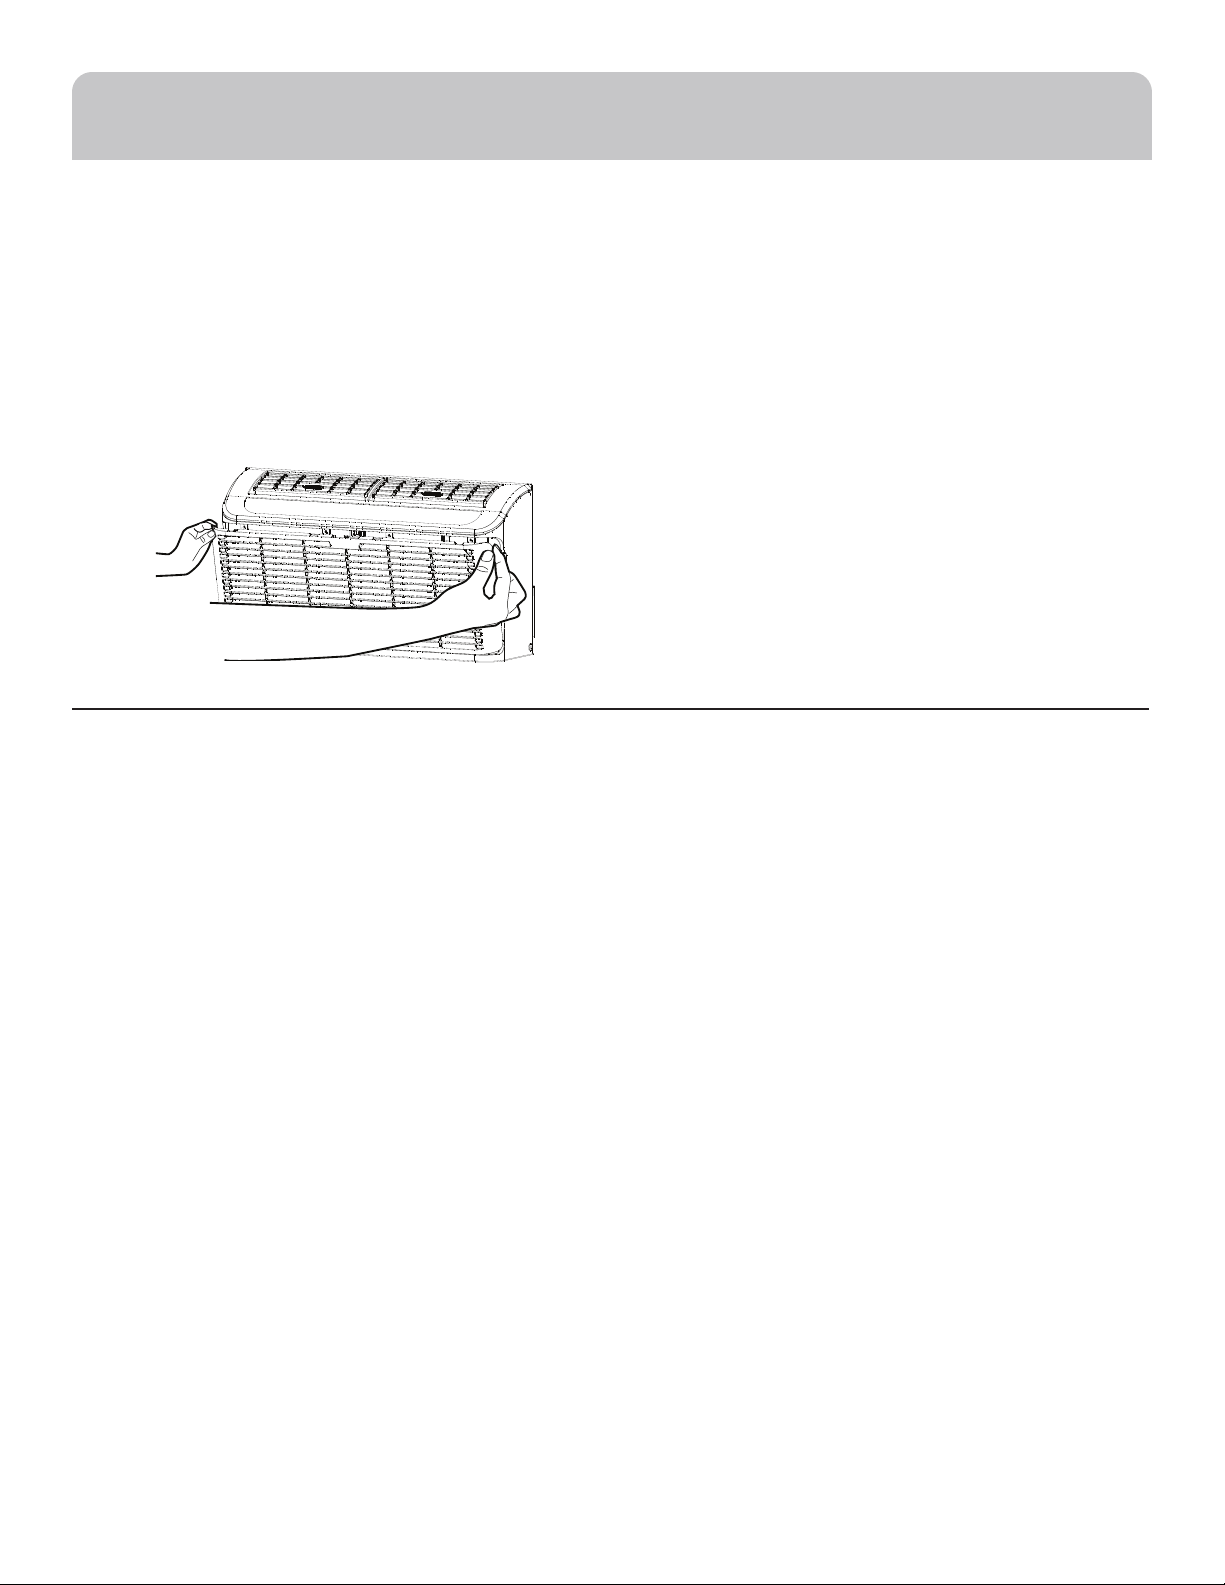
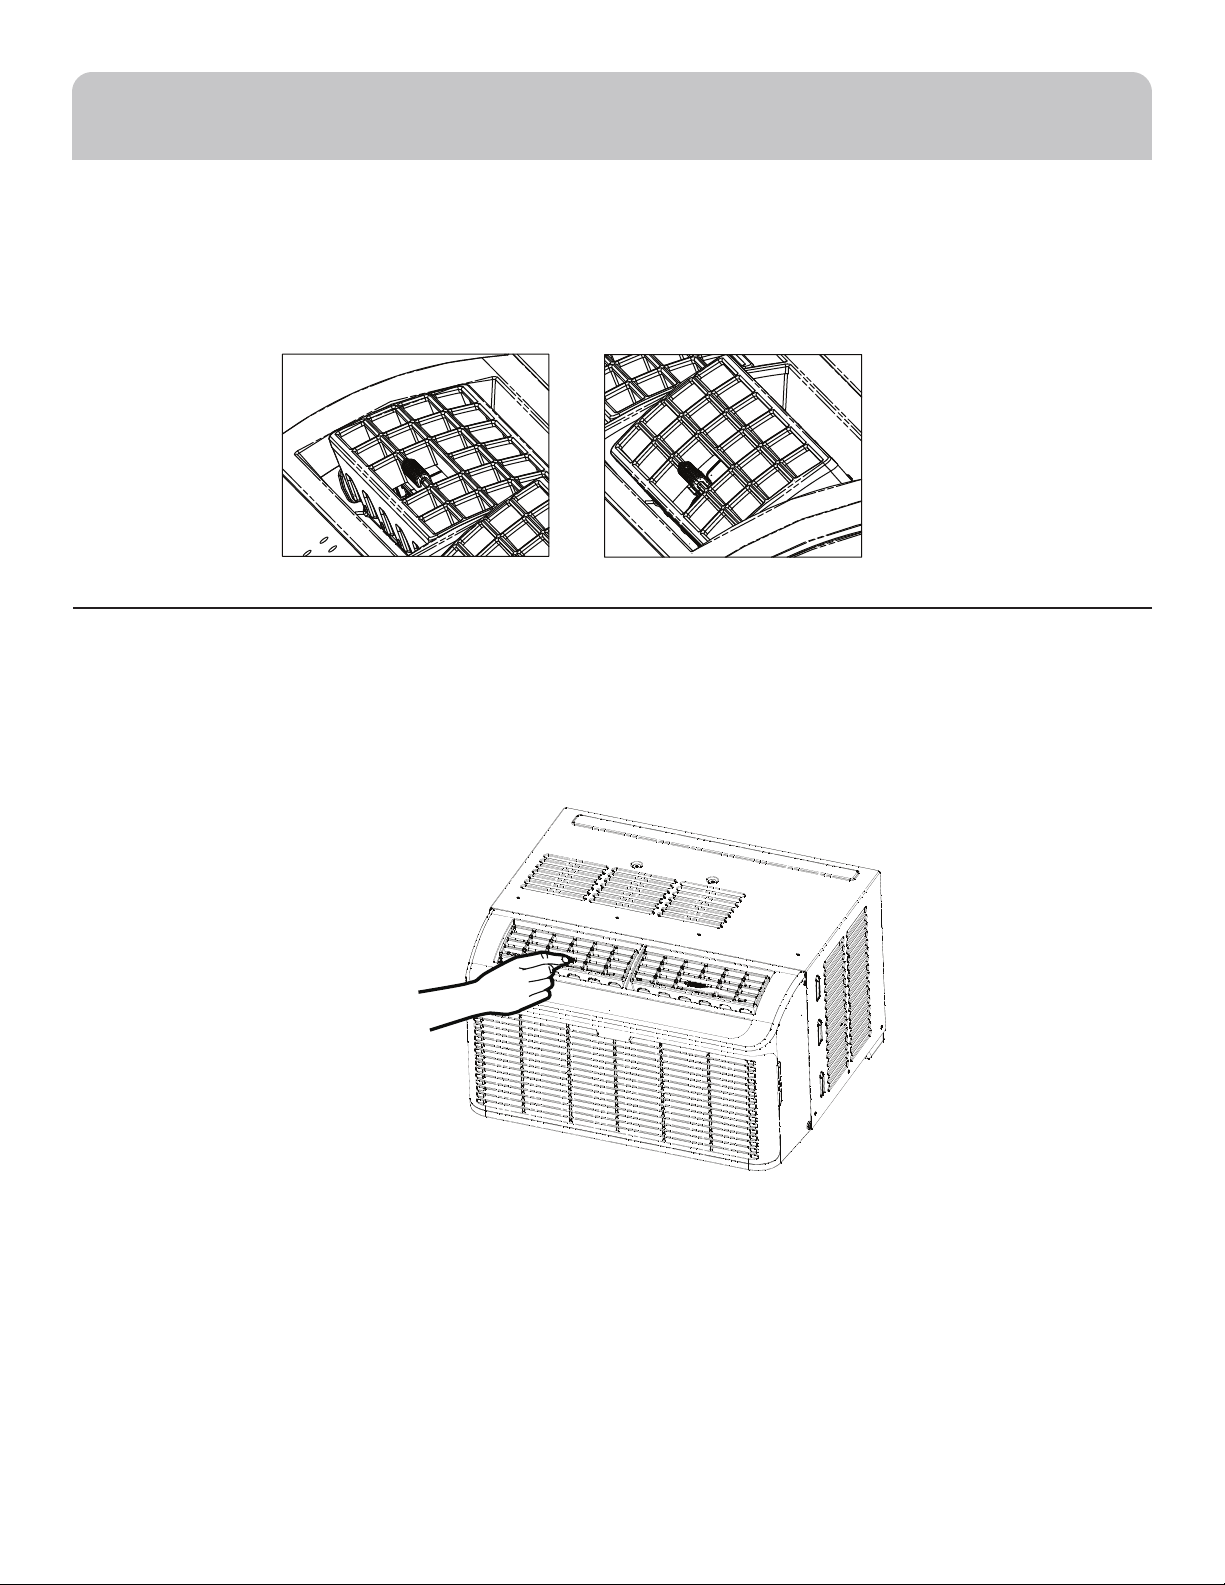
Cleaning the Air Filter
The air filter is removable for easy cleaning. A clean air filter
helps remove dust, lint and particles from the air for optimal
cooling operating efficiency. The Filter Reset light will turn on to
notify you that the air filter must be cleaned. The light goes on
after the air conditioner has been operating for 240 hours.
1. Turn off the air conditioner and unplug the power supply cord
from the outlet.
2. Remove the air filter by opening the front panel.
To do this, gently grip the front panel by the two openings on
the side, and slide towards you.
3. Use a vacuum cleaner with the hose attachment to clean the
air filter. If the air filter is very dirty, wash it in warm water with
mild detergent. Do not wash the air filter in a dishwasher or
clothes washer, or use any chemical cleaners. Do not use a
cloth dryer or microwave oven to dry it. Air dry the air filter
completely before placing it back in the unit.
4. Place the air filter back in the air conditioner. The bottom of
the black filter should nest behind three white tabs in the base
of the front panel.
5. Close the front panel.
6. Plug the power supply cord into the outlet, turn on the air
conditioner and press the filter reset button to turn off the
indicator light.
NOTE: Do not operate the air conditioner without the filter in
place.
Cleaning the Front Panel
1. Turn off the air conditioner and unplug the power supply cord
from the outlet.
2. Clean the front panel with a soft cloth. Do not use chemical
cleaners, especially spray cleaners, sharp instruments, or
flammable fluids. These products can damage the surface of
your air conditioner.
3. Air-dry the front panel completely.
4. Plug the power supply cord in the outlet and turn on the air
conditioner.
AIR CONDITIONER CARE
10 49-5000454 Rev. 0
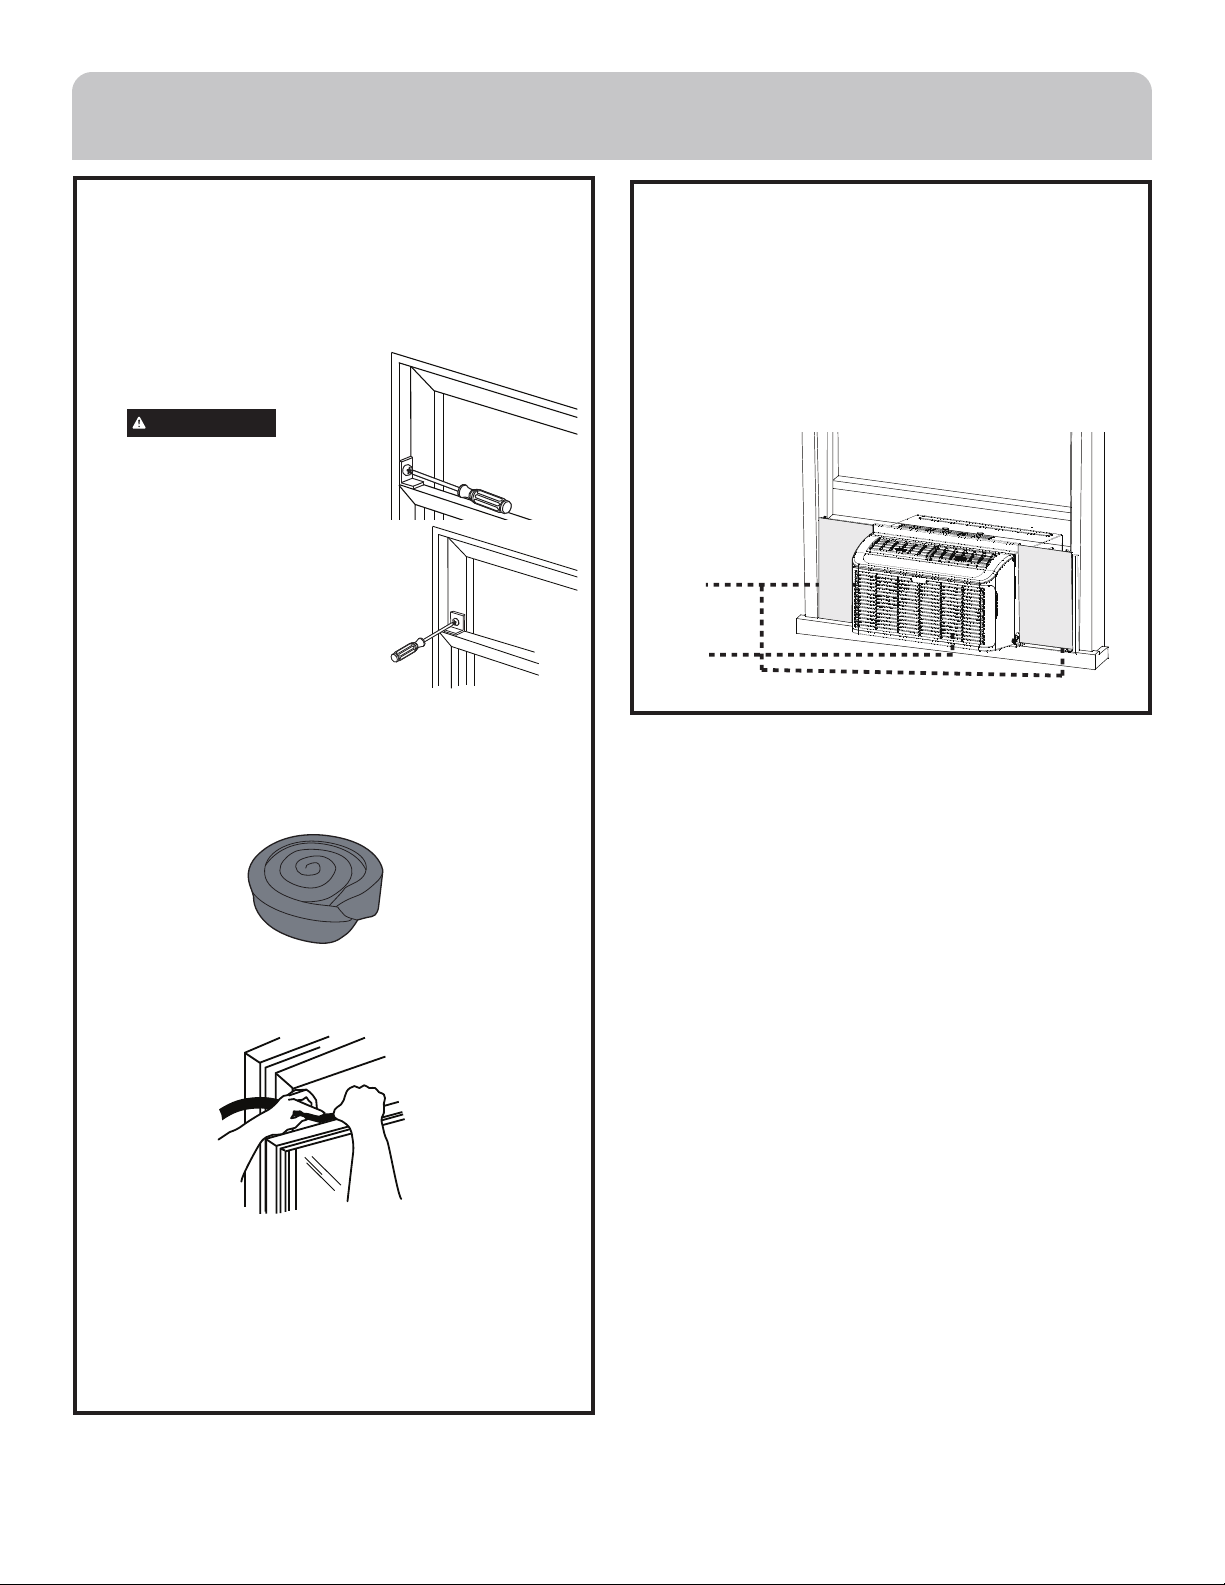
BEFORE YOU BEGIN
Read these instructions completely and carefully.
•
IMPORTANT – Save these instructions
for local inspector’s use.
•
IMPORTANT – Observe all governing
codes and ordinances.
• Note to Installer – Be sure to leave these
instructions with the Consumer.
• Note to Consumer – Keep these instructions for
future reference.
• Skill level – Installation of this appliance requires
basic mechanical skills.
• Completion time – Approximately 1 hour
• We recommend that two people install
this product.
• Proper installation is the responsibility
of the installer.
• Product failure due to improper installation is not
covered under the Warranty.
• You MUST use all supplied parts and use proper
installation procedures as described in these
instructions when installing this air conditioner.
Questions? Visit our Website at: haierappliances.com
These models require a 115/120-volt AC, 60-Hz
grounded outlet protected with a 15-amp
time-delay fuse or circuit breaker.
The 3-prong grounding plug minimizes the
possibility of electric shock hazard. If the wall outlet
you plan to use is only a 2-prong outlet, it is your
responsibility to have it replaced with a properly
grounded 3-prong wall outlet.
CAUTION
Do not, under any circumstances, cut or remove the
third (ground) prong from the power cord.
Do not change the plug on the power cord of this air
conditioner.
Aluminum house wiring may present special problems—
consult a qualified electrician.
Power cord includes a current interrupter device. A test
and reset button is provided on the plug case. The device
should be tested on a periodic basis by first pressing the
TESTåø÷÷òñäñç÷ëèñ÷ëèRESETåø÷÷òñúëìïèóïøêêèç
into the outlet. If the TESTåø÷÷òñçòèöñò÷÷õìóòõìé
the RESETåø÷÷òñúìïïñò÷ö÷äüèñêäêèççìöæòñ÷ìñøè
use of the air conditioner and contact a qualified service
technician.
ELECTRICAL
REQUIREMENTS
WARNING
EXCESSIVE WEIGHT HAZARD - When moving or lifting
the air conditioner, use two or more people. Wear gloves
when handling the air conditioner to protect against
possible sharp edges and metal fins.
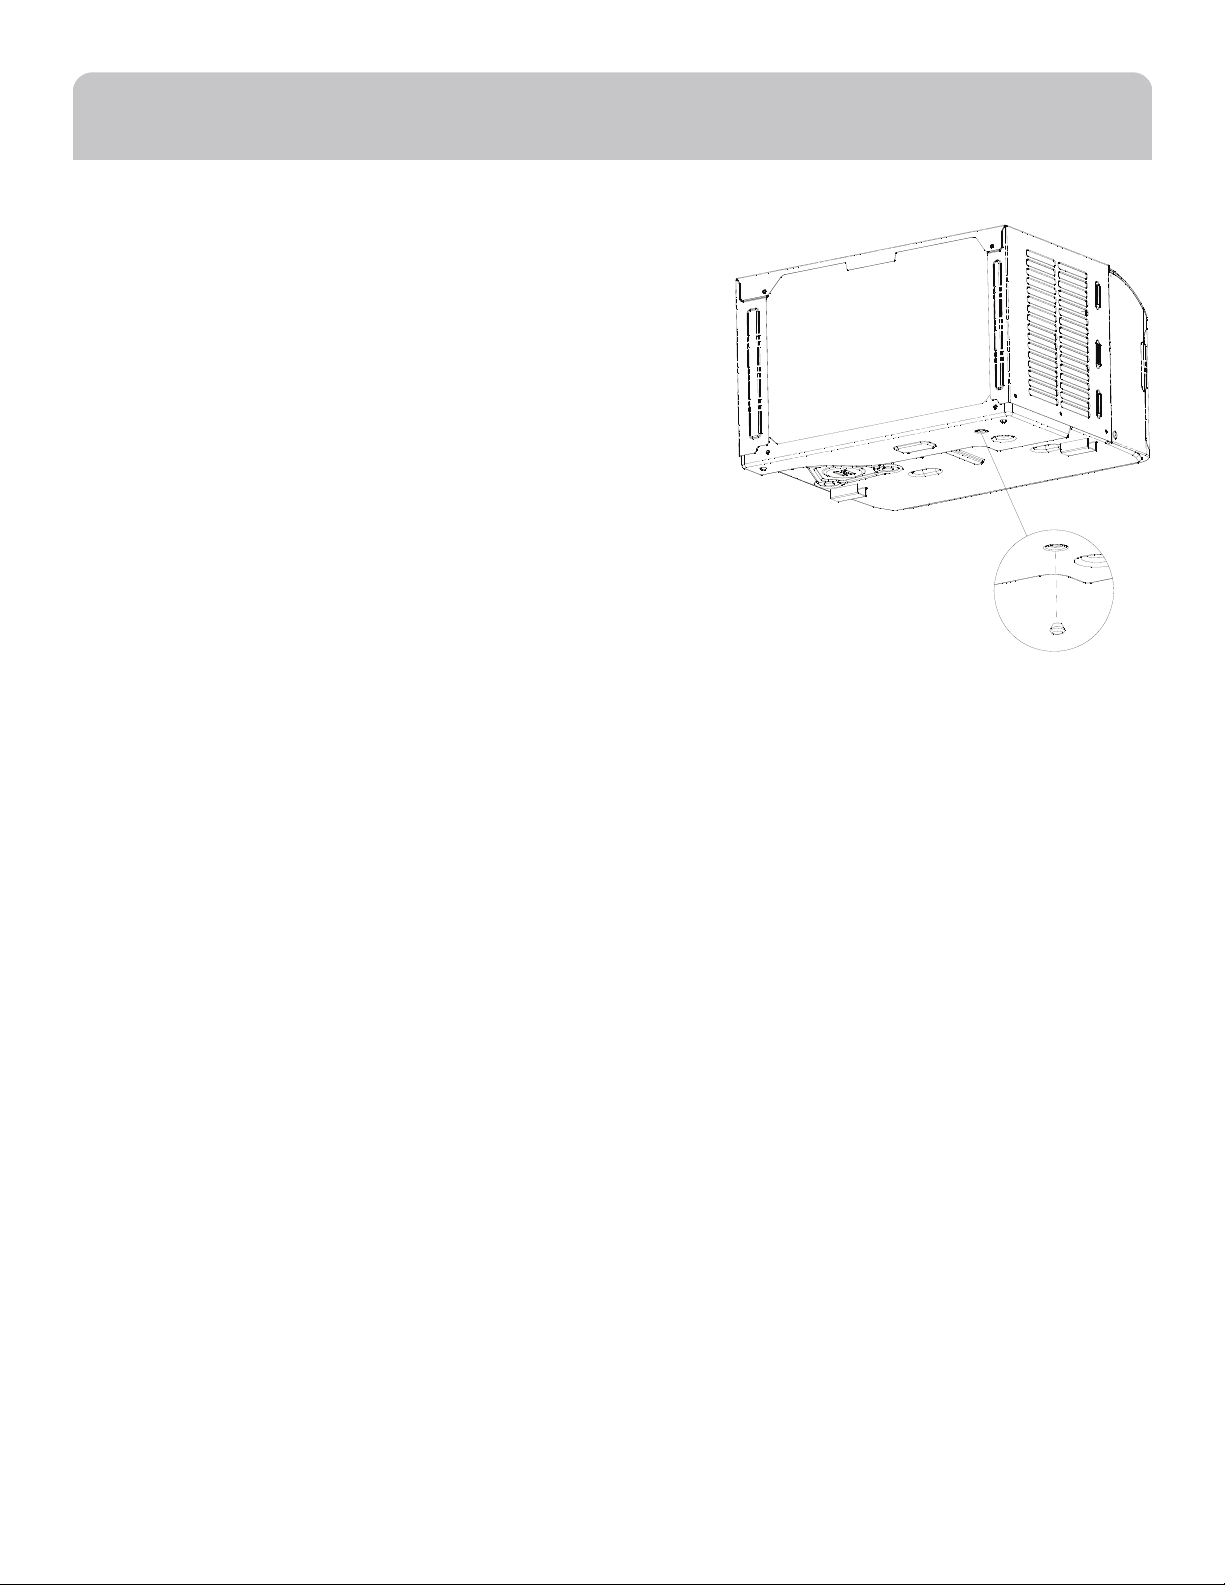
Remove Packaging Materials
• Remove packaging materials. Save the carton and
the foam packaging for storing the unit when not in
use.
NOTE: There is NO internal packing material inside
the air conditioner to remove - DO NOT open the
cabinet.
• Handle the air conditioner gently.
• Keep the air conditioner upright and level. Do not
set the air conditioner on its side, front, back or
upside down.
• The air conditioner must be standing upright for 2
hours prior to installation and operation.
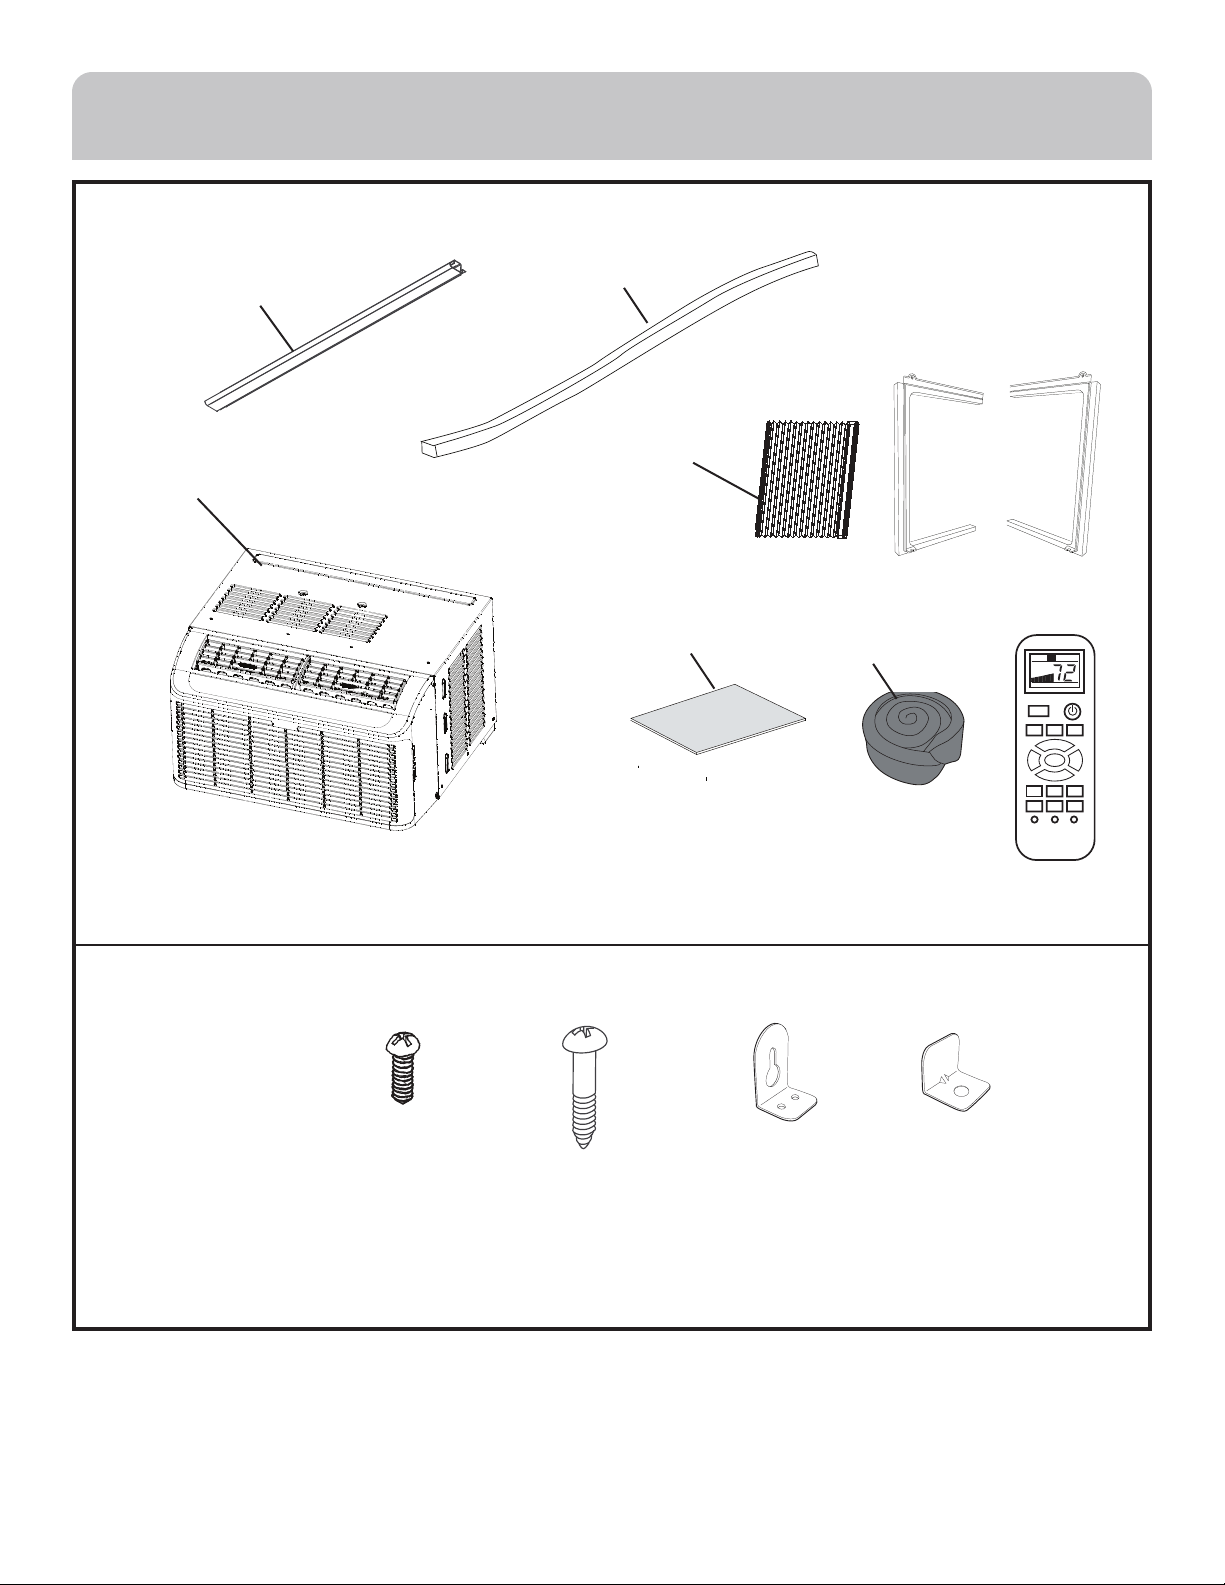
UNPACKING THE AIR CONDITIONER
TOOLS YOU WILL NEED
Phillips head screwdriver
Ruler or tape measurePencil
Level
Scissors or knife
Drill and 1/8” drill bit
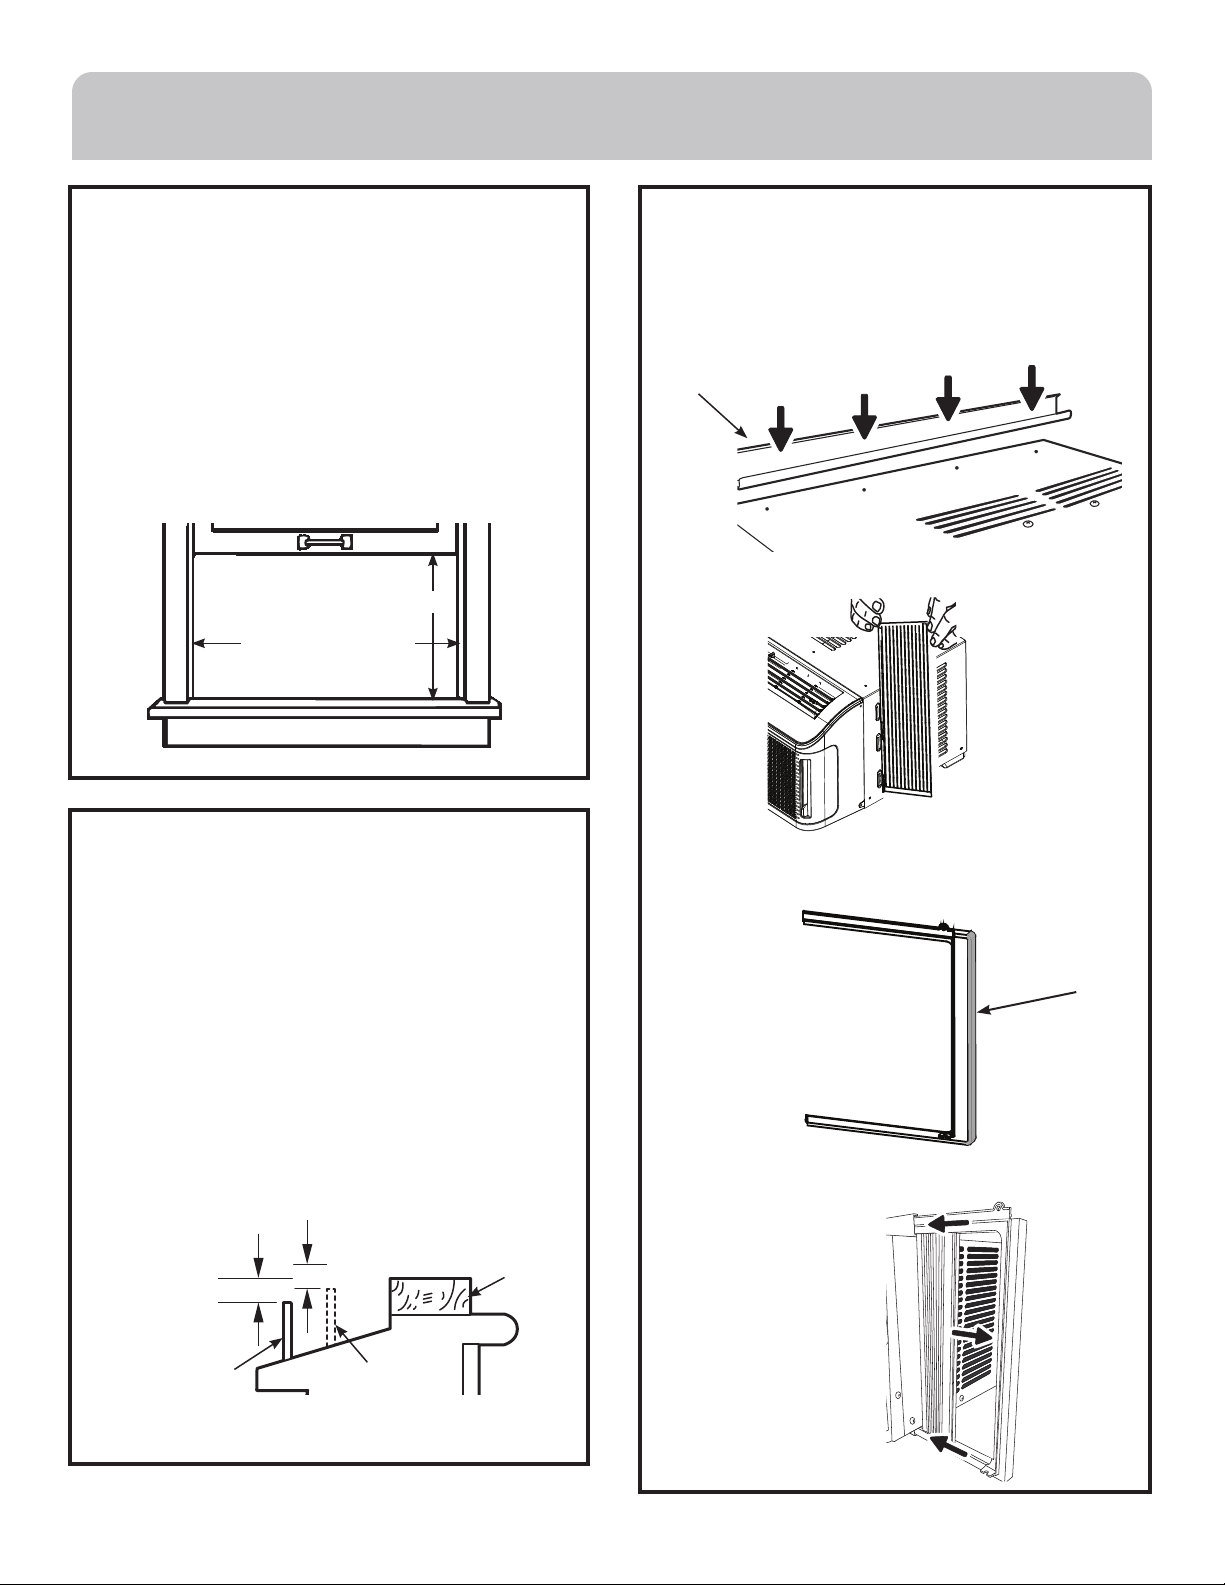
INSTALLATION INSTRUCTIONS
49-5000454 Rev. 0 11
DEHUM
TIMER
UP
SLEEP
LOCK
TIMER
ON/OFF
F/C
TIMER
DOWN
LIGHT RESET
TEMP DOWN
QUIET
HIGH MED AUTO
COOLFAN
ENERGY
SAVE
TEMP UP
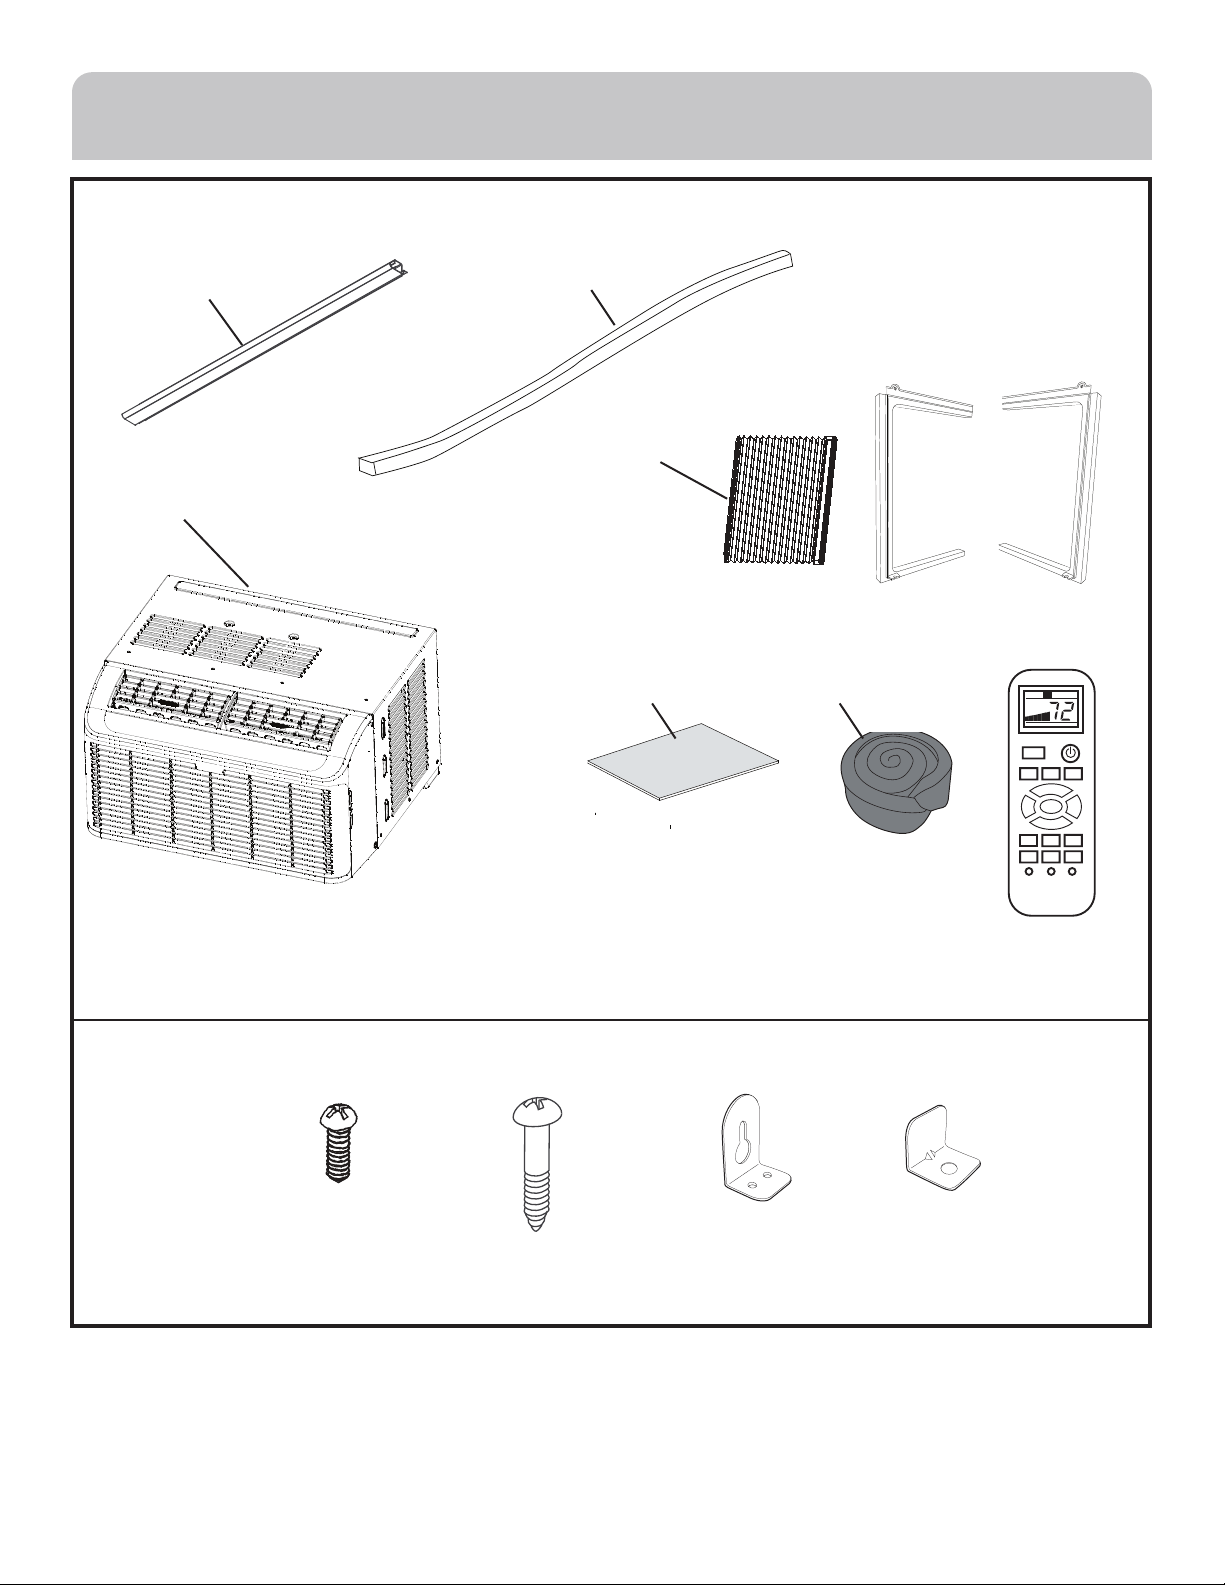
Side Curtain
Frame
Type B (9)
1” wood screw
Weather Seal (3)
Side Curtain
(2)
Top mounting rail
Air
conditioner
Window locking
bracket (1)
Side Brackets (2)
ÙÊÛÝÜÒ×ÌÕÞÍÎÍ
(Appearance may vary)
Left
Right
Type A (4)
3/8” self-
tapping screw
Foam
Seal
Remote Control
Side Curtain Foam
(2)
INSTALLATION INSTRUCTIONS

12 49-5000454 Rev. 0
#ÙÛÎÙÊÛÎÝÑÎÊÒÛÌØ×ÍÒÝÒØ×ÎÛ
A. Install the top mounting rail with 4 Type A screws
B. Slide the side curtain panels into the side panel rails.
C. For model ESAQ406, cut and apply a weather
strip to side of the curtain frame (one each side).
D. Slide left and right side curtain frames into top and
bottom rails. Make sure that side curtains snap into
side of the frames.
!àÒ×ÍØàÛÎÚÞÒÛÎÖÎ×ÝÜ
• These instructions are for a standard double-hung
window. You will need to modify them for other
types of windows.
• The air conditioner can be installed without the
side curtain panels if needed to fit in a narrow
window. See the window opening dimensions.
• All supporting parts must be secured to firm
wood, masonry or metal.
• The electrical outlet must be within reach of the
power cord.
• Follow the dimensions in the table and illustration
for your model.
2. ÜÝØÛÖàÒ×ÍØàÛÎÚÞÒÛÎÖÎ×ÝÜ
A storm window frame will not allow the air
conditioner to tilt toward the outside, and will keep
it from draining properly. To adjust for this, attach a
piece of wood to the sill.
àØØÍÙÒÎÌÎÜ
WIDTH: 2ė
LENGTH: Long enough to fit inside the window
frame.
THICKNESS: To determine the thickness, place
äóìèæèòéúòòçòñ÷ëèöìïï÷òðäîèì÷!¦"ėëìêëèõ
than the top of the storm window frame or the vinyl
frame.
Attach securely with nails or screws provided by
the installer.
Vinyl frame
13 3/8”
(With side curtain panels)
26-1/16”- 39-1/4”
!¦"ėëìêëèõ
than storm
window
frame
Storm window
frame
Wood
Sill
!¦"ėëìêëèõ
than vinyl frame
(on some windows)
Top Mounting rail
CLICK
INSTALLATION INSTRUCTIONS
49-5000454 Rev. 0 13
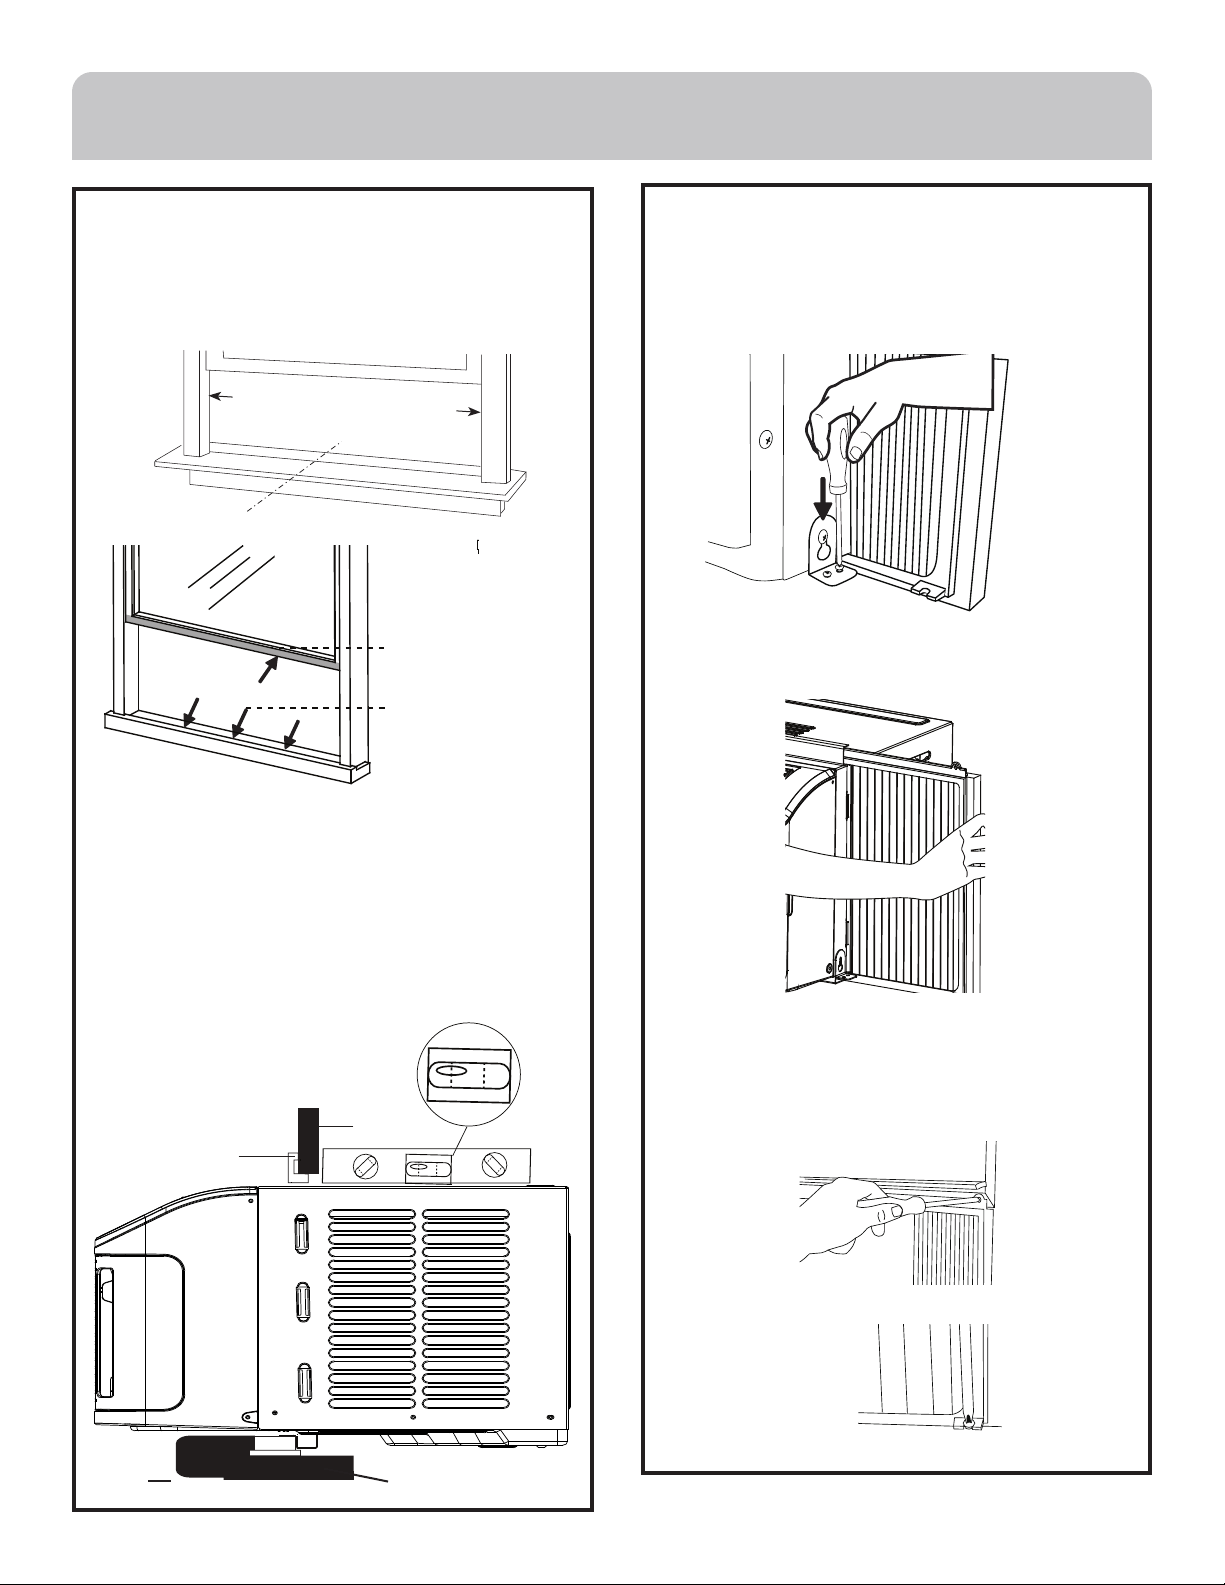
4. INSTALL THE AIR CONDITIONER IN
THE WINDOW
A. Measure the width of the window opening and mark
the center line on the inside window sill.
Place the unit in the window. Lower the window
sash to hold unit in place.
B. Set the air conditioner in the window so that is
centered. Place the air conditioner so that front
edge of the bottom mounting rail is against the
back edge of the sill.
Make sure that the air conditioner is level or tilting
slightly to the outside.
Width of window opening
Center line
4. INSTALL THE AIR CONDITIONER IN
THE WINDOW (continues)
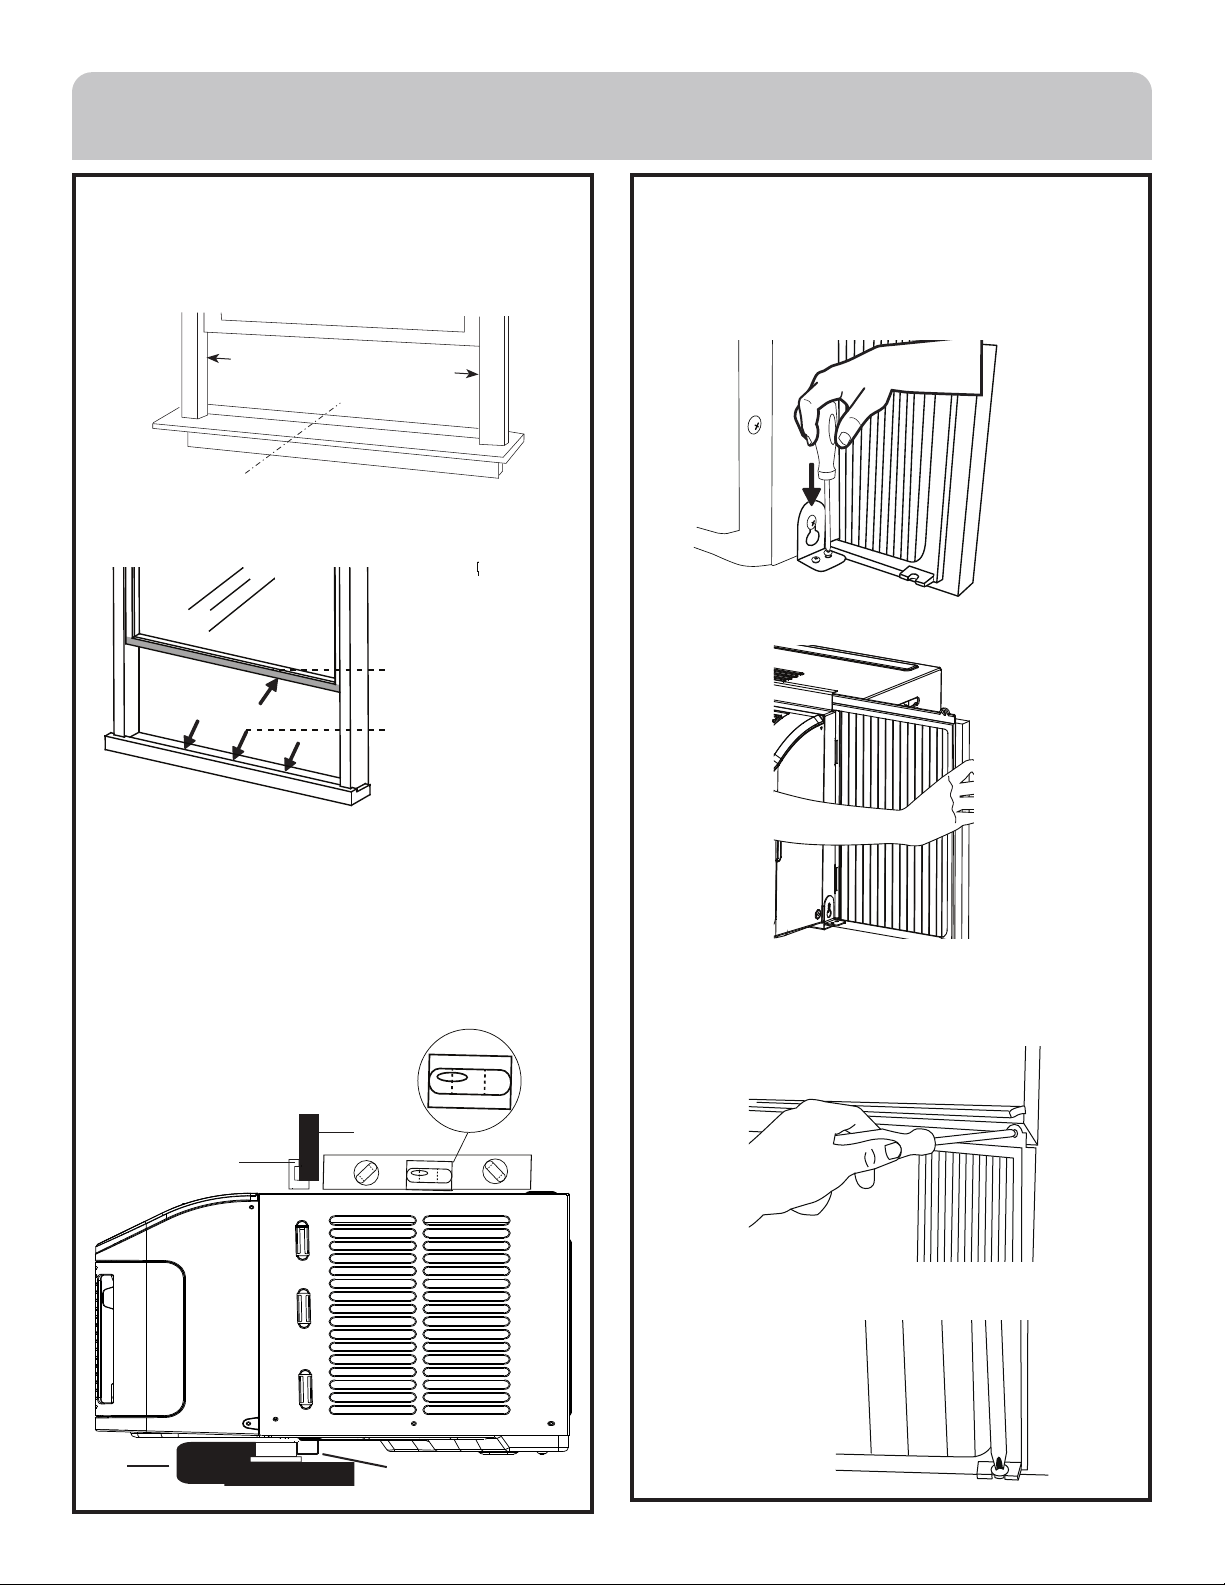
C. Install the side bracket into the unit and into the
window sill using two 1” wood screws provided.
Repeat on other side.
D. Extend the curtain panels until they fill the window.
Mark the location of the holes in each corner of the
curtain. Use the drill and 1/8” drill bit to drill pilot
holes. Use 4 type B screws to secure the side
panels in place.
Top Rail
Lower
Window
Sash
Sill
Bottom Rail
Cut and apply weather
strip to front and
bottom edge of window
frame.
Cut and apply weather
strip to back edge of
the window sill
INSTALLATION INSTRUCTIONS

14 49-5000454 Rev. 0
5. INSTALL WINDOW LOCKING
BRACKET AND FOAM TOP WINDOW
GASKET
Use Type B Screw to install the window lock bracket
on top of the bottom window.
.
A.
CAUTION
To prevent broken glass or
damage to windows, on vinyl
or other similarly constructed
windows, attach the window
locking bracket to the
window side jamb with one
Type B screw.
B. Cut the foam top window gasket to the window
width.
C. Stuff the foam between the glass and the window to
prevent air and insects from getting into the room.
NOTE: If the gasket supplied does not fit your
window, obtain appropriate material locally to
provide a proper installation seal.
Wood
Vinyl
5. INSTALL WINDOW LOCKING
BRACKET AND FOAM TOP WINDOW
GASKET (continues)
D. For additional energy savings, on ESAQ406 only,
measure and cut the adhesive backed foam
sheets, and apply over the side curtains and
frames to seal air leakage.
Side Curtain
Foam
Weather
Seals
INSTALLATION INSTRUCTIONS
49-5000454 Rev. 0 15
Save time and money! Review the charts on the following pages first and you may not need to call for service.
Problem Possible Cause What To Do
Air conditioner does not
start.
The unit is unplugged. Make sure the air conditioner plug is pushed completely into
the outlet.
The fuse is blown/circuit breaker is
tripped.
Check the house fuse/circuit breaker box and replace the fuse
or reset the breaker.
Power Failure. The unit will automatically restart in the setting last used after
the power is restored.
There is a protective time delay (approximately 3 minutes) to
prevent tripping of the compressor overload. For this reason,
the unit may not start normal cooling for 3 minutes after it is
turned back on.
The current interrupter device is
tripped.
Press RESET button located on the power cord plug.
If the RESET button will not stay engaged, discontinue use of
the air conditioner and contact a qualified service technician.
Remote control is not
working
Batteries are dead. Replace the batteries.
Batteries inserted wrong. Make sure batteries are inserted in the correct position.
Air conditioner does not
cool as it should.
Indoor airflow is restricted. Make sure there are not curtains, blinds or furniture blocking
the front of the air conditioner.
The temp control may not be set
properly.
Turn the temperature control to a higher number.
The air filter is dirty. Clean the filter at least every 30 days. See Care and Cleaning
section.
The room may have been hot. When the air conditioner is first turned on, you need to allow
time for the room to cool down.
Cold air is escaping. Check for open furnace registers and cold air returns.
Cooling coils have iced up. See “Air conditioner freezing up” below.
Air conditioner freezing up Ice blocks the air flow and stops
the air conditioner from cooling the
room.
On models with control knobs, set the mode control at High
Fan or High Cool with the Temp at 1 or 2.
Water drips outside Hot, humid weather. This is normal.
Water drips inside The air conditioner is not tilted to
the outside.
For proper disposal, make sure the air conditioner slants
slightly from the case front to the rear.
Water collects in base pan Moisture removed from air and drain
into base pan.
This is normal for a short period in areas with little humidity;
normal for a longer period in very humid areas.
TROUBLESHOOTING
16 49-5000454 Rev. 0
• You may hear a pinging noise caused by water being picked up and
thrown against the condenser on rainy days or when the humidity
is high. This design feature helps remove moisture and improve
efficiency.
• You may hear the thermostat click when the compressor cycles on
and off.
• Water will collect in the base pan during high humidity or on rainy days.
The water may overflow and drip from the outdoor side of the unit.
• The fan may run even when the compressor does not.
• Water droplets being thrown against the outside coils can make a
pinging noise. This helps cool the condenser. You can reduce this
noise by removing the subbase water plug.
Removing this plug will lower the Energy Efficiency of your until.
NOTE: Do not drill hole in the base pan.
Subbase Water Plug
NORMAL OPERATING SOUNDS

49-5000454 Rev. 0 17
NOTES
18 49-5000454 Rev. 0
Staple your receipt here.
Proof of the original purchase date is needed to make a warranty claim.
EXCLUSION OF IMPLIED WARRANTIES - Your sole and exclusive remedy is product repair as provided in this Limited
Warranty. Any implied warranties, including the implied warranties of merchantability or fitness for a particular purpose,
are limited to one year or the shortest period allowed by law.
For US Customers: This limited warranty is extended to the original purchaser and any succeeding owner for products
purchased for home use within the USA. If the product is located in an area where service by a Haier Appliances Authorized
Servicer is not available, you may be responsible for a trip charge or you may be required to bring the product to an Authorized
Haier Appliances Service location for service. In Alaska, the limited warranty excludes the cost of shipping or service calls to
your home.
Some states do not allow the exclusion or limitation of incidental or consequential damages. This limited warranty gives you
specific legal rights, and you may also have other rights which vary from state to state. To know what your legal rights are,
consult your local or state consumer affairs office or your state’s Attorney General.
Warrantor US:
GE Appliances, a Haier company
Louisville, KY 40225
• Customer instruction. This owner’s manual provides
information regarding operating instructions and user
controls.
• Improper installation. If you have an installation problem,
or if the air conditioner is of improper capacity, contact
your dealer or installer. You are responsible for providing
adequate electrical connecting facilities.
• Failure of the product resulting from modifications to the
product or due to unreasonable use including failure to
provide reasonable and necessary maintenance.
• Replacement of house fuses or resetting of circuit breakers.
• Failure due to corrosion on models not corrosion-protected.
• Damage to the product caused by improper power supply
voltage, accident, fire, floods or acts of God.
• Incidental or consequential damage caused by possible
defects with this air conditioner.
• Damage caused after delivery.
What Will Not Cover:
For The Period Of: Haier Appliances Will Replace:
One Year
From the date of the
original purchase
Replacement, repair, or refund of the original retail price for any product which fails due to a
defect in materials or workmanship. If the unit is exchanged, the replacement unit is warranted
for the remainder of your product’s original one-year warranty period. Haier Appliances will, at its
sole discretion, replace the product with a product of the same or comparable functionality and
quality or refund the original retail price.
• Properly pack your unit. We recommend using the original
carton and packing materials.
• Return the product to the retail location where it was
purchased.
• Include in the package a copy of the sales receipt or other
evidence of date of original purchase. Also print your name
and address and a description of the defect.
In Order to Make a Warranty Claim During Your Retailer’s Allowable Return Period:
• Locate your original sales receipt and make a note of your
model and serial number.
• Call 800.GE.CARES (800.432.2737) (in the United States) to
initiate the product replacement process.
• You will be asked to provide your name, address, date of
purchase, model and serial number.
• Haier Appliances will arrange for a carton to be sent to your
home to recover the product.
• Please return all requested materials (postage pre-paid) in the
carton provided. Please include a description of the defect.
• You should receive your replacement product or refund
within 7 to 10 business days after your package is received.
In Order to Make a Warranty Claim During the Remainder of the One-Year Warranty:
LIMITED WARRANTY

49-5000454 Rev. 0 19
ÍNDICE
SEGURIDAD DEL ACONDICIONADOR DE AIRE ......................................................................... 20
PANEL DE CONTROL .................................................................................................. 21
CONTROLES .......................................................................................................... 22
CUIDADO DEL ACONDICIONADOR DE AIRE ............................................................................25
INSTRUCCIONES DE INSTALACIÓN ....................................................................................26
SOLUCIÓN DE PROBLEMAS ............................................................................................31
CONFIGURACIÓN WIFI ................................................................................................32
GARANTÍA LIMITADA ..................................................................................................34
SITIO WEB DE HAIER
¿Desea realizar una consulta o necesita ayuda con su electrodoméstico? ¡Intente a través del Sitio Web de Haier las 24 horas del día,
cualquier día del año! Usted también puede comprar más electrodomésticos maravillosos de Haier y aprovechar todos nuestros servicios
de soporte a través de Internet, diseñados para su conveniencia. En EE.UU.: Haierappliances.com
INFORMACIÓN A TENER EN CUENTA
Le agradecemos la compra de este producto de marca Haier. Este
manual del propietario le ayudará a lograr el mejor rendimiento de su
nuevo acondicionador de aire.
Para referencia futura, registre el modelo y número de serie ubicados
al costado de su acondicionador de aire, y la fecha de compra.
Engrape la prueba de compra a este manual para asistirle cuando
necesite obtener servicio bajo la garantía.
__________________________________________________________
Número de modelo
__________________________________________________________
Número de serie
__________________________________________________________
Fecha de compra
20 49-5000454 Rev. 0
LEA Y GUARDE ESTAS INSTRUCCIONES
INFORMACIÓN IMPORTANTE DE SEGURIDAD
LEA TODAS LAS INSTRUCCIONES ANTES DE USAR
Para su seguridad, siga las instrucciones de este manual a fin de minimizar riesgos de incendio,
descargas eléctricas o heridas personales.
Ŷ8VHHVWHHOHFWURGRPpVWLFRVyORSDUDVXSURSyVLWRRULJLQDOFRPRVH
GHVFULEHHQHO0DQXDOGHO3URSLHWDULR
Ŷ(VWHDFRQGLFLRQDGRUGHDLUHVHGHEHLQVWDODUGHIRUPDDSURSLDGDGH
DFXHUGRFRQODV,QVWUXFFLRQHVGH,QVWDODFLyQDQWHVGHVHUXVDGR
Ŷ1XQFDGHVHQFKXIHVXDFRQGLFLRQDGRUGHDLUHHPSXMDQGRHOFDEOH
GHFRUULHQWH6LHPSUHWRPHVXHQFKXIHGHPDQHUDILUPH\HPSXMHHO
PLVPRKDFLDDIXHUDGHOUHFHSWiFXOR
Ŷ5HHPSODFHGHLQPHGLDWRWRGRVORVFDEOHVGHOVHUYLFLRGHHOHFWULFLGDG
SHODGRVRFRQFXDOTXLHUWLSRGHGDxR8QFDEOHGHOVHUYLFLRGHFRUULHQWH
TXHHVWpGDxDGRGHEHUiVHUUHHPSOD]DGRSRUXQRQXHYRSURYLVWRSRUHO
IDEULFDQWH\QRGHEHUiVHUUHSDUDGR1RXVHXQFDEOHFRQFRUWDGXUDV
RDEUDVLyQVREUHVXH[WHQVLyQRHQFXDOTXLHUDGHVXVHQFKXIHVR
H[WUHPRV
Ŷ&RORTXHODXQLGDGHQ2))$SDJDGR\GHVHQFKXIHHODFRQGLFLRQDGRU
GHDLUHDQWHVGHXVDUHOPLVPR
Ŷ3DUDVXVHJXULGDGQRDFXPXOHQLXVHPDWHULDOHVFRPEXVWLEOHV
JDVROLQDXRWURVYDSRUHVROtTXLGRVLQIODPDEOHVFHUFDGHpVWHXRWUR
HOHFWURGRPpVWLFR
Ŷ6LHOUHFHSWiFXORQRFRLQFLGHFRQHOHQFKXIHHOFDPELRGHOPLVPR
GHEHUiVHUUHDOL]DGRSRUXQHOHFWULFLVWDFDOLILFDGR
ADVERTENCIA
Ŷ$ILQGHDFHOHUDUHOSURFHVRGHGHVFRQJHODFLyQRSDUDOLPSLDUQRXVH
QLQJ~QPpWRGRTXHQRVHDHOUHFRPHQGDGRSRUHOIDEULFDQWH
Ŷ(VWHHOHFWURGRPpVWLFRGHEHUiVHUJXDUGDGRHQXQDVDODGRQGHQR
KD\DIXHQWHVGHHQFHQGLGRFRQWLQXDVSRUHMHPSOROODPDVDELHUWDVXQ
HOHFWURGRPpVWLFRTXHIXQFLRQHDJDVRXQFDOHIDFWRUTXHIXQFLRQHD
HOHFWULFLGDG
Ŷ1RSHUIRUHQLTXHPHHOWXERUHIULJHUDQWH7HQJDSUHVHQWHTXHORV
UHIULJHUDQWHVQRGHEHQWHQHURORU
Ŷ0DQWHQJDODVDEHUWXUDVGHODYHQWLODFLyQOLEUHVGHREVWUXFFLRQHV
Ŷ$OPRYHULQVWDODU\RSHUDUHOHOHFWURGRPpVWLFRVHGHEHUiWHQHUFXLGDGR
SDUDHYLWDUGDxDUODWXEHUtDGHOUHIULJHUDQWH
Ŷ1RUHDOLFHSHUIRUDFLRQHVHQODXQLGDG
Ŷ(OPDQWHQLPLHQWRODOLPSLH]D\HOVHUYLFLRWpFQLFRVyORGHEHUiQVHU
UHDOL]DGRVSRUWpFQLFRVDGHFXDGDPHQWHHQWUHQDGRV\FDOLILFDGRVHQHO
XVRGHUHIULJHUDQWHVLQIODPDEOHV
Ŷ+DLHUQRVXPLQLVWUDVHUYLFLRWpFQLFRSDUDHODFRQGLFLRQDGRUGHDLUH
Ŷ'HVFDUWHHOHOHFWURGRPpVWLFRGHDFXHUGRFRQODV5HJXODFLRQHV
)HGHUDOHV\/RFDOHV/RVUHIULJHUDQWHVLQIODPDEOHVUHTXLHUHQ
SURFHGLPLHQWRVGHGHVFDUWHHVSHFtILFRV$ILQGHGHVFDUWDUVX
DFRQGLFLRQDGRUGHDLUHGHIRUPDDPELHQWDOPHQWHVHJXUDFRPXQtTXHVH
FRQODVDXWRULGDGHVORFDOHV
Riesgo de Incendio o Explosión. Esta unidad contiene refrigerante inflamable.
Se deben seguir las precauciones adicionales de seguridad.
ADVERTENCIA
USO DE PROLONGADORES
RIESGO DE INCENDIO. Podría
ocasionar lesiones graves o la muerte.
Ŷ12XVHXQSURORQJDGRUFRQHVWH$FRQGLFLRQDGRUGH$LUHGH
9HQWDQD
Ŷ12XVHSURWHFWRUHVFRQWUDSLFRVGHFRUULHQWHQLDGDSWDGRUHV
SDUDP~OWLSOHVWRPDFRUULHQWHVFRQHVWH$FRQGLFLRQDGRUGH
$LUHGH9HQWDQD
CÓMO CONECTAR LA ELECTRICIDAD
1XQFDEDMRQLQJXQDFLUFXQVWDQFLDFRUWHRHOLPLQHHOWHUFHUFDEOH
WLHUUDGHOFDEOHGHFRUULHQWH3DUDVXVHJXULGDGSHUVRQDOHVWH
HOHFWURGRPpVWLFRGHEHHVWDUDGHFXDGDPHQWHFRQHFWDGRDWLHUUD
NO use un enchufe adaptador con este electrodoméstico.
(OFDEOHGHFRUULHQWHGHHVWHHOHFWURGRPpVWLFRFRQWLHQHXQ
HQFKXIHGHFDEOHVFRQH[LyQDWLHUUDTXHVHFRQHFWDDXQ
WRPDFRUULHQWHGHSDUHGHVWiQGDUGHFDEOHVFRQH[LyQDWLHUUD
SDUDPLQLPL]DUODSRVLELOLGDGGHULHVJRVGHGHVFDUJDVHOpFWULFDV
SRUSDUWHGHOPLVPR
(OFDEOHGHFRUULHQWHLQFOX\HXQLQWHUUXSWRUGHFRUULHQWH6HEULQGD
XQERWyQGHHYDOXDFLyQ\UHLQLFLRHQODFDMDGHOHQFKXIH(O
GLVSRVLWLYRGHEHUiVHUHYDOXDGRHQIRUPDSHULyGLFDSUHVLRQDQGR
SULPHURHOERWyQTEST(YDOXDU\OXHJRRESET5HLQLFLR
PLHQWUDVVHHQFXHQWUHHQFKXIDGRDOWRPDFRUULHQWH6LHOERWyQ
TEST (YDOXDUQRVHDFWLYDRHOERWyQRESET5HLQLFLRQR
SHUPDQHFHHQVXSRVLFLyQGHMHGHXVDUHODFRQGLFLRQDGRUGHDLUH\
FRPXQtTXHVHFRQXQWpFQLFRFDOLILFDGRGHOVHUYLFLR
&RQWUDWHDXQHOHFWULFLVWDFDOLILFDGRSDUDTXHFRQWUROHHO
WRPDFRUULHQWH\HOFLUFXLWRHOpFWULFRSDUDDVHJXUDUTXHHO
HQFKXIHHVWpFRUUHFWDPHQWHFRQHFWDGRDWLHUUD
(QFDVRGHFRQWDUFRQXQWRPDFRUULHQWHGHSDUHGGHFDEOHV
HVVXUHVSRQVDELOLGDG\REOLJDFLyQUHHPSOD]DUORSRUXQ
WRPDFRUULHQWHGHSDUHGGHFDEOHVFRUUHFWDPHQWHFRQHFWDGRD
WLHUUD
(ODFRQGLFLRQDGRUGHDLUHGHEHUtDHVWDUVLHPSUHFRQHFWDGRDXQ
HQFKXIHHVSHFtILFRFRQXQtQGLFHGHYROWDMHHTXLYDOHQWHDOTXH
ILJXUDHQVXHWLTXHWDGHFDUDFWHUtVWLFDVWpFQLFDV
(VWRJDUDQWL]DHOPHMRUIXQFLRQDPLHQWR\DGHPiVSUHYLHQHOD
VREUHFDUJDGHORVFLUFXLWRVGHOKRJDUORFXDOSRGUtDRFDVLRQDU
ULHVJRVGHLQFHQGLRGHELGRDOUHFDOHQWDPLHQWRGHFDEOHV
3DUDFRQRFHUORVUHTXLVLWRVHVSHFtILFRVGHODFRQH[LyQHOpFWULFD
FRQVXOWHODV,QVWUXFFLRQH
VGH,QVWDODFLyQ5HTXLVLWRV
(OpFWULFRV
ADVERTENCIA
SEGURIDAD DEL ACONDICIONADOR DE AIRE

49-5000454 Rev. 0 21
/DVIXQFLRQHV\ODDSDULHQFLDSRGUiQYDULDU
(VWDVHFFLyQH[SOLFDFyPRKDFHUIXQFLRQDUHVWHDLUH
DFRQGLFLRQDGR
IMPORTANTE:
&XDQGRDSDJXHHODLUHDFRQGLFLRQDGR\DVHDGHVGHHO
WDEOHURGHFRQWURORFRQHOFRQWUROUHPRWRHVSHUHSRUOR
PHQRVPLQXWRVDQWHVGHYROYHUDHQFHQGHUOR(VWRHYLWD
TXHHOFRPSUHVRUVHVREUHFDUJXH(VWDHVSHUDGHPLQXWRV
WDPELpQVHDSOLFDFXDQGRVHFDPELDGHOPRGRGHHVSHUDDO
GHYHQWLODFLyQ\DODLQYHUVD
NOTA: +D\XQUHWDUGRLQWHJUDGRGHPLQXWRV3XHGHQRWDU
TXHHOFRPSUHVRUQRHQFLHQGHLQPHGLDWDPHQWH(VWRVH
GLVHxyDVtSDUDSURWHJHUODXQLGDG
1RSRQJDHQIXQFLRQDPLHQWRHODLUHDFRQGLFLRQDGRHQHO
PRGRGHHQIULDPLHQWRFXDQGRODWHPSHUDWXUDH[WHULRUVHD
PHQRUDORV)&(OVHUSHQWtQGHOHYDSRUDGRU
LQWHULRUVHFRQJHODUi\HODLUHDFRQGLFLRQDGRQRIXQFLRQDUi
FRUUHFWDPHQWH
NOTA: &XDQGRHODLUHDFRQGLFLRQDGRVHFRQHFWHSRUSULPHUD
YH]ODSDQWDOOD/('PRVWUDUi³´GXUDQWHVHJXQGRV
'HVSXpVGHHQFHQGHUHODLUHDFRQGLFLRQDGRSRUSULPHUDYH]
ODSDQWDOODPRVWUDUiODWHPSHUDWXUDGH)&HO
YHQWLODGRUVHHVWDEOHFHUiDXWRPiWLFDPHQWHHQ4XLHWVSHHG
YHORFLGDGVLOHQFLRVD\HOLQGLFDGRUGHPRGRPRVWUDUi
(1(5*<6$9(DKRUURGHHQHUJtD
NOTA: 3DUDFDPELDUODWHPSHUDWXUDHQWUHJUDGRV)DKUHQKHLW
)\&HOVLXV&HQODSDQWDOODGHEHFRQHFWDUHODLUH
DFRQGLFLRQDGR\HQFHQGHUOR(QHOWDEOHURGHFRQWUROHQOD
SDUWHIURQWDOGHODLUHDFRQGLFLRQDGRRSULPDORVERWRQHV83
DUULED\'2:1DEDMRDOPLVPRWLHPSR\PDQWpQJDORV
RSULPLGRVGXUDQWHVHJXQGRV3XOVHHOERWyQ)&HQHO
FRQWUROUHPRWRSDUDFDPELDUHQWUH)DKUHQKHLW)\&HOVLXV
&
NOTA:&DGDYH]TXHVHHQFLHQGHXQDLUHDFRQGLFLRQDGR
FDOLILFDGRGH(1(5*<67$5pVWHRSHUDUiHQHOPRGRGH
DKRUURGHHQHUJtDGHDFXHUGRFRQORVUHTXHULPLHQWRVGH(3$
3XHGHVHOHFFLRQDU
FXDOTXLHURWURPRGRTXHVHDMXVWHDVXVQHFHVLGDGHV
Controles
1. MODO
2SULPD02'(KDVWDTXHYHDTXHODOX]LQGLFDGRUD
SDVDDODVLJXLHQWHFRQILJXUDFLyQGHVHDGD
(OLMD)DQYHQWLODFLyQ&RROHQIULDPLHQWR(QHUJ\6DYH
(6DYHDKRUURGHHQHUJtDR'HKXPGHVKXPLGLILFDU
Fan -6RORIXQFLRQDHOYHQWLODGRU2SULPD)$163(('
SDUDVHOHFFLRQDUODYHORFLGDGGHOYHQWLODGRU+LJK0HG
R4XLHWDOWDEDMDRVLOHQFLRVD/DSDQWDOODPXHVWUDOD
WHPSHUDWXUDDFWXDOGHODKDELWDFLyQNOTA: En el modo
Fan, la temperatura no puede ajustarse.
E-Save - (QHVWHPRGRHOYHQWLODGRUIXQFLRQD~QLFDPHQWH
FXDQGRVHUHTXLHUHHOHQIULDPLHQWR(OYHQWLODGRUIXQFLRQDUi
GXUDQWHPLQXWRVGHVSXpVGHTXHHOFRPSUHVRUVH
DSDJXH3RVWHULRUPHQWHHOYHQWLODGRUVHHQFHQGHUiHQ
FLFORVGHPLQXWRVHQLQWHUYDORVGHPLQXWRVKDVWD
TXHODWHPSHUDWXUDHQODKDELWDFLyQHVWpSRUDUULEDGH
ODWHPSHUDWXUDHVWDEOHFLGD'HVSXpVHOFRPSUHVRUVH
HQFLHQGHGHQXHYR
Cool (QIUtDODKDELWDFLyQ2SULPD)$163(('SDUD
VHOHFFLRQDUODYHORFLGDGGHOYHQWLODGRU+LJKDOWD0HG
PHGLD4XLHWVLOHQFLRVDR$XWRDXWRPiWLFD2SULPDHO
ERWyQ7(037,0(^Rv HOERWyQGHIOHFKDSDUDDMXVWDUOD
WHPSHUDWXUD(OYHQWLODGRURSHUDUiFRQWLQXDPHQWHHQPRGR
GHHQIULDPLHQWR
'HKXP$\XGDDHOLPLQDUODKXPHGDGGHODKDELWDFLyQ(O
PRGR'HKXPQRGHEHXWLOL]DUVHSDUDHQIULDUODKDELWDFLyQ
NOTA: (QPRGR'HKXPFXDQGRODWHPSHUDWXUD
HVWDEOHFLGDHVWpFHUFDGHODWHPSHUDWXUDDPELHQWH
HOFRPSUHVRUSXHGHGHWHQHUVH\HOYHQWLODGRURSHUDUi
VRODPHQWHHQODYHORFLGDG4XLHWRQO\
2. VELOCIDAD (FAN SPEED)
3UHVLRQH)$163(('YHORFLGDGKDVWDTXHYHDTXH
ODOX]LQGLFDGRUDSDVDDODVLJXLHQWHFRQILJXUDFLyQGHVHDGD
(OLMDHOHQIULDPLHQWR+LJKDOWR0HGPHGLR4XLHW
VLOHQFLRVRR$XWRDXWRPiWLFR
+,*+²3DUDXQPi[LPRHQIULDPLHQWR
0('²3DUDXQHQIULDPLHQWRQRUPDO
48,(7²3DUDXQHQIULDPLHQWR\UXLGRPtQLPRV
$872±$MXVWDDXWRPiWLFDPHQWHODYHORFLGDGGHOYHQWLODGRU
SDUDRIUHFHUXQHQIULDPLHQWR
ySWLPRFRQEDVHHQODWHPSHUDWXUDGHODKDELWDFLyQ
/DOX]VyOLGDLQGLFDTXHHO:L)LHVWiFRQHFWDGR
/DOX]SDUSDGHDQWHLQGLFDTXHVHHVWiFRQHFWDQGR
&RQVXOWHODVHFFLyQGH&RQILJXUDFLyQGH:L)LHQ
HVWHPDQXDOSiJ
PANEL DE CONTROL
Temp.
Time
FAN
E-SAVE
COOL
DEHUM.
HIGH
MED
QUIET ON SLEEP CLEAN FILTER
OFF
MODE SPEED TIMER
FILTER
RESET
POWER
Hr
°F/°C
AUTO

22 49-5000454 Rev. 0
6. RETRASO
Delay ON (Retraso Encendido)²&XDQGRHO
DFRQGLFLRQDGRUGHDLUHVHHQFXHQWUHDSDJDGRVHSRGUi
FRQILJXUDUSDUDTXHVHHQFLHQGDDXWRPiWLFDPHQWH
HQXQSHUtRGRGHHQWUH\KRUDVHQHOPRGR\
FRQILJXUDFLRQHVGHOYHQWLODGRUSUHYLDV
Delay OFF (Retraso del Apagado)²&XDQGRHO
DFRQGLFLRQDGRUGHDLUHVHHQFXHQWUHHQFHQGLGRVHSRGUi
FRQILJXUDUDXWRPiWLFDPHQWHSDUDTXHVHDSDJXHHQXQ
SHUtRGRGHHQWUH\KRUDV
Cómo configurar:
3UHVLRQHODWHFODDelay 1–24hr 5HWUDVRHQWUH\
KUVHQODXQLGDGRHQHOFRQWUROUHPRWR&DGDYH]TXH
SUHVLRQHODVWHFODVIncrease (Incrementar) +/ Decrease
(Reducir) – GHODXQLGDGGHOFRQWUROUHPRWRVHDMXVWDUiHO
WHPSRUL]DGRUSRULQWHUYDORVGHKRUD
3DUDUHYLVDUHOWLHPSRUHVWDQWHHQHOWHPSRUL]DGRUGH
Delay 1–24hr (Retraso entre 1 y 24 hrs), SUHVLRQHOD
WHFODDelay 1–24hr (Retraso entre 1 y 24 hrs.) GHOD
XQLGDGRGHOFRQWUROUHPRWR8VHODVWHFODV Increase
(Incrementar) ^ / Decrease (Reducir) v GHODXQLGDGGHO
FRQWUROUHPRWRSDUDFRQILJXUDUXQWLHPSRQXHYRVLDVtOR
GHVHD
Para cancelar el temporizador,SUHVLRQHODWHFODreducir
vHQODXQLGDGRHQHOFRQWUROUHPRWRKDVWDTXHHOWLHPSR
FRQILJXUDGRVHDFHUR/XHJRGHVHJXQGRVODOX]GH
ODWHFOD Delay 1-24 hour (Retraso de 1 a 24 horas)VH
DSDJD
4. TIEMPO/TEMPERATURA
2SULPDHOERWyQ7(037,0(ASDUDVXELUOD
WHPSHUDWXUD&DGDYH]TXHRSULPDHOERWyQ7(037,0(A
ODWHPSHUDWXUDDXPHQWDUi)&KDVWDTXHOOHJXHD
ORV)&
2SULPDHOERWyQ7(037,0(YSDUDEDMDUOD
WHPSHUDWXUD&DGDYH]TXHRSULPDHOERWyQ7(037,0(Y
ODWHPSHUDWXUDGLVPLQXLUi)&KDVWDTXHOOHJXHD
ORV)&
NOTA(QHOPRGRGHYHQWLODGRUODSDQWDOODPRVWUDUiOD
WHPSHUDWXUDDFWXDO(QHOPRGRGHDKRUURGHHQHUJtD
HQIULDURGHVKXPLGLILFDUODSDQWDOODPRVWUDUiODWHPSHUDWXUD
HVWDEOHFLGD
5. RESTABLECIMIENTO DEL FILTRO
(VWDFDUDFWHUtVWLFDOHQRWLILFDGHPDQHUDDXWRPiWLFDTXHHO
ILOWURGHDLUHGHEHOLPSLDUVH/DOX]LQGLFDGRUDVHHQFHQGHUi
GHVSXpVGHKRUDVGHIXQFLRQDPLHQWR/LPSLHHOILOWUR
GHDLUHFRQVXOWHODVHFFLyQ&XLGDGR\OLPSLH]DFROyTXHOR
GHQXHYRHQHOWDEOHURIURQWDO\SUHVLRQHHOERWyQ)LOWHU
5HVHWUHVWDEOHFLPLHQWRGHOILOWUR/DOX]VHDSDJDUi
5. WiFi Connect
(QDEOHVFRQQHFWLRQRIWKHDLUFRQGLWLRQHUWRKWHKRPH:L)L
'RZQORDG$SSIRUGHWDLOVDW
+DLHUDSSOLDQFHVFRPFRQQHFW
CONTROLES
49-5000454 Rev. 0
USO DEL CONTROL REMOTO
(OFRQWUROUHPRWRSXHGHWHQHUXQDDSDULHQFLDGLIHUHQWHDOGH
ODLPDJHQPRVWUDGD
NOTA: 5HWLUHODSDUWHWUDVHUDGHOFRQWUROHLQVHUWHGRVEDWHUtDV$$$
5HHPSODFHODVEDWHUtDVGHVSXpVGHPHVHVGHXVRRELHQFXDQGR
HOFRQWUROUHPRWRFRPLHQFHDSHUGHUHQHUJtD
NOTA: 12FRPELQHEDWHUtDVYLHMDV\QXHYDV
1. ENCENDIDO
2SULPDHOHQFHQGLGRERWyQSDUDHQFHQGHUHODLUHDFRQGLFLRQDGR
&XDQGRSUHVLRQHSRUSULPHUDYH]HOHQFHQGLGRERWyQHODLUH
DFRQGLFLRQDGRRSHUDUiHQPRGRGHDKRUURGHHQHUJtDFRQOD
YHORFLGDGGHOYHQWLODGRUHVWDEOHFLGDHQ4XLHWVLOHQFLRVR\XQD
WHPSHUDWXUDGH)&8VWHGSXHGHVHOHFFLRQDURWUR
PRGRTXHVHDMXVWHDVXVQHFHVLGDGHV
2. Velocidad
High3UHVV+,*+EXWWRQWRFKRRVHKLJKIDQVSHHG
Me Alta - 2SULPDHOERWyQ+LJKSDUDHOHJLUODYHORFLGDGDOWDGHO
YHQWLODGRU
Media - 2SULPDHOERWyQ0HGSDUDHOHJLUODYHORFLGDGPHGLDGHO
YHQWLODGRU
Quiet -2SULPDHOERWyQ4XLHWSDUDHOHJLUODYHORFLGDGVLOHQFLRVD
PtQLPDGHOYHQWLODGRU
Auto Cool -2SULPDHOERWyQ$XWR&RROSDUDHOHJLUODYHORFLGDG
GHOYHQWLODGRUFRQHQIULDPLHQWRDXWRPiWLFRd 3UHVV0('EXWWRQ
WRFKRRVHPHGLXPIDQVSHHG
Quiet3UHVV48,(7EXWWRQWRFKRRVHTXLHWIDQVSHHG
Auto Cool 3UHVV$872EXWWRQWRFKRRVHDXWRFRROIDQVSHHG
3. MODO
FAN - 2SULPDHOERWyQ)DQSDUDDFWLYDUHOPRGRGHYHQWLODGRU
COOL - 2SULPDHOERWyQ&RROSDUDDFWLYDUHOPRGRGH
HQIULDPLHQWR
ENERGY SAVE (E-Save) -2SULPDHOERWyQ(QHUJ\6DYHSDUD
DFWLYDUHOPRGRGHHQHUJtD
DEHUM - 2SULPDHOERWyQ'HKXPSDUDDFWLYDUHOPRGRGH
GHVKXPLGLILFDFLyQ
4. TEMPORIZADOR
Para ajustar el aire acondicionado para que se apague
después de una cantidad determinada de horas, entre 1 y 24
(la unidad debe estar encendida):
2SULPDHOERWyQ7,0(212))(QFHQGLGR$SDJDGRGHO
WHPSRUL]DGRUHQHOFRQWUROUHPRWRSDUDVHOHFFLRQDUODIXQFLyQ
GHDSDJDGRGHOWHPSRUL]DGRU
2SULPDHOERWyQGHIOHFKD7,0(583DXPHQWDU
WHPSRUL]DGRUR7,0(5'2:1GLVPLQXLUWHPSRUL]DGRU
SDUDFDPELDUHOWLHPSRGHGHPRUDGHDKRUDV/D
OX]LQGLFDGRUD7LPHU2))GHOSDQHOGHFRQWUROGHODLUH
DFRQGLFLRQDGRVHHQFHQGHUi
(OWLPEUHVXHQDGRVYHFHVGHVSXpVGHVHJXQGRVOXHJR
7LPHU2))FXHQWDDWUiVLQLFLDUi
PARA BORRAR LA PROGRAMACIÓN DE DEMORA DEL
TEMPORIZADOR:
NOTA:(ODLUHDFRQGLFLRQDGRSXHGHHVWDUHQFHQGLGRRDSDJDGR
2SULPDHOERWyQ7,0(5212))KDVWDTXHODOX]LQGLFDGRUDGHO
WHPSRUL]DGRUVHDSDJXH
5. AUMENTAR/DISMINUIR TEMPERATURA
2SULPDHOERWyQ7(0383SDUDDXPHQWDUODWHPSHUDWXUD
&DGDYH]TXHRSULPDHOERWyQ7(0383ODWHPSHUDWXUD
DXPHQWDUi)&KDVWDOOHJDUDORV)&
2SULPDHOERWyQ7(03'2:1SDUDGLVPLQXLUODWHPSHUDWXUD
&DGDYH]TXHRSULPDHOERWyQ7(03'2:1ODWHPSHUDWXUD
GLVPLQXLUi)&KDVWDOOHJDUDORV)&
6. DORMIR
2SULPDHOERWyQ6/((3SDUDHOHJLUHOPRGRGHDSDJDGR
DXWRPiWLFR/DSDQWDOODPRVWUDUi\VHHQFHQGHUiODOX]
GHOLQGLFDGRU
/DWHPSHUDWXUDDXPHQWDUi)&KRUDGHVSXpVGH
KDEHUVHOHFFLRQDGRHOPRGR3RVWHULRUPHQWHODWHPSHUDWXUD
DXPHQWDUiRWURV)&GHVSXpVGHKRUD/DXQLGDG
PDQWHQGUiHVWDWHPSHUDWXUDGXUDQWHKRUDV\GHVSXpVVH
GHWHQGUi
3DUDDSDJDUHOPRGRGHDSDJDGRDXWRPiWLFRSUHVLRQHHO
ERWyQ6/((3KDVWDTXHODOX]GHOLQGLFDGRUVHDSDJXH
7. FAHRENHEIT/CELSIUS
2SULPDHOERWyQ)&SDUDHOHJLUHQWUH)DKUHQKHLW\&HOVLXV
8. BLOQUEO
2SULPDHOERWyQ/2&.EORTXHDUHQHOFRQWUROUHPRWRSDUD
GHVKDELOLWDUODIXQFLRQDOLGDGGHOERWyQ2SULPDHOERWyQ/RFN
QXHYDPHQWHSDUDDFWLYDUODIXQFLRQDOLGDGGHOFRQWUROUHPRWR
9. LUZ
&XDQGRSUHVLRQHHOERWyQ/,*+7OX]ODSDQWDOODGHODXQLGDG
VHDSDJDUiSHURODXQLGDGFRQWLQXDUiRSHUDQGRQRUPDOPHQWH
&XDQGRSUHVLRQHQXHYDPHQWHHOERWyQ/,*+7RFXDOTXLHU
ERWyQGHOFRQWUROUHPRWRODSDQWDOODVHYROYHUiDLOXPLQDU
10. RESTABLECER
2SULPDHOERWyQ5HVHWSDUDUHVWDEOHFHUODXQLGDGDOD
FRQILJXUDFLyQGHIiEULFD
DEHUM
TIMER
UP
SLEEP
LOCK
TIMER
ON/OFF
F/C
TIMER
DOWN
LIGHT RESET
TEMP DOWN
QUIET
HIGH MED AUTO
COOLFAN
ENERGY
SAVE
TEMP UP
CONTROLES
49-5000454 Rev. 0
DIRECCIÓN DEL AIRE
Enfriamiento mínimo:
3DUDUHGXFLUODFDSDFLGDGGHHQIULDPLHQWRDSXQWHSDUD
DUULEDODVUHMLOODVTXHGDQGLUHFFLyQDODLUH
Enfriamiento máximo:
3DUDPD[LPL]DUODFDSDFLGDGGHHQIULDPLHQWRDSXQWHSDUD
DEDMRODVUHMLOODVTXHGDQGLUHFFLyQDODLUH
CAMBIO DE LA DIRECCIÓN DEL AIRE
)OXMRGHDLUHGHGLUHFFLRQHV/DVUHMLOODVGLUHFFLRQDOHVGH
DLUHOHSHUPLWHQFRQWURODUODGLUHFFLyQGHOIOXMRGHDLUH(O
IOXMRGHDLUHVHSXHGHGLULJLUKDFLDDUULEDRKDFLDDEDMR
CONTROLES
49-5000454 Rev. 0
LIMPIEZA DEL FILTRO DE AIRE
3DUDIDFLOLWDUODOLPSLH]DVHSXHGHTXLWDUHOILOWURGHDLUH8Q
ILOWURGHDLUHOLPSLRD\XGDDHOLPLQDUGHODLUHHOSROYRODV
SHOXVDV\ODVSDUWtFXODVSDUDREWHQHUXQHQIULDPLHQWRySWLPR
\XQIXQFLRQDPLHQWRHILFD]/DOX])LOWHU5HVHWVHHQFHQGHUi
SDUDQRWLILFDUOHTXHHOILOWURGHDLUHGHEHOLPSLDUVH/DOX]VH
HQFLHQGHGHVSXpVGHXQIXQFLRQDPLHQWRGHKRUDVGHO
DLUHDFRQGLFLRQDGR
(QFLHQGDHODLUHDFRQGLFLRQDGR\GHVFRQHFWHHOFDEOHGH
VXPLQLVWURHOpFWULFRGHOWRPDFRUULHQWH
5HWLUHHOILOWURGHDLUHDEULHQGRHOSDQHOIURQWDO
3DUDKDFHUHVWRWRPHGHIRUPDVXDYHHOSDQHOIURQWDO
GHVGHODGRVDEHUWXUDVODWHUDOHV\UHDOLFHHOGHVOL]DPLHQWR
KDFLDXVWHG
8WLOLFHXQDDVSLUDGRUDFRQHODFFHVRULRGHPDQJXHUDSDUD
OLPSLDUHOILOWURGHDLUH6LHOILOWURGHDLUHHVWiPX\VXFLR
OiYHORFRQDJXDWLELD\GHWHUJHQWHVXDYH1RODYHHOILOWURGH
DLUHHQXQODYDYDMLOODVXQDODYDGRUDQLXWLOLFHOLPSLDGRUHV
TXtPLFRV1RXVHXQDVHFDGRUDQLXQKRUQRGHPLFURRQGDV
SDUDVHFDUOR'HMHTXHHOILOWURVHTXHFRPSOHWDPHQWHDODLUH
OLEUHDQWHVGHFRORFDUORGHQXHYRHQODXQLGDG
9XHOYDDFRORFDUHOILOWURGHDLUHHQHODFRQGLFLRQDGRUGH
DLUH/DSDUWHLQIHULRUGHOILOWURQHJURVHGHEHUiSRGHUFDO]DU
GHWUiVGHWUHVOHQJHWDVEODQFDVHQODEDVHGHOSDQHO
IURQWDO
&LHUUHHOSDQHOIURQWDO
&RQHFWHHOFDEOHGHVXPLQLVWURHOpFWULFRHQHO
WRPDFRUULHQWHHQFLHQGDHODLUHDFRQGLFLRQDGR\SUHVLRQH
HOERWyQGHUHVWDEOHFLPLHQWRGHILOWURSDUDDSDJDUODOX]
LQGLFDGRUD
NOTA: 1RKDJDIXQFLRQDUHODLUHDFRQGLFLRQDGRVLQFRORFDU
HOILOWURHQVXOXJDU
LIMPIEZA DEL PANEL FRONTAL
(QFLHQGDHODLUHDFRQGLFLRQDGR\GHVFRQHFWHHOFDEOHGH
VXPLQLVWURHOpFWULFRGHOWRPDFRUULHQWH
/LPSLHHOSDQHOIURQWDOFRQXQSDxRVXDYH1RXWLOLFH
OLPSLDGRUHVTXtPLFRVHVSHFLDOPHQWHOLPSLDGRUHVHQ
DHURVROLQVWUXPHQWRVILORVRVQLOtTXLGRVLQIODPDEOHV
(VWRVSURGXFWRVSXHGHQGDxDUODVXSHUILFLHGHODLUH
DFRQGLFLRQDGR
'HMHTXHHOSDQHOIURQWDOVHTXHFRPSOHWDPHQWHDODLUH
&RQHFWHHOFDEOHGHVXPLQLVWURHOpFWULFRHQHO
WRPDFRUULHQWH\HQFLHQGDHODLUHDFRQGLFLRQDGR
CUIDADO DEL AIRE ACONDICIONADO

49-5000454 Rev. 0
ANTES DE INICIAR
Lea estas instrucciones completa y
cuidadosamente.
•
IMPORTANTE – *XDUGHHVWDV
LQVWUXFFLRQHVSDUDXVRGHOLQVSHFWRUORFDO
•
IMPORTANTE – 2EVHUYHWRGRV
ORVFyGLJRV\yUGHQHVGHOH\
• Nota al instalador ±$VHJ~UHVHGHGHMDUHVWDV
LQVWUXFFLRQHVFRQHOFRQVXPLGRU
• Nota al consumidor ±&RQVHUYHHVWDV
LQVWUXFFLRQHVSDUDUHIHUHQFLDIXWXUD
• Nivel de destreza±/DLQVWDODFLyQGHHVWHDSDUDWR
UHTXLHUHGHGHVWUH]DVPHFiQLFDVEiVLFDV
• Tiempo de ejecución – Aprox. 1 hora
5HFRPHQGDPRVGRVSHUVRQDVSDUD
ODLQVWDODFLyQGHHVWHSURGXFWR
/DLQVWDODFLyQDSURSLDGDHVODUHVSRQVDELOLGDGGHO
LQVWDODGRU
/DIDOODGHOSURGXFWRGHELGRDXQDLQVWDODFLyQ
LQDGHFXDGDQRHVWiFXELHUWD
SRUODJDUDQWtD
&XDQGRLQVWDOHHVWHDFRQGLFLRQDGRU
GHDLUH'(%(XVDUWRGDVODVSLH]DVVXPLQLVWUDGDV
\XVDUSURFHGLPLHQWRVDGHFXDGRVGHLQVWDODFLyQ
¿Preguntas? visite nuestra página en la red en: haierappliances.com
$OJXQRVPRGHORVUHTXLHUHQWRPDFRUULHQWHV
GHYROWLRVGHFRUULHQWHDOWHUQD\
+]FRQHFWDGRVDWLHUUDSURWHJLGRVFRQ
XQIXVLEOHGHGLODWDFLyQGHWLHPSRGH
DPSHULRVRXQFRUWDFLUFXLWRV
(OHQFKXIHGHWUHVS~DVFRQFRQH[LyQDWLHUUD
PLQLPL]DODSRVLELOLGDGGHGHVFDUJDVHOpFWULFDV6L
HOWRPDFRUULHQWHGHODSDUHGTXHXVWHGSODQHDXVDU
VRODPHQWHWLHQHWRPDVHVVXUHVSRQVDELOLGDG
KDFHUTXHXQWpFQLFRORUHHPSODFHSRUXQRGHWUHV
WRPDVFRQFRQH[LyQDWLHUUD
PRECAUCIÓN
%DMRQLQJXQDFLUFXQVWDQFLDFRUWHRUHPXHYDOD
WHUFHUDS~DFRQH[LyQDWLHUUDGHOFDEOHHOpFWULFR
1RFDPELHHOHQFKXIHHQHOFDEOHHOpFWULFRGHHVWH
DFRQGLFLRQDGRUGHDLUH
/RVFDEOHVFDVHURVGHDOXPLQLRSRGUtDQSUHVHQWDU
SUREOHPDVHVSHFLDOHV&RQVXOWHDXQWpFQLFR
HOHFWULFLVWDFDOLILFDGR
REQUISITOS ELÉCTRICOS
(OFDEOHGHDOLPHQWDFLyQLQFOX\HXQGLVSRVLWLYRSDUD
LQWHUUXSFLyQGHFRUULHQWH6HLQFOX\HXQERWyQGHSUXHED
\GHUHLQLFLRHQHOGLVSRVLWLYR(OGLVSRVLWLYRGHEH
SRQHUVHDSUXHEDSHULyGLFDPHQWHSULPHURVHSUHVLRQD
HOERWyQGHTEST SUXHED\OXHJRRESET UHLQLFLR
PLHQWUDVVHHQFXHQWUDHQFKXIDGRDOWRPDFRUULHQWH6L
HOERWyQ TEST QRVHGLVSDUDRVLHOERWyQRESET QR
TXHGDHQJDQFKDGRGHMHGHXWLOL]DUHODFRQGLFLRQDGRU
GHDLUH\FRPXQtTXHVHFRQXQWpFQLFRFDOLILFDGR
REQUISITOS ELÉCTRICOS(CONT)
HERRAMIENTAS QUE
NECESITARÁ
8QGHVWRUQLOODGRUGHHVWUHOOD
8QDUHJODRFLQWDPpWULFD/iSL]
1LYHO
7LMHUDVRFXFKLOOD
7DODGUR\EURFDGH´
INSTRUCCIONES DE INSTALACIÓN
49-5000454 Rev. 0
DEHUM
TIMER
UP
SLEEP
LOCK
TIMER
ON/OFF
F/C
TIMER
DOWN
LIGHT RESET
TEMP DOWN
QUIET
HIGH MED AUTO
COOLFAN
ENERGY
SAVE
TEMP UP
&LQWDGHHVSXPD
&RQWUROUHPRWR
PARTES INCLUIDAS
(La apariencia puede variar)
5LHOGHPRQWDMHVXSHULRU
$FRQGLFLRQDGRU
GHDLUH
&RUWLQDV
/DWHUDOHV
0DUFRVGHOD
&RUWLQD/DWHUDO
GHMDGR
GHUHFKR
7LSR%
7RUQLOORGHPDGHUD
GH´
6RSRUWHGH&LHUUH
GHOD9HQWDQD
6RSRUWHV/DWHUDOHV
7LSR$
7RUQLOORV
DXWRUURVFDQWHV
GH´
%XUOHWH
*RPDHVSXPDGH
OD&RUWLQD/DWHUDO
INSTRUCCIONES DE INSTALACIÓN
49-5000454 Rev. 0
3. PREPARE EL ACONDICIONADOR
DE AIRE
A. ,QVWDOHHOULHOGHPRQWDMHVXSHULRUFRQWRUQLOORV7LSR$
GHVGHODSDUWHH[WHULRUGHODFDMD
B.'HVOLFHORVSDQHOHVGHODFRUWLQDODWHUDOHQORVULHOHV
GHOSDQHOODWHUDO
C. Para el modelo ESAQ406,FRUWH\FRORTXHXQ
EXUOHWHVREUHHOODWHUDOGHOPDUFRGHODFRUWLQD
XQRHQFDGDODGR
D. 'HVOLFHORVPDUFRVGH
ODVFRUWLQDVODWHUDOHV
L]TXLHUGD\GHUHFKD
HQHOULHOGHPRQWDMH
VXSHULRUHLQIHULRU
$VHJ~UHVHGHTXH
ODVFRUWLQDVODWHUDOHV
FRLQFLGDQVREUH
ORVFRVWDGRVGHORV
PDUFRV
1. REQUISITOS PARA LA VENTANA
(VWDVLQVWUXFFLRQHVVRQSDUDXQDYHQWDQDHVWiQGDU
GHGRVSOLHJXHV8VWHGQHFHVLWDUiPRGLILFDUHO
SURFHVRSDUDRWURVWLSRVGHYHQWDQDV
(ODFRQGLFLRQDGRUGHDLUHSXHGHLQVWDODUVHVLQORV
SDQHOHVGHDFRUGHyQSDUDDMXVWDUVHDXQDYHQWDQD
PiVHVWUHFKD9HUODVGLPHQVLRQHVGHODDEHUWXUDGH
ODYHQWDQD
7RGDVODVSDUWHVGHDSR\RGHEHQTXHGDUWRWDOPHQWH
DVHJXUDGDVDDOJ~QPHWDOPDPSRVWHUtDRDOD
PDGHUD
(OWRPDFRUULHQWHHOpFWULFRGHEHHVWDUDODOFDQFHGHO
FDEOHHOpFWULFRGHODFRQGLFLRQDGRUGHDLUH
6LJDODVGLPHQVLRQHVGHODWDEOD\ODLOXVWUDFLyQ
VHJ~QVXPRGHOR
2. REQUISITOS DE UNA VENTANA
DE TORMENTAS
8QPDUFRGHYHQWDQDGHWRUPHQWDVQRSHUPLWLUiTXH
HODFRQGLFLRQDGRUGHDLUHVHLQFOLQHKDFLDHOH[WHULRU
\HYLWDUiTXHGUHQHDSURSLDGDPHQWH3DUDVROXFLRQDU
HVWHSUREOHPDDGKLHUDXQSHGD]RGHPDGHUDDHO
XPEUDO
PEDAZOS DE MADERA
$1&+2Ǝ
LONGITUD: /RVXILFLHQWHPHQWHODUJRFRPRSDUD
DMXVWDUHQHOLQWHULRUGHOPDUFRGHODYHQWDQD
GRUESO: 3DUDGHWHUPLQDUHOJUXHVRFRORTXHXQ
SHGD]RGHPDGHUDHQHOXPEUDOSDUDKDFHUODƎPiV
DOWDTXHODSDUWHVXSHULRUGHOPDUFRGHODYHQWDQDGH
WRUPHQWDVRGHOPDUFRYLQLOR
3pJXHORILUPHPHQWHFRQFODYRVRFRQWRUQLOORV
SURSRUFLRQDGRVSRUHOLQVWDODGRU
ƎPiVDOWR
TXHHOPDUFR
GHYHQWDQDGH
WRUPHQWDV
0DUFRGH
YHQWDQDGH
WRUPHQWDV
8PEUDO
ƎPDVDOWRTXHHOPDUFR
YLQLORHQDOJXQDVYHQWDQDV
0DUFRYLQLOR
0DGHUD
FRQSDQHOHVGHDFRUGHyQ
13 3/8”
26-1/16”- 39-1/4”
CLICK
5LHOGHPRQWDMHVXSHULRUO
INSTRUCCIONES DE INSTALACIÓN
49-5000454 Rev. 0 29
4. INSTALL THE AIR CONDITIONER
IN THE WINDOW
A. 0LGDHODQFKRGHODDEHUWXUDGHODYHQWDQD\
PDUTXHODOtQHDFHQWUDOGHODOIpL]DULQWHULRUGHOD
YHQWDQD
&RORTXHODXQLGDGHQODYHQWDQD%DMHODPDUFR
GHODYHQWDQDSDUDPDQWHQHUVRVWHQLGDODXQLGDG
B.&RORTXHHODFRQGLFLRQDGRUGHDLUHHQODYHQWDQD
GHPRGRTXHVHHQFXHQWUHFHQWUDGR&RORTXHHO
DFRQGLFLRQDGRUGHDLUHGHPRGRTXHHOH[WUHPR
IURQWDOGHOULHOGHPRQWDMHLQIHULRUVHHQFXHQWUH
FRQWUDHOH[WUHPRWUDVHURGHODOIpL]DU
$VHJ~UHVHGHTXHHODFRQGLFLRQDGRUGHDLUHHVWp
QLYHODGRRDSHQDVLQFOLQDGRKDFLDHOH[WHULRU
4. INSTALL THE AIR CONDITIONER
IN THE WINDOW (continues)
C. ,QVWDOHHOVRSRUWHODWHUDOHQODXQLGDG\HQHO
DOIpL]DUGHODYHQWDQDXVDQGRORVGRVWRUQLOORV
GHPDGHUDGH´SURYLVWRV5HSLWDHVWHSDVRGHO
RWURODGR
D. ([WLHQGDORVSDQHOHVGHODFRUWLQDKDVWDTXH
OOHQHQODYHQWDQD
0DUTXHODXELFDFLyQGHORVDJXMHURVHQFDGD
HVTXLQD8VHHOWDODGUR\XQDEURFDGH´SDUD
WDODGUDUDJXMHURVSLORWR8VHWRUQLOORVWLSR%
SDUDDVHJXUDUORVSDQHOHVODWHUDOHVHQVXV
OXJDUHVFRUUHVSRQGLHQWHV
$QFKRGHODDEHUWXUDGH
ODYHQWDQD
/tQHDFHQWUDO
5LHOVXSHULRU
0DUFRGHOD
YHQWDQD
$OIpL]DU
5LHOLQIHULRU
&RUWH\FRORTXHXQ
EXUOHWHHQODSDUWH
IURQWDO\HQHOH[WUHPR
LQIHULRUGHOPDUFRGHOD
YHQWDQD
&RUWH\FRORTXHXQ
EXUOHWHHQHOH[WUHPR
WUDVHURGHODOIpL]DUGH
ODYHQWDQD
INSTRUCCIONES DE INSTALACIÓN
49-5000454 Rev. 0
5. INSTALE EL SOPORTE DE
LA TRABA DE LA VENTANA
Y LA JUNTA SUPERIOR DE
GOMAESPUMA DE LA VENTANA
8VHXQWRUQLOORWLSR%SDUDLQVWDODUHOVRSRUWHGH
EORTXHRDUULEDGHODSDUWH
LQIHULRUGHODYHQWDQD
A.
PRECAUCIÓN
3DUDHYLWDUODURWXUDGHYLGULRV
RGDxRVVREUHODVYHQWDQDV
VREUHYLQLORRYHQWDQDV
FRQVWUXLGDVGHPDQHUDVLPLODU
DGMXQWHHOVRSRUWHGHEORTXHR
GHODYHQWDQDDODMDPEDODWHUDO
GHODYHQWDQDFRQXQWRUQLOOR
7LSR%
B.&RUWHODMXQWDGHJRPDHVSXPDVXSHULRUGHODYHQWDQD
GHOPLVPRDQFKRTXHODYHQWDQD
C.&RORTXHODJRPDHVSXPDHQWUHHOYLGULR\ODYHQWDQD
SDUDHYLWDUHOLQJUHVRGHDLUHHLQVHFWRVDODKDELWDFLyQ
NOTA: 6LODMXQWDSURYLVWDQRVHDMXVWDDVXYHQWDQD
REWHQJDHOPDWHULDODSURSLDGRHQIRUPDORFDOSDUD
FRQWDUFRQXQVHOODGRFRUUHFWRHQODLQVWDODFLyQ
Madera
Vinilo
5. I NSTALE EL SOPORTE DE
LA TRABA DE LA VENTANA
Y LA JUNTA SUPERIOR DE
GOMAESPUMA DE LA VENTANA
D.3DUDDKRUURVDGLFLRQDOHVGHHQHUJtDVyORHQ
(6$4PLGD\FRUWHODVSODQFKDVDGKHVLYDV
FRQEDVHGHJRPDHVSXPD\FRORTXHODVPLVPDV
VREUHODVFRUWLQDVODWHUDOHV\PDUFRVSDUDVHOODU
HOSDVRGHODLUH
*RPDHVSXPD
GHODFRUWLQD
ODWHUDO
6HOORV
KHUPpWLFRV
Side Curtain
Foam
Weather
Seals
INSTRUCCIONES DE INSTALACIÓN
49-5000454 Rev. 0
£$KRUUHWLHPSR\GLQHUR3ULPHURUHYLVHORVFXDGURVTXHDSDUHFHQHQODVVLJXLHQWHVSiJLQDV\HVSRVLEOHTXHQR
QHFHVLWHVROLFLWDUUHSDUDFLRQHV
Problema Causas posibles Qué hacer
El acondicionador de aire
no enciende
El acondicionador de aire está
desconectado.
&HUFLyUHVHGHTXHHODFRQGLFLRQDGRUGHDLUHHVWi
HQFKXIDGRWRWDOPHQWHHQHOWRPDFRUULHQWH
El fusible se disparó/ el cortacircuitos
se disparó.
,QVSHFFLRQHORVIXVLEOHVFDMDGHLQWHUUXSWRUHVGH
ODFDVD\UHHPSODFHFXDOTXLHUIXVLEOHRUHDMXVWHHO
LQWHUUXSWRU
Interrupción en el suministro eléctrico. /DXQLGDGVHUHLQLFLDUiDXWRPiWLFDPHQWHFRQOD
FRQILJXUDFLyQXWLOL]DGDSRU~OWLPDYH]OXHJRGH
UHHVWDEOHFHUODHOHFWULFLGDG
([LVWHXQUHWUDVRGHWLHPSRSRUSURWHFFLyQGH
DSUR[LPDGDPHQWHPLQXWRVSDUDHYLWDUOD
GHVFRQH[LyQSRUVREUHFDUJDGHOFRPSUHVRU3RUHVWD
UD]yQHVSRVLEOHTXHODXQLGDGQRFRPLHQFHDHQIULDU
GHIRUPDQRUPDOKDVWDWUDQVFXUULGRVPLQXWRVGHVGH
TXHYROYLyDHQFHQGHUVH
El dispositivo de interrupción de
corriente se ha activado.
3UHVLRQHHOERWyQ5(6(7XELFDGRHQHOFDEOHGH
DOLPHQWDFLyQ
6LHOERWyQ5(6(7QRVHPDQWLHQHHQVXOXJDUQR
XWLOLFHPiVHODFRQGLFLRQDGRUGHDLUH\FRPXQtTXHVH
FRQXQWpFQLFRFDOLILFDGR
El acondicionador de aire
no enfría como debería
El flujo de aire está restringido. &HUFLyUHVHGHTXHQRH[LVWHQLQJXQDFRUWLQDSHUVLDQD
RPXHEOHEORTXHDQGRHOIUHQWHGHODFRQGLFLRQDGRUGH
DLUH
El control de temperatura no está
ajustado apropiadamente.
(QORVPRGHORVFRQERWRQHVJLUHODWHPSHUDWXUDDXQ
Q~PHURPD\RU
El filtro de aire está sucio. /LPSLHHOILOWURFDGDGtDVSRUORPHQRV9HUOD
VHFFLyQGH&XLGDGR\OLPSLH]D
La habitación podría haber estado
caliente.
&XDQGRHODFRQGLFLRQDGRUGHDLUHVHHQFLHQGHXVWHG
QHFHVLWDGDUOHWLHPSRSDUDTXHHQIULpODKDELWDFLyQ
El aire frío se está escapando. &HUFLyUHVHGHTXHORVUHJLVWURVGHODFDOHIDFFLyQQR
HVWiQDELHUWRV\VHHQFXHQWUDQUHWRUQDQGRHODLUHIUtR
Las bobinas de enfriamiento se
congelaron.
9HU³$FRQGLFLRQDGRUGHDLUHFRQJHOiQGRVH´PiV
DGHODQWH
El acondicionador de aire
se está congelando
El hielo bloquea el flujo de aire hacia
el acondicionador de aire evitando
que se enfríe la habitación.
(QPRGHORVFRQORVERWRQHVGHFRQWUROFRORTXHHO
FRQWUROGHPRGRHQ+LJK)DQ9HQWLODGRU$OWRy+LJK
&RRO)UtR$OWRFRQODWHPSHUDWXUDHQy
Hay agua goteando afuera Tiempo húmedo y caliente. (VWRHVQRUPDO
Hay agua goteando en el
interior de la habitación
El acondicionador de aire no está
inclinado hacia afuera.
3DUDGUHQDUHODJXDDSURSLDGDPHQWHFHUFtRUHVH
GHTXHHODFRQGLFLRQDGRUGHDLUHHVWiLQFOLQDGR
OLJHUDPHQWHGHVGHHOIUHQWHKDFLDDWUiV
Se acumula agua en la
bandeja
La humedad removida del aire y se
drena hasta la bandeja.
(VWRHVQRUPDOSRUXQFRUWRSHUtRGRHQiUHDVFRQ
SRFDKXPHGDGQRUPDOSRUXQSHUtRGRGHWLHPSRPiV
SRVWHUJDGRHQiUHDVPiVK~PHGDV
SOLUCIÓN DE PROBLEMAS

49-5000454 Rev. 0
Ŷ4XL]iVHVFXFKHXQVRQLGRPHWiOLFRFDXVDGRSRUHODJXD
WRPDGD\WLUDGDFRQWUDHOFRQGHQVDGRUHQORVGtDVOOXYLRVRV
RFXDQGRODKXPHGDGHVDOWD(VWDFDUDFWHUtVWLFDGHGLVHxR
D\XGDDUHPRYHUODKXPHGDG\PHMRUDODHILFLHQFLD
Ŷ4XL]iVHVFXFKHTXHHOWHUPRVWDWRKDFHFOLFFXDQGRHO
FRPSUHVRUKDFHFLFORHQWUHHQFHQGLGR\DSDJDGR
Ŷ(ODJXDVHDFXPXODHQODEDQGHMDGXUDQWHGtDVOOXYLRVRVRFRQ
PXFKDKXPHGDG(ODJXDSRGUtDGHUUDPDUVH\JRWHDUGHVGHHO
ODGRH[WHUQRGH
ODXQLGDG
Ŷ(OYHQWLODGRUSRGUtDIXQFLRQDUDXQVLHOFRPSUHVRUQRORKDFH
Ŷ/DVJRWLWDVGHDJXDTXHFDHQFRQWUDODVERELQDVH[WHUQDVSXHGHQKDFHUXQUXLGRGH³SLQJ´(VWRD\XGDDHQIULDUHOFRQGHQVDGRU
3XHGHUHGXFLUHVWHUXLGRUHWLUDQGRHOHQFKXIHGHDJXDGHODVXEEDVH
(OUHWLURGHOHQFKXIHUHGXFLUiOD(ILFLHQFLD(QHUJpWLFDGHODXQLGDG
NOTA: 1RKDJDXQDJXMHURHQODROODGHODEDVH
Haier Appliances WiFi Connect (Conexión WiFi de Haier Appliances)
(Para clientes en Estados Unidos)
Haier Appliances WiFi Connected Habilitado*6LVXDFRQGLFLRQDGRUGHDLUHSRVHHXQDHWLTXHWDGH,QIRUPDFLyQGHO
(OHFWURGRPpVWLFR&RQHFWDGRXELFDGDHQODSDUWHH[WHUQDFRPRVHPXHVWUDDFRQWLQXDFLyQVXDFRQGLFLRQDGRUGHDLUHFXHQWDFRQ
+DLHU:L)L&RQQHFW+DELOLWDGR8QDWDUMHWDGHFRPXQLFDFLyQGH:L)LHVWiLQFRUSRUDGDHQHOSURGXFWRSHUPLWLHQGRODFRPXQLFDFLyQ
GHOPLVPRFRQVXWHOpIRQRLQWHOLJHQWHSDUDHOPRQLWRUHRUHPRWRFRQWURO\QRWLILFDFLRQHV3DUDDSUHQGHUPiVVREUHODVIXQFLRQHVGHO
HOHFWURGRPpVWLFRFRQHFWDGR\SDUDVDEHUTXpDSOLFDFLRQHVGHHOHFWURGRPpVWLFRVFRQHFWDGRVIXQFLRQDUiQFRQVXWHOpIRQRLQWHOLJHQWH
YLVLWHZZZ+DLHUDSSOLDQFHVFRPFRQQHFW
&RQHFWLYLGDG:L)L3DUDVROLFLWDUDVLVWHQFLDHQUHODFLyQDVXHOHFWURGRPpVWLFRRVREUHODFRQHFWLYLGDGGHUHGConnectPlusSDUD
PRGHORVFRQ:L)LKDELOLWDGRR:L)LRSFLRQDOFRPXQtTXHVHDO1-800-220-6899.
(QFKXIHGH$JXDGHOD
6XEEDVH
Network: GE_MODULE_XXXXNetwork: GE_MODULE_XXXX
PASSWORD: XXXXXXXX
MAC ID: XX-XX-XX-XX-XX-XX
CONTAINS FCCID: 2ALD3-MKQTWIFI11
CONTAINS IC:
22987-MKQTWIFI11
123-45-678
Cómo Funciona
'HVFDUJXHOD$SOLFDFLyQGH+DLHU
$SSOLDQFHV
8VHODDSOLFDFLyQSDUDFRQHFWDUVX
DFRQGLFLRQDGRUGHDLUHSDUDVDODDO
:L)L
8QDYH]FRQHFWDGDXVHODDSOLFDFLyQ
SDUDDSDJDUVXDFRQGLFLRQDGRUGHDLUH
DOVDOLUGHOWUDEDMR
CHANGE TEMP
TO 65
SONIDOS DE OPERACIÓN NORMALES
CONFIGURACIÓN WIFI

49-5000454 Rev. 0
INFORMACIÓN REGULATORIA
Declaración de Cumplimiento con FCC/IC:
(VWHGLVSRVLWLYRQRSRGUiFDXVDULQWHUIHUHQFLDVSHUMXGLFLDOHV
(VWHGLVSRVLWLYRGHEHDFHSWDUFXDOTXLHULQWHUIHUHQFLD
UHFLELGDLQFOXLGDVODVLQWHUIHUHQFLDVTXHSXHGDQSURYRFDUXQ
IXQFLRQDPLHQWRQRGHVHDGR
(VWHHTXLSRIXHSUREDGR\FXPSOHFRQORVOtPLWHVHVWDEOHFLGRV
SDUDXQGLVSRVLWLYRGLJLWDOGHFODVH%VHJ~QODSDUWHGH
OD1RUPDWLYDGHOD)&&(VWRVOtPLWHVIXHURQGLVHxDGRVSDUD
EULQGDUXQDSURWHFFLyQUD]RQDEOHFRQWUDLQWHUIHUHQFLDVQRFLYDV
HQXQDLQVWDODFLyQUHVLGHQFLDO(VWHHTXLSRJHQHUDXVD\SXHGH
HPLWLUHQHUJtDGHUDGLRIUHFXHQFLD\VLQRVHLQVWDOD\XWLOL]DGH
DFXHUGRFRQODVLQVWUXFFLRQHVSXHGHRFDVLRQDULQWHUIHUHQFLDV
SHUMXGLFLDOHVVREUHODVFRPXQLFDFLRQHVUDGLDOHV6LQHPEDUJR
QRVHJDUDQWL]DTXHQRVHSUHVHQWHQLQWHUIHUHQFLDVHQXQD
LQVWDODFLyQHQSDUWLFXODU6LHVWHHTXLSRSURYRFDLQWHUIHUHQFLDV
SHUMXGLFLDOHVSDUDODUHFHSFLyQGHUDGLRRWHOHYLVLyQORTXHSXHGH
FRPSUREDUHQFHQGLHQGR\DSDJDQGRHOHTXLSRVHDFRQVHMDDO
XVXDULRTXHLQWHQWHFRUUHJLUODLQWHUIHUHQFLDDWUDYpVGHXQDR
PiVGHODVVLJXLHQWHVPHGLGDV
5HRULHQWHRUHXELTXHODDQWHQDUHFHSWRUD
$XPHQWHODVHSDUDFLyQHQWUHHOHTXLSR\HOUHFHSWRU
&RQHFWHHOHTXLSRDXQWRPDFRUULHQWHGHXQFLUFXLWRGLIHUHQWHDO
WRPDFRUULHQWHDOFXDOVHHQFXHQWUDFRQHFWDGRHOUHFHSWRU
3DUDVROLFLWDUD\XGDFRQVXOWHDOFRPHUFLDQWHPLQRULVWDRDXQ
WpFQLFRH[SHULPHQWDGRGHUDGLRWHOHYLVLyQ
Etiqueta: /DVPRGLILFDFLRQHVVREUHHVWDXQLGDGQRDSUREDGDV
H[SUHVDPHQWHSRUSDUWHGHOIDEULFDQWHSRGUtDQDQXODUODDXWRULGDG
GHOXVXDULRSDUDXWLOL]DUHOHTXLSR
0RGHORV6HOHFWRVÒQLFDPHQWH
(VWHSURGXFWRWLHQHFDSDFLGDG:L)L\UHTXLHUHFRQHFWLYLGDGD,QWHUQHW\
XQHQUXWDGRULQDOiPEULFRSDUDSHUPLWLUODLQWHUFRQH[LyQFRQXQ6LVWHPD
GHDGPLQLVWUDFLyQGHHQHUJtD\RFRQRWURVGLVSRVLWLYRVVLVWHPDVR
DSOLFDFLRQHVH[WHUQRV
(OXVRGH:RUNVFRQHOORJRWLSRGH$SSOH+RPH.LWVLJQLILFDTXHXQ
DFFHVRULRHOHFWUyQLFRVHKDGLVHxDGRSDUDFRQHFWDUVHHVSHFtILFDPHQWH
FRQL3RGWRXFKL3KRQHRL3DGUHVSHFWLYDPHQWH\HOGHVDUUROODGRU
KDFHUWLILFDGRTXHFXPSOHFRQORVHVWiQGDUHVGHUHQGLPLHQWRGH$SSOH
$SSOHQRHVUHVSRQVDEOHGHOIXQFLRQDPLHQWRGHHVWHGLVSRVLWLYRQLGHVX
FXPSOLPLHQWRGHODVQRUPDVGHVHJXULGDG\UHJODPHQWDULDV
Puesta en marcha
$ILQGHFRQHFWDUVXDFRQGLFLRQDGRUGHDLUHSDUDVDOD
QHFHVLWDUiOD$SOLFDFLyQGH+DLHU$SSOLDQFHV/DDSOLFDFLyQ
ORJXLDUiDWUDYpVGHOSURFHVRGHFRQH[LyQ'HVFDUJXHOD
DSOLFDFLyQGHL7XQHVR*RRJOH3OD\
Los datos de todos los electrodomésticos conectados
son guardados en estricto cumplimiento con la
Política de Privacidad de Datos de Conexión de
Haier Appliances. Para acceder a esta política, visite
geappliances.com/privacy/privacy_policy_connected.
Preguntas acerca de WiFi Connect
$FFHGDDUHVSXHVWDVQHFHVDULDVVREUHODFRQILJXUDFLyQ
GHHOHFWURGRPpVWLFRVFRQ:L)L\ODFRQH[LyQDVXUHG
KRJDUHxDDWUDYpVGHQXHVWURVDUWtFXORVGHVRSRUWH
3DUDDFFHGHUDORVDUWtFXORVGHVRSRUWHODFRQH[LyQZLIL
GHODFRQGLFLRQDGRUGHDLUHSDUDVDODYLVLWHSURGXFWV
JHDSSOLDQFHVFRPDSSOLDQFHJHDVXSSRUWVHDUFKFRQWHQW
Respuesta a la Demanda
(VWHSURGXFWRFXHQWD FRQFDSDFLGDGGH5HVSXHVWD DOD'HPDQGDOR FXDOSHUPLWHTXHSDUWLFLSH HQHYHQWRVGHUHGXFFLyQ GHFDUJD
LQLFLDGRVSRUODV XWLOLGDGHV(VWRVHYHQWRVDSDJDUiQ GHIRUPDWHPSRUDOHO$FRQGLFLRQDGRUGH$LUH DILQGHUHDOL]DU OHYHVDMXVWHVGH
WHPSHUDWXUD/RV XVXDULRVSRGUiQ DQXODUGHIRUPD DFWLYDHVWRV HYHQWRVPDQWHQLHQGRSUHVLRQDGR HOERWyQ 0RGH0RGRGXUDQWH
VHJXQGRV/DXQLGDGUHJUHVDUiDOPLVPRHVWDGRDOFXDOIXHFRQILJXUDGDDQWHVGHUHFLELUODVHxDOGHUHVSXHVWDDODGHPDQGD
$QWHVGHOXVRGHVFDUJXHOD$SOLFDFLyQ+DLHU$SSOLDQFHV&RPIRUW\DFWXDOLFHVXVRIWZDUHFRQHFWDGRVLDVtVHLQGLFD
(VWHSURGXFWRFXHQWDFRQFDSDFLGDG:L)L\UHTXLHUHGHFRQHFWLYLGDGD,QWHUQHW\XQHQUXWDGRULQDOiPEULFRDILQGHSHUPLWLUODLQWHUFRQH[LyQ
FRQXQ6LVWHPDGH0DQHMRGH(QHUJtD\RFRQRWURVGLVSRVLWLYRVVLVWHPDVRDSOLFDFLRQHVH[WHUQDVW
CONFIGURACIÓN WIFI
49-5000454 Rev. 0
*UDSHDTXtVXUHFLER
6HUHTXLHUHIDFLOLWDUSUXHEDGHODIHFKDGHFRPSUDRULJLQDOSDUDKDFHUXQUHFODPRGHJDUDQWtD
EXCLUSIÓN DE GARANTÍAS IMPLÍCITAS—Su única y exclusiva alternativa es la reparación del producto, como
se indica en la Garantía Limitada. Las garantías implícitas, incluyendo garantías implícitas de comerciabilidad o
conveniencia sobre un propósito particular, se limitan a un año o al período más corto permitido por la ley.
Para Clientes de EE.UU: (VWDJDUDQWtDOLPLWDGDVHH[WLHQGHDOFRPSUDGRURULJLQDO\DFXDOTXLHUGXHxRVXEVLJXLHQWHGH
SURGXFWRVFRPSUDGRVSDUDXVRKRJDUHxRGHQWURGH((886LHOSURGXFWRHVWiHQXQiUHDGRQGHQRVHHQFXHQWUDGLVSRQLEOH
XQ3URYHHGRU$XWRUL]DGRGHO6HUYLFLR7pFQLFRGH+DLHU$SSOLDQFHVXVWHGVHUiUHVSRQVDEOHSRUHOFRVWRGHXQYLDMHRVHSRGUi
UHTXHULUTXHWUDLJDHOSURGXFWRDXQDXELFDFLyQGHO6HUYLFLR7pFQLFRGH+DLHU$SSOLDQFHV$XWRUL]DGRSDUDUHFLELUHOVHUYLFLR(Q
$ODVNDODJDUDQWtDOLPLWDGDH[FOX\HHOFRVWRGHHQYtRROODPDGDVGHOVHUYLFLRWpFQLFRDVXKRJDU
$OJXQRVHVWDGRVQRSHUPLWHQODH[FOXVLyQROLPLWDFLyQGHGDxRVIRUWXLWRVRFRQVHFXHQWHV(VWDJDUDQWtDOLPLWDGDOHGDGHUHFKRV
OHJDOHVHVSHFtILFRV\HVSRVLEOHTXHWHQJDRWURVGHUHFKRVOHJDOHVTXHYDUtDQHQWUHXQHVWDGR\RWUR3DUDFRQRFHUFXiOHVVRQ
VXVGHUHFKRVOHJDOHVFRQVXOWHDODRILFLQDGHDVXQWRVGHOFRQVXPLGRUORFDORHVWDWDORDO)LVFDOGHVXHVWDGR
Garante en EE.UU:
GE Appliances, a Haier company
Louisville, KY 40225
Ŷ,QVWUXFFLyQDOFOLHQWH(VWHPDQXDOGHOSURSLHWDULR
brinda información relacionada con instrucciones de
funcionamiento y controles del usuario.
Ŷ,QVWDODFLyQLQDGHFXDGD6LWLHQHXQSUREOHPDGH
instalación o el acondicionador de aire no posee la
capacidad adecuada, contacte a su vendedor minorista
o instalador. Usted es responsable de brindar
instalaciones de conexión eléctrica adecuadas.
Ŷ)DOODGHOSURGXFWRFRPRUHVXOWDGRGHPRGLILFDFLRQHV
sobre el mismo o debido a un uso irrazonable,
incluyendo la falta de mantenimiento razonable o
necesario.
Ŷ5HHPSOD]RGHIXVLEOHVGHOKRJDURUHLQLFLRGH
disyuntores.
Ŷ)DOODVFRPRFRQVHFXHQFLDGHFRUURVLyQHQPRGHORV
sin protección contra ésta.
Ŷ'DxRVRFDVLRQDGRVVREUHHOSURGXFWRSRUQLYHOGH
suministro de voltaje inadecuado, accidente, incendio,
inundaciones o catástrofes naturales.
Ŷ'DxRVFRQVHFXHQWHVRLQFLGHQWDOHVFDXVDGRVSRU
posibles defectos del acondicionador de aire.
Ŷ'DxRFDXVDGRGHVSXpVGHODHQWUHJD
Qué No Será Cubierto:
Por el Período de: Reemplazaremos:
8Q$xR
'HVGHODIHFKDGHOD
FRPSUDRULJLQDO
Reemplazo, reparación o reembolso GHOFRVWRPLQRULVWDRULJLQDOGHFXDOTXLHUSURGXFWR
TXHIDOOHGHELGRDXQGHIHFWRHQORVPDWHULDOHVRODIDEULFDFLyQ6LODXQLGDGHVFDPELDGDOD
XQLGDGGHUHHPSOD]RSRVHHJDUDQWtDSRUHOUHVWRGHOSHUtRGRGHODJDUDQWtDRULJLQDOGHXQDxR
VREUHVXSURGXFWR+DLHU$SSOLDQFHVUHHPSOD]DUiDVXH[FOXVLYRFULWHULRHOSURGXFWRSRURWUR
GHODPLVPDRGHXQDIXQFLRQDOLGDG\FDOLGDGFRPSDUDEOHRKDUiXQUHHPEROVRSRUHOSUHFLR
PLQRULVWDRULJLQDO
Ŷ Embale la unidad correctamente. Le recomendamos
usar la caja de cartón y los materiales de embalaje
originales.
Ŷ(QWUHJXHHOSURGXFWRHQODXELFDFLyQGHOYHQGHGRU
minorista donde fue adquirido.
Ŷ Incluya en el paquete una copia del receptor de la
venta u otro comprobante de la fecha de compra
original. También escriba su nombre y domicilio y una
descripción del defecto.
A Fin de Realizar un Reclamo de la Garantía Durante el Período de Devolución Permitido por el Vendedor Minorista:
Ŷ8ELTXHVXUHFLERGHYHQWDRULJLQDO\KDJDXQDQRWDGH
su modelo y número de serie.
Ŷ/ODPHDO*(&$5(6HQ(VWDGRV
8QLGRVpara iniciar el proceso de reemplazo del
producto.
Ŷ6HVROLFLWDUiVXQRPEUHGRPLFLOLRIHFKDGHFRPSUD\
números de modelo y serie.
Ŷ+DLHU$SSOLDQFHVKDUiDUUHJORVSDUDTXHVHHQYtHXQD
caja de cartón a su hogar para recuperar el producto.
Ŷ3RUIDYRUHQWUHJXHWRGRVORVPDWHULDOHVVROLFLWDGRVHQYtR
SRVWDOSUHSDJRHQODFDMDGHFDUWyQSURYLVWD3RUIDYRU
LQFOX\DXQDGHVFULSFLyQGHOGHIHFWR
Ŷ'HEHUtDUHFLELUHOSURGXFWRGHUHHPSOD]RRXQ
reembolso entre los 7 y 10 días hábiles una vez que
hayamos recibido su paquete.
A Fin de Realizar un Reclamo sobre la Garantía Durante el Resto de la Garantía de un Año:
GARANTÍA LIMITADA

49-5000454 Rev. 0
NOTAS

49-5000454 Rev. 0
3ULQWHGLQ&KLQD
IMPORTANT
Do Not Return This Product To The Store
If you have a problem with this product, please call 1-877-337-3639 for the name and telephone number of the
nearest authorized service center.
DATED PROOF OF PURCHASE REQUIRED FOR WARRANTY SERVICE
IMPORTANTE
No regrese este producto a la tienda
Si tiene un problema con este producto, por favor comuníquese al 1-877-337-3639 para solicitar el
nombre y número telefónico del centro de servicio al cliente autorizado más cercano.
NECESITA UNA PRUEBA DE COMPRA FECHADA, NÚMERO DE MODELO
Y DE SERIE PARA EL SERVICIO DE LA GARANTÍA