Loading ...
Loading ...
Loading ...
8
• When clearing deeper drifts, hold the electric snow shovel
by the upper and lower handles and use a swinging or
sweeping motion. Remove up to 6 in. (15 cm) of snow with
each pass and repeat as many times as needed.
• Keep the cord clear of obstructions, sharp objects and the
rotating auger. Do not pull sharply on the cord or abuse
it in any manner. Frequently inspect the cord for signs of
damage. If damage is found, replace the cord immediately.
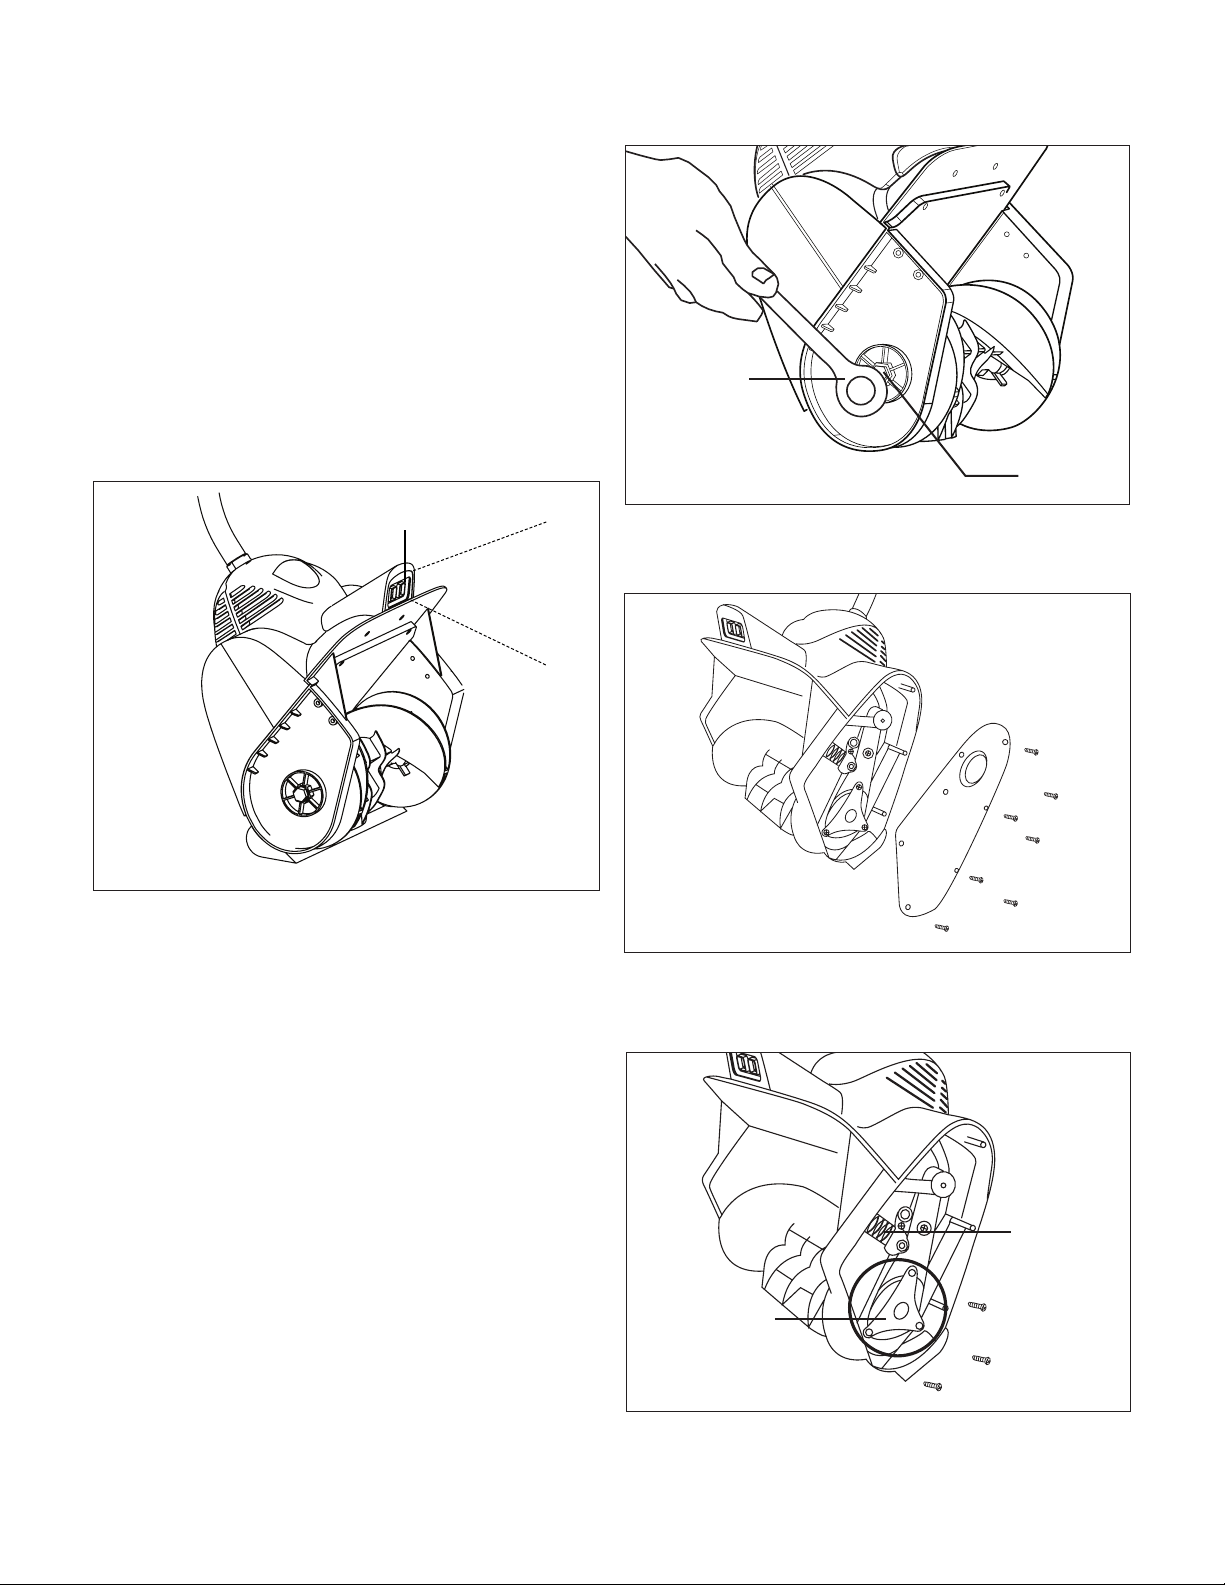
• This electric snow shovel is equipped with a 2 W LED light
to faciliate clearing at night and under conditions of poor
visibility (Fig. 7). When you start the machine, the LED
light will automatically power on and illuminate the path in
front of you. When you stop the machine, the LED light will
automatically power o.
• Disconnect the extension cord after using the electric
snow shovel. Hang the extension cord with the shovel
so it will not be misplaced or damaged.
Maintenance
To order genuine replacement parts or accessories for the
Snow Joe
®
324E electric snow shovel, please visit snowjoe.com
or contact the Snow Joe
®
+ Sun Joe
®
customer service center at
1-866-SNOWJOE (1-866-766-9563).
mWARNING! Disconnect the extension cord before
performing any maintenance task.
If the extension cord is plugged into the appliance, someone
could accidentally turn on the unit while you are performing
maintenance on it, which could result in serious personal injury.
Replacing the Auger
mWARNING! Disconnect the power supply to the electric
snow shovel before beginning work.
1. Use a wrench to remove the bolt and the washer on the
right side of the housing (Fig. 8).
2. Using a Phillips head screwdriver, disassemble the left side
cover by removing the seven (7) screws (Fig. 9).
3. Remove the tensioner. Unscrew the three (3) screws
securing the big pulley plate, then remove the plate and
pulley assembly (Fig. 10).
Fig. 7
LED light
Fig. 8
Wrench
Bolt
Fig. 9
Fig. 10
Tensioner
Big pulley plate
Loading ...
Loading ...
Loading ...