Loading ...
Loading ...
Loading ...
7
The appliance plug will t into a polarized extension cord only
one way. If the appliance plug does not t fully into the
extension cord, reverse the plug. If the plug still does not
t, obtain a correct polarized extension cord. A polarized
extension cord will require the use of a polarized wall outlet.
The extension cord plug will t into the polarized wall outlet
only one way. If the plug does not t fully into the wall outlet,
reverse the plug. If the plug still does not t, contact a qualied
electrician to install the proper wall outlet. Do not modify the
appliance plug, extension cord receptacle or extension cord
plug in any way.
IMPORTANT: Check the extension cord frequently during
use for holes or cracks in the insulation. Do not use a
damaged cord. Do not run the cord through standing water
or wet grass.
Use only an extension cord recommended for outdoor use.
Securing the Extension Cord
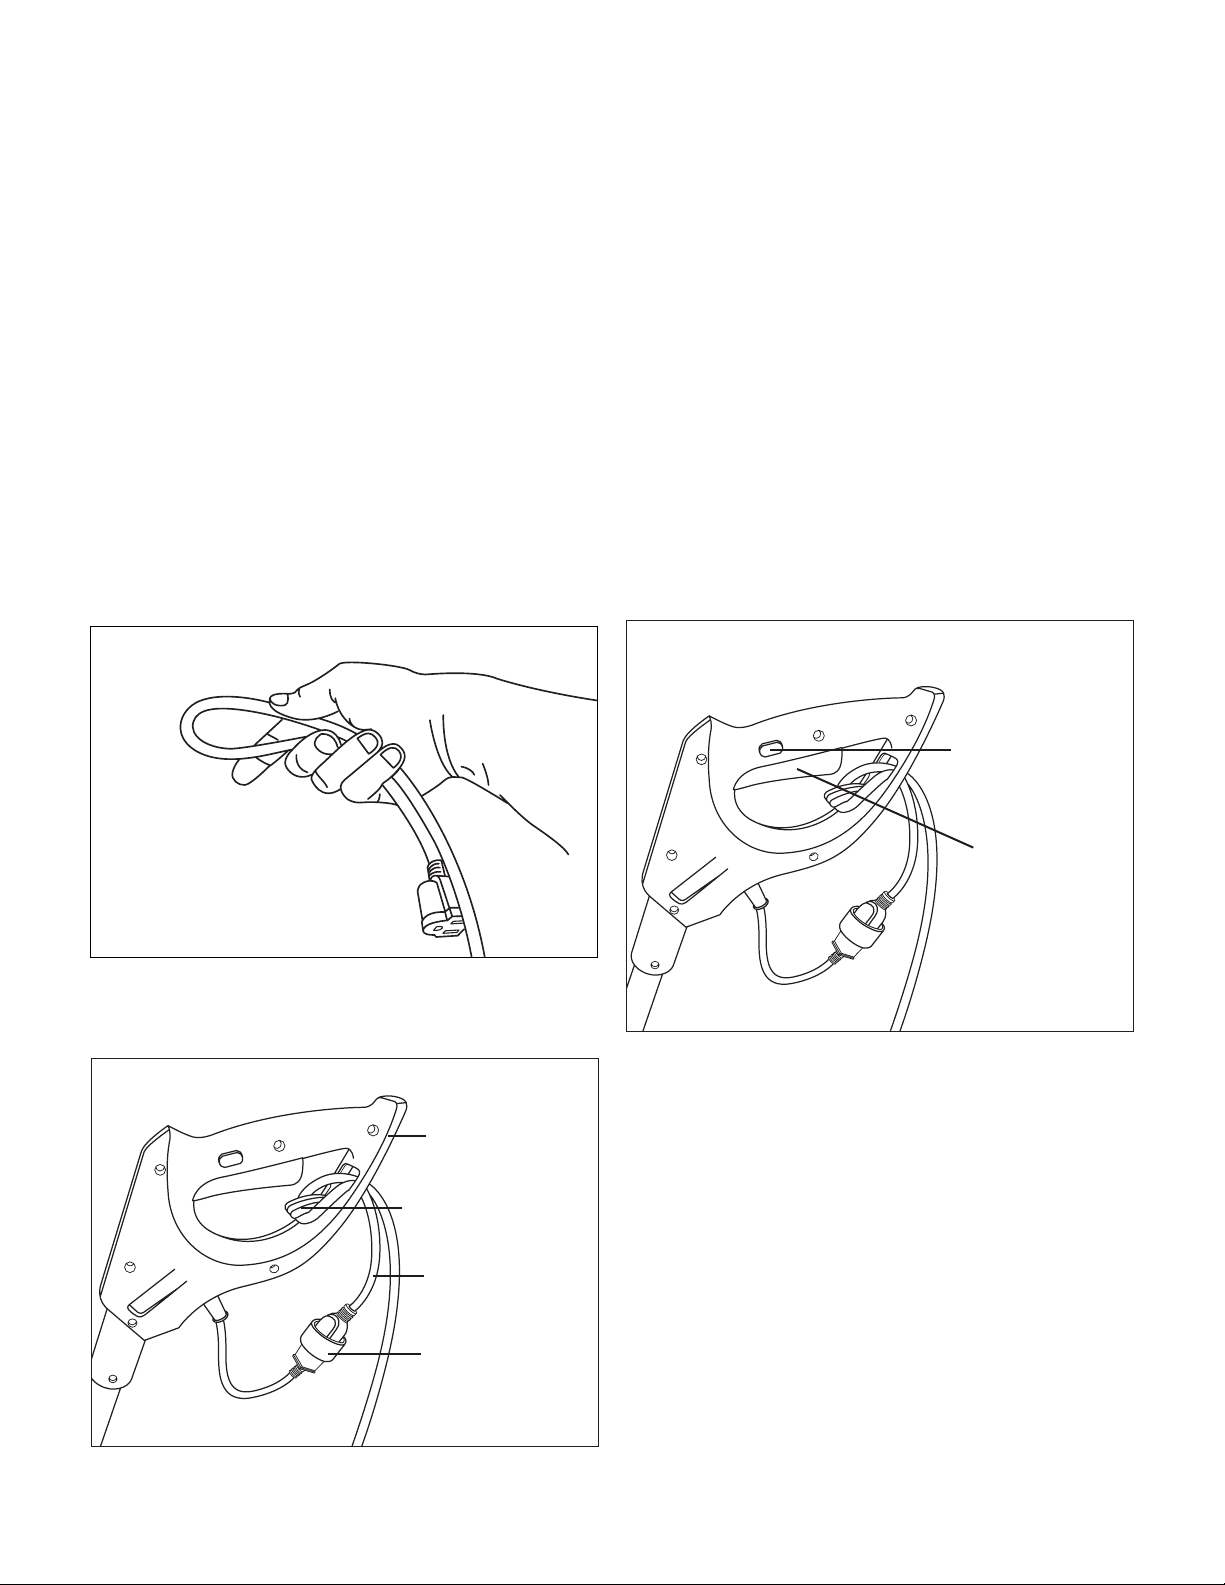
1. Make a loop with the extension cord (Fig. 4).
2. Insert the loop through the opening in the back of the
upper handle and secure the loop onto the extension
cord hook (Fig. 5).
3. Connect the extension cord to the appliance cord.
NOTE: Securing the extension cord in this way helps to
prevent you from accidentally disconnecting the extension
cord from the appliance during operation.
4. Plug the extension cord into a wall outlet.
5. Keep the area to be cleared free of stones, toys or other
foreign objects that the rotor blades might pick up and
throw. Such items could be covered by snow and are easy
to overlook, so be sure to conduct a thorough inspection
of the area before beginning work.
Starting + Stopping
1. To start the electric snow shovel, push and hold the safety
lock button on the top of the handle grip with your thumb
and then squeeze the trigger switch with your ngers.
Once the machine powers on, you can release the safety
lock button and proceed with operation (Fig. 6).
2. To stop the electric snow shovel, release the trigger switch
(Fig. 6).
Operating Tips
• Start the electric snow shovel and tilt it forward until the
scraper blade at the base of the unit contacts the ground.
Push the shovel forward at a comfortable rate, yet slow
enough to clear the path completely. The clearing width of
the snow shovel and the depth of snowfall should dictate
your forward speed.
• Direct the snow discharge to the right or to the left by
holding the electric snow shovel at a slight angle.
• To remove snow most eciently, throw the snow
downwind and slightly overlap each swath.
• If you need to clear snow from a crushed rock or gravel
surface, push down on the handle to clear the scraper of
any loose material that the rotor blades could throw.
• This electric snow shovel cuts a path 11 in. (28 cm) wide
and up to 6 in. (15 cm) deep in one pass.
Fig. 4
Fig. 5
Appliance cord
Extension cord
Upper handle
Extension cord hook
Fig. 6
Safety lock button
Trigger switch
Loading ...
Loading ...
Loading ...