Loading ...
Loading ...
Loading ...
8
We value your experience using Sunny Health and Fitness products. For assistance with parts or
(877-907-8669).
a
a
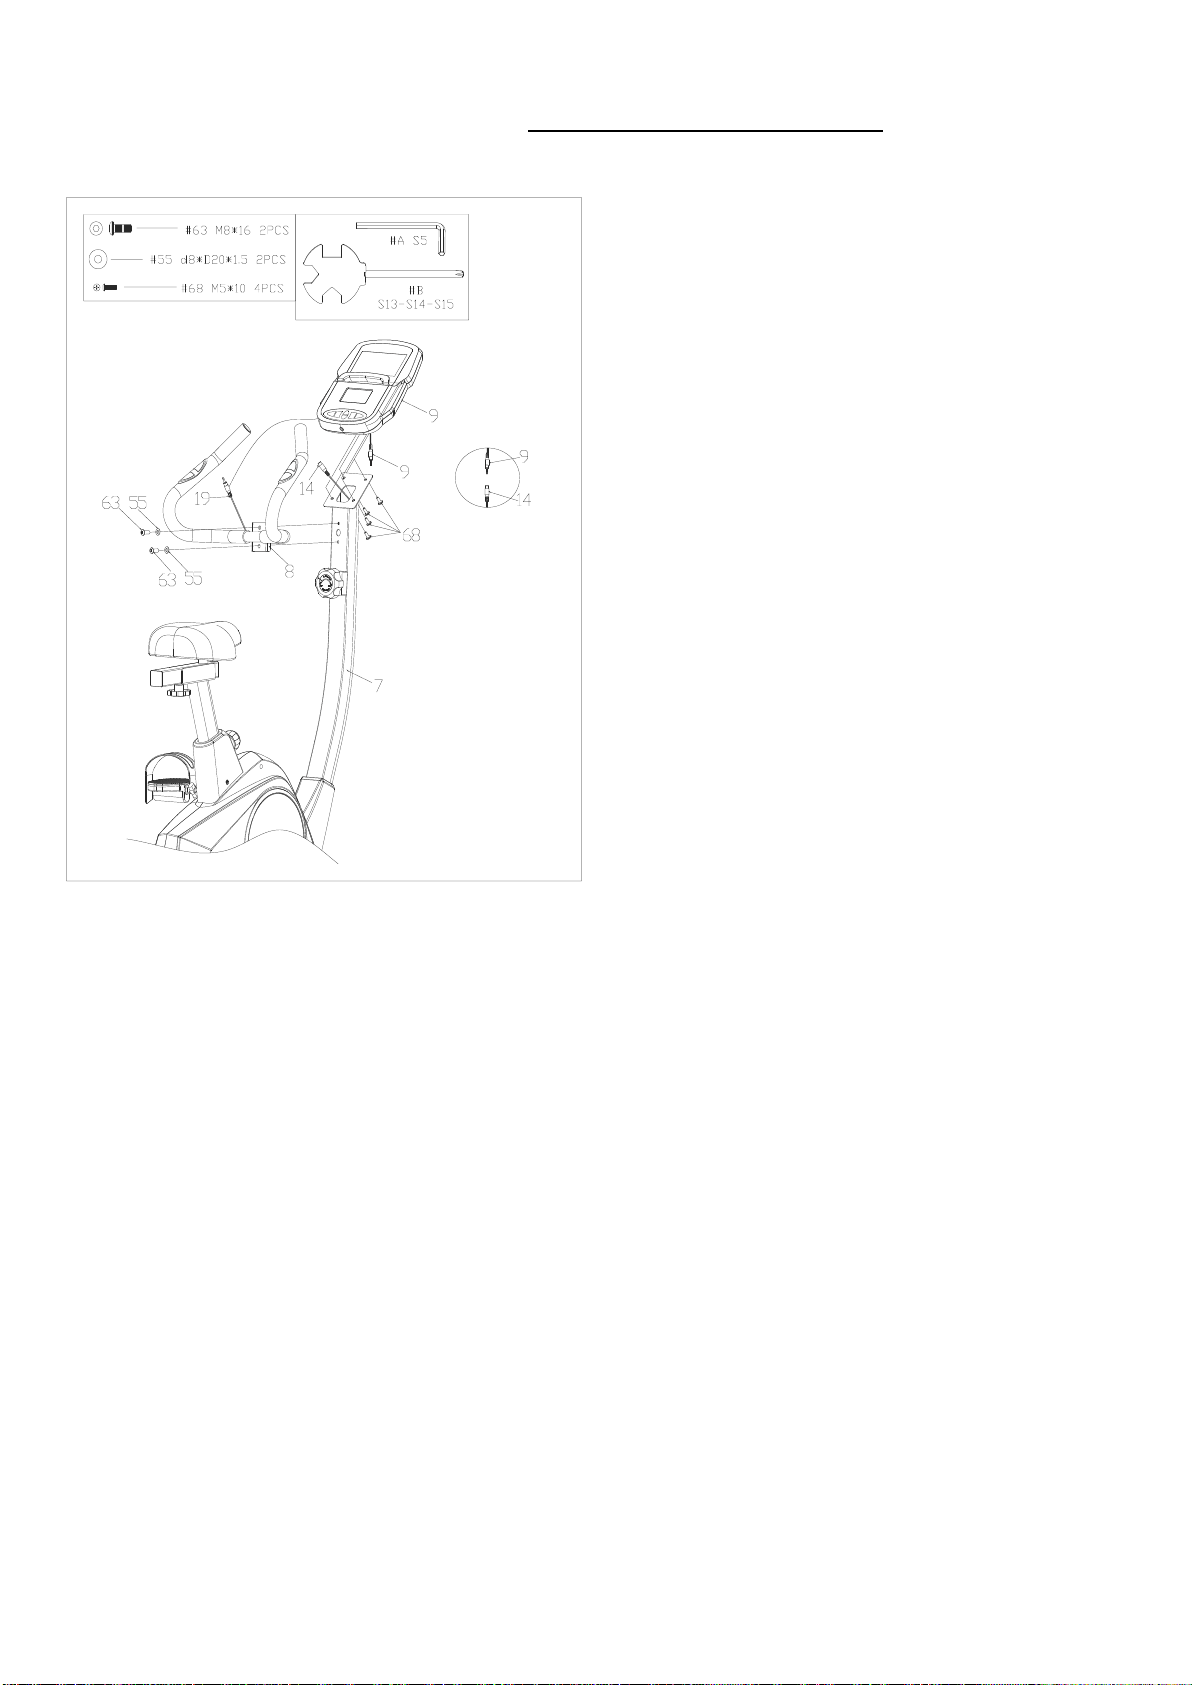
STEP 4:
Remove 2 Screws (No. 63) and 2 Flat
Washers (No. 55) from the top end Front Post
(No. 7) using Allen Wrench (No. A).
Attach Handlebar (No. 8) onto the Front Post
(No. 7). Secure them with 2 Flat Washers (No.
55) and 2 Screws (No. 63) that were removed.
Tighten using Allen Wrench (No. A).
Remove 4 Screws (No. 68) from the back of
Computer (No. 9) using Spanner (No. B).
Connect Sensor Wire 1 (No. 14) with
Computer Wire (No. 9a).
Attach the Computer (No. 9) onto the bracket
on the top of the Front Post (No. 7) with the 4
Screws (No. 68) that were removed. Tighten
and secure using Spanner (No. B).
Insert Handle Pulse Wire (No. 19) into the
hole marked with “pulse input” on back of the
Computer (No. 9).
The assembly is complete!
Loading ...
Loading ...
Loading ...