Loading ...
Loading ...
Loading ...
9ninjakitchen.com
8 ninjakitchen.com
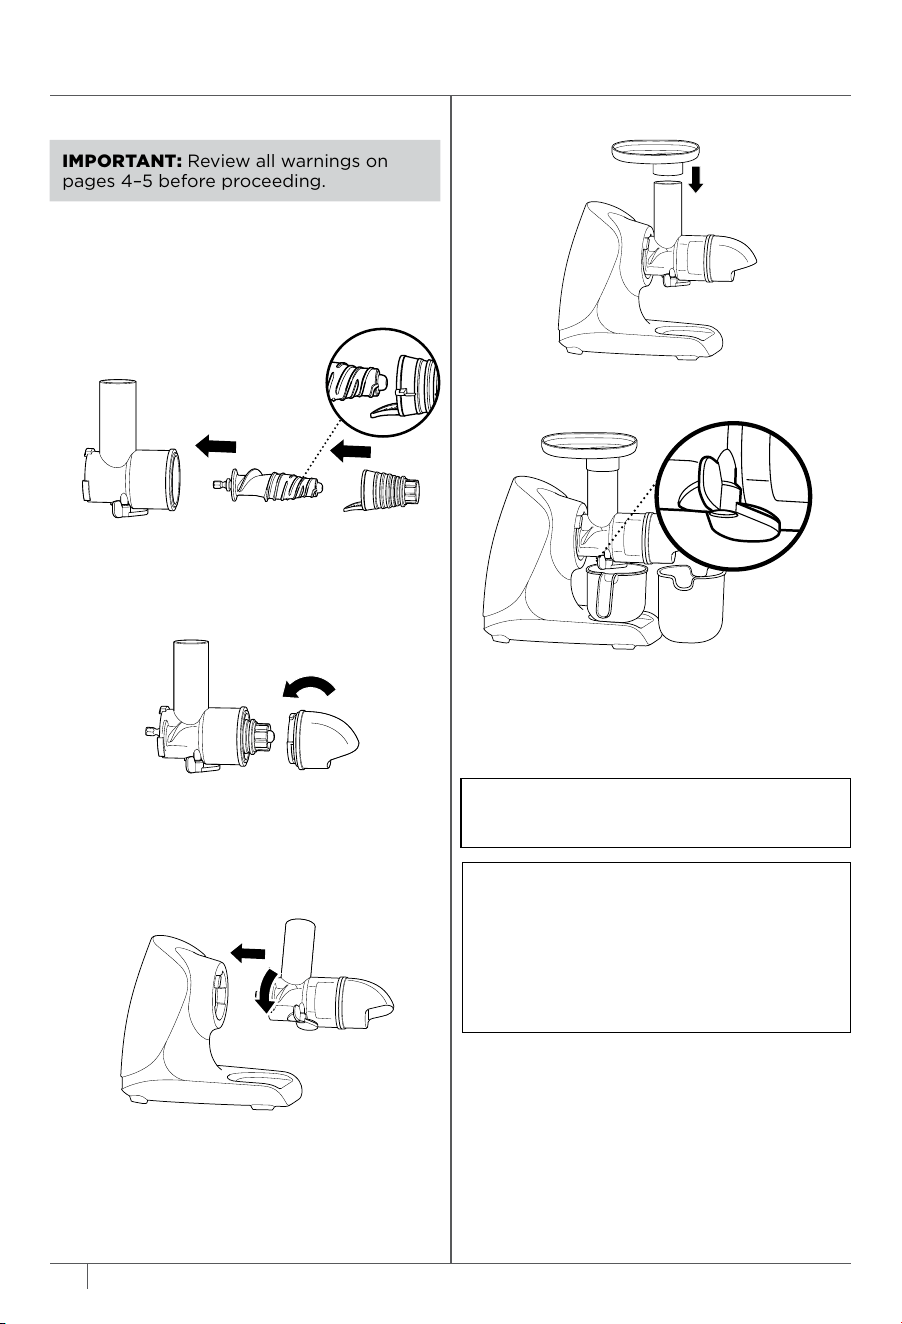
USING THE JUICER
7 Select START/STOP, then gradually add
ingredients to the feed chute. For best
results, allow juicer to process each
ingredient before adding more to the
feed chute. Use the tamper to push
ingredients down through the feed
chute, as needed.
8 When juicing is complete, select
START/STOP, then close the anti-drip
lever. Stir juice and serve.
9 To disassemble, press and hold the
RELEASE button while turning the
feed chute chamber clockwise and
remove from motor base.
10 Remove the pulp spout from the feed
chute chamber by turning clockwise
Then, remove the filter and auger.
11 Unplug the unit when finished. Refer
to the Care & Maintenance section for
cleaning and storage instructions.
1 Plug in motor base and place on a
clean, dry, level surface such as a
countertop or table.
2 Insert the auger into the feed chute
chamber, then attach the desired filter
onto the auger, with the metal portion
of the filter on the bottom of the auger.
3 Install the pulp spout in the feed
chute chamber, on top of the filter,
by installing at an angle then turning
counterclockwise to lock in place.
4 Install the assembled feed chute
chamber on the motor base at an angle,
then turn counterclockwise until it
clicks into place.
IMPORTANT: Review all warnings on
pages 4–5 before proceeding.
5 Install the food tray on the top of the
feed chute.
6 Place the pulp container under the pulp
spout, then place the juice jug under
the anti-drip lever on the feed chute
chamber.
NOTE: If the feed chute chamber becomes
blocked or ingredients are not processing,
press and hold REVERSE. There will be a
beep and a brief pause, then the auger will
rotate in the opposite direction. Release
REVERSE to stop. Repeat as needed. Press
START/STOP to resume normal operation.
IMPORTANT: DO NOT add frozen fruits
and vegetables or ice to the unit.
Align the metal portion
of the filter with the
bottom of the auger.
Make sure the
anti-drip lever
is open before
juicing.
Loading ...
Loading ...
Loading ...