
Loading ...
Loading ...
Loading ...
en-us Electrical connection
10
2. Attach the hold-down brackets to the underside of the
cooktop with the provided short screws . Do not
tighten the screws.
3. Rotate the hold-down brackets so that the appliance
can be placed in the cutout.
4.
CAUTION Do not let the cooktop drop into place.
▶
Make sure that the cooktop is supported along the
edges when carefully placing it into the cutout.
Turn the cooktop over and place it carefully into the
countertop cutout.
5. Insert the clamping screws into the hold-down bracket
and secure the cooktop to the countertop . Protect
delicate countertops by placing a wooden disk under-
neath.
6. Tighten the hold-down bracket screws on the cooktop
underside.
Electrical connection
5 Electrical connection
Electrical connection
Read these instructions to safely connect your appliance
to the electrical supply.
5.1 Electrical requirements
Ensure that the following general requirements are met.
¡ You can find the rating plate with the electrical specifi-
cations on the underside of the appliance.
→
"Rating plate location", Page11
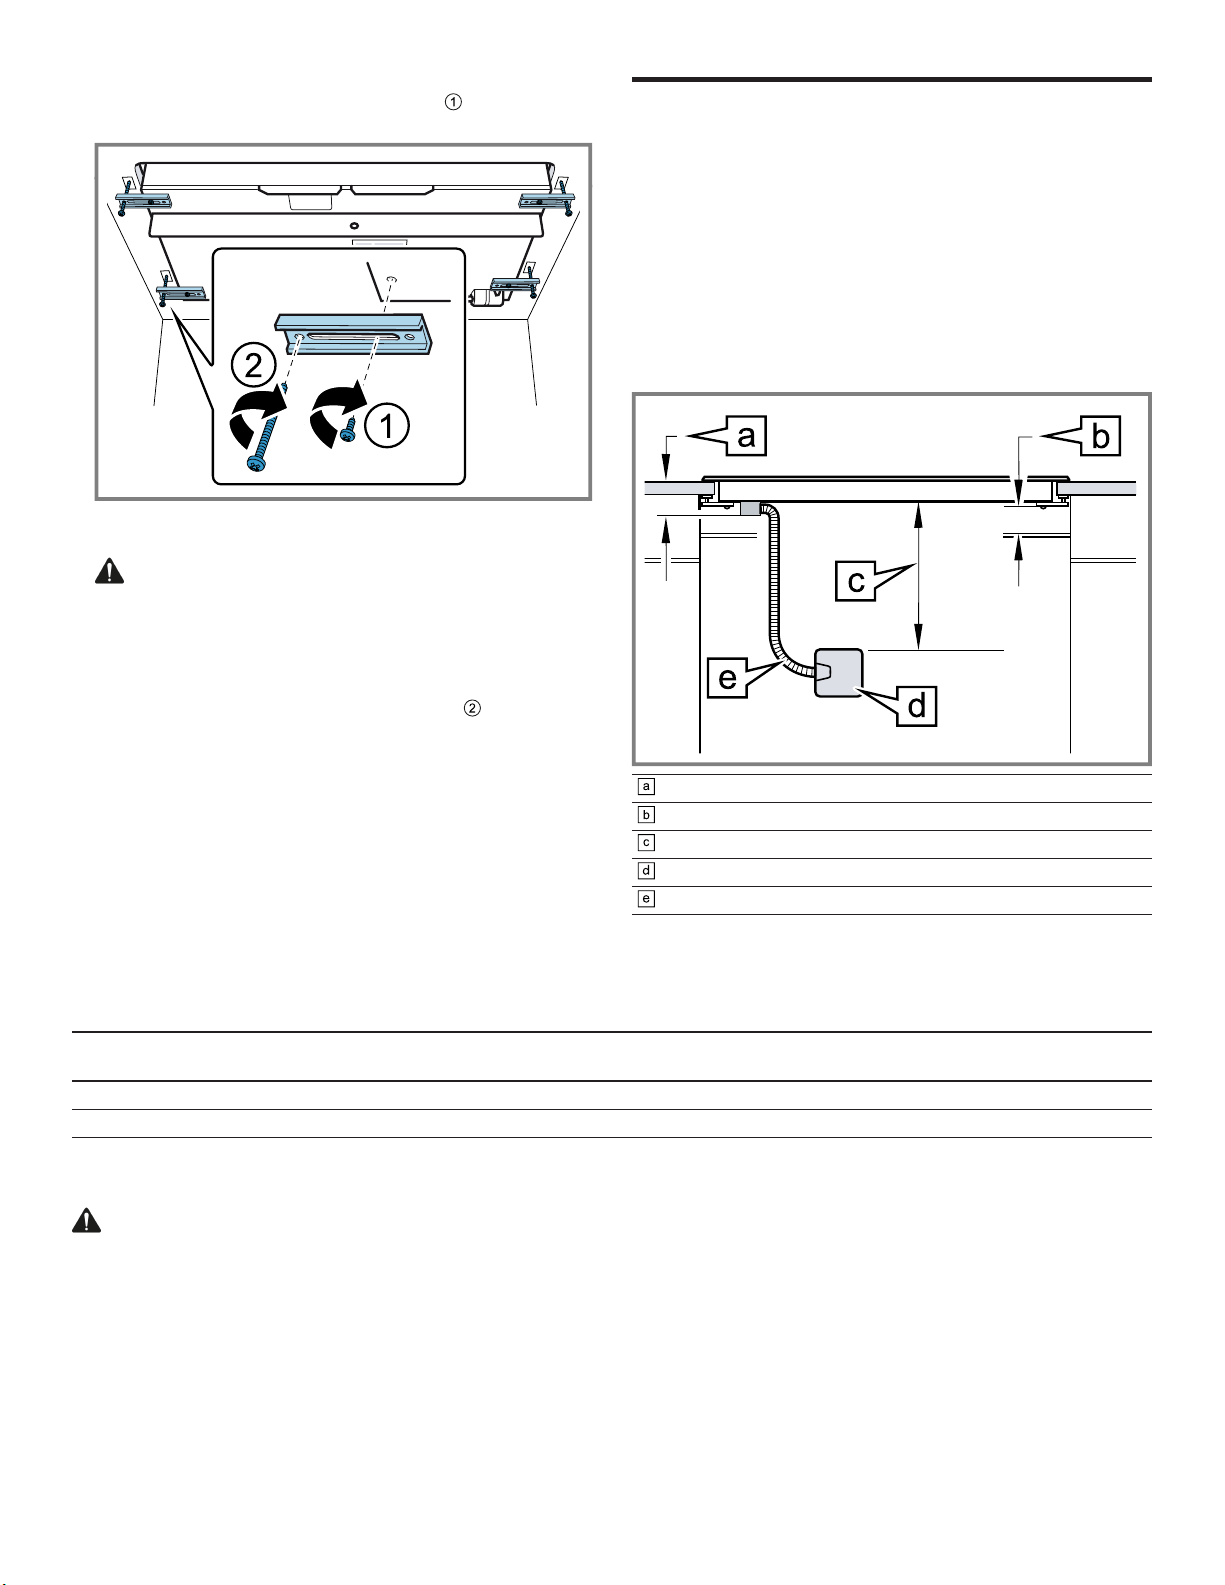
¡ The junction box must be located within 3feet of the
cooktop connection. It should be easily accessible for
service purposes.
max. 3¼" (79mm) + fitting/conduit 1" (25mm)
min. 1" (25mm) air clearance
approx. 12" (300mm)
junction box
flexible conduit approx. 3ft. (900mm)
Power supply
All models must be connected with the included 39" (1m) flexible conduit.
Models 240V AC, 3-wire, 60Hz system: cir-
cuit breaker
208V AC, 3-wire, 60Hz system: cir-
cuit breaker
CX482611 30A 30A
CX492611 30A 30A
5.2 Connecting electrical supply
WARNING
Before installing, turn power OFF at the service panel.
▶
Lock service panel to prevent power from being turned
ON accidentally.
Note:If the cooktop is installed and connected as speci-
fied here, it will be grounded in compliance with the Na-
tional Electrical Code.
1. Install a suitable junction box (not furnished).
The branch-circuit breakers ampacity, the wire sizes
and the connections must conform to the requirements
of the National Electrical Code or Canadian Electrical
Code and all local codes and ordinances.
2. Attach the flexible conduit to the junction box.
Loading ...
Loading ...
Loading ...