Loading ...
Loading ...
Loading ...
9
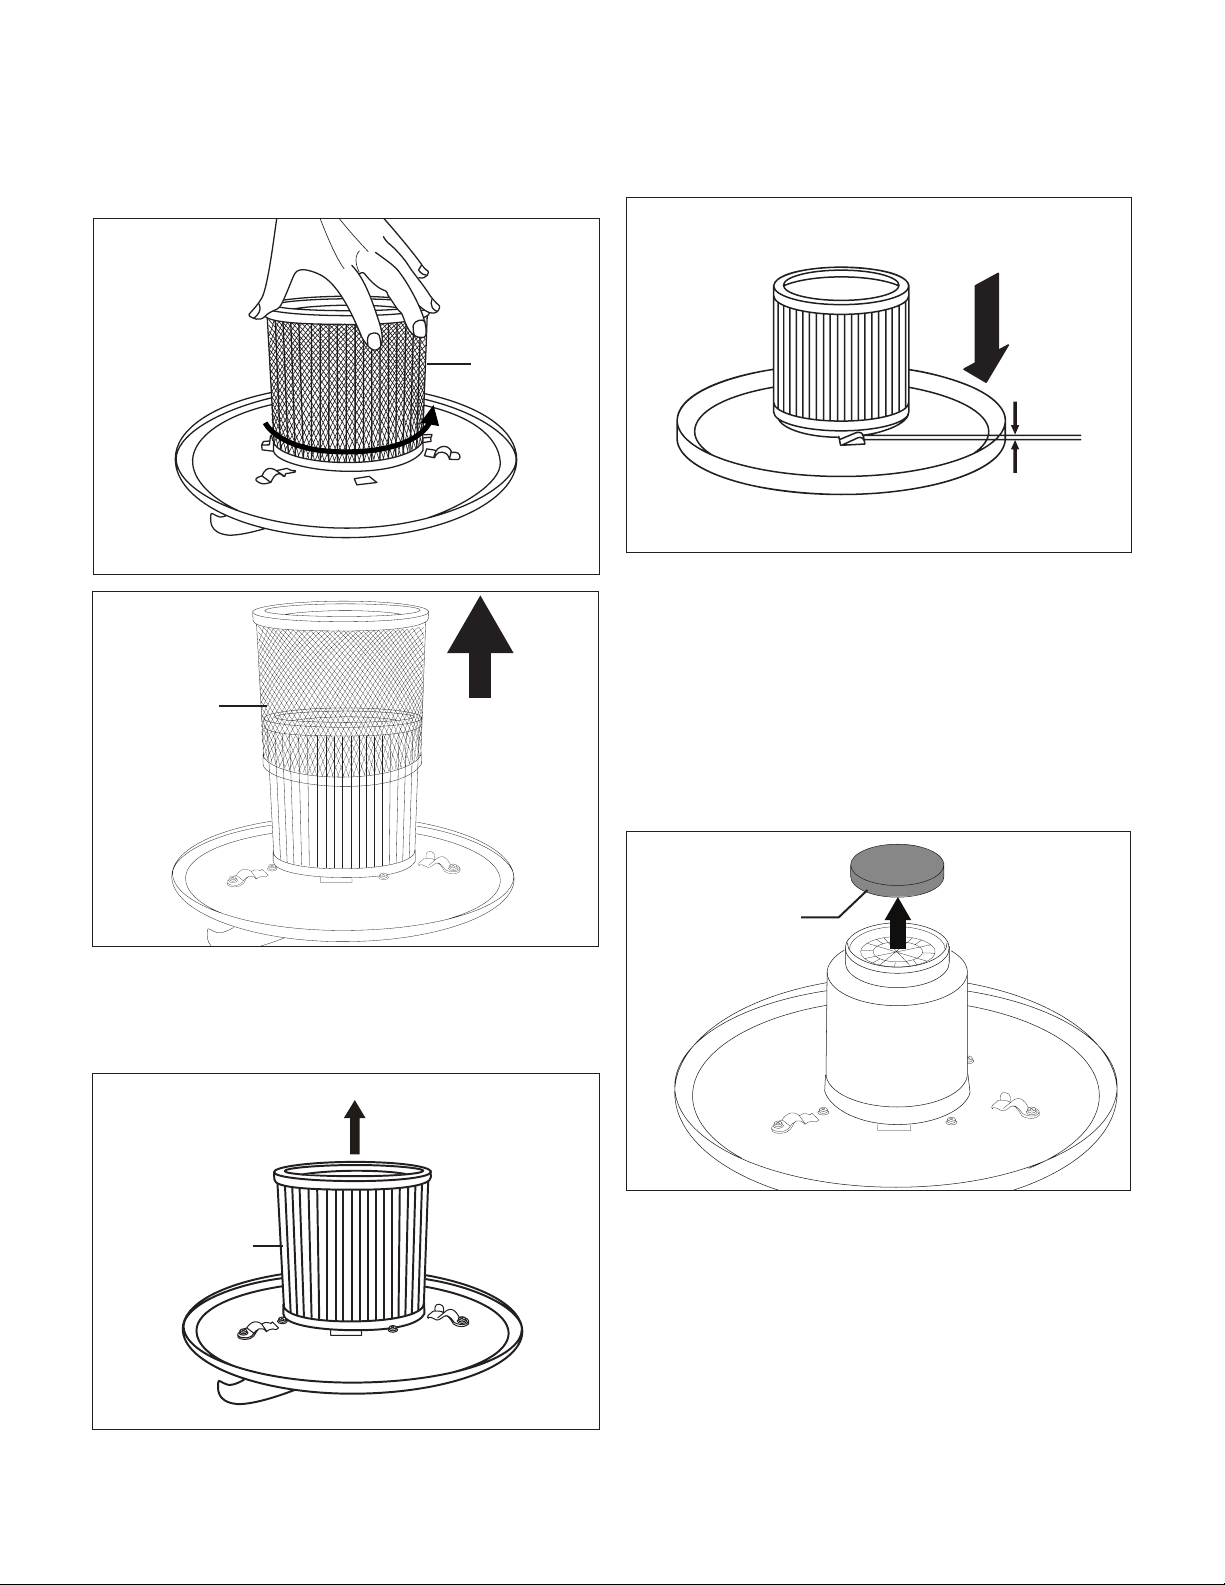
2. Remove the wire lter basket by turning it
counterclockwise. Tap out the basket to remove any
accumulated residue (Figs. 11 – 12).
3. Take out the pleated lter and tap it clean. Remove any
debris with a clean and dry paintbrush or hand brush
(Fig. 13).
NOTE: Do not wash the pleated lter in water.
4. After cleaning, replace the pleated lter on the motor and
lter housing located on the underside of the container lid
(Fig. 14).
NOTE: Check that the rubber rim of the pleated lter is
seated ush against the container lid.
5. Fit the wire lter basket over the pleated lter and turn it
clockwise until it stops. The wire lter basket tabs must
cover and depress the safety stop switch.
NOTE: Make sure the wire lter basket tabs are under the
metal retainer clips.
Cleaning the Air Filter
1. Take o the container cover, wire lter basket and
pleated lter.
2. Take the air lter out of the lter housing (Fig. 15).
3. Clean the lter with soap and water and let it air dry.
4. Place the air lter back into the lter housing and
reassemble the pleated lter and the wire lter basket.
Cleaning the Pre-lter
1. Gently clean the pre-lter with water and hang to dry.
NOTE: Make sure not to rub the cloth when cleaning as this
could damage the coarse cloth grain.
Fig. 11
Wire lter
basket
Fig. 12
Wire lter
basket
Fig. 13
Pleated lter
Fig. 14
0 mm
Fig. 15
Air lter
Loading ...
Loading ...
Loading ...