Loading ...
H
E
G
F
M
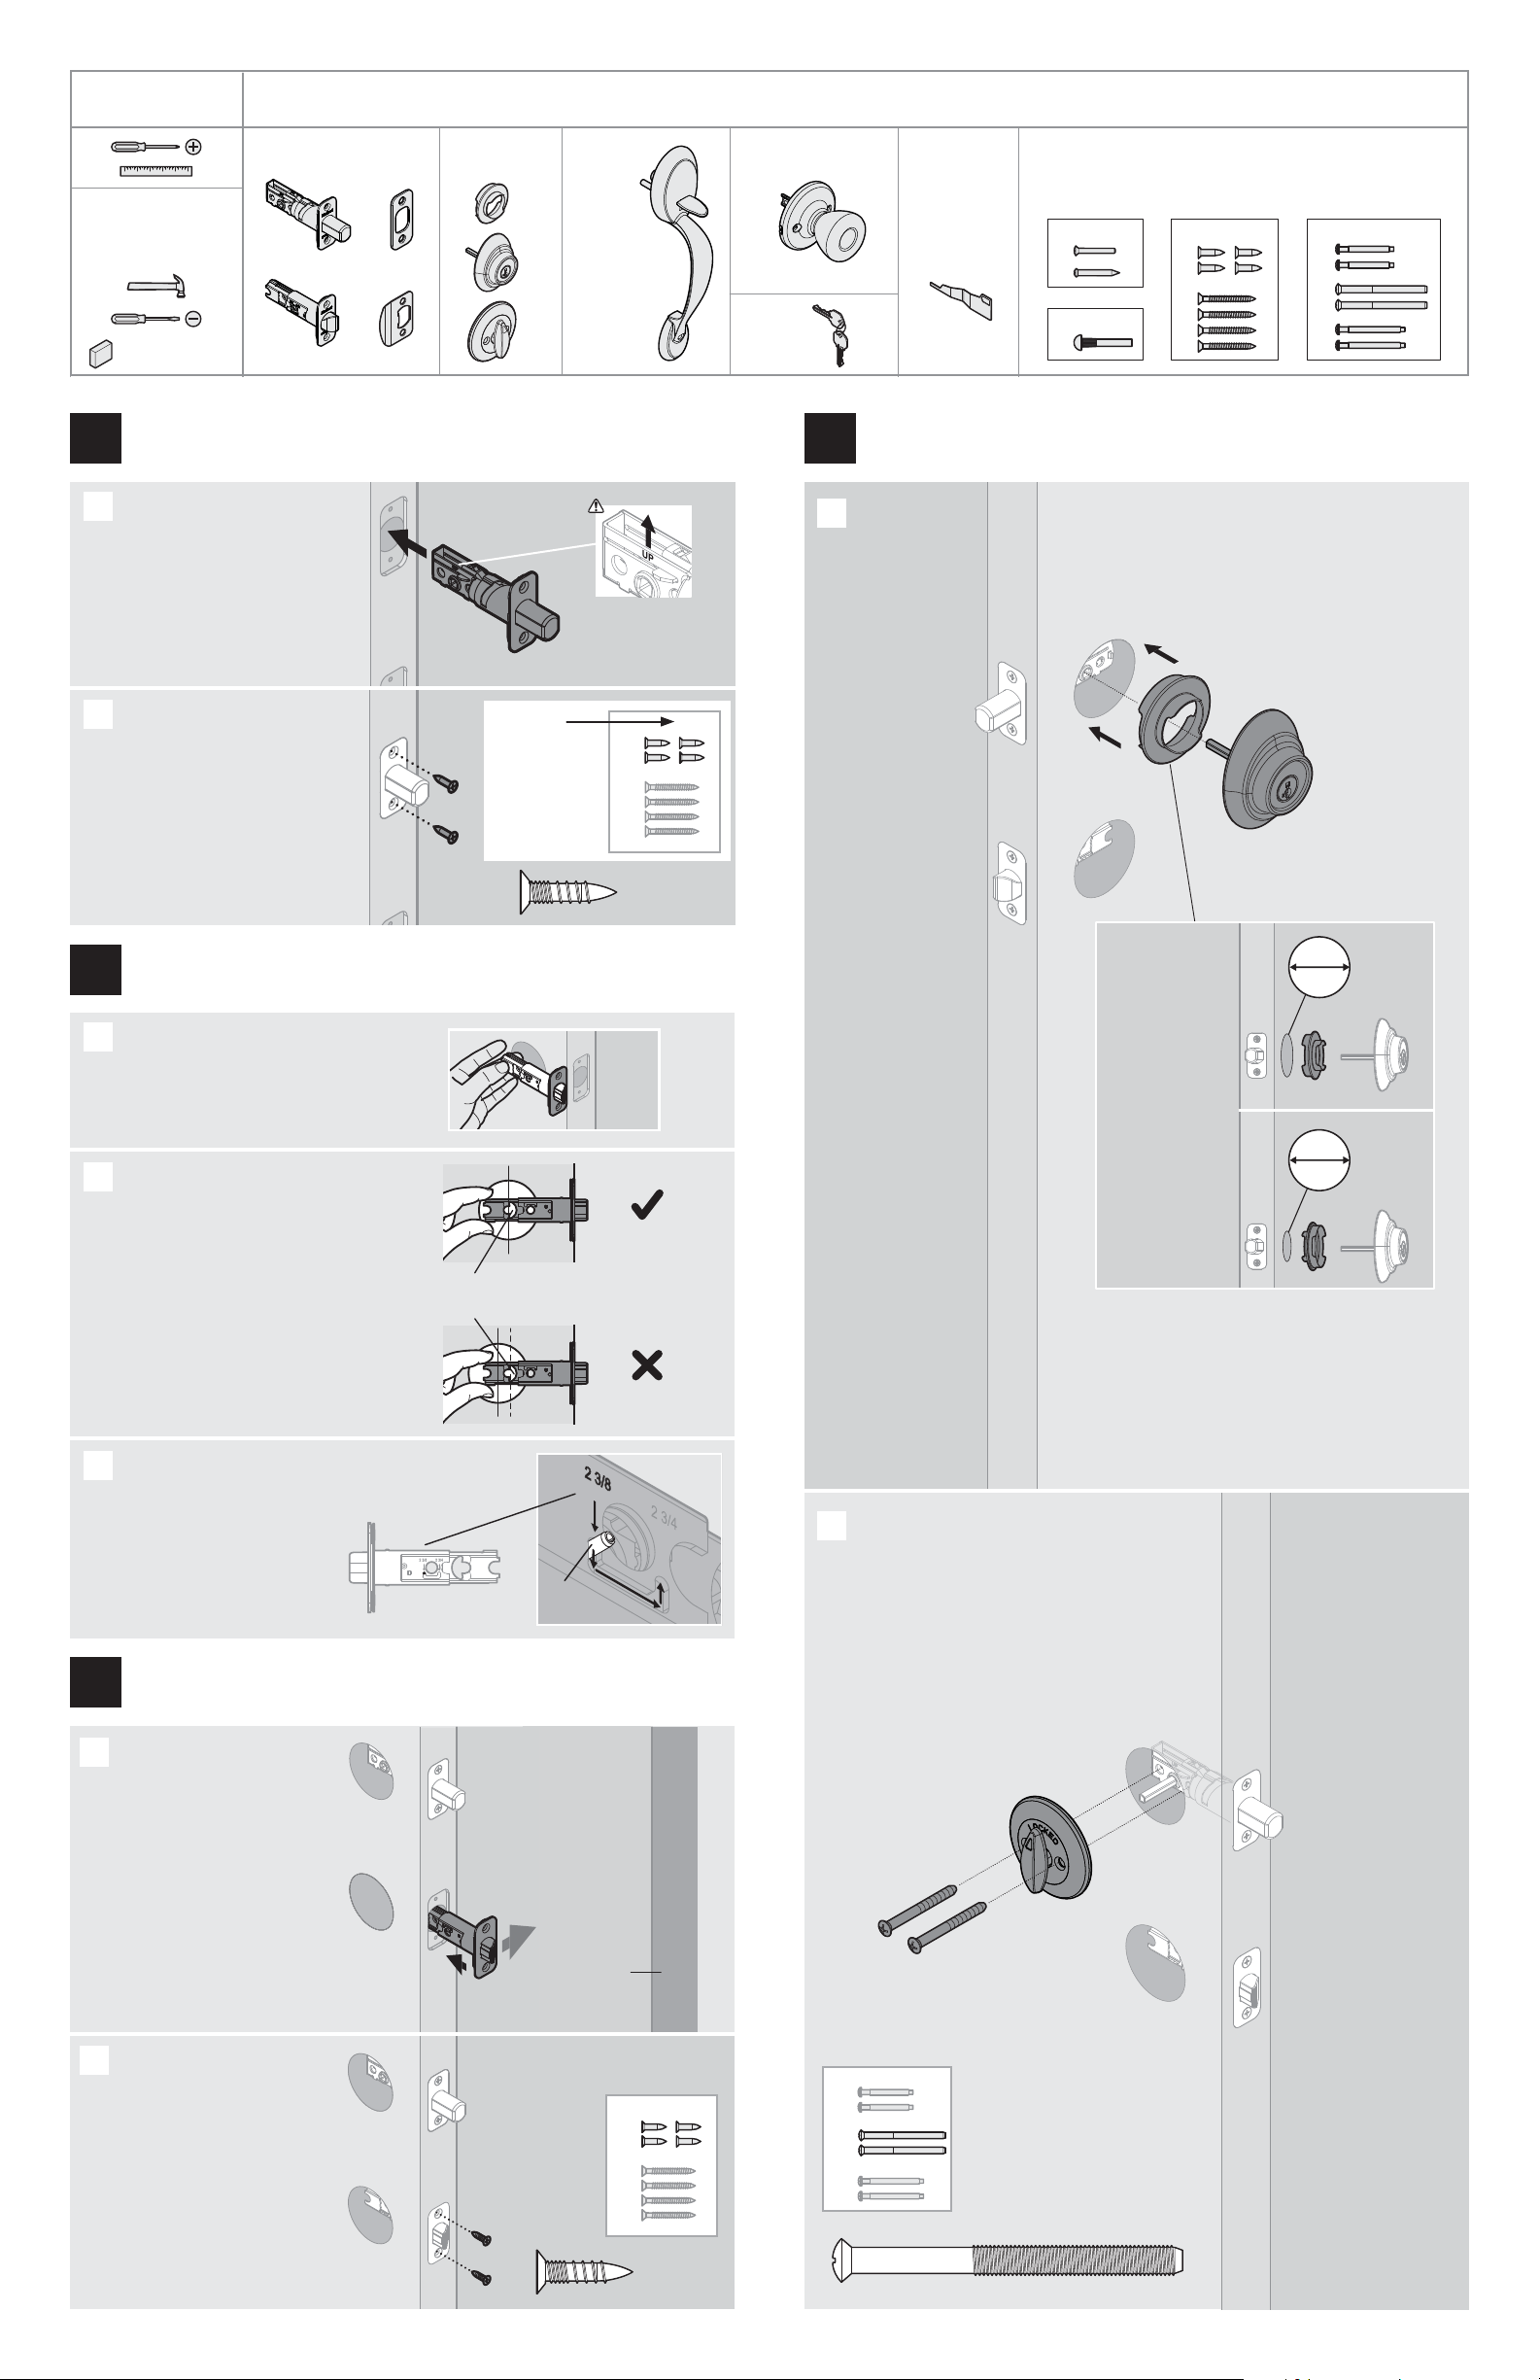
Parts in the box
Piezas en la caja
Handleset
Conjunto
de manija
Additional tools
(if needed)
Herramientas adicionales
(si es necesario)
Latches and strikes
Pestillos y placas
Deadbolt
Cerrojo
SmartKey tool
(SmartKey locks
only)
Herramienta
SmartKey
(cerraduras
SmartKey
solamente)
Required tools
Herramientas necesarias
Knob
Perilla
AB
CD
wood block
bloque de madera
Keys
Llaves
K
J
Screws
Tornillos
T
Z
P
R
W
V
U
S
07535
2204103596
23286
semi-circular hole
oriicio de medio circulo
2-1/8"
54 mm
1-1/2"
38 mm
P1 (2x)
Secure with
screws.
Fije el pestillo
con los tornillos.
Insert bottom latch
into bottom hole.
Inserte el pestillo en
el orificio inferior.
The slant of bolt
faces in direction
that door closes.
La inclinación del
perno del pestillo
queda en la dirección
que cierra la puerta.
door frame
marco de
la puerta
P (2x)
C
P
A
B
“UP” is on top
“UP” está en la
parte superior
P (2x)
P
B
Secure latch with screws.
Fije el pestillo con
los tornillos.
A
A
If the semi-circular hole is centered
in the door hole, no adjustment is
required. Proceed to step 8.
If the semi-circular hole is NOT
centered, adjust latch. See “Latch
Adjustment” (step 7C).
Si el oriicio de medio círculo está
centrado con el oriicio de la puerta, no
se requiere ajustarlo. Vaya al paso 8.
Si el oriicio de medio círculo NO está
centrado, ajuste el pestillo. Consulte
“Ajuste del pestillo” (el paso 7C).
not centered
no centrado
centered
centrado
exterior
exterior
A
B
Install top latch in top hole.
Instale el pestillo superior
en el oriicio superior.
interior
interior
B
R (2x)*
R*
G
F*
E
E
E
The orientation of
“E” will depend on
the diameter of the
hole in the door.
Flip as required.
La orientación de
“E” dependerá del
diámetro del
oriicio en la puerta.
Gire según se indica.
A
Hold the BOTTOM latch in front of
the door hole, with the latch face
lush against the door edge.
Sostenga el pestillo inferior en frente
del oriicio de la puerta, con la cara del
pestillo al ras con el borde de la puerta.
C
Grasp the pin on both sides
of the latch and move it
to the longer setting.
Mantenga el pasador
en ambos lados del
pestillo, y muevalo a la
coniguración más largo.
pin
pasador
C
Latch Adjustment (only if needed)
Ajuste del pestillo (si es necesario)
C
actual size
tamaño real
03596
P
Z
22041
W
V
R
actual size
tamaño real
actual size
tamaño real
03596
P
Z
Note: Part
numbers are
printed on
screw bags.
Nota: Los números
de parte están
impresos en
las bolsas de
los tornillos.
Install the top latch
Instale el pestillo superior
6
Install the bottom latch
Instale el pestillo inferior
Adjust bottom latch length (if needed)
Ajuste la longitud del pestillo inferior (si es necesario)
Install deadbolt
Instale el cerrojo
7
8
9
Insert the torque
blade of the deadbolt
through the D-shaped
hole in the top latch.
Inserte la paleta
de torsión del
cerrojo a través
del oriicio en forma
de D en el pestillo
superior.
* Additional installation steps are required for this
component when installing a service kit for 21/4"
(57 mm) thick doors. See thick door kit instructions.
* Se requieren pasos adicionales de instalación para este
componente cuando se instala un kit de servicio para puertas
gruesas con un espesor de entre 57 mm (21/4"). Consulte las
instrucciones para el kit de servicio para puertas gruesas.
* If installing the
thick door service
kit, use the screws
provided in the kit.
* Si va a instalar el
kit de servicio de
puertas gruesas,
utilice los tornillos
suministrados en el kit.
Install deadbolt interior.
Instale el cerrojo interior.
2/4
Loading ...
Loading ...