Loading ...
Loading ...
Loading ...
10 49-1000564 Rev. 0
ENGLISH
INSTALLATION INSTRUCTIONS
BEFORE YOU BEGIN
Read these instructions completely and carefully.
• IMPORTANT – Save these instructions
for local inspector’s use.
• IMPORTANT – Observe all governing
codes and ordinances.
• Note to Installer – Be sure to leave these
instructions with the Consumer.
• Note to Consumer – Keep these instructions for
future reference.
•
WARNING
This appliance must be properly
êõòøñçèçÜèèēÐõòøñçìñê÷ëèàìñèÌëìïïèõĔ
• If you received a damaged wine chiller, you should
immediately contact your dealer or builder.
• Skill Level – Installation requires basic mechanical
skills. Proper installation is the responsibility of the
installer. Product failure due to improper installation is
ñò÷æòùèõèçøñçèõ÷ëèÐÎÊóóïìäñæèàäõõäñ÷ü
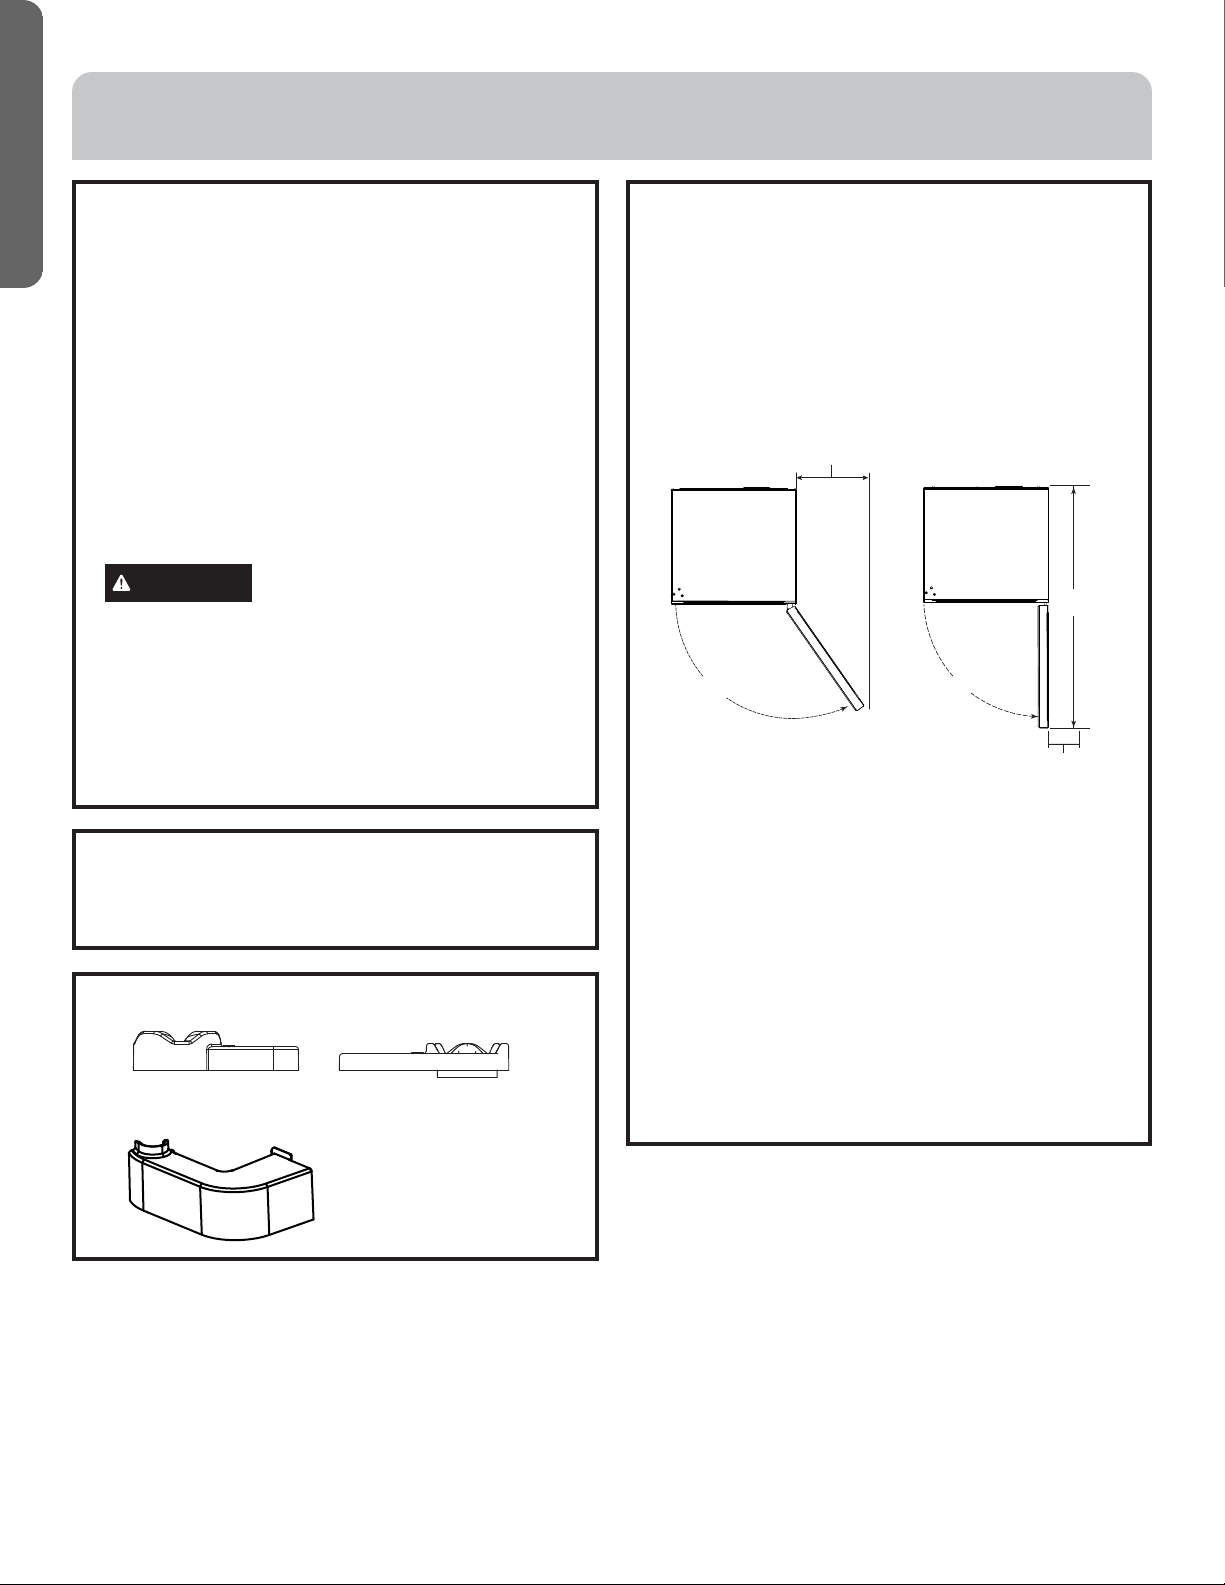
PRODUCT CLEARANCES
The wine chiller is factory set for a 105° door swing.
When installed in a corner:
• Allow 1” min. clearance on the hinge side for the 90°
door swing and to allow racks to slide out.
• Allow 8” minimum clearance on the hinge side for a full
105° door swing.
Choose the location:
• Do not install the appliance where the temperature
will go below 55°F (13°C) because it will not run often
enough to maintain proper temperatures.
• Do not install the appliance where the temperature
will go above 90°F (32°C) because it will not perform
properly.
• Do not install the appliance in a location exposed to
water (rain, etc.) or direct sunlight.
• These products are not designed to be stacked one over
the other.
TOOLS REQUIRED
• #2 Phillips screwdriver
• 5/16” (8mm) Hex nut driver
PARTS INCLUDED
8" Minimum
to Wall
105°
41-1/4"
1" Minimum
to Wall
90°
ALTERNATE DOOR CAM
ALTERNATE HINGE COVER
ALTERNATE HINGE CAM
Loading ...
Loading ...
Loading ...