
Loading ...
Loading ...
Loading ...
OperatingTips
•Keepthetrimmertiltedtowardtheareabeingcut;thisisthe
bestcuttingarea.
•Thestringtrimmercutswhenpassingtheunitfromleftto
right.Thisavoidsthrowingdebrisattheoperator.
•Usethetipofthestringtodothecutting;donotforcethe
stringheadintouncutgrass.
•Usingthetrimmeralongwireandpicketfences,stoneand
brickwalls,curbs,andwoodcancausethelinetorapidly
wearandevenbreak.
•Avoidtreesandshrubs.Treebark,woodmoldings,siding,
andfencepostscaneasilybedamagedbythestrings.
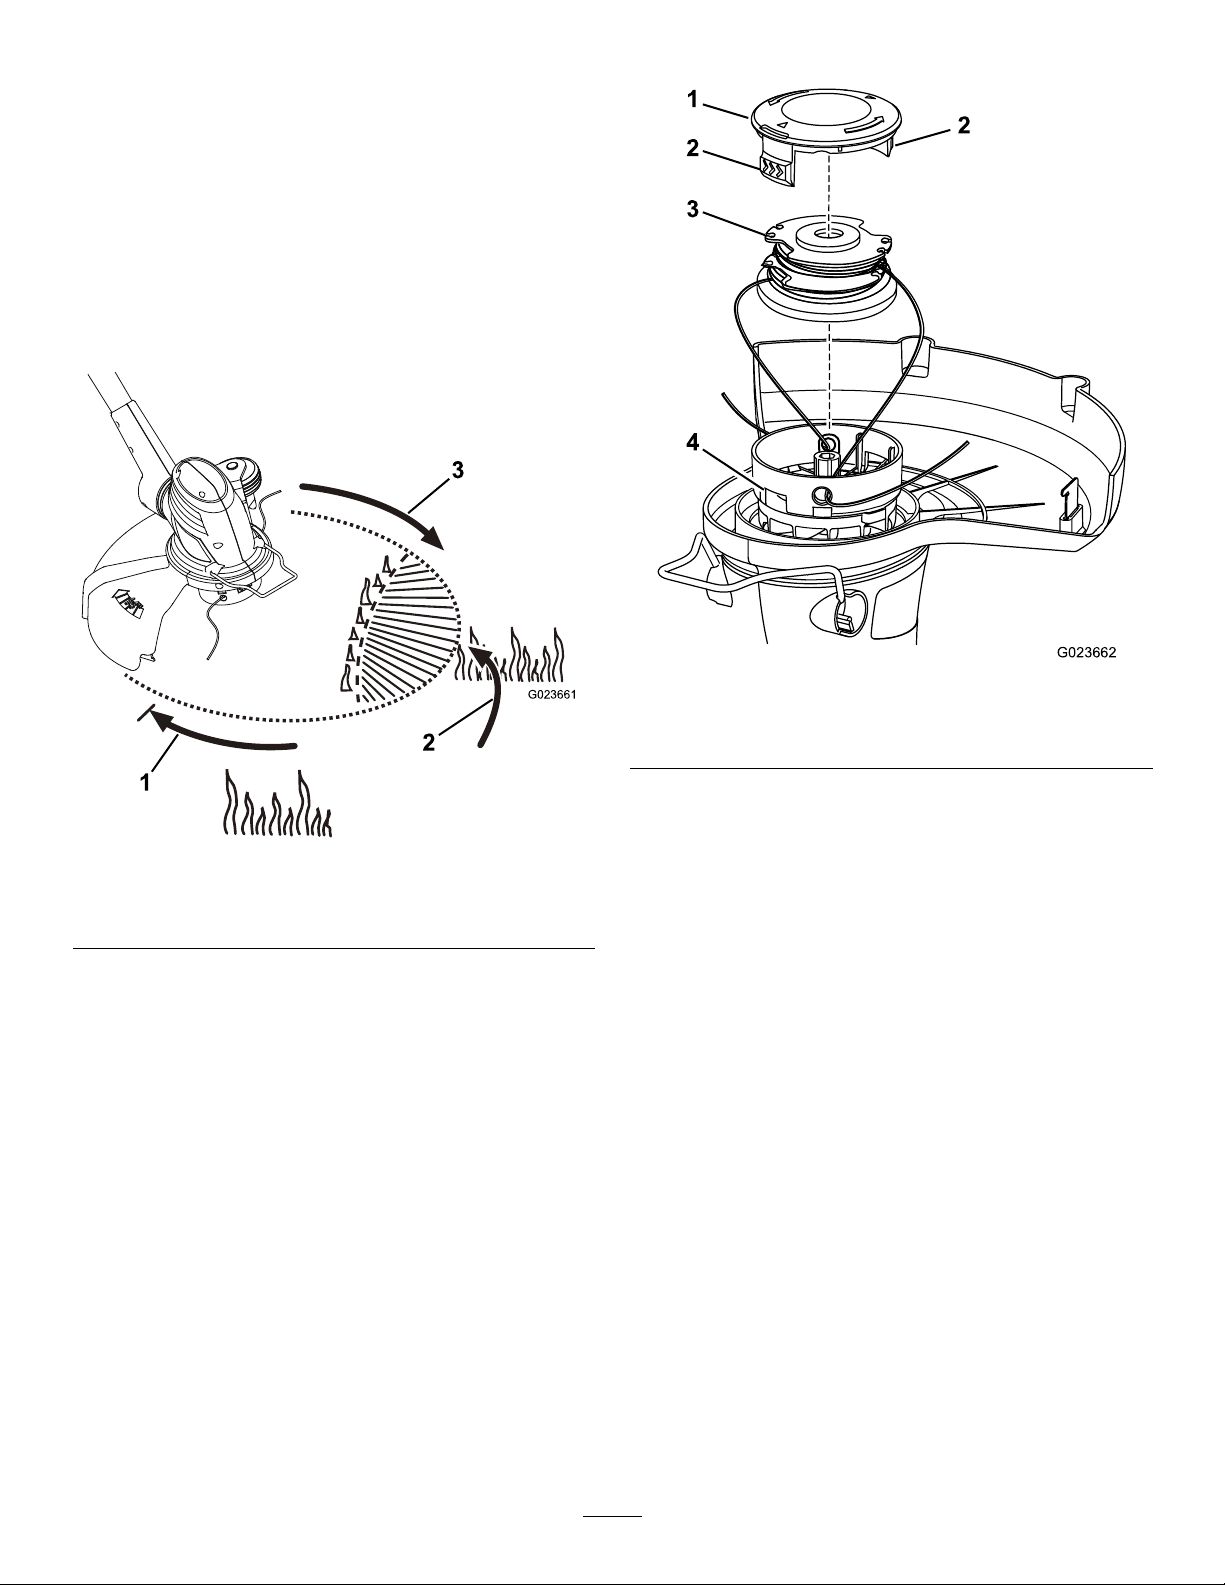
G023661
Figure10
1.Directionofrotation3.Stringpath
2.Idealcuttingrange
Maintenance
Aftereachuseofthetrimmer,completethefollowing:
1.Wipethetrimmercleanwithadampcloth.Donothosethe
trimmerdownorsubmergeitinwater.
2.Wipeorscrapecleananydebrisfromthecutting-headarea.
3.Checkandtightenallfasteners.Ifanypartisdamagedor
lost,repairorreplaceit.
4.Brushdebrisawayfromtheairintakeventsonthemotor
housingtopreventthemotorfromoverheating.
ReplacingtheSpool
Note:Useonly1.65mm(065in)diametermonolamentstring.
Forbestperformance,useonlyTororeplacementstring(part
number88512).
Important:Usingalargerdiameterstringmaycausethe
motortooverheatandfail.
1.Pushinthetabsonthesideofthespoolretainer(
Figure11).
G023662
1
2
3
4
2
Figure11
1.Spoolretainer3.Slots
2.Spool
4.Tabs
2.Pullthespoolretaineruptoremoveit.
3.Removethespool.
4.Installthenewspool,makingsurethatthestringsare
capturedintheretainingslotsonthenewspool.
Note:Makesurethattheendsofthestringsextend
approximately152mm(6in).
5.Installthenewspoolsothatthestringendsalignwith
theeyeletsinthestringhead,andthreadthestringends
throughtheeyelets.
6.Pullthestringsextendingfromthestringheadsothatthe
stringsreleasefromtheslotsinthespool.
7.Installthespoolretainerbypressingthetabsintotheslots
andpushingdownonthespooluntilthespoolretainerclicks
intoplace.
ReplacingtheString
Important:Useonly.065inch(1.65mm)diameter
monolamentstring.Donotuseanyothergaugeortypeof
string,asthiscoulddamagethetrimmer.
1.Removethespool;refertoReplacingtheSpool(page7).
2.Removeanystringremainingonthespool.
3.Insertthestringintotheanchorholeintheupperpartof
thespool(Figure12).
7
Loading ...