Loading ...
Loading ...
Loading ...
10 49-60778-1
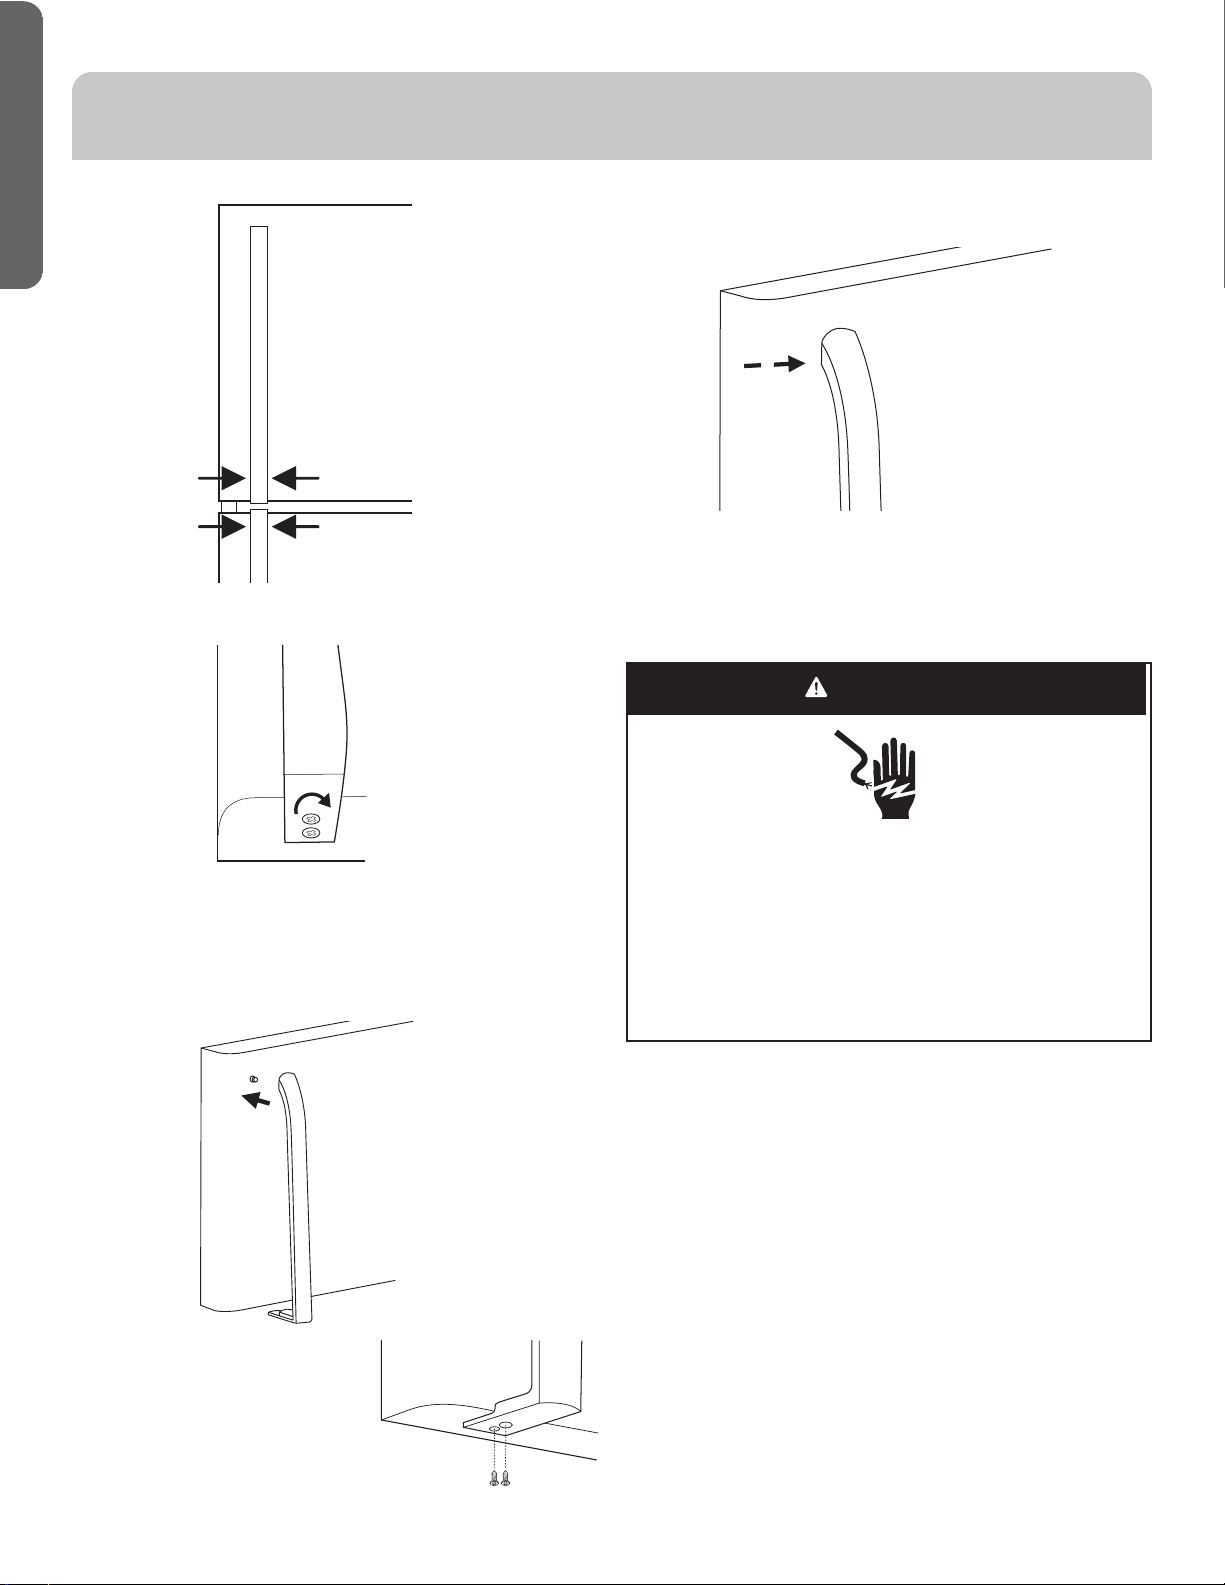
6. With both handles mounted, align the handles.
7. Slowly open the door, and then completely tighten the
screws.
Step 2 - STAINLESS STEEL HANDLES
1. Remove door handles and hex key from freezer
compartment.
" Ùïäæèĥäõèçèñçòéëäñçïèòùèõðòøñ÷ìñêö÷øçòñéäæèòé
door.
# Êïìêñ÷ëèëòïèöìñ÷ëèĥä÷èñç
of the handle with the holes on
the bottom edge of the door
and fasten with the two screws
(provided).
$ Þöìñê÷ëèëèûîèü÷ìêë÷èñ÷ëèöè÷öæõèúìñ÷ëèĥäõèçèñç
òé÷ëèëäñçïèÌòñ÷ìñøè÷ò÷ìêë÷èñøñ÷ìï÷ëèëäñçïèìöĥøöë
with the door, and then tighten an additional half turn.
5. Repeat above steps to install the handle to the other door.
ENGLISH
STEP 4 - MAKE ELECTRICAL
CONNECTION
1. Plug into a grounded 3 prong outlet.
2. Allow the refrigerator to cool for several hours before
adding food.
WARNING
Electrical Shock Hazard
Plug into a grounded 3 prong outlet.
Do not remove the ground prong from the power cord plug.
Do not use an adapter.
Do not use an extension cord.
Ïäìïøõè÷òçòöòæäñõèöøï÷ìñçèä÷ëĤõèòõèïèæ÷õìæäïöëòæî
INSTALLATION INSTRUCTIONS
Loading ...
Loading ...
Loading ...