Loading ...
Loading ...
Loading ...
INSTALLATION
Check the appliance is electrically safe and gas sound when you have nished.
20
You will also need the following tools:
1. Electric drill
2. Masonry drill bit & anchors (only required if installing
the range on a stone or concrete oor)
3. Steel tape measure
4. Phillips head screwdriver
5. Flat head screwdriver
6. 2.5mm Allen key (supplied with the range)
7. Level
8. Open-end or adjustable wrench
9. Pencil and ruler
10. Pipe wrenches
Additional materials you may need:
• Gas line shut-off valve.
• Pipe joint sealant or UL-approved pipe thread tape with
Teflon* that resists action of natural and LP gases.
• Flexible metal appliance connector (½’’ I.D.). A 5foot
length is recommended for ease of installation
but other lengths are acceptable. Never use an old
connector when installing a new range.
• Flare union adapter for connection to gas supply line
(¾’’ or ½’’ NPT x ½’’ I.D.)
• Flare union adapter for connection to pressure regulator
on range (½’’ NPT x ½’’ I.D.)
• To protect any floor covering under the range a sheet of
¼’’ thick plywood or equivalent large enough to stand
the range on.
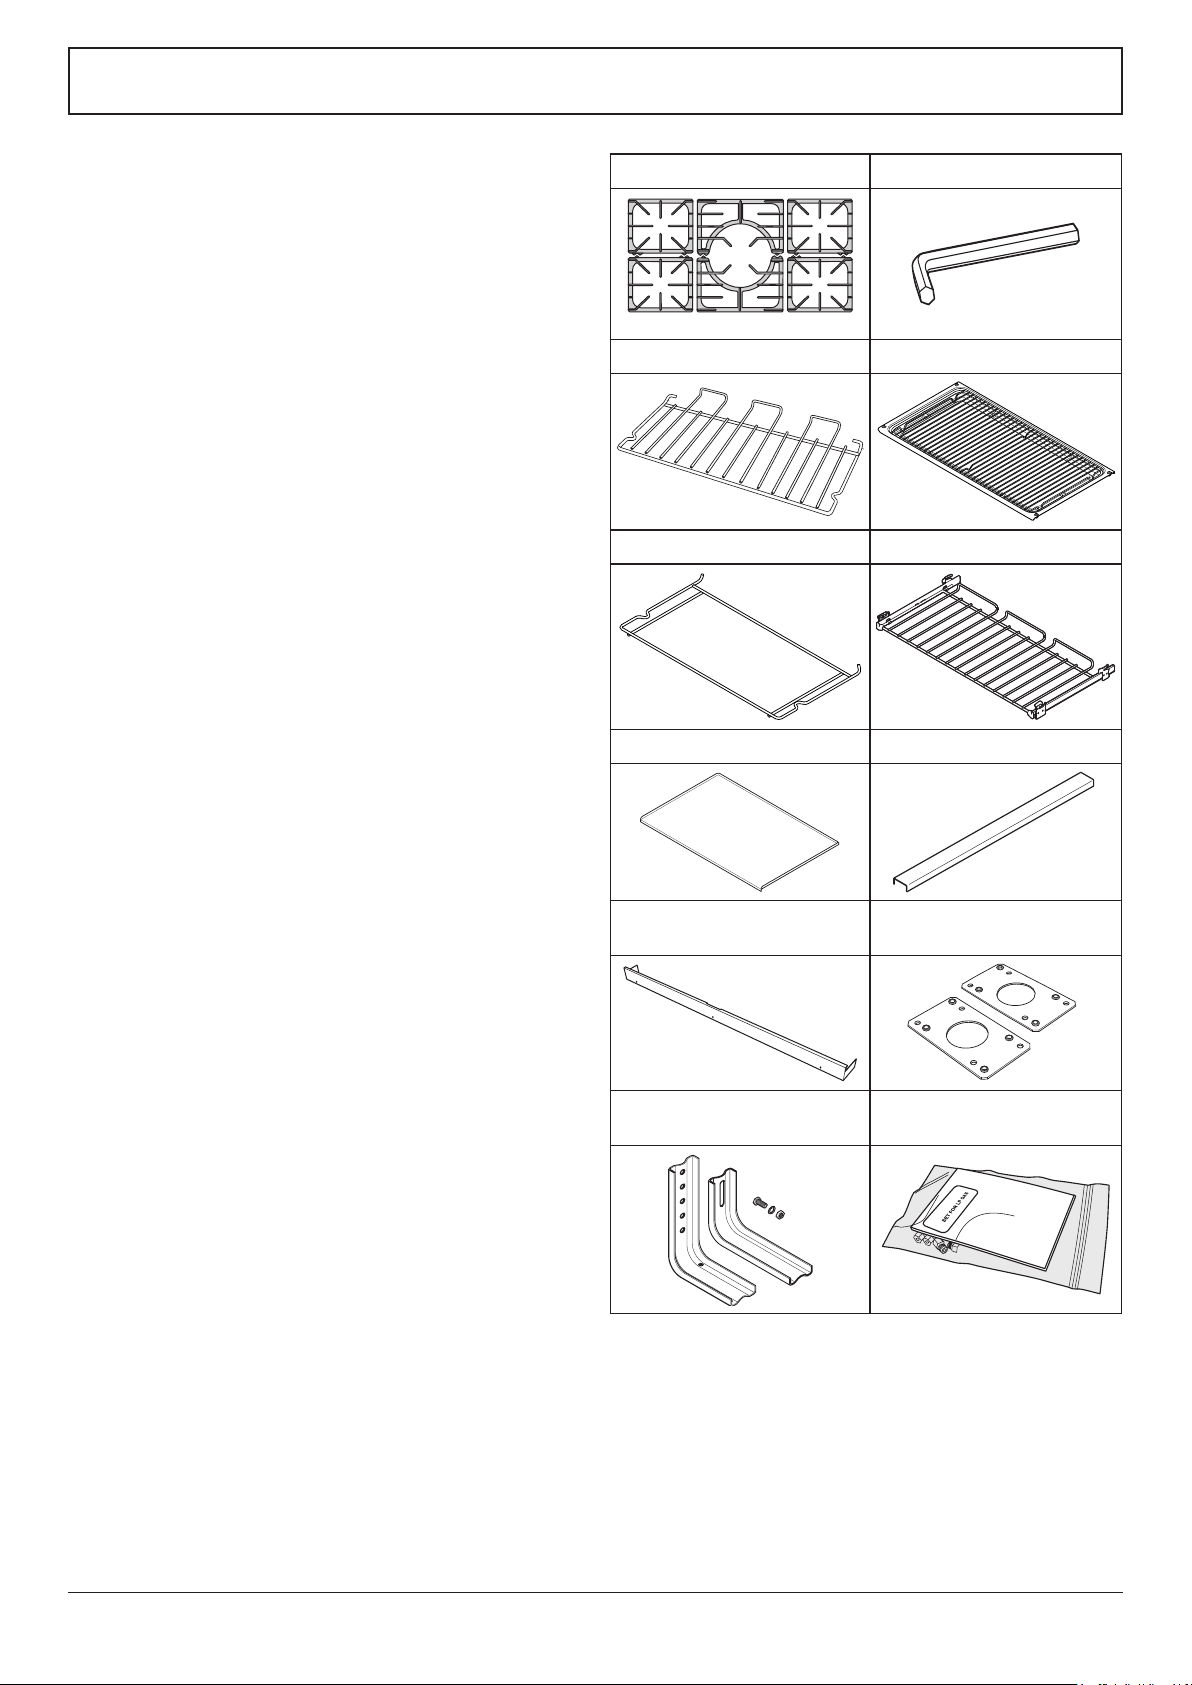
Checking the parts:
6 grates Allen key
2 full capacity racks Broiler tray and grid
Broiler tray rack Telescopic rack with runners
1 pastry tray Side extension kit
ArtNo.326-0005 - Pastry tray
ArtNo.351-0001 - Side extension
panel USA
Toe kick
Reducer plates for conduit
connection
ArtNo.350-0007 - Plinth USA
ArtNo.020-0012 Reducer Plates USA
Anti-tip device
Conversion kit from natural
gas to propane gas
ArtNo.020-0019
Conversion Kit USA
Loading ...
Loading ...
Loading ...