
Loading ...
Loading ...
Loading ...
11
3
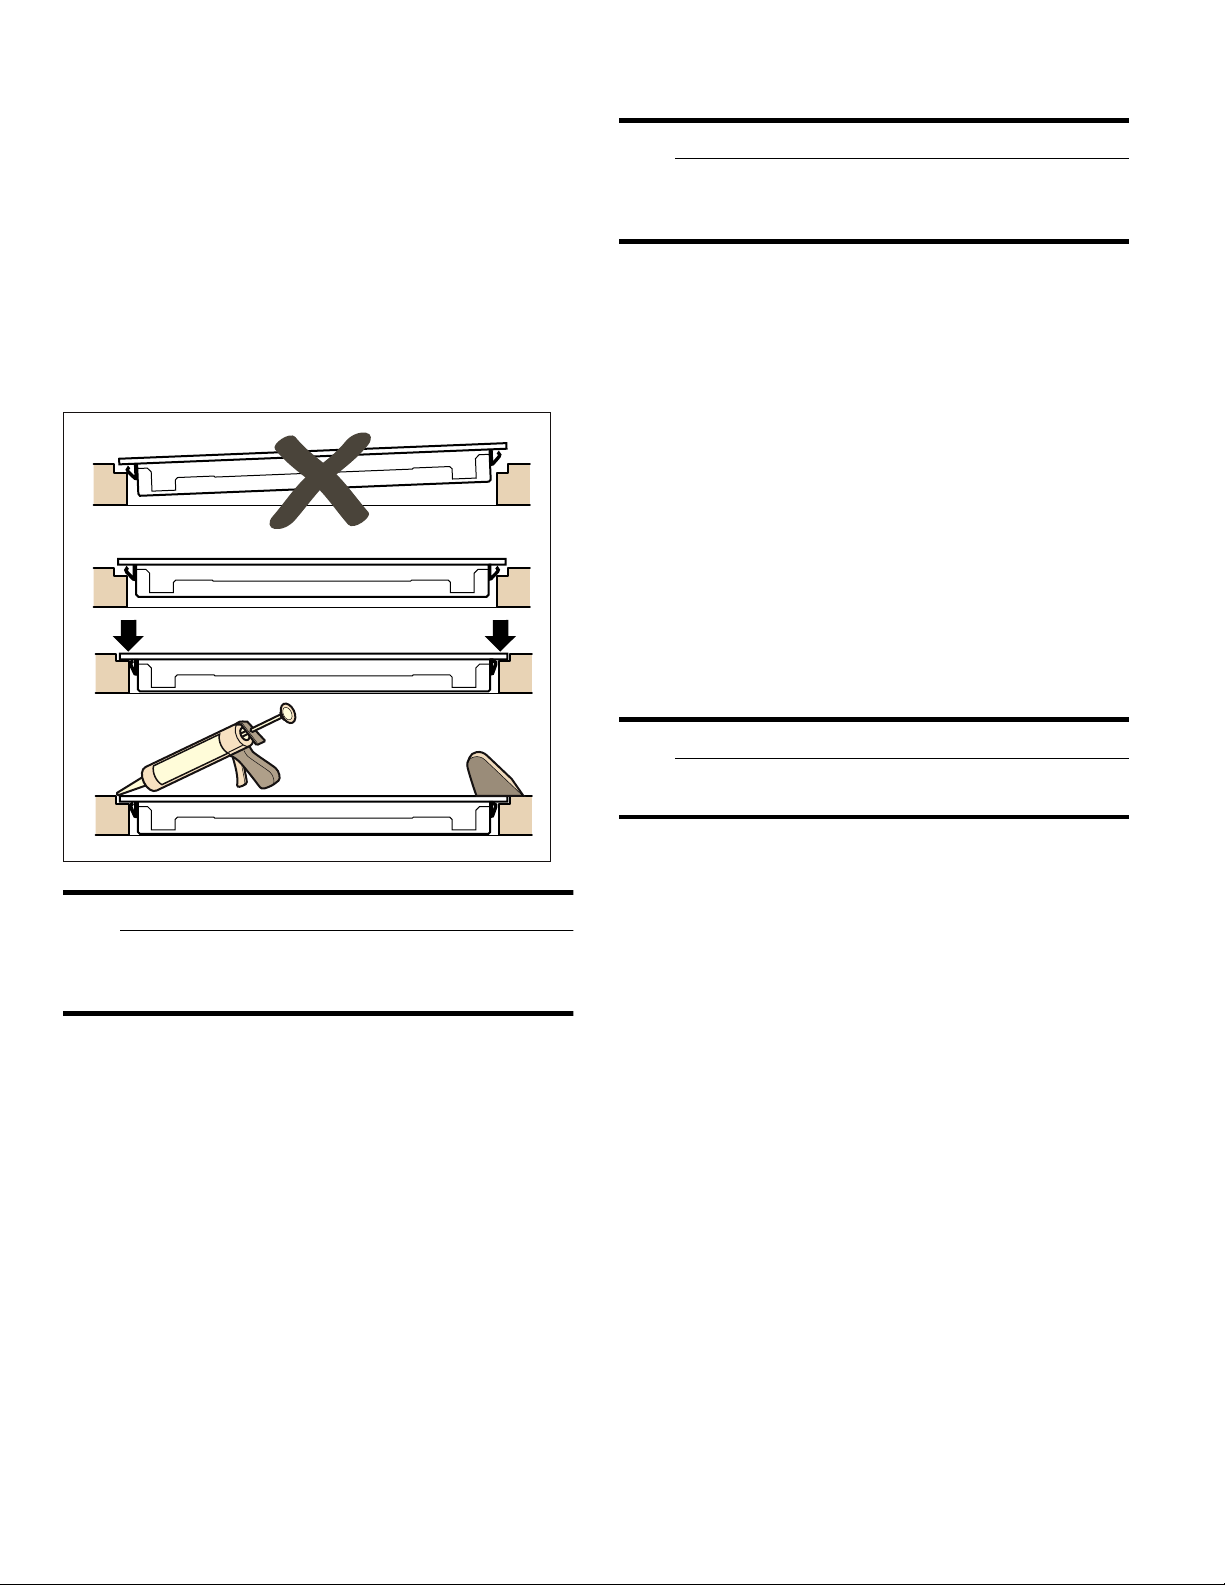
Only for flush installation:
Check appliance for functionality first (see section
“Check the installation").
Fill in the gap between the worktop and the ceramic
hob using a suitable commercial silicone bonding
agent in a color of your choice. Please observe the
manufacturer’s instructions for use. Apply the
silicone bonding agent in the joints. Before the
silicone bonding agent starts to form a skin,
moisten a blade or your finger with a soapy solution
and smooth it over.
Don't turn on the appliance until after the silicone
adhesive has completely dried (at least 24 hours,
depending on room temperature).
9 CAUTION
Unsuitable silicone adhesive will cause natural
stone countertops to become permanently
discolored.
Connect Electrical Supply
Refer to data plate for more information. See "Service"
for data plate location.
The branch-circuit breakers ampacity, the wire sizes and
the connections must be conform to the requirements of
the National Electrical Code or Canadian Electrical
Code and all local codes and ordinances.
Attach flexible conduit to the junction box. Connect the
lead wires to the junction box supply wires in proper
phase:
▯ black (L1) to black
▯ red (L2) to red
▯ green or bare to ground
Check the Installation
9 WARNING
Before you plug in an electrical cord or turn on
power supply, make sure all controls are in the
OFF position.
Remove everything from the cooktop surface. Clean
cooktop surface with cooktop cleaning creme.
Switch on the circuit breaker.
Verify that elements function properly.
When the light rings behind the control knobs blink, the
connecting cable between the control console and the
appliance isn't plugged in correctly. Disconnect the
appliance from power and ensure that the connecting
cable is correctly fitted.
Removing appliance
Disconnect the appliance from the power supply. For
flush-mounted appliances, remove the silicone joint.
Push out the appliance from below.
9 CAUTION
Damage to appliance! Don't lever device out from
above at the frame.
Loading ...
Loading ...
Loading ...