Loading ...
Loading ...
Loading ...
ENGLISH
7
Fig. K
5
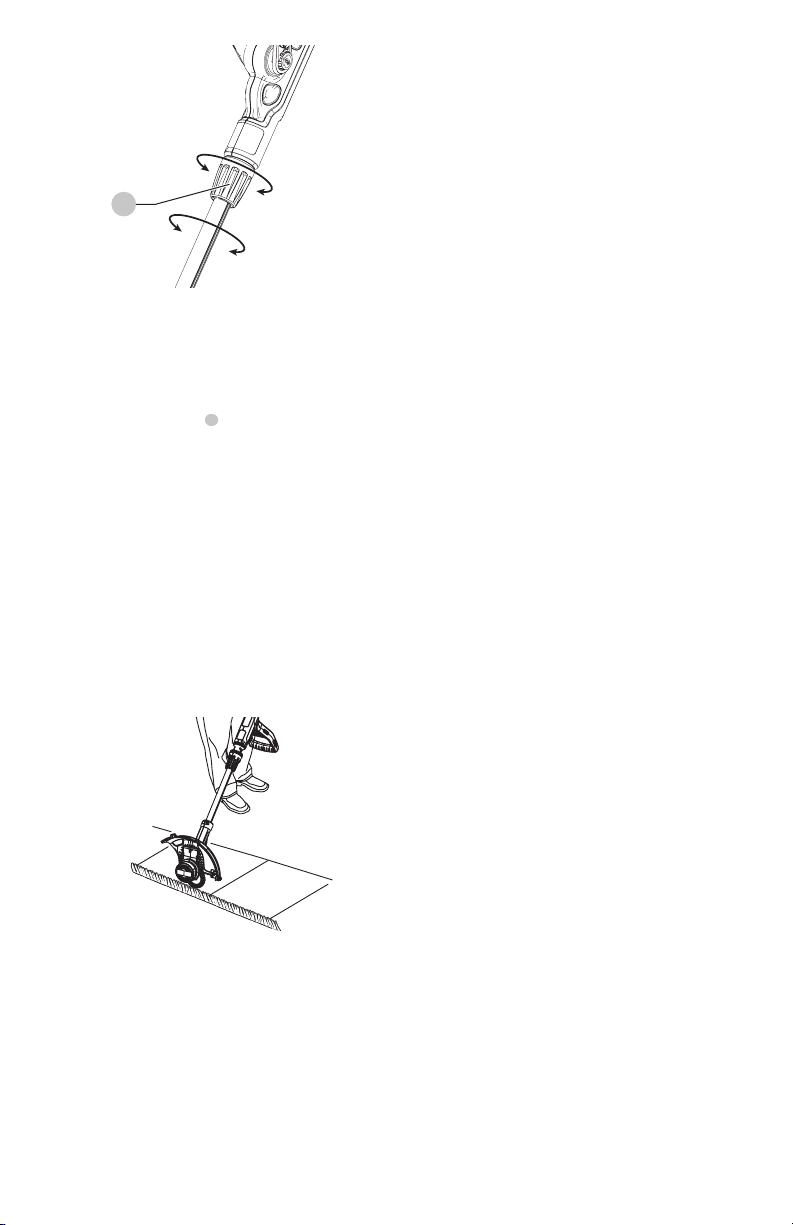
Edging (Fig. L)
Optimum cutting results are achieved on edges deeper
than 2 inches (50 mm). Do not use this trimmer to
createtrenches.
• Using the edging wheel
7
, guide the trimmer as shown
in Fig.L.
• Position the edging wheel on the edge of the sidewalk
or abrasive surface so the cutting line is over the grass or
dirt area to beedged.
NOTE: The Auto Feed System may not operate correctly if
wheeled edge guide is notused.
NOTE: You will experience faster than normal cutting line
wear if the edging wheel is positioned too far from the
edge with the cutting line positioned over the sidewalk or
abrasivesurface.
• To make a closer cut, slightly tilt thetrimmer.
• Return to the trimming postion by loosening the lock
collar and rotating the lower housing back 180°. The
tool will lock in the trimmerposition.
Fig. L
Cutting Line / Line Feeding
Your trimmer uses .065 inch (1.65 mm) diameter, ROUND
nylon line. During use, the tips of the nylon lines will
become frayed and worn and the special self feeding
spool will automatically feed and trim a fresh length of
line. Cutting line will wear faster and require more feeding
if the cutting or edging is done along sidewalks or other
abrasive surfaces or heavier weeds are being cut. The
advanced automatic line feeding mechanism senses when
more cutting line is needed and feeds and trims the correct
length of line whenever it’s required. Do not bump trimmer
on ground in attempt to feed line or for any otherpurposes.
Helpful Cutting Tips
• Use the tip of the string to do the cutting; do not force
string head into uncutgrass.
• Wire and picket fences cause extra string wear, even
breakage. Stone and brick walls, curbs, and wood may
wear stringrapidly.
• Do not allow spool cap to drag on ground or othersurfaces.
• In long growth, cut from the top down and do not
exceed 12 inches (304.8 mm)high.
• Keep trimmer tilted toward the area being cut; this is
the best cuttingarea.
• The trimmer cuts when passing the unit from the left to
right. This will avoid throwing debris at theoperator.
• Avoid trees and shrubs. Tree bark, wood moldings, siding,
and fence posts can easily be damaged by thestring.
MAINTENANCE
WARNING: To reduce the risk of serious personal
injury, turn unit off and disconnect it from
power source before making any adjustments or
removing/installing attachments or accessories.
An accidental start-up can causeinjury.
1. Keep the air intake slots clean to avoidoverheating.
2. Your trimmer line can dry out over time. To keep your
line in top condition, store spare pre-wound spools or
bulk line in a plastic, sealable bag with a tablespoon
ofwater.
3. Plastic parts may be cleaned by using a mild soap and
a damprag.
4. The line cutter on the edge of the guard can dull over
time. It is recommended you periodically touch-up the
sharpness of the blade with afile.
Cleaning
WARNING: Blow dirt and dust out of all air vents with
clean, dry air at least once a week. To minimize the risk
of eye injury, always wear ANSI Z87.1 approved eye
protection when performingthis.
WARNING: Never use solvents or other harsh
chemicals for cleaning the non-metallic parts of
the tool. These chemicals may weaken the plastic
materials used in these parts. Use a cloth dampened
only with water and mild soap. Never let any liquid
get inside the tool; never immerse any part of the tool
into aliquid.
Accessories
WARNING: Since accessories, other than those
offered by BLACK+DECKER, have not been tested with
this product, use of such accessories with this tool
could be hazardous. To reduce the risk of injury, only
BLACK+DECKER recommended accessories should be
used with thisproduct.
WARNING: The use of any accessory not
recommended by BLACK+DECKER for use with this
trimmer could behazardous.
CAUTION: Before you begin trimming, only use the
appropriate type of cutting line.
Loading ...
Loading ...
Loading ...